


I
Note
To use the OpenCV library you have two options: Installation by Using the Pre-built Libraries or Installation by Making Your Own Libraries from the Source Files. While the first one is easier to complete, it only works if you are coding with the latest Microsoft Visual Studio IDE and doesn’t take advantage of the most advanced technologies we integrate into our library.
IInstallation by Making Your Own Libraries from theSource Files
step 1:安装必要的软件和第三方库
- 安装Microsoft Visual Studio ,当然可以采用其它的IDE开发工具
- 安装CMake,用于从opencv的源代码中,产生相应的项目文件——用于编译产生必要的库
- opencv源代码,有两种方式获得(推荐第二种方式)(第一种方式获得440M左右的源代码,第二种方式则有3.10G左右包括了预编译的库等):
- 使用git工具获取最新源代码
- 下载安装msysgit,http://code.google.com/p/msysgit/downloads/list,我使用的是Git-1.8.3-preview20130601.exe
- 下载安装TortoiseGit,http://code.google.com/p/tortoisegit/wiki/Download,这是git的一个GUI前端,方便使用。我使用的版本是TortoiseGit 1.8.3.0 - 32-bit。安装好后设置msysgit的地址,打开settings,设置Git.exe目录.
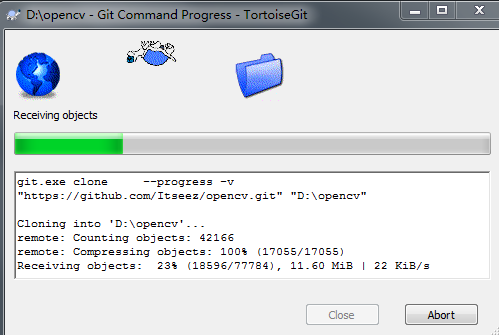
- 在D盘建立文件夹opencv,进入这个文件夹,右键选择Git Clone,在URL中填入https://github.com/Itseez/opencv.git点击OK,开始下载。
- 使用git工具获取最新源代码
step 2:上面三项内容已足以开始opencv的编译安装,但是还有一些第三方的工具,推荐安装。
- Download the Python libraries(http://www.python.org/getit/) and install it with the default options
- For the Intel © Threading Building Blocks (TBB) download the source files and extract it inside a directory on your system. For example let there be D:/OpenCV/dep
- For the CUDA you need again two modules: the latest CUDA Toolkit and the CUDA Tools SDK. Download and install both of them with a complete option by using the 32 or 64 bit setups according to your OS.
- In case of the Qt framework you need to build yourself the binary files (unless you use the Microsoft Visual Studio 2008 with 32 bit compiler). To do this go to the Qt Downloads page. Download the source files (not the installers!!!).Extract it into a nice and short named directory like D:/OpenCV/dep/qt/ . Then you need to build it. Start up a Visual Studio Command Prompt (2010) by using the start menu search (or navigate through the start menu ).
Now navigate to the extracted folder and enter inside it by using this console window. You should have a folder containing files like Install, Make and so on. Use the dir command to list files inside your current directory. Once arrived at this directory enter the following command:
Completing this will take around 10-20 minutes. Then enter the next command that will take a lot longer (can easily take even more than a full hour):
After this set the Qt enviroment variables using the following command on Windows 7:
Also, add the built binary files path to the system path by using the Path Editor. In our case this is D:/OpenCV/dep/qt/qt-everywhere-opensource-src-4.7.3/bin.
Note
If you plan on doing Qt application development you can also install at this point the Qt Visual Studio Add-in. After this you can make and build Qt applications without using theQt Creator. Everything is nicely integrated into Visual Studio.
如果之前已经安装好qt,则只需要在cmake过程指定好路径即可。
Step 3:使用CMake进行配置
- 在Ungrouped Entries组中,手工指定CMake没有检测到,而你又需要使用的环境变量。比如,我需要TBB,就设定TBB_INCLUDE_DIRS为D:/Develop/TBB/tbb41_20121003oss/include等等。在这一步中,将上述第三方库诸如python,qt等的环境变量在Ungrouped Entries中设定好。
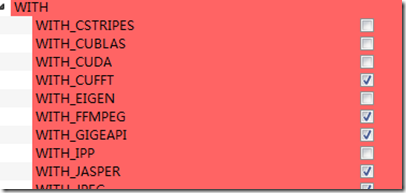
- 浏览其它选项,选择需要的内容,特别地,在ENABLE中的ENABLE_SOLUTION_FOLDERS必须确定选上
- 设定完成后,点击左下方Generate,生成vs2010的工程文件。
Step 5:添加OpenCV路径至PATH
打开<opencv Build目录>\install\bin\Debug\contours2.exe(或者其他程序),如果成功运行,则表示OpenCV安装成功!


 2万+
2万+

 被折叠的 条评论
为什么被折叠?
被折叠的 条评论
为什么被折叠?
 到【灌水乐园】发言


