


“我喜欢编写身份验证和授权代码。” 〜从来没有Java开发人员。 厌倦了一次又一次地建立相同的登录屏幕? 尝试使用Okta API进行托管身份验证,授权和多因素身份验证。
在过去的几年中,React受到了很多积极的报导,使其成为Java开发人员的吸引人的前端选择! 一旦了解了它的工作原理,它就会变得很有意义,并且可以很有趣地进行开发。 不仅如此,而且速度也很快! 如果您一直在关注我,或者已经阅读了此博客,那么您可能还记得我的《 使用Spring Boot和Angular进行Bootiful开发》教程。 今天,我将向您展示如何构建相同的应用程序,除了这次使用React。 在深入探讨之前,让我们先讨论一下React有什么用处,以及我为什么选择在本文中探索它。
首先,React不是一个成熟的Web框架。 它更像是用于开发UI的工具包,如la GWT。 如果您想发出HTTP请求以从服务器获取数据,React将不提供任何实用程序。 但是,它确实有一个庞大的生态系统,提供许多库和组件。 我所说的巨大意味着什么? 这么说:根据npmjs.com , Angular有17,938个软件包 。 反应几乎三倍多在42428!
Angular是我的好朋友,已经有很长时间了。 我并没有放弃我的老朋友采用React。 我只是结交新朋友。 拥有很多具有不同背景和不同见解的朋友,对于人类的观点来说是件好事!
这篇文章展示了如何将UI和API构建为单独的应用程序。 您将学习如何使用Spring MVC创建REST端点,如何配置Spring Boot以允许CORS,以及如何创建一个React应用来显示其数据。 该应用程序将显示API中的啤酒列表,然后从GIPHY提取与啤酒名称匹配的GIF。 我还将向您展示如何集成Okta及其OpenID Connect(OIDC)支持以锁定API并向UI添加身份验证。
让我们开始吧!
使用Spring Boot构建API
注意:以下有关构建Spring Boot API的说明与使用Spring Boot和Angular进行Bootiful开发中的说明相同。 为了方便起见,我在下方将其复制。
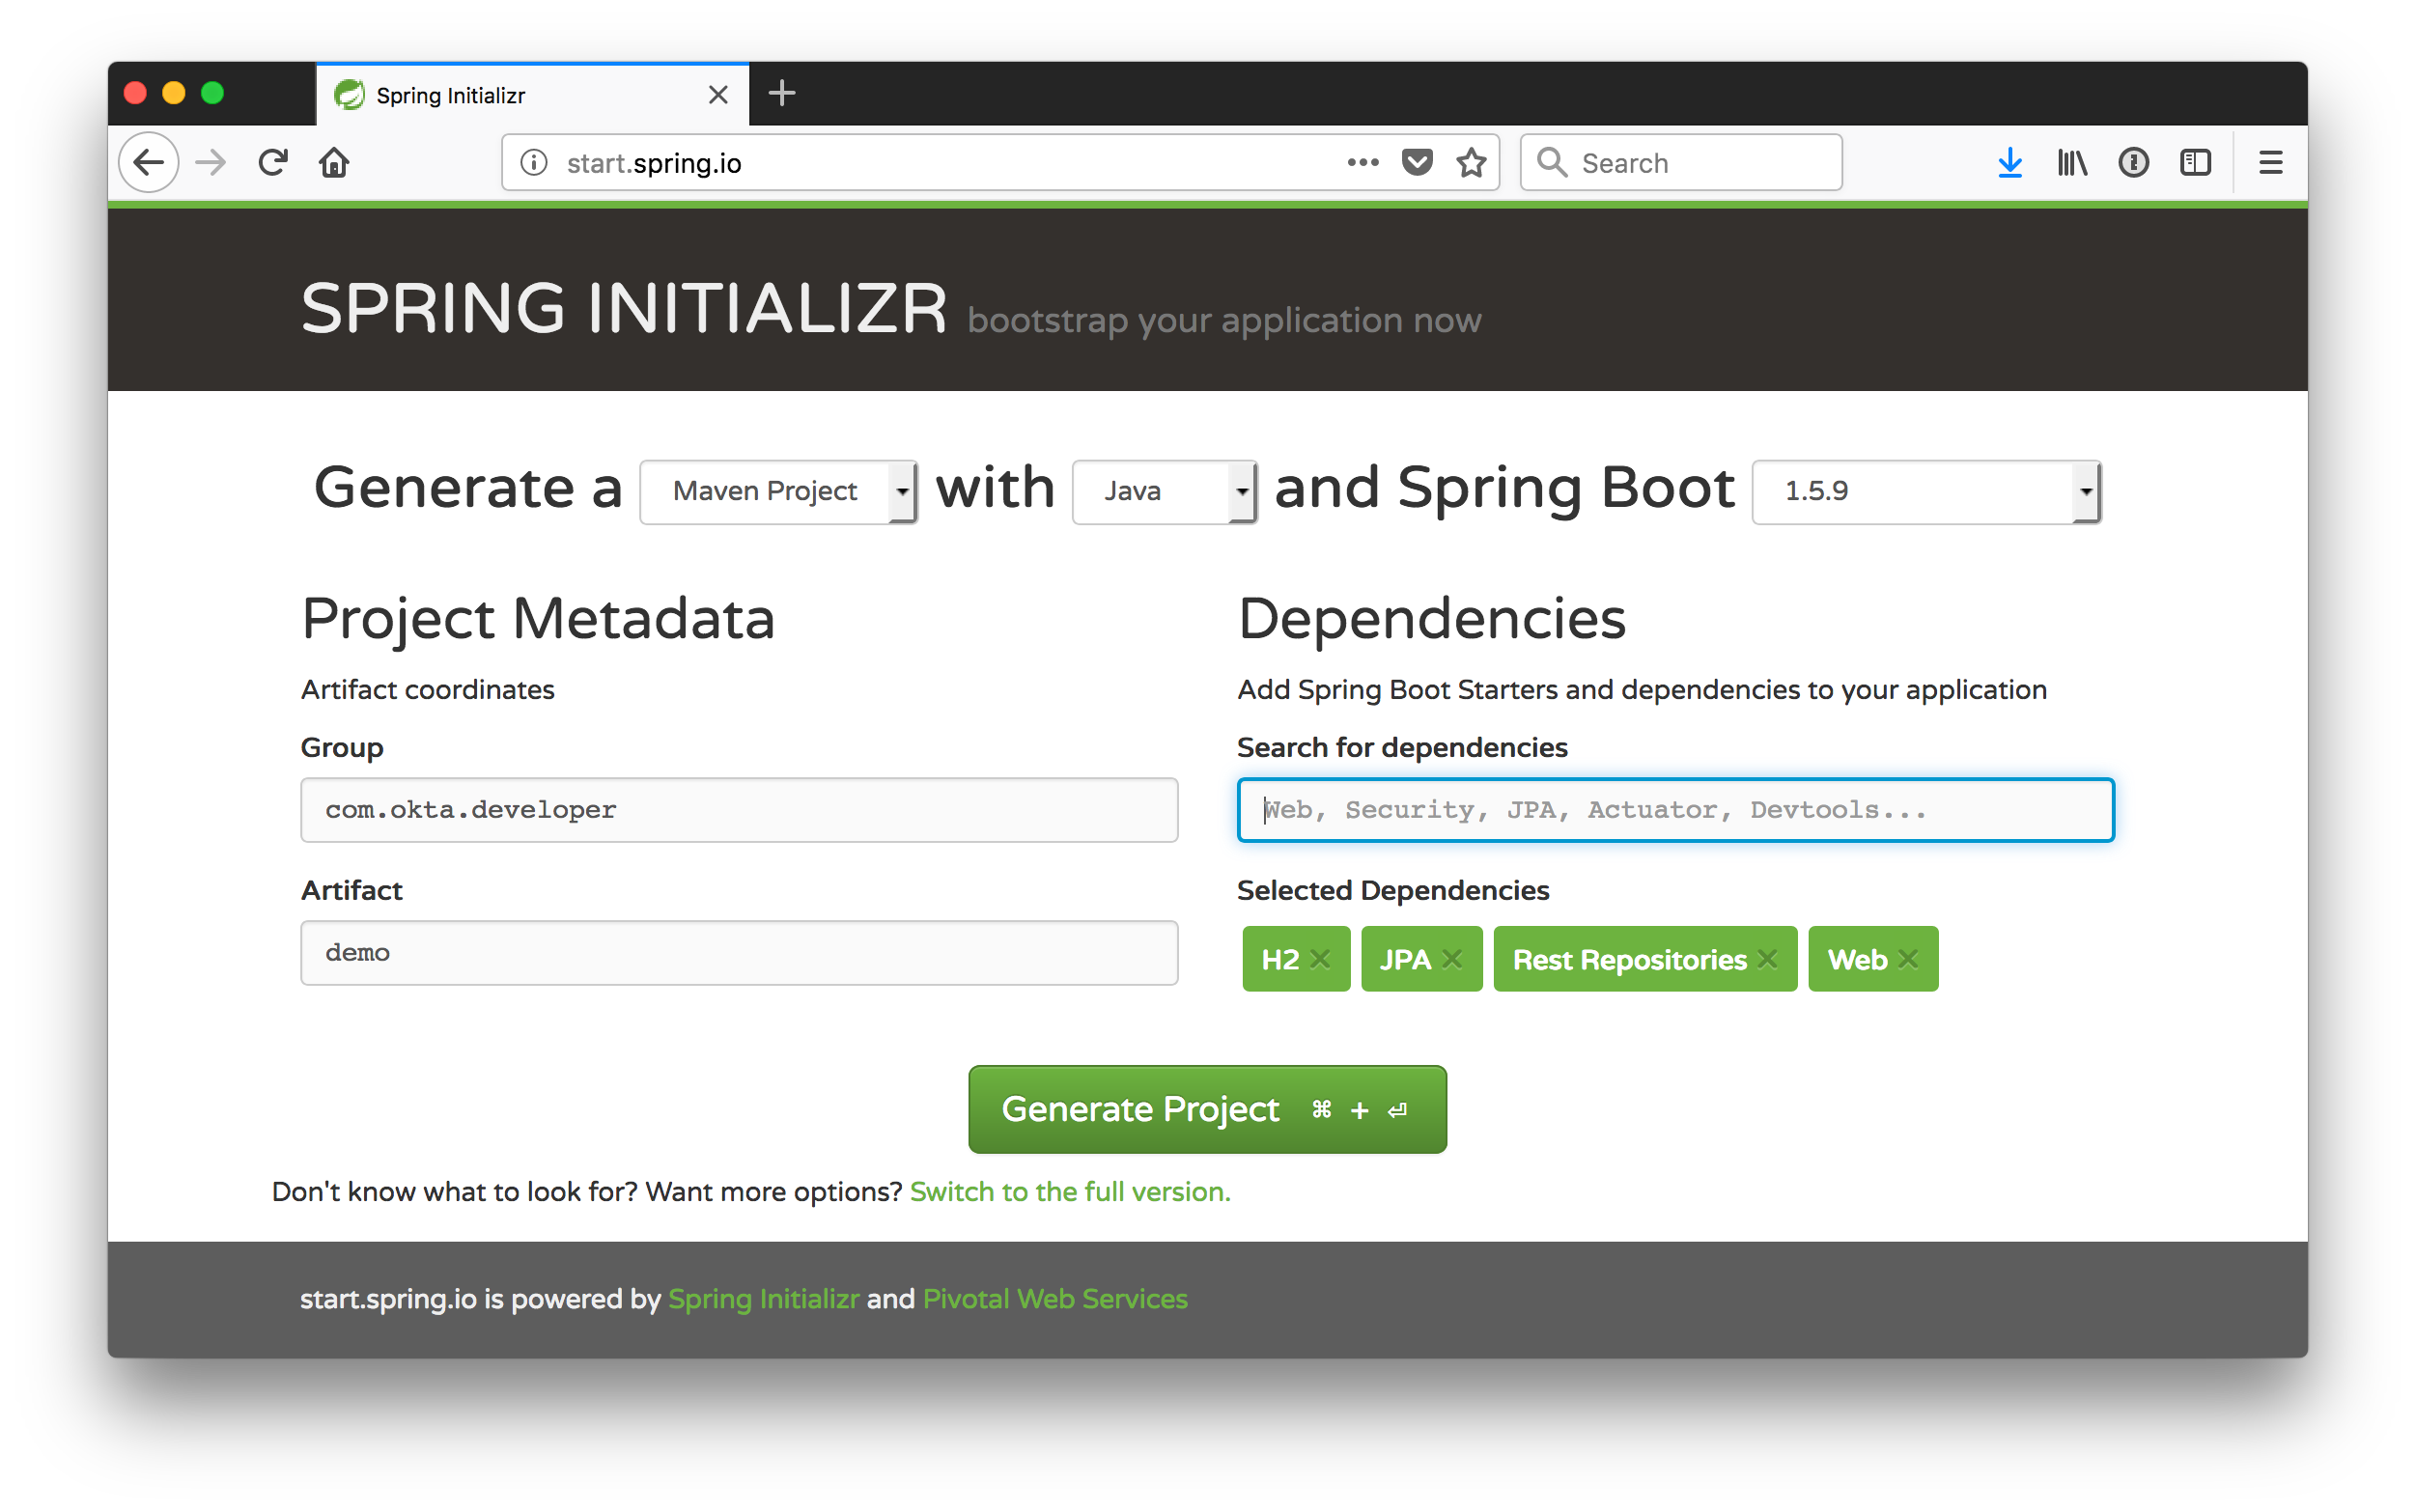
要开始使用Spring Boot,请导航到start.spring.io 。 在“搜索依赖项”字段中,选择以下内容:
- H2 :内存数据库
- JPA :Java的标准ORM
- 其余存储库 :允许您将JPA存储库公开为REST端点
- Web :具有Jackson(用于JSON),Hibernate Validator和嵌入式Tomcat的Spring MVC
如果你喜欢命令行更好,你可以使用下面的命令来下载一个demo.zip与文件HTTPie 。
http https://start.spring.io/starter.zip \
dependencies==h2,data-jpa,data-rest,web -d 创建一个名为spring-boot-react-example目录,其中包含server目录。 将demo.zip的内容demo.zip到server目录中。
在您喜欢的IDE中打开“服务器”项目,然后运行DemoApplication或使用./mvnw spring-boot:run从命令行启动它。
在其中创建com.example.demo.beer程序包和Beer.java文件。 此类将是保存您的数据的实体。
package com.example.demo.beer;

import javax.persistence.Entity;
import javax.persistence.GeneratedValue;
import javax.persistence.Id;

@Entity
public class Beer {

    @Id
    @GeneratedValue
    private Long id;
    private String name;

    public Beer() {}

    public Beer(String name) {
        this.name = name;
    }

    public Long getId() {
        return id;
    }

    public void setId(Long id) {
        this.id = id;
    }

    public String getName() {
        return name;
    }

    public void setName(String name) {
        this.name = name;
    }

    @Override
    public String toString() {
        return "Beer{" +
                "id=" + id +
                ", name='" + name + '\'' +
                '}';
    }
}
添加一个利用Spring Data在此实体上执行CRUD的BeerRepository类。
package com.example.demo.beer;

import org.springframework.data.jpa.repository.JpaRepository;

interface BeerRepository extends JpaRepository<Beer, Long> {
} 添加使用此存储库的BeerCommandLineRunner并创建一组默认数据。
package com.example.demo.beer;

import org.springframework.boot.CommandLineRunner;
import org.springframework.stereotype.Component;

import java.util.stream.Stream;

@Component
public class BeerCommandLineRunner implements CommandLineRunner {

    private final BeerRepository repository;

    public BeerCommandLineRunner(BeerRepository repository) {
        this.repository = repository;
    }

    @Override
    public void run(String... strings) throws Exception {
        // Top beers from https://www.beeradvocate.com/lists/top/
        Stream.of("Kentucky Brunch Brand Stout", "Good Morning", "Very Hazy", "King Julius",
                "Budweiser", "Coors Light", "PBR").forEach(name ->
                repository.save(new Beer(name))
        );
        repository.findAll().forEach(System.out::println);
    }
}
重建您的项目,您应该会在终端上看到印刷的啤酒清单。

a添加@RepositoryRestResource注释BeerRepository揭露其所有CRUD操作的REST端点。
import org.springframework.data.rest.core.annotation.RepositoryRestResource;

@RepositoryRestResource
interface BeerRepository extends JpaRepository<Beer, Long> {
} 添加一个BeerController类来创建一个端点,该端点过滤出的啤酒数量少于大啤酒。
package com.example.demo.beer;

import org.springframework.web.bind.annotation.GetMapping;
import org.springframework.web.bind.annotation.RestController;

import java.util.Collection;
import java.util.HashMap;
import java.util.Map;
import java.util.stream.Collectors;

@RestController
public class BeerController {
    private BeerRepository repository;

    public BeerController(BeerRepository repository) {
        this.repository = repository;
    }

    @GetMapping("/good-beers")
    public Collection<Beer> goodBeers() {
        return repository.findAll().stream()
                .filter(this::isGreat)
                .collect(Collectors.toList());
    }

    private boolean isGreat(Beer beer) {
        return !beer.getName().equals("Budweiser") &&
                !beer.getName().equals("Coors Light") &&
                !beer.getName().equals("PBR");
    }
} 重新构建您的应用程序并导航到http://localhost:8080/good-beers 。 您应该在浏览器中看到优质啤酒的列表。
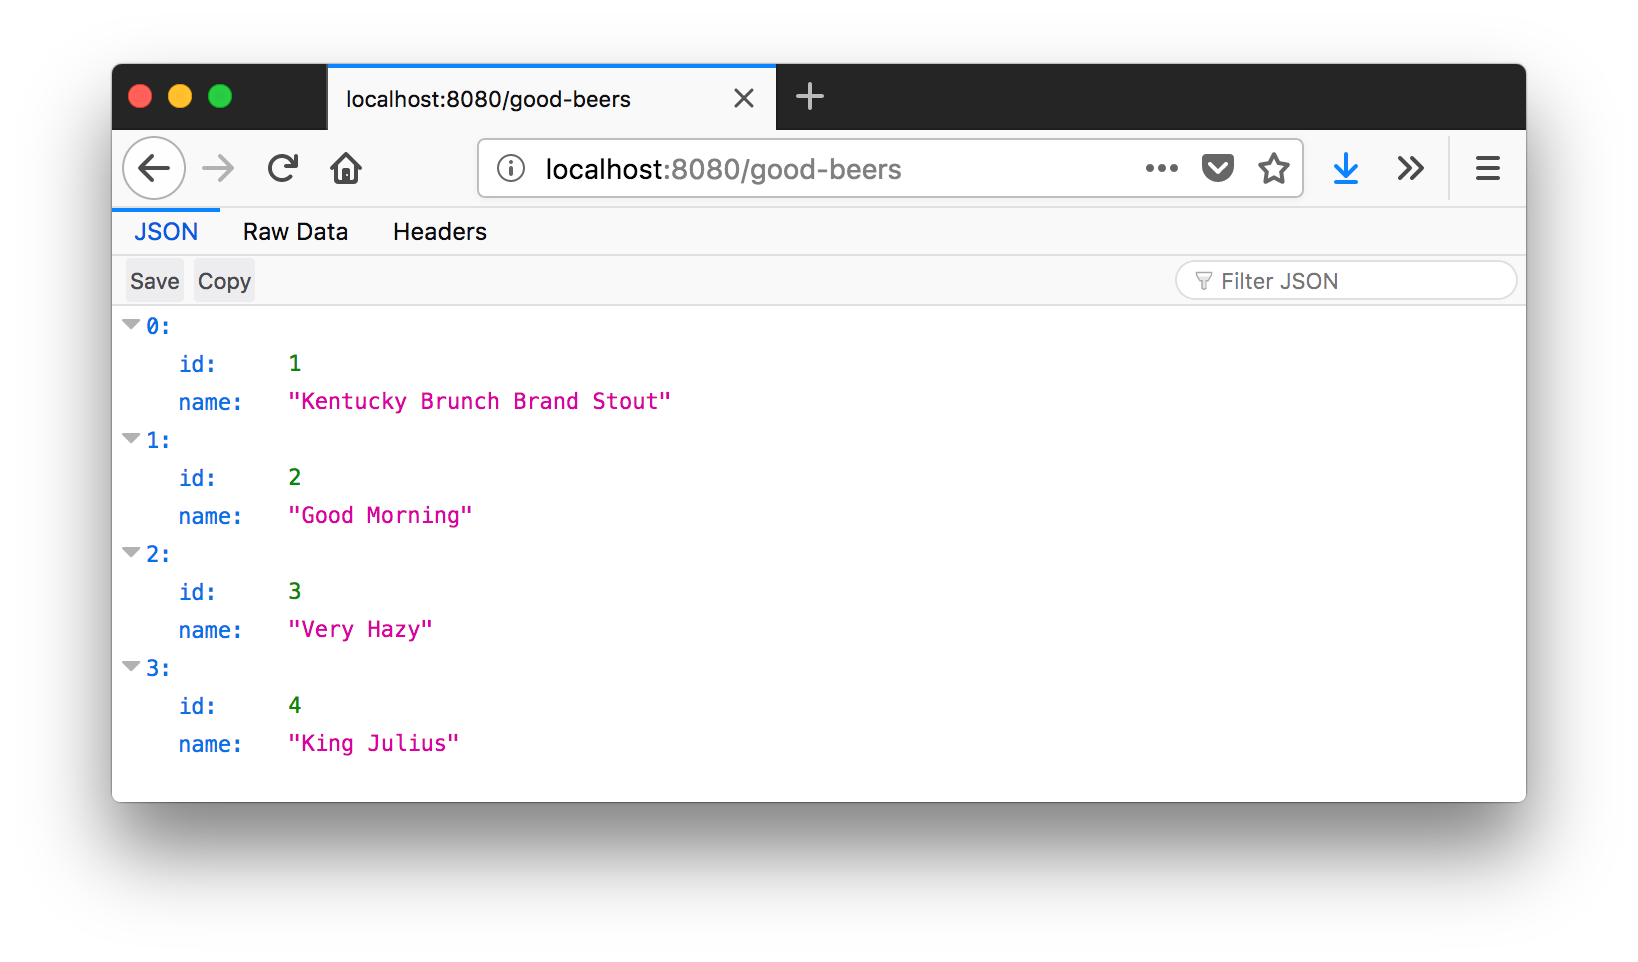
使用HTTPie时,您也应该在终端窗口中看到相同的结果。
http localhost:8080/good-beers使用Create React App创建一个项目
这些天来,创建API似乎很容易,这在很大程度上要归功于Spring Boot。 在本部分中,我希望向您展示使用React创建UI也非常容易。 如果您按照以下步骤操作,则将创建一个新的React应用,从API获取啤酒名称和图像,并创建用于显示数据的组件。
要创建一个React项目,请确保您已安装Node.js , Create React App和Yarn 。
npm install -g create-react-app@1.4.3 在终端窗口中,cd进入spring-boot-react-example目录的根目录并运行以下命令。 该命令将创建一个具有TypeScript支持的新React应用程序。
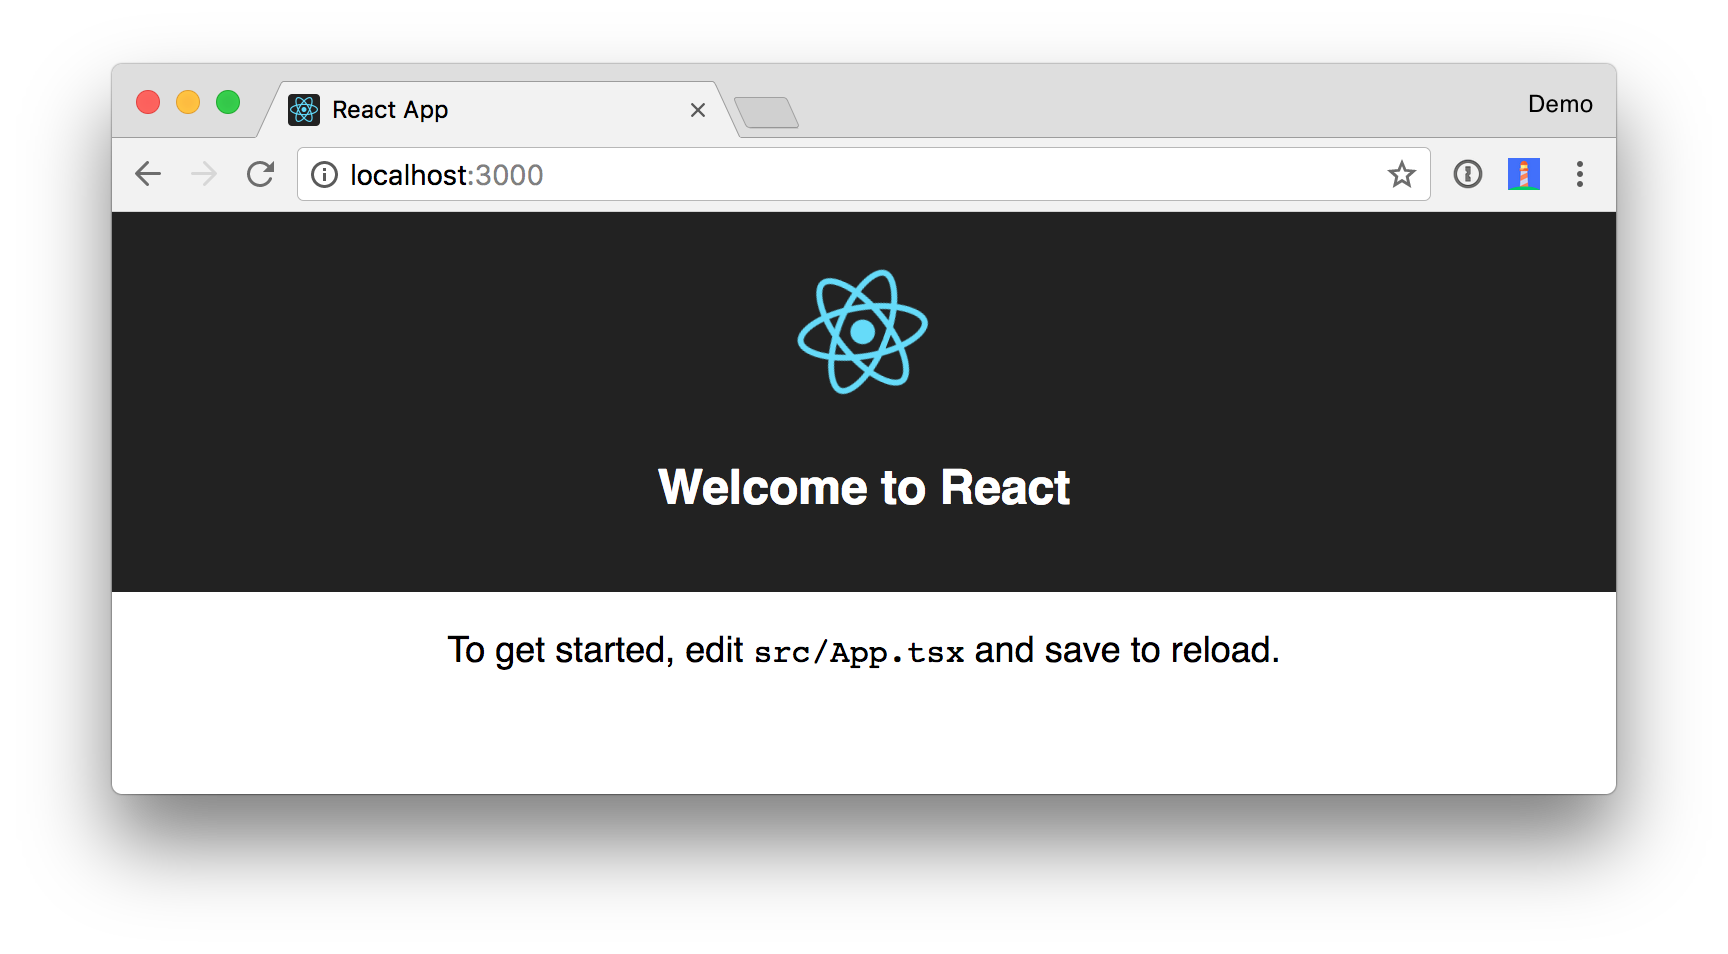
create-react-app client --scripts-version=react-scripts-ts 运行此过程之后,您将拥有一个新的client目录,其中安装了所有必需的依赖项。 为了验证一切正常,将cd进入client目录并运行yarn start 。 如果一切正常,您应该在浏览器中看到以下内容。
到目前为止,您已经创建了一个good-beers API和一个React应用程序,但是尚未创建UI来显示API中的啤酒列表。 为此,请打开client/src/App.tsx并添加componentDidMount()方法。
componentDidMount() {
  this.setState({isLoading: true});

  fetch('http://localhost:8080/good-beers')
    .then(response => response.json())
    .then(data => this.setState({beers: data, isLoading: false}));
} React的组件生命周期将调用componentDidMount()方法。 上面的代码使用fetch ,这是XMLHttpRequest的现代替代。 根据caniuse.com,大多数浏览器均支持该功能 。
您会看到它使用响应数据设置了beers状态。 要初始化此组件的状态,您需要重写构造函数。
constructor(props: any) {
  super(props);

  this.state = {
    beers: [],
    isLoading: false
  };
}
为此,您需要将参数类型添加到类签名中。 下面的代码显示了此时App类顶部的外观。
class App extends React.Component<{}, any> {
  constructor(props: any) {
    super(props);

    this.state = {
      beers: [],
      isLoading: false
    };
  }
  // componentDidMount() and render()
} 更改render()方法以具有以下JSX。 JSX是Facebook的类XML语法,可通过JavaScript呈现HTML。
render() {
  const {beers, isLoading} = this.state;

  if (isLoading) {
    return <p>Loading...</p>;
  }

  return (
    <div className="App">
      <div className="App-header">
        <img src={logo} className="App-logo" alt="logo" />
        <h2>Welcome to React</h2>
      </div>
      <div>
        <h2>Beer List</h2>
        {beers.map((beer: any) =>
          <div key={beer.id}>
            {beer.name}
          </div>
        )}
      </div>
    </div>
  );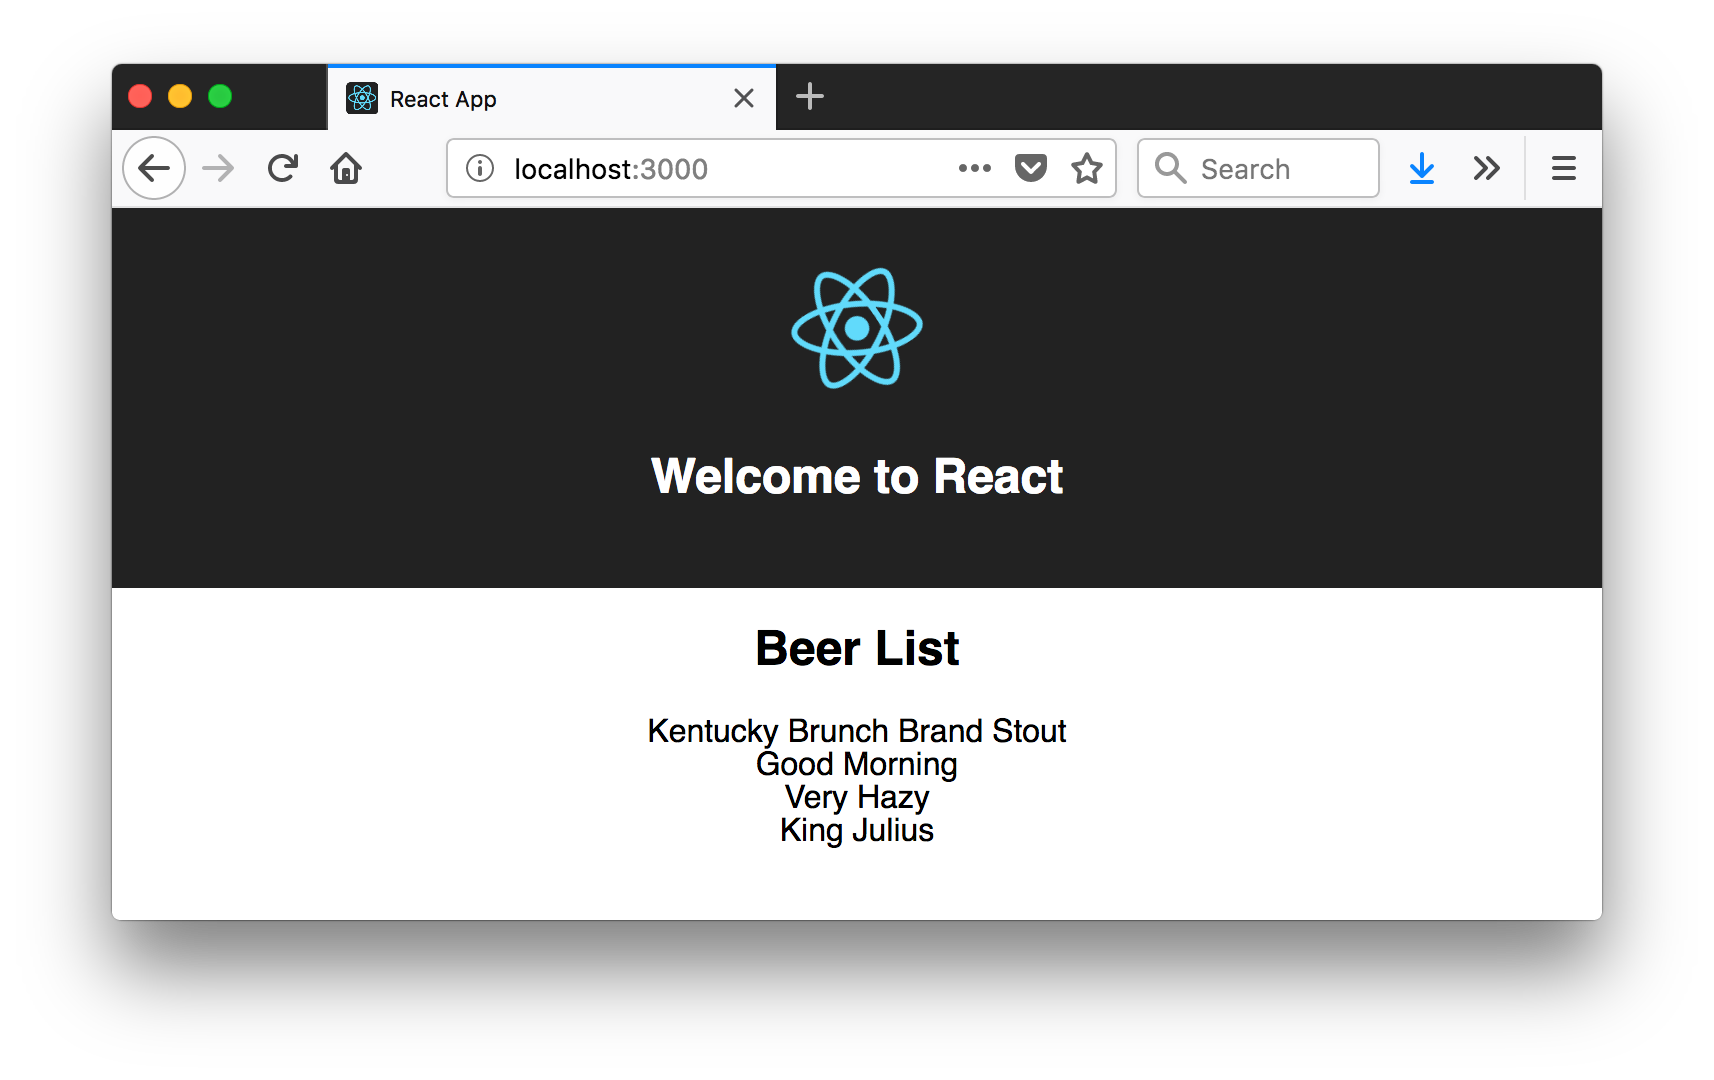
} 如果在浏览器中查看http://localhost:3000 ,则会看到“正在加载...”消息。 如果您在浏览器的控制台中查看,可能会看到有关CORS的问题。
Failed to load http://localhost:8080/good-beers: No 'Access-Control-Allow-Origin' header is present on the requested resource. Origin 'http://localhost:3000' is therefore not allowed access. 要解决此问题,您需要将Spring Boot配置为允许从http://localhost:3000进行跨域访问。
为Spring Boot配置CORS
在服务器项目中,打开server/src/main/java/com/example/demo/beer/BeerController.java并添加@CrossOrigin批注以启用客户端的跨域资源共享(CORS)( http://localhost:3000 )。
import org.springframework.web.bind.annotation.CrossOrigin;
...
    @GetMapping("/good-beers")
    @CrossOrigin(origins = "http://localhost:3000")
    public Collection goodBeers() {
进行了这些更改之后,重新启动服务器,刷新浏览器,您应该能够从Spring Boot API中看到啤酒列表。
创建一个BeerList组件
为了使此应用程序更易于维护,请将啤酒清单的获取和呈现从App.tsx到其自己的BeerList组件。 创建src/BeerList.tsx并使用App.tsx的代码填充它。
import * as React from 'react';

class BeerList extends React.Component<{}, any> {
  constructor(props: any) {
    super(props);

    this.state = {
      beers: [],
      isLoading: false
    };
  }

  componentDidMount() {
    this.setState({isLoading: true});

    fetch('http://localhost:8080/good-beers')
      .then(response => response.json())
      .then(data => this.setState({beers: data, isLoading: false}));
  }

  render() {
    const {beers, isLoading} = this.state;

    if (isLoading) {
      return <p>Loading...</p>;
    }

    return (
      <div>
        <h2>Beer List</h2>
        {beers.map((beer: any) =>
          <div key={beer.id}>
            {beer.name}
          </div>
        )}
      </div>
    );
  }
}

export default BeerList; 然后更改client/src/App.tsx ,使其仅包含一个外壳和对<BeerList/>的引用。
import * as React from 'react';
import './App.css';
import BeerList from './BeerList';

const logo = require('./logo.svg');

class App extends React.Component<{}, any> {
  render() {
    return (
      <div className="App">
        <div className="App-header">
          <img src={logo} className="App-logo" alt="logo"/>
          <h2>Welcome to React</h2>
        </div>
        <BeerList/>
      </div>
    );
  }
}

export default App;
创建一个GiphyImage组件
为了使其看起来更好一点,添加GIPHY组件以根据啤酒的名称获取图像。 创建client/src/GiphyImage.tsx并将以下代码放入其中。
import * as React from 'react';

interface GiphyImageProps {
  name: string;
}

class GiphyImage extends React.Component<GiphyImageProps, any> {
  constructor(props: GiphyImageProps) {
    super(props);

    this.state = {
      giphyUrl: '',
      isLoading: false
    };
  }

  componentDidMount() {
    const giphyApi = '//api.giphy.com/v1/gifs/search?api_key=dc6zaTOxFJmzC&limit=1&q=';

    fetch(giphyApi + this.props.name)
      .then(response => response.json())
      .then(response => {
        if (response.data.length > 0) {
          this.setState({giphyUrl: response.data[0].images.original.url});
        } else {
          // dancing cat for no images found
          this.setState({giphyUrl: '//media.giphy.com/media/YaOxRsmrv9IeA/giphy.gif'});
        }
        this.setState({isLoading: false});
      });
  }

  render() {
    const {giphyUrl, isLoading} = this.state;

    if (isLoading) {
      return <p>Loading image...</p>;
    }

    return (
      <img src={giphyUrl} alt={this.props.name} width="200"/>
    );
  }
}

export default GiphyImage; 更改BeerList.tsx的render()方法以使用此组件。
import GiphyImage from './GiphyImage';
...
render() {
const {beers, isLoading} = this.state;
if (isLoading) {
return <p>Loading...</p>;
}
return (
<div>
<h2>Beer List</h2>
{beers.map((beer: any) =>
<div key={beer.id}>
{beer.name}<br/>
<GiphyImage name={beer.name}/>
</div>
)}
</div>
);
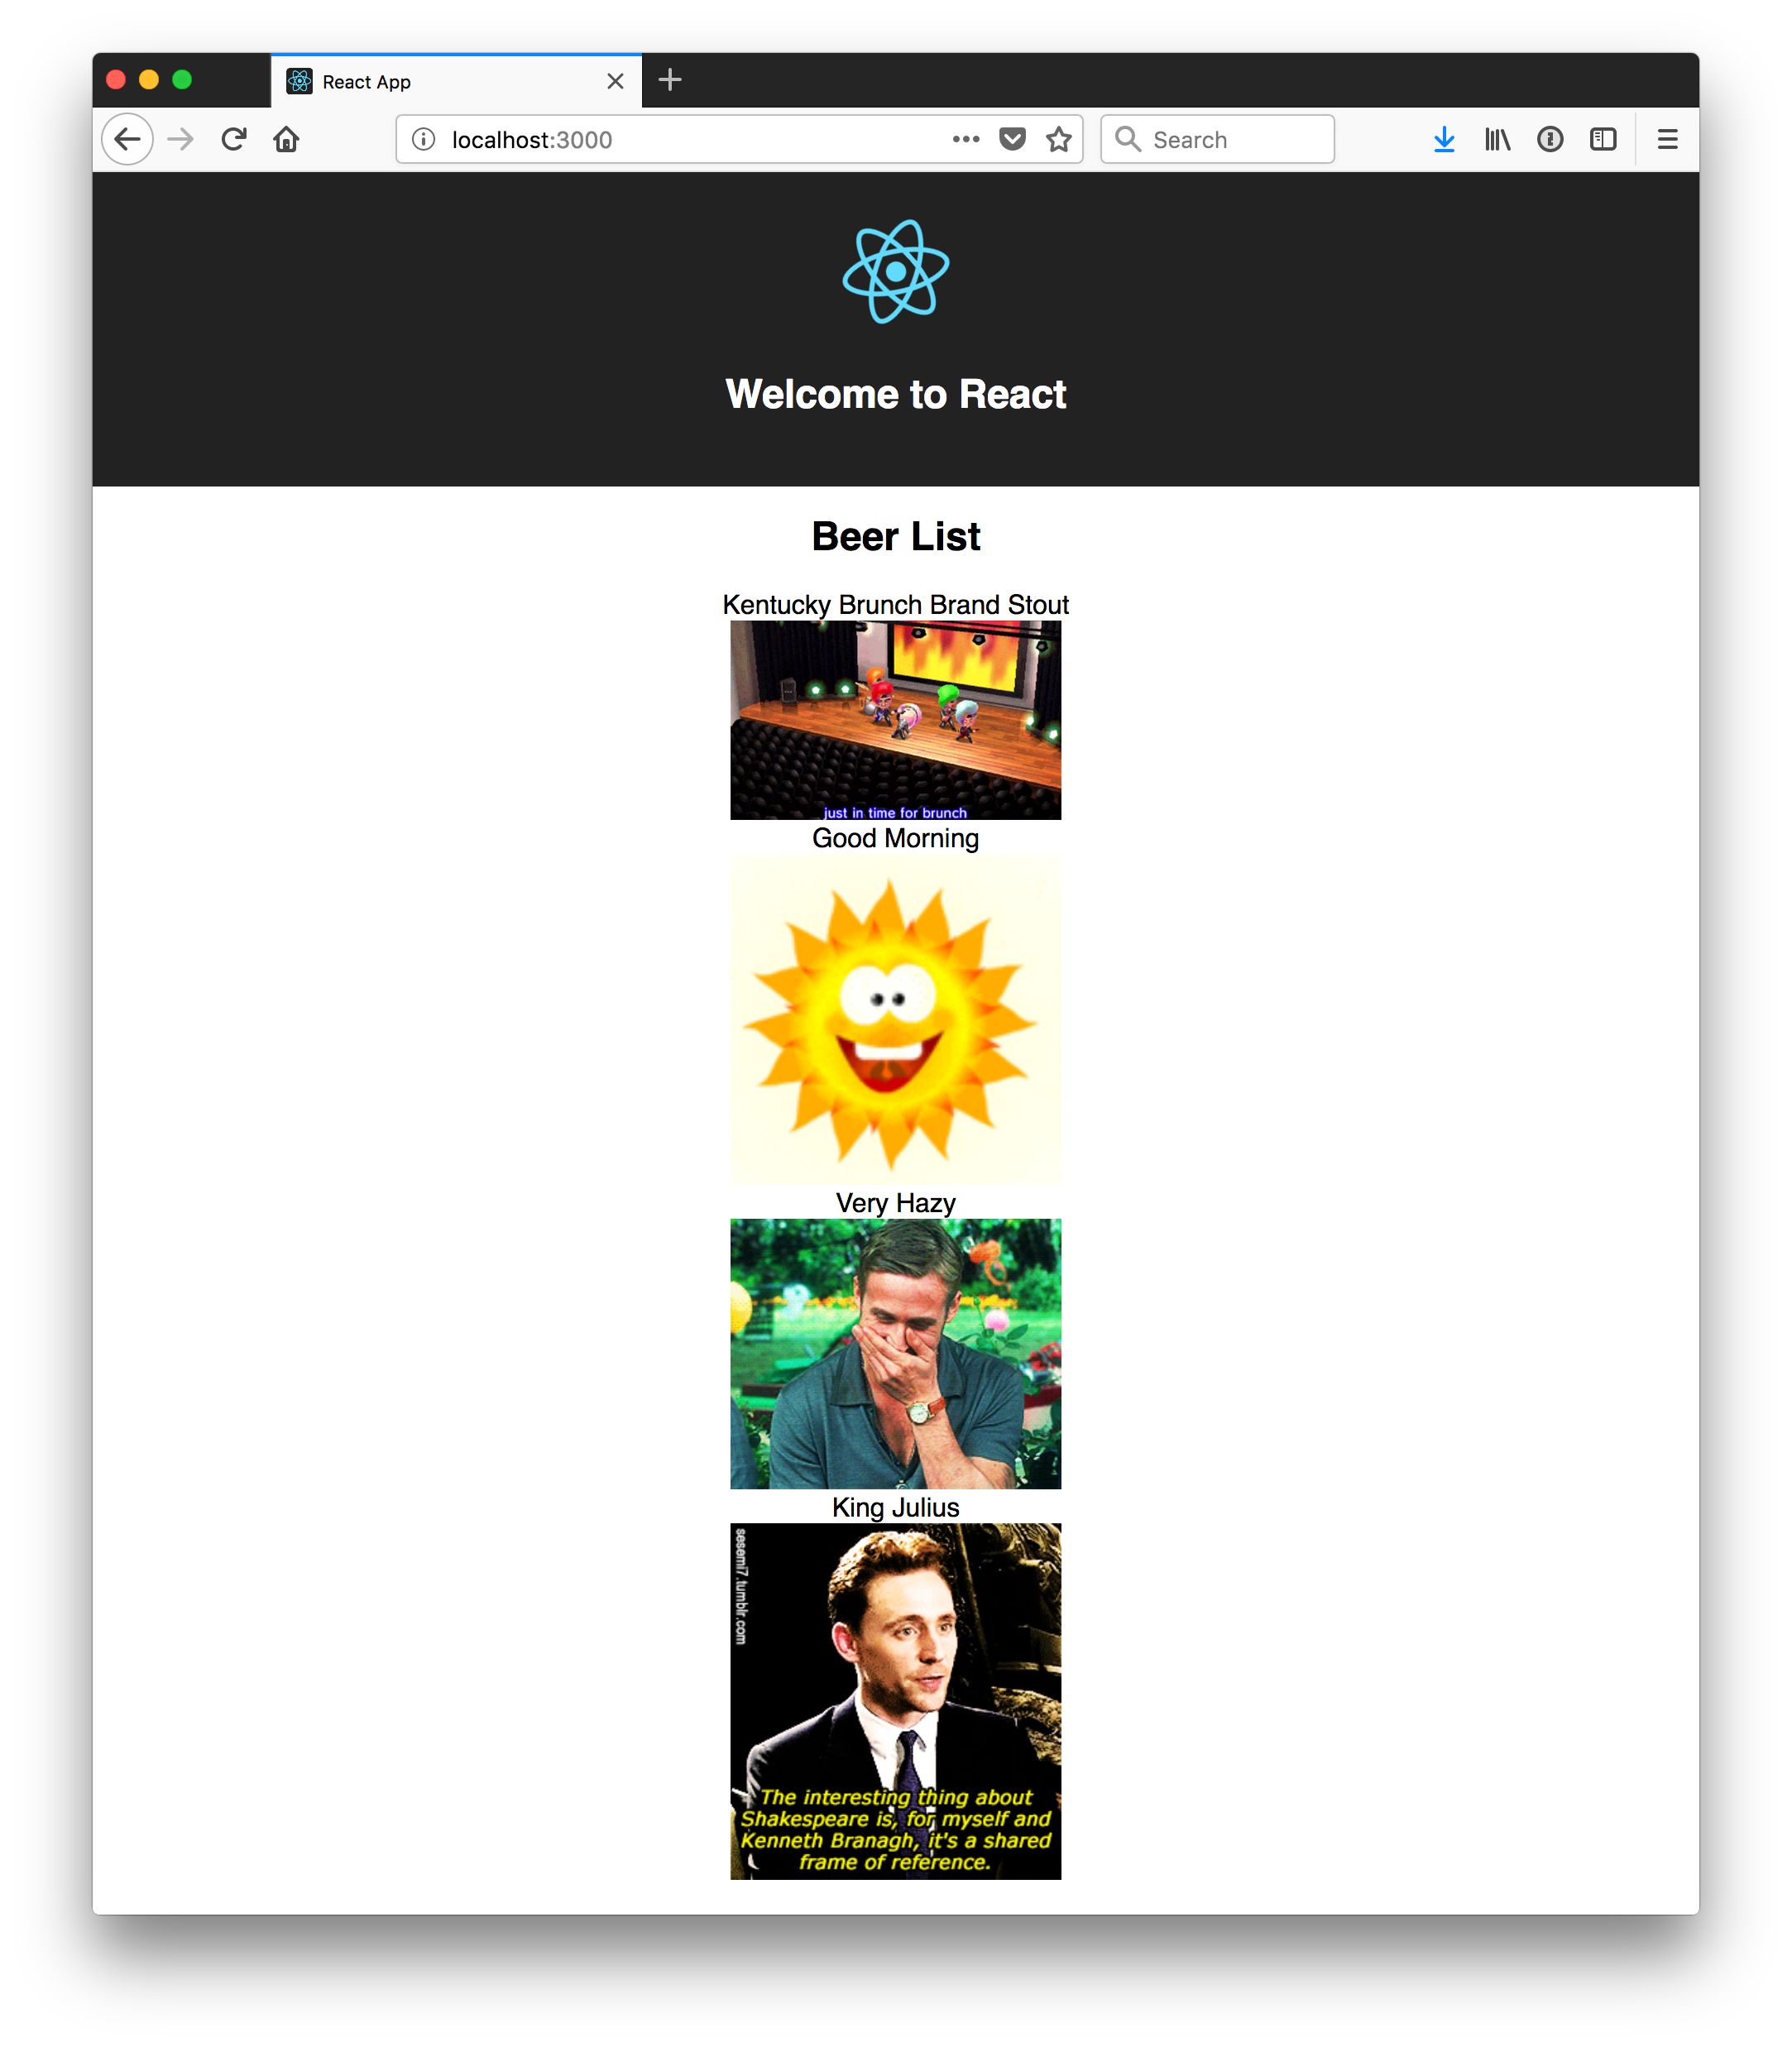
}结果应类似于以下带有图像的啤酒名称列表。
您刚刚创建了一个React应用,该应用使用跨域请求与Spring Boot API进行通讯。 恭喜你!
添加PWA支持
Create React App开箱即用地支持渐进式Web应用程序(PWA)。 要了解其集成方式,请打开client/README.md并搜索“制作渐进式Web应用程序”。
要查看其工作方式,请在client目录中运行yarn build 。 该命令完成后,您将看到类似以下的消息。
The build folder is ready to be deployed.
You may serve it with a static server:

  yarn global add serve
serve -s build 运行建议的命令,您应该能够打开浏览器以查看http://localhost:5000 。 您的浏览器可能会在其控制台中显示CORS错误,因此BeerController.java再次打开BeerController.java并调整其允许的来源以允许端口5000。
@CrossOrigin(origins = {"http://localhost:3000", "http://localhost:5000"}) 重新启动服务器,并且http://localhost:5000应该加载啤酒名称和图像。
我在Chrome中进行了Lighthouse审核,发现此应用目前仅获得73/100的评分。
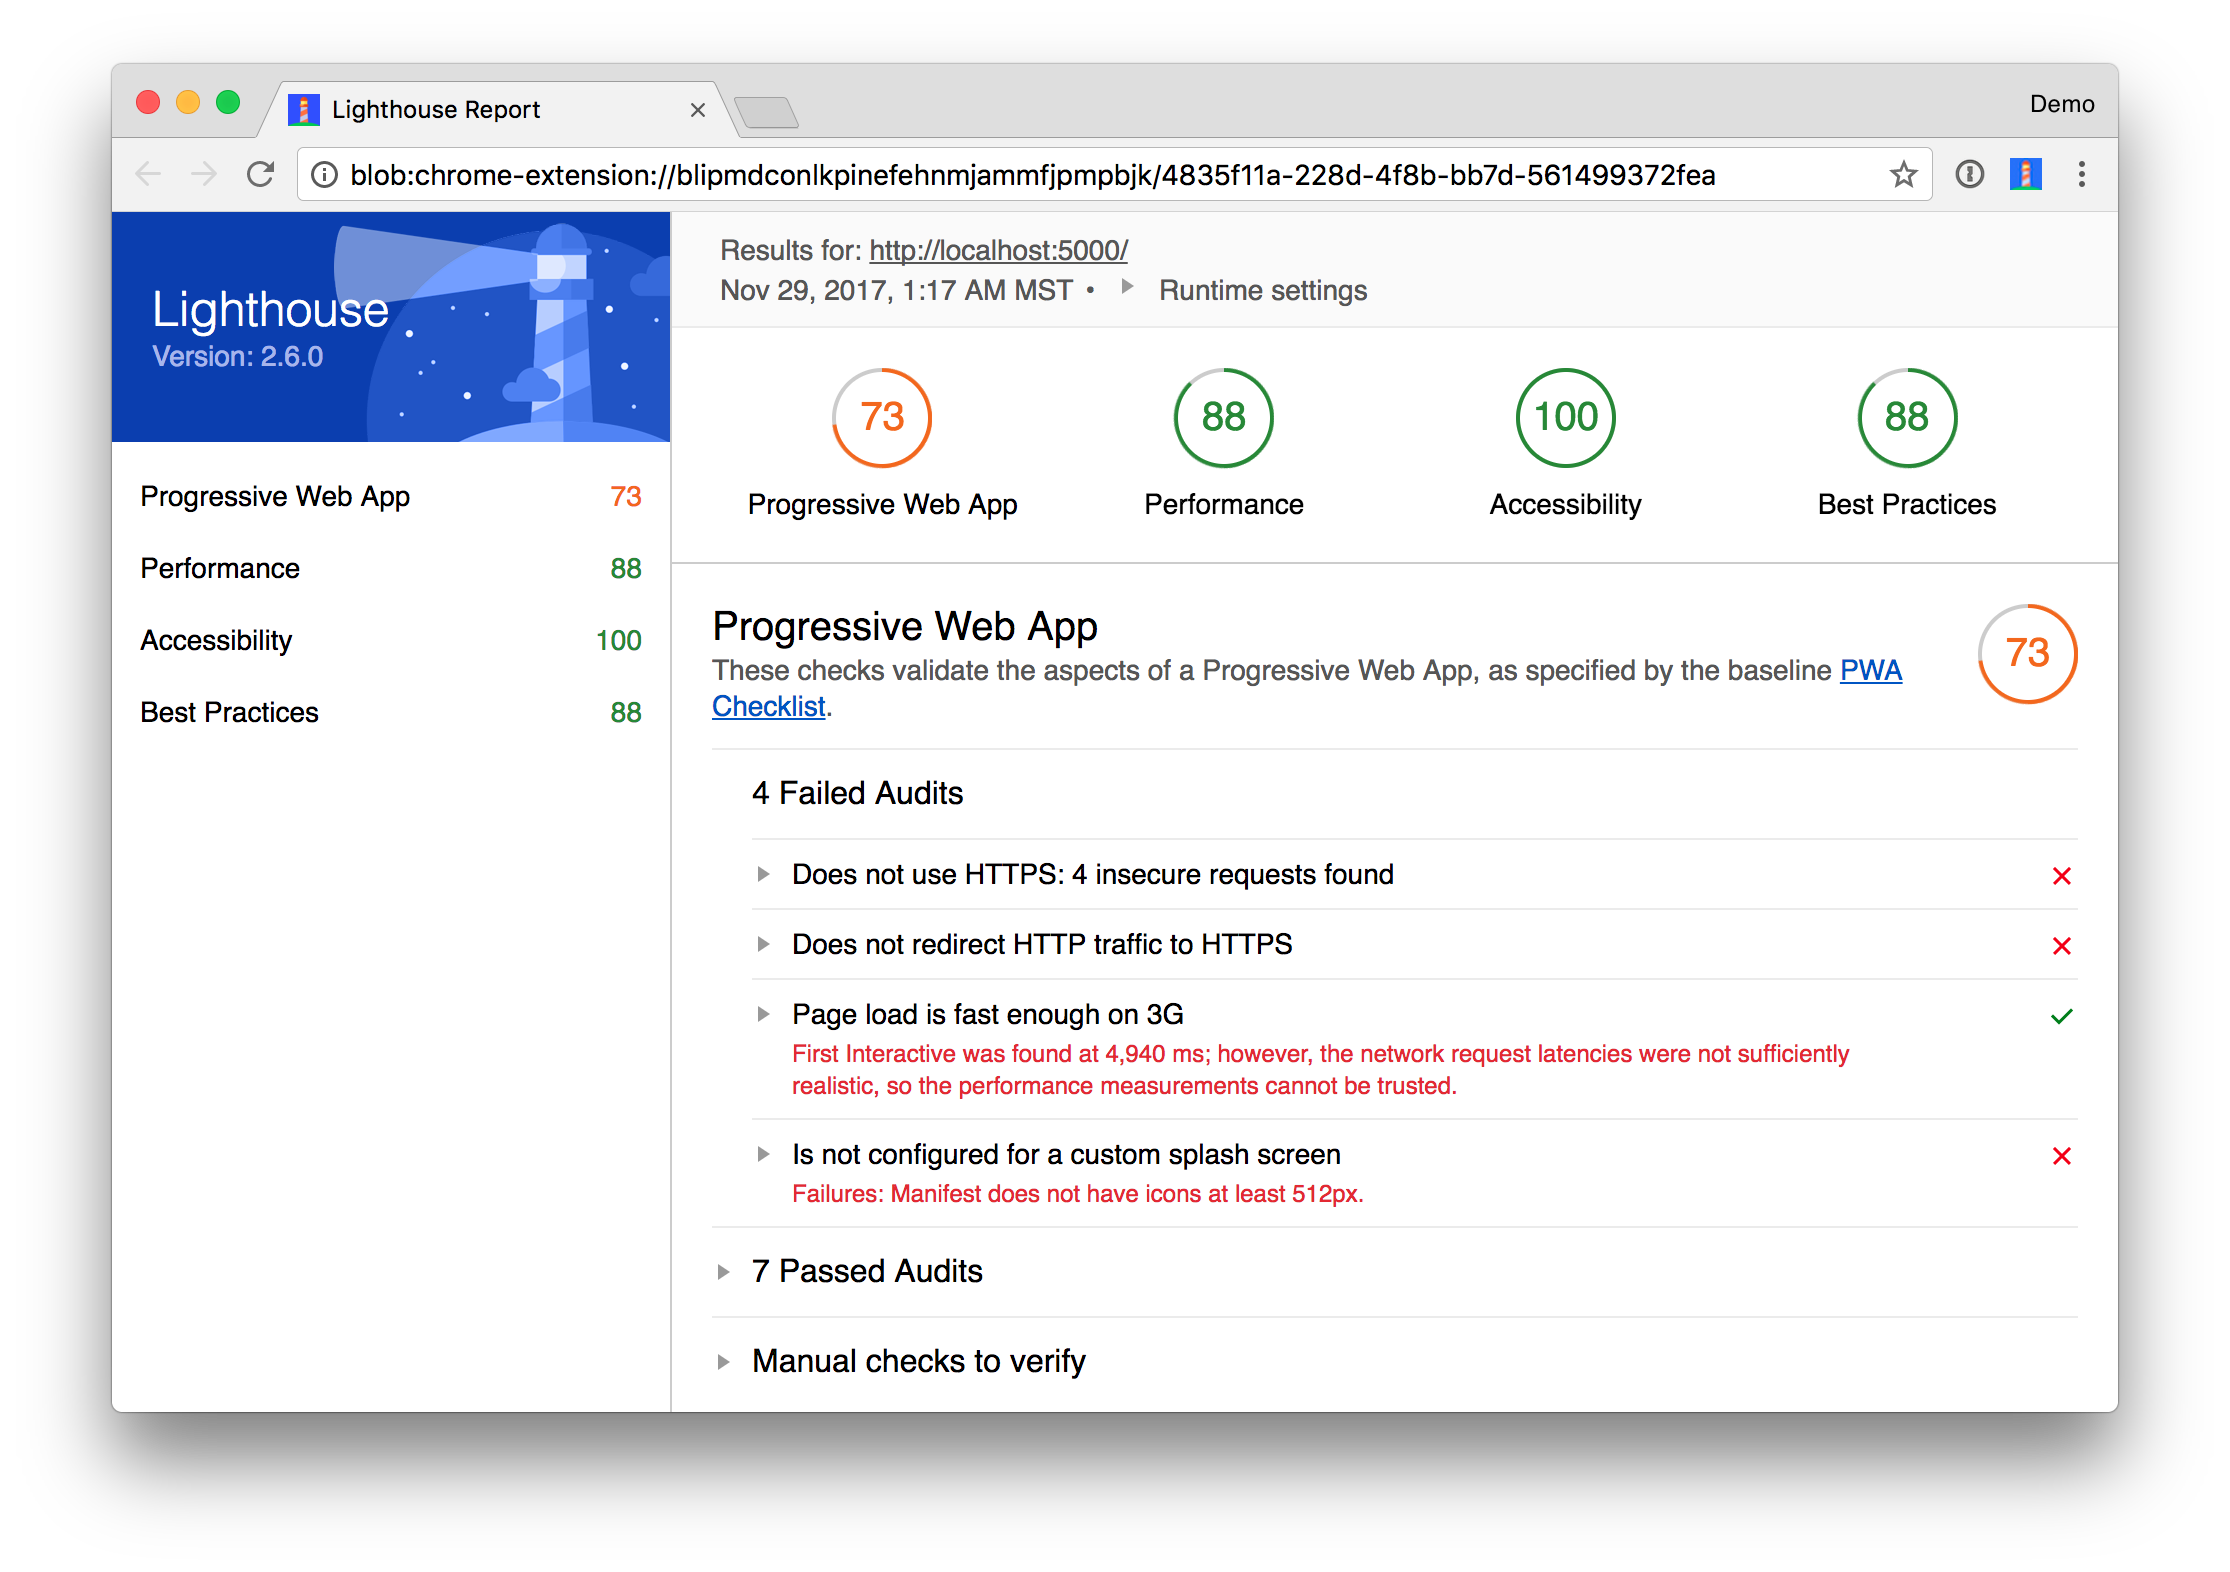
您会在上面的屏幕截图中注意到“清单没有至少512px的图标”。 听起来很容易修复。 您可以从此页面下载512像素的免费啤酒图标。
注意:此图标由Freepik从www.flaticon.com制作 。 它由CC 3.0 BY许可。
将下载的beer.png复制到client/public 。 修改client/public/manifest.json以具有特定于此应用程序的名称,并添加512像素的图标。
{
"short_name": "Beer",
"name": "Good Beer",
"icons": [
{
"src": "favicon.ico",
"sizes": "192x192",
"type": "image/png"
},
{
"src": "beer.png",
"sizes": "512x512",
"type": "image/png"
}
],
"start_url": "./index.html",
"display": "standalone",
"theme_color": "#000000",
"background_color": "#ffffff"
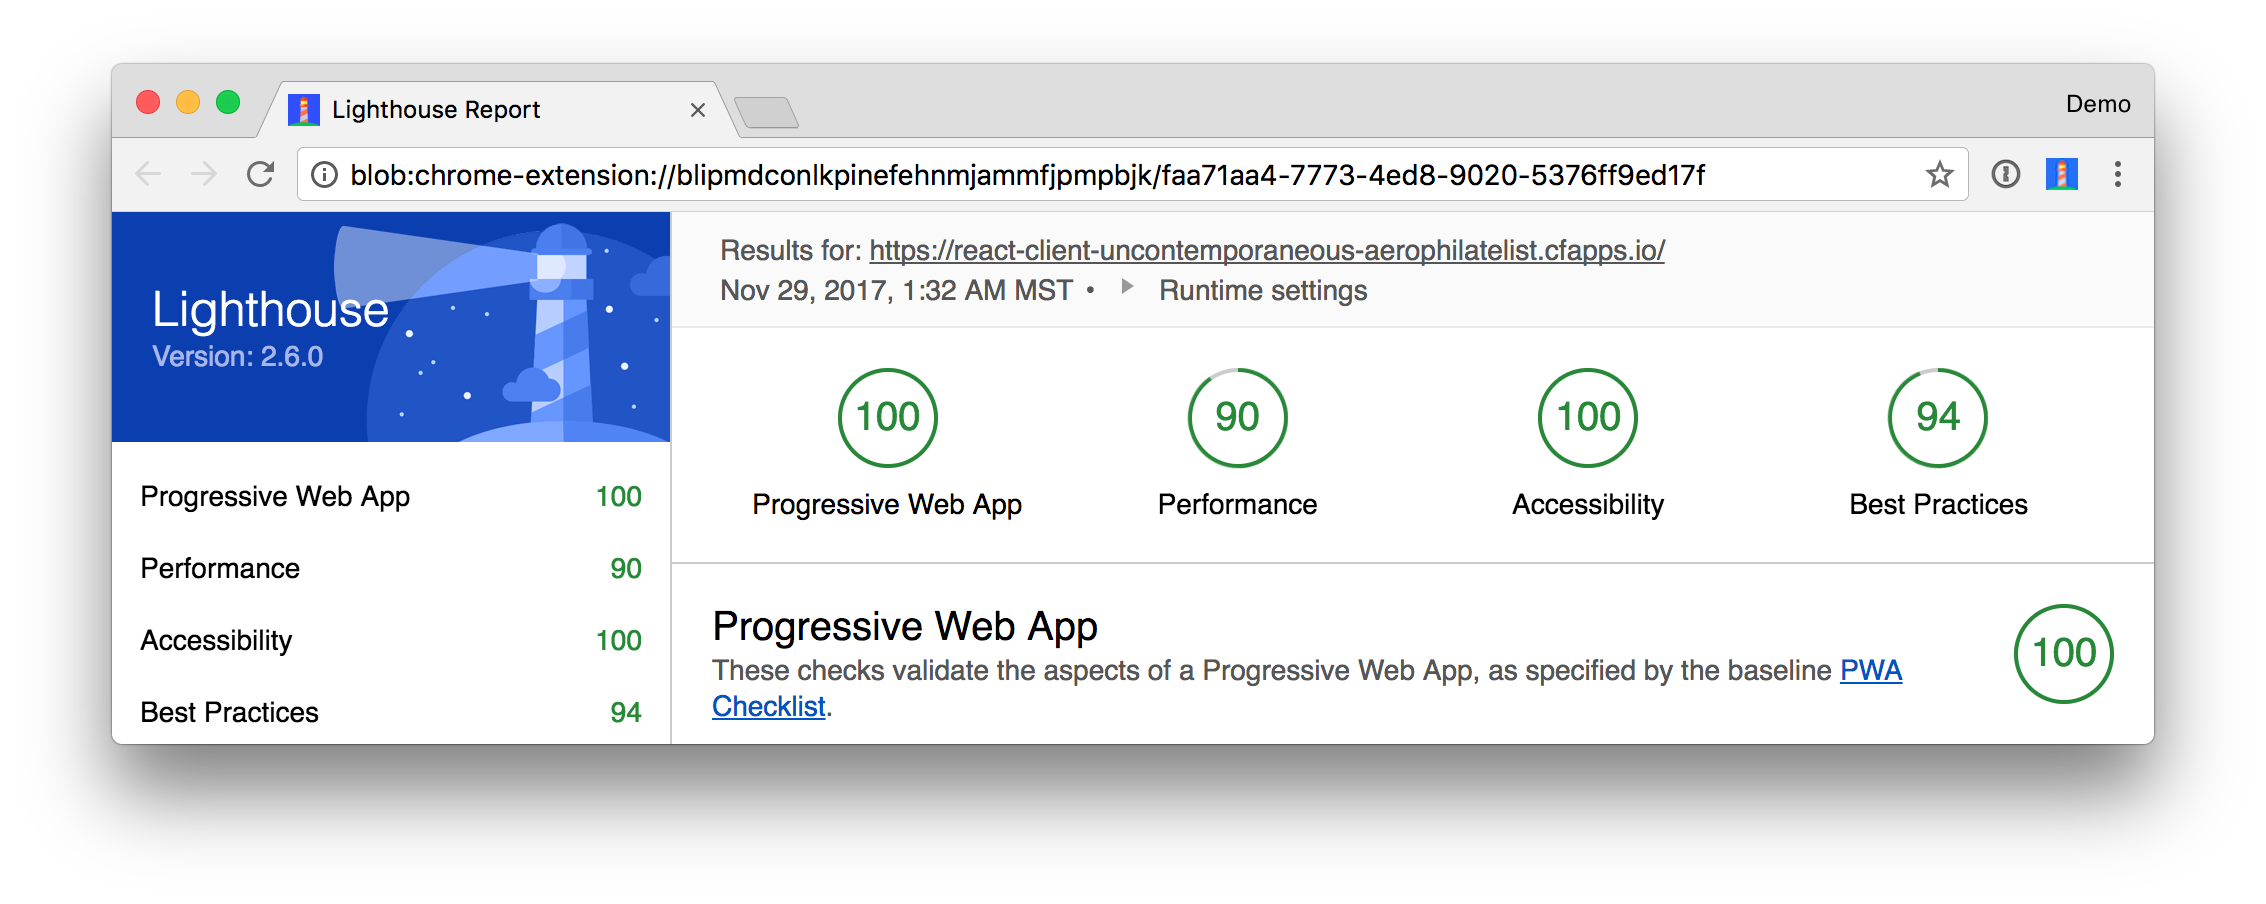
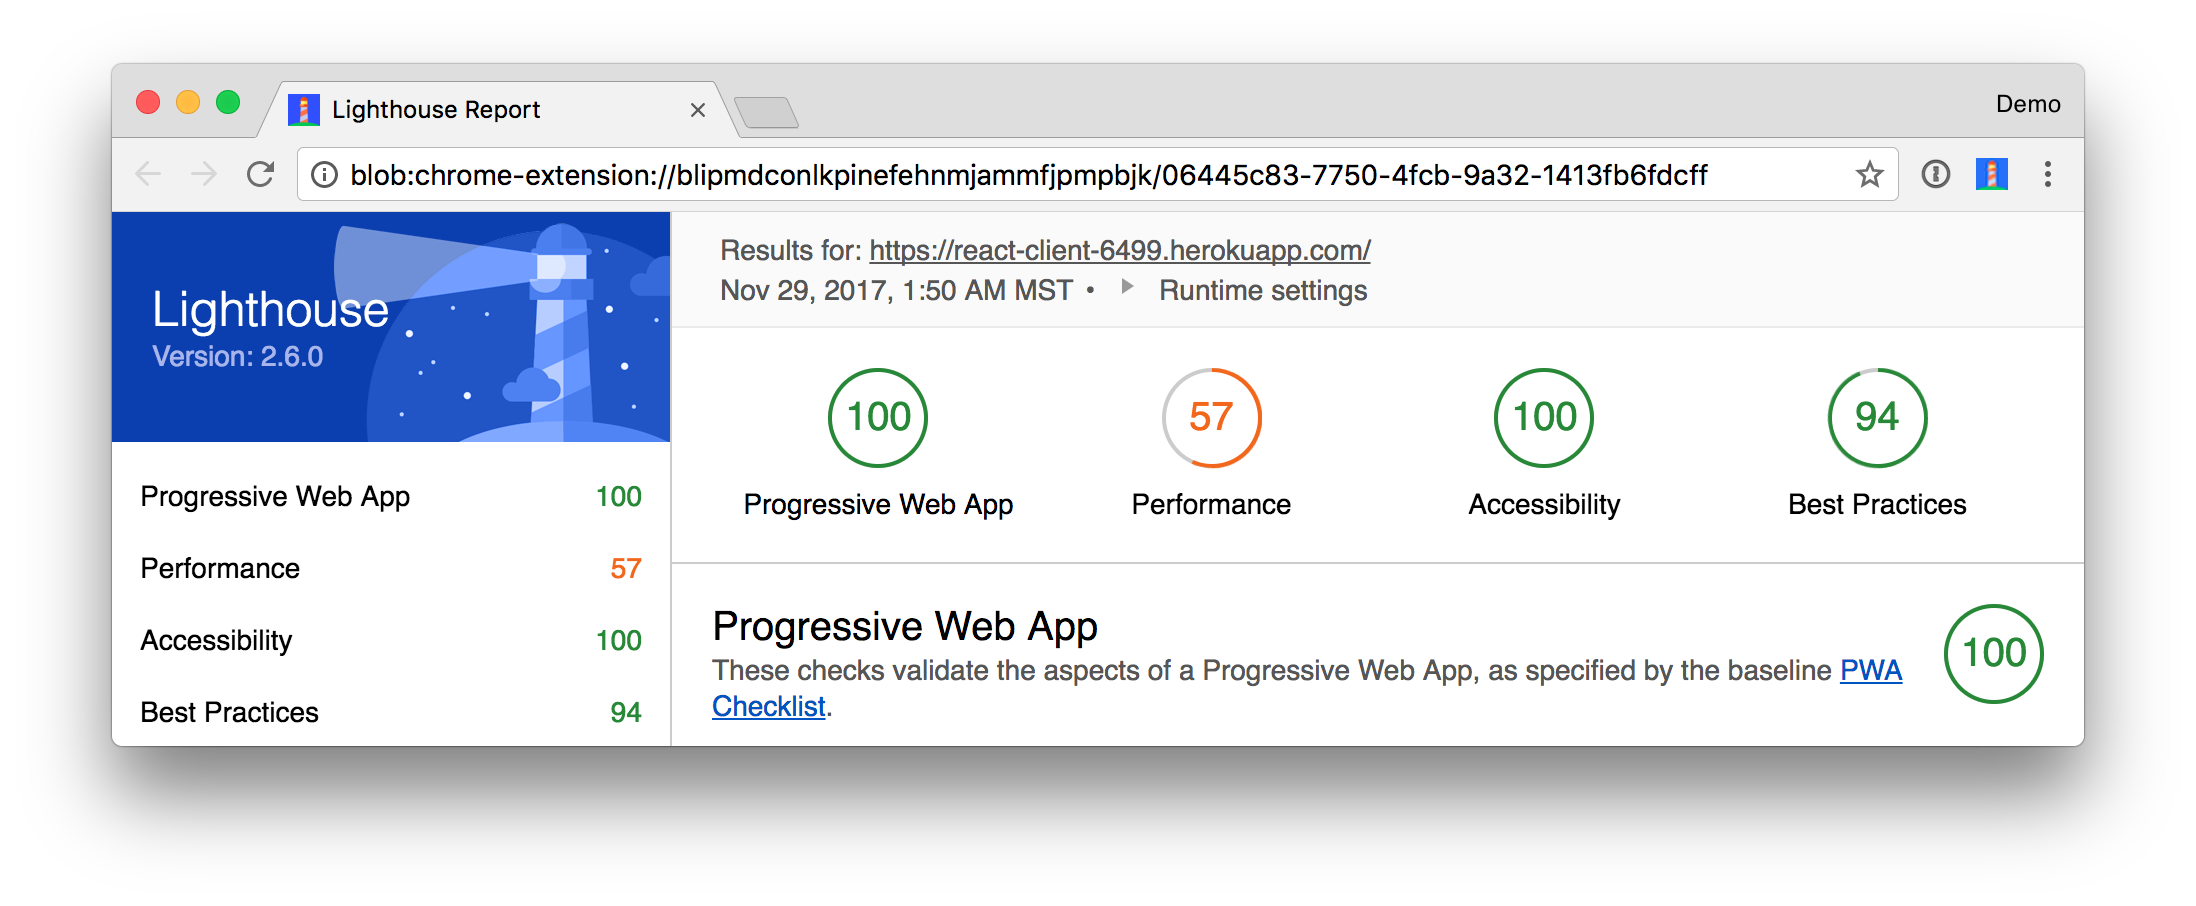
}进行此更改后,我的PWA得分达到82灯塔评分。 该报告最突出的抱怨是我没有使用HTTPS。 为了查看该应用使用HTTPS时的评分,我将其部署到Pivotal Cloud Foundry和Heroku 。 我很高兴发现它在两个平台上的得分都为💯。
要阅读我用于部署所有内容的脚本,请参阅本文附带的GitHub存储库中的cloudfoundry.sh和heroku.sh 。 我非常感谢@starbuxman和@codefinger在创建它们方面的帮助!
使用Okta添加身份验证
您可能会想,“这很酷,很容易看出人们为什么爱上React。” 试用过后,您可能会爱上另一个工具:使用Okta进行身份验证! 为什么选择Okta? 因为您可以免费获得7,000个每月活跃用户 ! 值得一试,特别是当您看到将auth添加到Spring Boot和使用Okta进行React很容易时。
Okta Spring启动启动器
要锁定后端,可以使用Okta的Spring Boot Starter 。 要集成此启动器,请将以下依赖项添加到server/pom.xml :
<dependency>
    <groupId>com.okta.spring</groupId>
    <artifactId>okta-spring-boot-starter</artifactId>
    <version>0.2.0</version>
</dependency> 您还需要添加<dependencyManagement>部分以升级Spring Security的OAuth支持。
<dependencyManagement>
    <dependencies>
        <dependency>
            <groupId>org.springframework.security.oauth</groupId>
            <artifactId>spring-security-oauth2</artifactId>
            <version>2.2.0.RELEASE</version>
        </dependency>
    </dependencies>
</dependencyManagement>
注意: 有一个问题与1563的Spring开机启动它不使用Spring Boot的DevTools工作。
现在,您需要配置服务器以使用Okta进行身份验证。 为此,您需要在Okta中创建OIDC应用。
在Okta中创建OIDC应用
登录到您的1563开发者帐户(或者注册 ,如果你没有一个帐户)并导航到应用程序 > 添加应用程序 。 单击“ 单页应用程序” ,再单击“ 下一步” ,然后为该应用程序命名。 将localhost:8080所有实例更改为localhost:3000 ,然后单击完成 。
将客户端ID复制到您的server/src/main/resources/application.properties文件中。 在其中时,添加与您的Okta域匹配的okta.oauth2.issuer属性。 例如:
okta.oauth2.issuer=https://{yourOktaDomain}.com/oauth2/default
okta.oauth2.clientId={clientId}
注意: { yourOktaDomain }的值应类似于dev-123456.oktapreview.com 。 确保在值中不包括-admin !
更新server/src/main/java/com/okta/developer/demo/DemoApplication.java以将其启用为资源服务器。
import org.springframework.security.oauth2.config.annotation.web.configuration.EnableResourceServer;

@EnableResourceServer
@SpringBootApplication进行了这些更改之后,您应该能够重新启动服务器,并在尝试导航到http:// localhost:8080时看到访问被拒绝。

Okta的React支持
Okta的React SDK允许您将OIDC集成到React应用程序中。 您可以在npmjs.com上了解有关Okta的React SDK的更多信息。 要安装,请运行以下命令:
yarn add @okta/okta-react react-router-dom
yarn add -D @types/react-router-dom
Okta的React SDK依赖于react-router ,因此需要安装react-router-dom的原因。 在client/src/App.tsx配置路由是一种常见的做法,因此,用下面的TypeScript替换其代码,该TypeScript使用Okta设置身份验证。
import * as React from 'react';
import './App.css';
import Home from './Home';
import { BrowserRouter as Router, Route } from 'react-router-dom';
import { Security, ImplicitCallback } from '@okta/okta-react';

const config = {
  issuer: 'https://{yourOktaDomain}.com/oauth2/default',
  redirectUri: window.location.origin + '/implicit/callback',
  clientId: '{clientId}'
};

export interface Auth {
  login(): {};
  logout(): {};
  isAuthenticated(): boolean;
  getAccessToken(): string;
}

class App extends React.Component {

  render() {
    return (
      <Router>
        <Security
          issuer={config.issuer}
          client_id={config.clientId}
          redirect_uri={config.redirectUri}
        >
          <Route path="/" exact={true} component={Home}/>
          <Route path="/implicit/callback" component={ImplicitCallback}/>
        </Security>
      </Router>
    );
  }
}

export default App; 创建client/src/Home.tsx以包含App.tsx以前包含的应用程序外壳。 此类呈现应用程序外壳,登录/注销按钮以及<BeerList/>如果已通过身份验证)。
import * as React from 'react';
import './App.css';
import BeerList from './BeerList';
import { withAuth } from '@okta/okta-react';
import { Auth } from './App';

const logo = require('./logo.svg');

interface HomeProps {
  auth: Auth;
}

interface HomeState {
  authenticated: boolean;
}

export default withAuth(class Home extends React.Component<HomeProps, HomeState> {
  constructor(props: HomeProps) {
    super(props);
    this.state = {authenticated: false};
    this.checkAuthentication = this.checkAuthentication.bind(this);
    this.checkAuthentication();
  }

  async checkAuthentication() {
    const isAuthenticated = await this.props.auth.isAuthenticated();
    const {authenticated} = this.state;
    if (isAuthenticated !== authenticated) {
      this.setState({authenticated: isAuthenticated});
    }
  }

  componentDidUpdate() {
    this.checkAuthentication();
  }

  render() {
    const {authenticated} = this.state;
    let body = null;
    if (authenticated) {
      body = (
        <div className="Buttons">
          <button onClick={this.props.auth.logout}>Logout</button>
          <BeerList auth={this.props.auth}/>
        </div>
      );
    } else {
      body = (
        <div className="Buttons">
          <button onClick={this.props.auth.login}>Login</button>
        </div>
      );
    }

    return (
      <div className="App">
        <div className="App-header">
          <img src={logo} className="App-logo" alt="logo"/>
          <h2>Welcome to React</h2>
        </div>
        {body}
      </div>
    );
  }
});
如果您在浏览器中查看React应用,则可能会看到类似以下的错误:
./src/Home.tsx
(4,26): error TS7016: Could not find a declaration file for module '@okta/okta-react'.
'/Users/mraible/spring-boot-react-example/client/node_modules/@okta/okta-react/dist/index.js'
implicitly has an 'any' type.
 Try `npm install @types/@okta/okta-react` if it exists or add a new declaration (.d.ts) file
containing `declare module '@okta/okta-react';` 使用以下声明创建client/src/okta.d.ts来解决此问题。
declare module '@okta/okta-react'; 重新启动客户端,您将看到在BeerList组件上有一些工作要做。
./src/Home.tsx
(44,21): error TS2339: Property 'auth' does not exist on type 'IntrinsicAttributes &
IntrinsicClassAttributes<BeerList> & Readonly<{ children?: ReactNode; }> & ...'. 在client/src/BeerList.tsx ,通过创建一个传递到类签名中的BeerListProps接口,将auth属性添加到道具中。
import { Auth } from './App';

interface BeerListProps {
  auth: Auth;
}

interface BeerListState {
  beers: Array<{}>;
  isLoading: boolean;
}

class BeerList extends React.Component<BeerListProps, BeerListState> {
  ...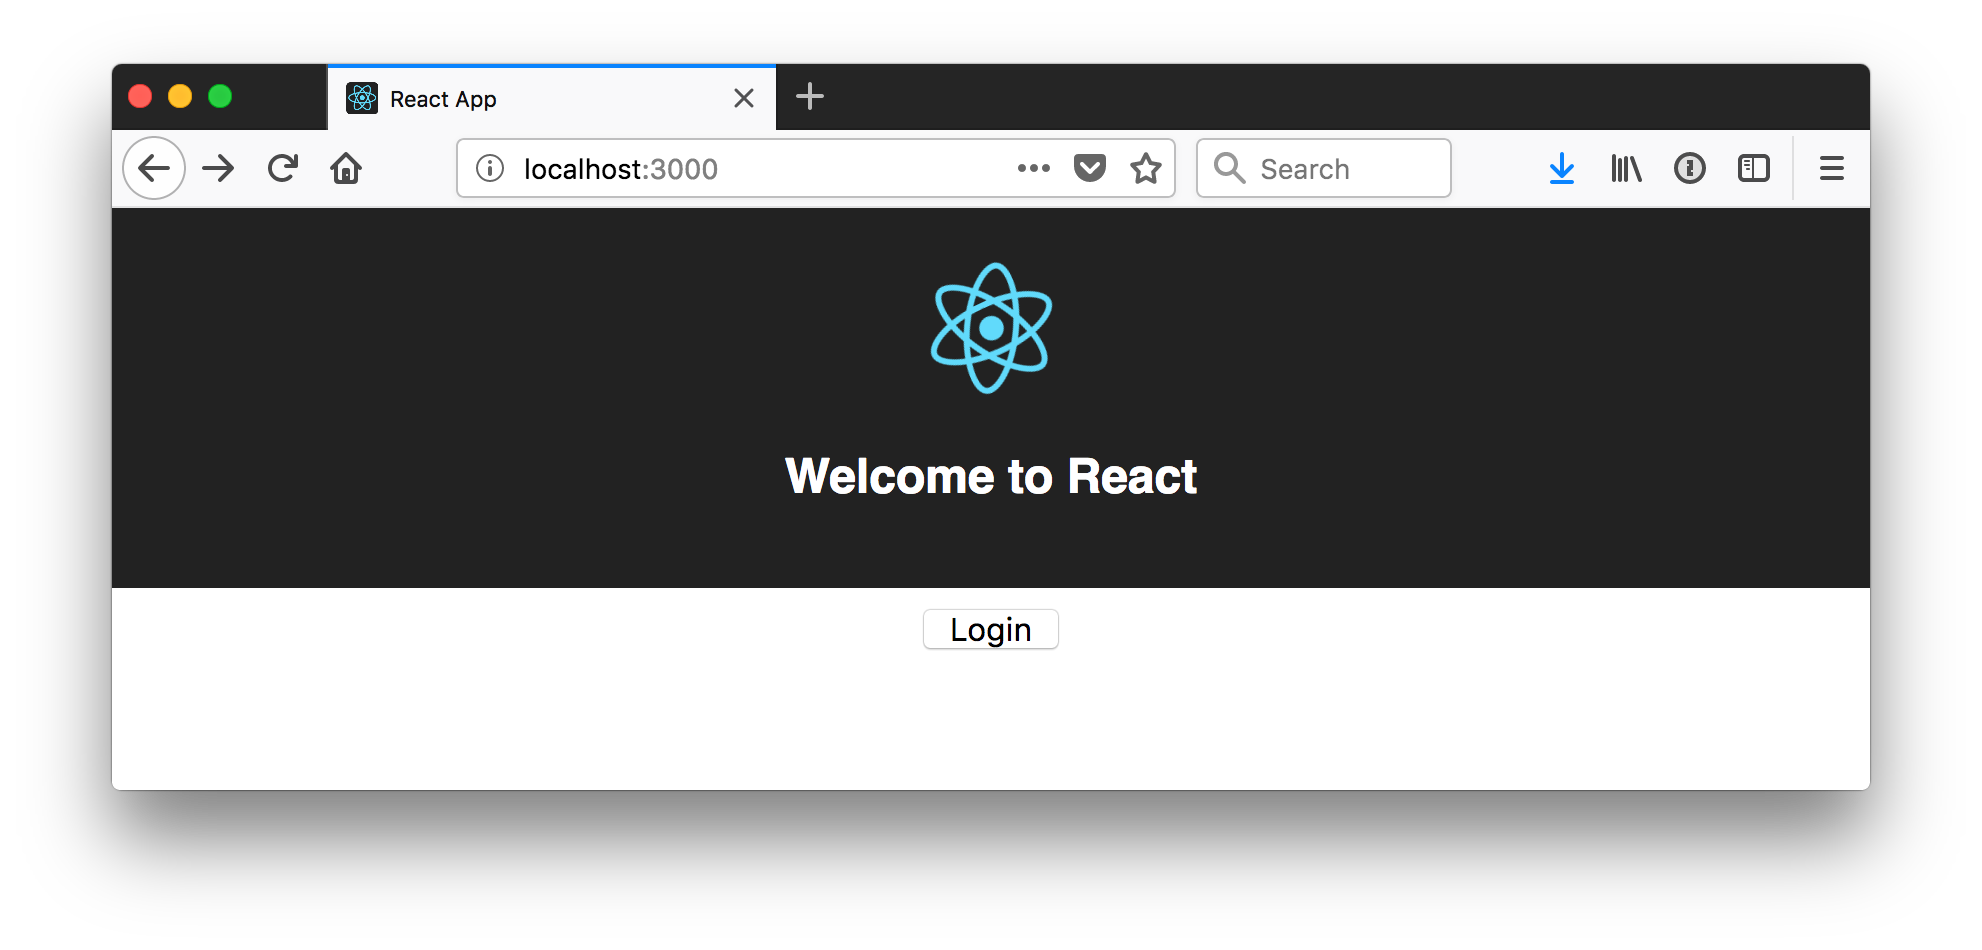
} 将以下CSS规则添加到client/src/App.css以使“登录/注销”按钮更加可见。
.Buttons {
  margin-top: 10px;
}

.Buttons button {
  font-size: 1em;
}
您的浏览器后台,请检查以下内容。
单击按钮登录后,输入用于创建Okta Developer帐户的电子邮件和密码。 当它将您重定向回您的应用程序时,您可能会在浏览器的控制台中看到“正在加载...”和CORS错误。
发生此错误是因为Spring的@CrossOrigin在Spring Security中不能很好地发挥作用。 要解决此问题,请在DemoApplication.java的主体中添加一个simpleCorsFilter bean。
package com.example.demo;

import org.springframework.boot.SpringApplication;
import org.springframework.boot.autoconfigure.SpringBootApplication;
import org.springframework.boot.web.servlet.FilterRegistrationBean;
import org.springframework.context.annotation.Bean;
import org.springframework.core.Ordered;
import org.springframework.security.oauth2.config.annotation.web.configuration.EnableResourceServer;
import org.springframework.web.cors.CorsConfiguration;
import org.springframework.web.cors.UrlBasedCorsConfigurationSource;
import org.springframework.web.filter.CorsFilter;

import java.util.Arrays;
import java.util.Collections;

@EnableResourceServer
@SpringBootApplication
public class DemoApplication {

    public static void main(String[] args) {
        SpringApplication.run(DemoApplication.class, args);
    }

    @Bean
    public FilterRegistrationBean simpleCorsFilter() {
        UrlBasedCorsConfigurationSource source = new UrlBasedCorsConfigurationSource();
        CorsConfiguration config = new CorsConfiguration();
        config.setAllowCredentials(true);
        config.setAllowedOrigins(Arrays.asList("http://localhost:3000", "http://localhost:5000"));
        config.setAllowedMethods(Collections.singletonList("*"));
        config.setAllowedHeaders(Collections.singletonList("*"));
        source.registerCorsConfiguration("/**", config);
        FilterRegistrationBean bean = new FilterRegistrationBean(new CorsFilter(source));
        bean.setOrder(Ordered.HIGHEST_PRECEDENCE);
        return bean;
    }
} 要使其在客户端上都能正常工作,请修改client/src/BeerList.tsx的componentDidMount()方法以设置授权标头。
async componentDidMount() {
  this.setState({isLoading: true});

  try {
    const response = await fetch('http://localhost:8080/good-beers', {
      headers: {
        Authorization: 'Bearer ' + await this.props.auth.getAccessToken()
    }
  });
    const data = await response.json();
    this.setState({beers: data, isLoading: false});
  } catch (err) {
    this.setState({error: err});
  }
} 您还需要在BeerListState接口中添加error 。
interface BeerListState {
  beers: Array<{}>;
  isLoading: boolean;
  error: string;
} 更改构造函数,以便将error初始化为空字符串。
this.state = {
  beers: [],
  isLoading: false,
  error: ''
}; 然后更改render()方法以在发生错误时显示错误。
render() {
  const {beers, isLoading, error} = this.state;

  if (isLoading) {
    return <p>Loading ...</p>;
  }

  if (error.length > 0) {
    return <p>Error: {error}</p>;
  }

  return (...)
}
现在您应该能够以经过身份验证的用户身份查看啤酒清单。

如果有效,那么恭喜!
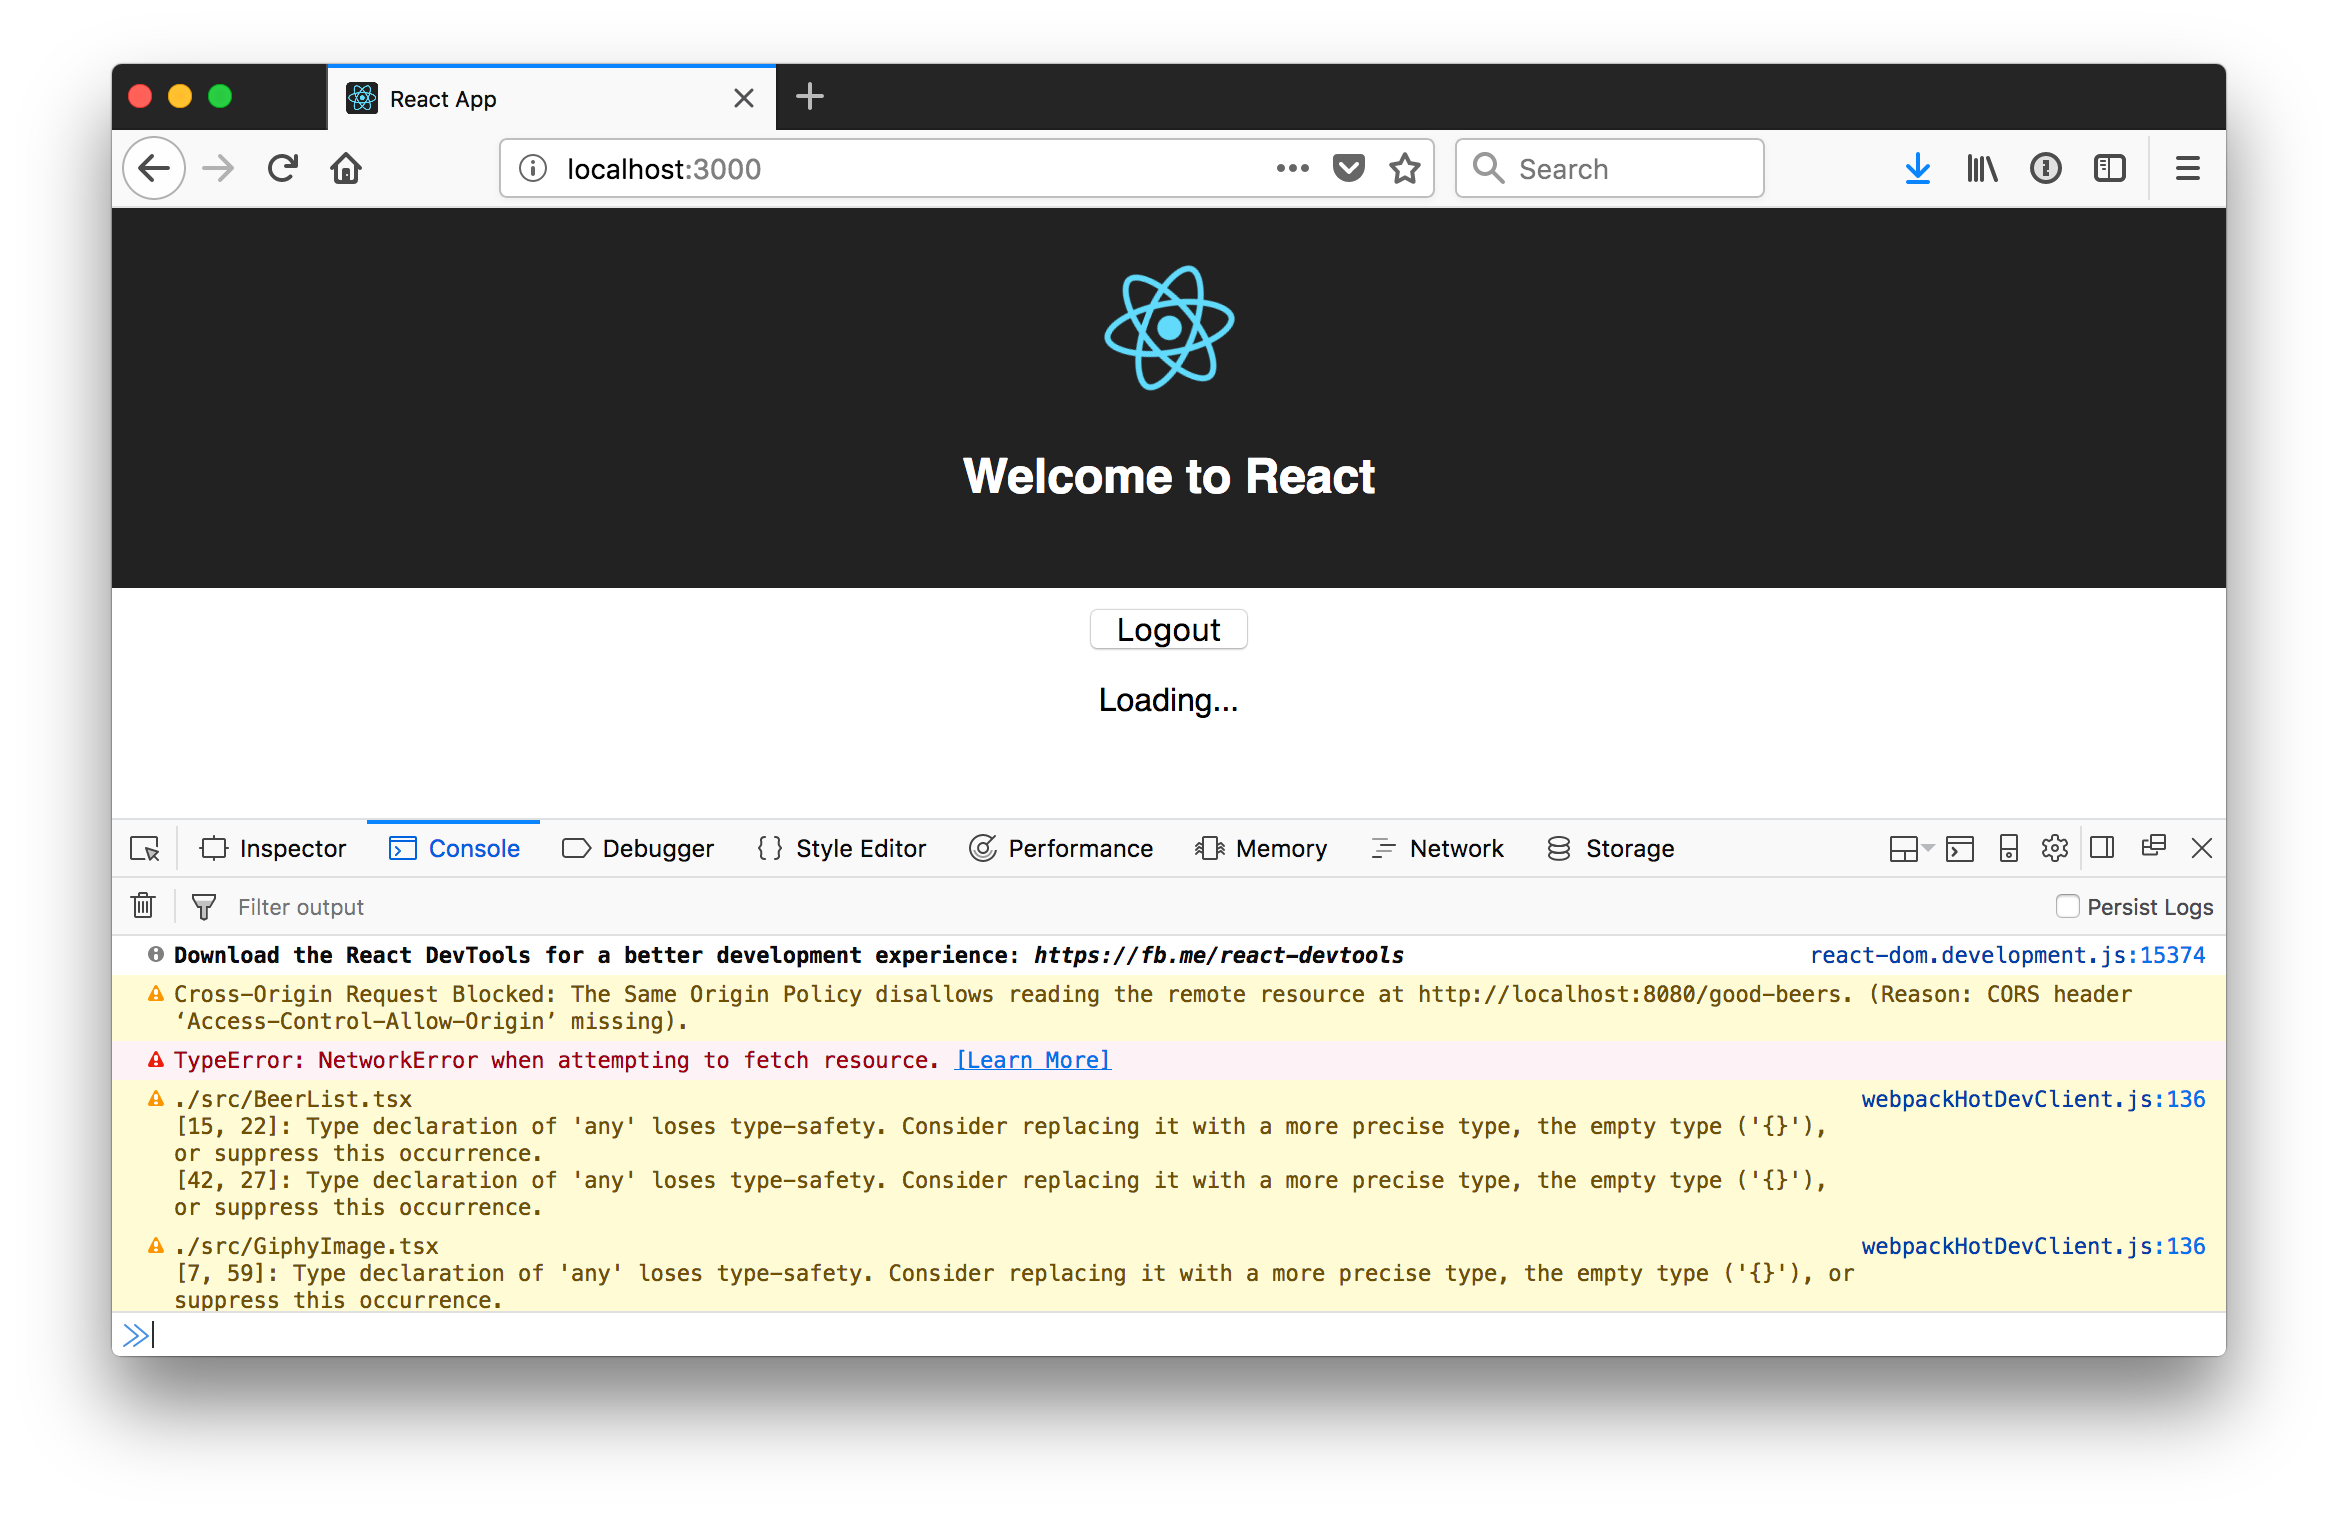
清理那些TypeScript警告
您可能会注意到,浏览器的控制台报告了一些TypeScript警告。
./src/BeerList.tsx
[16, 22]: Type declaration of 'any' loses type-safety. Consider replacing it with a more precise
type, the empty type ('{}'), or suppress this occurrence.
[52, 27]: Type declaration of 'any' loses type-safety. Consider replacing it with a more precise
type, the empty type ('{}'), or suppress this occurrence.
./src/GiphyImage.tsx
[7, 59]: Type declaration of 'any' loses type-safety. Consider replacing it with a more precise
type, the empty type ('{}'), or suppress this occurrence. 要解决第一个问题,请更改client/src/BeerList.tsx ,使其构造函数如下:
constructor(props: BeerListProps) {
  ...
} 对于第二个问题,在client/src/BeerList.tsx创建一个Beer接口。 将其放在顶部的其他接口旁边。
interface Beer {
  id: number;
  name: string;
} 然后将{ beers.map((beer: any) =>更改为{ beers.map((beer: Beer) => 。
第三个问题可以通过在client/src/GiphyImage.tsx创建一个新的GiphyImageState接口来定义状态属性来解决。
interface GiphyImageState {
  giphyUrl: string;
  isLoading: boolean;
}

class GiphyImage extends React.Component<GiphyImageProps, GiphyImageState> {
  ...
}
进行了这些更改之后,您应该摆脱TypeScript警告。
了解有关Spring Boot和React的更多信息
要了解有关React,Spring Boot或Okta的更多信息,请查看以下资源:
- Eric Vicenti的React工作坊简介 -强烈建议您学习React!
- 我与Deepu K Sasidharan 在比利时Devoxx上进行的Angular vs React Smackdown演讲
- Robin Wieruch 如何在React中获取数据
- 15分钟内通过用户身份验证构建React应用程序
- 使用身份验证构建预先应用
- 使用Okta的React SDK创建自定义登录表单
您可以在GitHub上找到与本文相关的源代码。 主要示例(无身份验证)在master分支中,而Okta集成在okta分支中。 要签出本地计算机上的Okta分支,请运行以下命令。
git clone git@github.com:oktadeveloper/spring-boot-react-example.git
git checkout okta
如果您发现任何问题,请在下面添加评论,我们将尽力为您提供帮助。 如果您喜欢本教程,希望您在Twitter上关注我 。 要获得更多类似此类文章的通知,请关注@oktadev 。
“我喜欢编写身份验证和授权代码。” 〜从来没有Java开发人员。 厌倦了一次又一次地建立相同的登录屏幕? 尝试使用Okta API进行托管身份验证,授权和多因素身份验证。
翻译自: https://www.javacodegeeks.com/2018/01/bootiful-development-spring-boot-react.html


 530
530

 被折叠的 条评论
为什么被折叠?
被折叠的 条评论
为什么被折叠?
 到【灌水乐园】发言


