


几年前,我写了一篇博客文章,介绍如何基于Maven工件生成P2存储库。 如今,这种描述的方法已经过时了,我想展示一种基于p2-maven-plugin的新方法,该方法是为解决该问题而创建的。
Maven构建生命周期中的P2-Maven-Plugin集成
首先,我们将p2-maven-plugin的目标站点绑定到Maven的生命周期阶段包 。 该目标负责生成P2存储库。
<plugin>
  <groupId>org.reficio</groupId>
  <artifactId>p2-maven-plugin</artifactId>
  <version>1.3.0</version>
  <executions>
    <execution>
      <id>default-cli</id>
      <phase>package</phase>
      <goals>
        <goal>site</goal>
      </goals>
      <!--... -->
    </execution>
  </executions>
</plugin>
生成P2存储库
现在,我们可以定义哪些Maven工件应该成为新P2存储库的一部分。 如果已定义的工件已经有OSGi清单,则与p2-maven插入无关。 如果不存在OSGi清单,则该插件将生成一个清单。
<execution>
<!-- ... -->
<configuration>
  <artifacts>
    <!-- specify your dependencies here -->
    <!-- groupId:artifactId:version -->
    <artifact>
      <id>com.google.guava:guava:jar:23.0</id>
      <!-- Artifact with existing OSGi-Manifest-->
    </artifact>
    <artifact>
      <id>commons-io:commons-io:1.3</id>
      <!-- Artifact without existing OSGi-Manifest-->
    </artifact>
  </artifacts>
</configuration>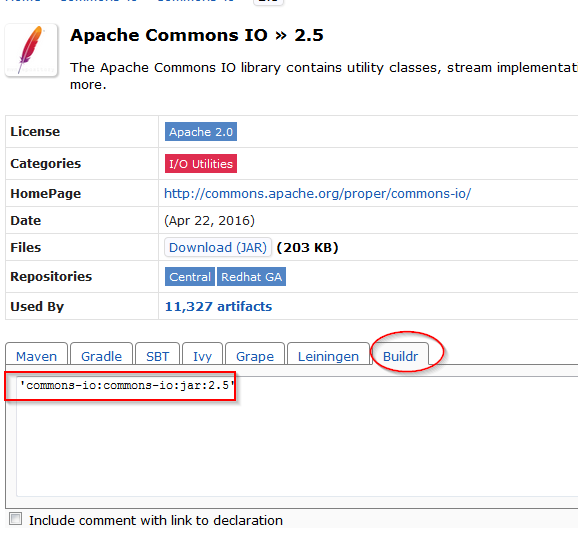
</execution>工件由模式groupId:artifactId:version指定 。 如果你想节省一些打字,请使用Buildr标签MVN库网站对复制权依赖性声明的格式。
此样本配置创建一个P2存储库,其外观类似于以下内容:
target/repository
├── artifacts.jar
├── category.xml
├── content.jar
└── plugins
    ├── com.google.code.findbugs.jsr305_1.3.9.jar
    ├── com.google.errorprone.error_prone_annotations_2.0.18.jar
    ├── com.google.guava_23.0.0.jar
    ├── com.google.j2objc.annotations_1.1.0.jar
    ├── commons-io_1.3.0.jar
    └── org.codehaus.mojo.animal-sniffer-annotations_1.14.0.jar

1 directory, 9 files
插件的默认行为是,还将下载已定义工件的所有传递依赖项,并将其打包到P2存储库中。 如果您不想要它,则必须在相应的工件声明中将选项transitive设置为false 。 如果需要P2存储库中已定义工件的源(如果它们存在于Maven存储库中),则必须在对应的工件声明中将选项源设置为true 。
<!-- ... -->
<artifact>
  <id>com.google.guava:guava:jar:23.0</id>
  <transitive>false</transitive>
  <source>true</source>
</artifact>
<!-- ... -->
然后,生成的P2存储库如下所示:
target/repository
├── artifacts.jar
├── category.xml
├── content.jar
└── plugins
    ├── com.google.guava.source_23.0.0.jar
    ├── com.google.guava_23.0.0.jar
    └── commons-io_1.3.0.jar

1 directory, 6 files
使用分组工件生成P2存储库
在某些情况下,您希望将工件归为所谓的feature 。 p2-maven-plugin提供了一个选项,可以将Maven工件直接分组为功能。 工件的定义与上面相同。 不同之处在于它必须在对应的功能内。 然后,要素定义需要一些元数据信息,例如要素ID,要素版本,描述等。
<!-- ...-->
<configuration>
  <featureDefinitions>
    <feature>
      <!-- Generate a feature including artifacts that are listed below inside the feature element-->
      <id>spring.feature</id>
      <version>4.3.11</version>
      <label>Spring Framework 4.3.11 Feature</label>
      <providerName>A provider</providerName>
      <description>${project.description}</description>
      <copyright>A copyright</copyright>
      <license>A licence</license>
      <artifacts>
        <artifact>
          <id>org.springframework:spring-core:jar:4.3.11.RELEASE</id>id>
        </artifact>
        <artifact>
          <id>org.springframework:spring-context:jar:4.3.11.RELEASE</id>id>
          <source>true</source>
        </artifact>
      </artifacts>
    </feature>
    <!--...-->
  </featureDefinitions>
  <!-- ... -->
<configuration>
然后,生成的P2存储库如下所示:
target/repository
├── artifacts.jar
├── category.xml
├── content.jar
├── features
│   └── spring.feature_4.3.11.jar
└── plugins
    ├── org.apache.commons.logging_1.2.0.jar
    ├── org.springframework.spring-aop.source_4.3.11.RELEASE.jar
    ├── org.springframework.spring-aop_4.3.11.RELEASE.jar
    ├── org.springframework.spring-beans.source_4.3.11.RELEASE.jar
    ├── org.springframework.spring-beans_4.3.11.RELEASE.jar
    ├── org.springframework.spring-context.source_4.3.11.RELEASE.jar
    ├── org.springframework.spring-context_4.3.11.RELEASE.jar
    ├── org.springframework.spring-core_4.3.11.RELEASE.jar
    ├── org.springframework.spring-expression.source_4.3.11.RELEASE.jar
    └── org.springframework.spring-expression_4.3.11.RELEASE.jar

2 directories, 14 files
当然,这两种选择(使用功能生成p2存储库,并且仅使用插件生成)可以混合使用。
p2-maven-plugin提供了更多选项,例如排除特定的传递依赖项,引用其他Eclipse功能等。 有关更多信息,请查看p2-maven-plugin主页。
现在,我们可以从Maven工件生成P2存储库。 我们缺少如何将此P2存储库部署到Artifactory或Sonatype Nexus等存储库管理器的方法。 两种存储库管理器都支持P2存储库,Professional版本中的Artifactory(需要付费)和OSS版本中的Sonatype Nexus(免费)。 对于Nexus,重要的是使用2.x版本。 最新版本3.x尚不支持P2存储库。
将P2存储库部署到存储库管理器
首先,我们希望将生成的P2存储库打包到一个zip文件中。 因此,我们将tycho-p2-repository-plugin添加到Maven构建生命周期:
<plugin>
  <groupId>org.eclipse.tycho</groupId>
  <artifactId>tycho-p2-repository-plugin</artifactId>
  <version>1.0.0</version>
  <executions>
    <execution>
      <phase>package</phase>
      <goals>
        <goal>archive-repository</goal>
      </goals>
    </execution>
  </executions>
</plugin>
然后,我们必须标记该zip文件,以便Maven认识到它必须在部署阶段将其部署到存储库管理器。 为此,我们将build-helper-maven-plugin添加到Maven构建生命周期。
<!-- Attach zipped P2 repository to be installed and deployed in the Maven repository during the deploy phase. -->
<plugin>
  <groupId>org.codehaus.mojo</groupId>
  <artifactId>build-helper-maven-plugin</artifactId>
  <version>3.0.0</version>
  <executions>
    <execution>
      <goals>
        <goal>attach-artifact</goal>
      </goals>
      <configuration>
        <artifacts>
          <artifact>
            <file>target/${project.artifactId}-${project.version}.zip</file>
            <type>zip</type>
          </artifact>
        </artifacts>
      </configuration>
    </execution>
  </executions>
</plugin>
现在,生成的P2存储库可以由其他项目处理。 有关如何处理P2存储库的更多信息,请查看存储库管理器的文档。
可以在Github上找到整个pom.xml示例。
链接
- 2013年的旧博客文章
- P2 Maven插件
- Github上示例的完整源代码
翻译自: https://www.javacodegeeks.com/2017/09/generate-p2-repository-maven-artifacts-2017.html


 1439
1439

 被折叠的 条评论
为什么被折叠?
被折叠的 条评论
为什么被折叠?
 到【灌水乐园】发言


