


什么是春天数据休息?
spring-data-rest是spring-data项目的新增功能,它是一个框架,可帮助您将实体直接作为RESTful Web服务端点公开。 与rails,grails或roo不同,它不会生成任何实现此目标的代码。 spring data-rest支持JPA,MongoDB,JSR-303验证, HAL等。 它确实具有创新性,可让您在几分钟内设置RESTful Web服务。 在此示例中,我将简要概述spring-data-rest的功能。
初始配置
我将使用新的Servlet 3 Java Web Configuration而不是古老的web.xml。 这里没什么特别的。
public class WebAppInitializer extends AbstractAnnotationConfigDispatcherServletInitializer {

    @Override
    protected Class<?>[] getRootConfigClasses() {
        return new Class<?>[]{AppConfiguration.class};
    }

    @Override
    protected Class<?>[] getServletConfigClasses() {
        return new Class[]{WebConfiguration.class};
    }

    @Override
    protected String[] getServletMappings() {
        return new String[]{"/"};
    }
}
GitHub上的WebAppInitializer.java
我正在将hibernate初始化为AppConfiguration类中的数据库抽象层。 我使用的是嵌入式数据库( hsql ),因为我想使此演示文稿保持简单愚蠢。 不过,这里没有什么特别的。
@Configuration
@EnableJpaRepositories
@EnableTransactionManagement
public class AppConfiguration {

    @Bean
    public DataSource dataSource() {
        EmbeddedDatabaseBuilder builder = new EmbeddedDatabaseBuilder();
        return builder.setType(EmbeddedDatabaseType.HSQL).build();
    }

    @Bean
    public LocalContainerEntityManagerFactoryBean entityManagerFactory() {
        HibernateJpaVendorAdapter vendorAdapter = new HibernateJpaVendorAdapter();
        vendorAdapter.setDatabase(Database.HSQL);
        vendorAdapter.setGenerateDdl(true);

        LocalContainerEntityManagerFactoryBean factory = new LocalContainerEntityManagerFactoryBean();
        factory.setJpaVendorAdapter(vendorAdapter);
        factory.setPackagesToScan(getClass().getPackage().getName());
        factory.setDataSource(dataSource());

        return factory;
    }

    @Bean
    public PlatformTransactionManager transactionManager() {
        return new JpaTransactionManager();
    }
}现在到应用程序servlet配置: WebConfiguration
@Configuration
public class WebConfiguration extends RepositoryRestMvcConfiguration {
}哦,那有点短吧? 完整的安装程序不需要一行代码。 这是约定优于配置范式的一个非常好的应用。 现在,我们可以开始创建spring-data-jpa存储库,因为它们将自动显示为RESTful资源。 而且,如果需要,我们仍然可以将自定义配置添加到WebConfiguration类。
初始化真的很简单。 我们不必编写任何特殊的代码。 我们唯一要做的就是建立数据库连接和休眠,这显然是不可避免的。 现在,我们已经设置了“ REST Servlet”和持久性,让我们从模型开始进入应用程序本身。
该模型
我将仅创建两个相关的实体,使其保持非常简单的状态。

@Entity
public class Book {

    @Id
    private String isbn;

    private String title;

    private String language;

    @ManyToMany
    private List<Author> authors;

}@Entity
public class Author {
@Id
@GeneratedValue(strategy = GenerationType.SEQUENCE)
private Integer id;
private String name;
@ManyToMany(mappedBy = "authors")
private List<Book> books;
}为了最终使实体持久化并作为RESTful Web服务公开,我们需要spring-data存储库。 存储库基本上是DAO 。 它为我们的实体提供CRUD功能。 spring-data消除了创建此类存储库的大部分编程工作。 我们只需要定义一个空接口,spring-data即可完成其他所有工作。 尽管如此,由于其设计优于配置,因此易于定制。
实际仓库
@RestResource(path = "books", rel = "books")
public interface BookRepository extends PagingAndSortingRepository<Book, Long> {
}@RestResource(path = "authors", rel = "authors")
public interface AuthorRepository extends PagingAndSortingRepository<Author, Integer> {
}同样,几乎不需要代码。 甚至@RestResource注释也可以被忽略。 但是,如果我这样做了,路径和rel将以我不想要的实体命名。 但是,包含多个子项的REST资源应命名为复数。
访问结果
我们的RESTful Web服务现在可以部署了。 运行后,它将在根目录上列出所有可用资源,因此您可以从那里导航。
获取http:// localhost:8080 /
{
  "links" : [ {
    "rel" : "books",
    "href" : "http://localhost:8080/books"
  }, {
    "rel" : "authors",
    "href" : "http://localhost:8080/authors"
  } ],
  "content" : [ ]
}
精细! 现在让我们创建一个作者和一本书。
POST http:// localhost:8080 / authors
{"name":"Uncle Bob"}响应
201 Created
Location: http://localhost:8080/authors/1
放置http:// localhost:8080 / books / 0132350882
{
  "title": "Clean Code",
  "authors": [
      {
          "rel": "authors",
          "href": "http://localhost:8080/authors/1"
      }
  ]
}
响应
201 Created注意到我是如何使用PUT创建书的? 这是因为其ID是实际的isbn。 我必须告诉服务器要使用哪个isbn,因为他无法猜测。 我为作者使用了POST,因为他的ID只是自动生成的一个增量数字。 另外,我使用了一个链接来连接这本书( / books / 0132350882 )和作者( / authors / 1 )。 基本上,这就是超媒体的全部意义:链接用于实体之间的导航和关系。
现在,让我们看看这本书是否是相应创建的。
GET http:// localhost:8080 / books
{
  "links" : [ ],
  "content" : [ {
    "links" : [ {
      "rel" : "books.Book.authors",
      "href" : "http://localhost:8080/books/0132350882/authors"
    }, {
      "rel" : "self",
      "href" : "http://localhost:8080/books/0132350882"
    } ],
    "title" : "Clean Code"
  } ],
  "page" : {
    "size" : 20,
    "totalElements" : 1,
    "totalPages" : 1,
    "number" : 1
  }
}
精细!
这是一个集成测试,将自动执行以下步骤。 它也可以在github的示例中找到。
public class BookApiIT {

    private final RestTemplate restTemplate = new RestTemplate();

    private final String authorsUrl = "http://localhost:8080/authors";
    private final String booksUrl = "http://localhost:8080/books";

    @Test
    public void testCreateBookWithAuthor() throws Exception {
        final URI authorUri = restTemplate.postForLocation(authorsUrl, sampleAuthor()); // create Author

        final URI bookUri = new URI(booksUrl + "/" + sampleBookIsbn);
        restTemplate.put(bookUri, sampleBook(authorUri.toString())); // create Book linked to Author

        Resource<Book> book = getBook(bookUri);
        assertNotNull(book);

        final URI authorsOfBookUri = new URI(book.getLink("books.Book.authors").getHref());
        Resource<List<Resource<Author>>> authors = getAuthors(authorsOfBookUri);
        assertNotNull(authors.getContent());
        assertFalse(authors.getContent().isEmpty()); // check if /books/0132350882/authors contains an author
    }

    private String sampleAuthor() {
        return "{\"name\":\"Robert C. Martin\"}";
    }

    private final String sampleBookIsbn = "0132350882";

    private String sampleBook(String authorUrl) {
        return "{\"title\":\"Clean Code\",\"authors\":[{\"rel\":\"authors\",\"href\":\"" + authorUrl + "\"}]}";
    }

    private Resource<Book> getBook(URI uri) {
        return restTemplate.exchange(uri, HttpMethod.GET, null, new ParameterizedTypeReference<Resource<Book>>() {
        }).getBody();
    }

    private Resource<List<Resource<Author>>> getAuthors(URI uri) {
        return restTemplate.exchange(uri, HttpMethod.GET, null, new ParameterizedTypeReference<Resource<List<Resource<Author>>>>() {
        }).getBody();
    }
}结论
我们已经创建了完整的RESTful Web服务,而无需花费很多代码。 我们只是定义了实体和数据库连接。 spring-data-rest表示,其他所有内容都只是样板,我同意。
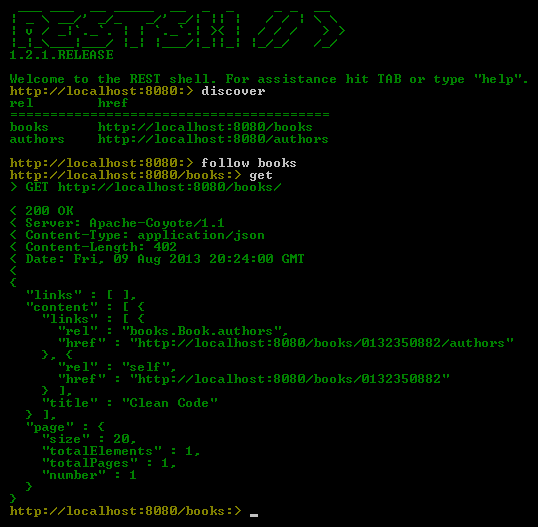
要手动使用Web服务,请考虑rest-shell 。 它是一个命令外壳,它使您的Web服务中的导航尽可能轻松有趣。 这是屏幕截图:
完整的示例可以在我的github上找到 https://github.com/gregorriegler/babdev-spring/tree/master/spring-data-rest https://github.com/gregorriegler/babdev-spring
翻译自: https://www.javacodegeeks.com/2013/08/spring-data-rest-in-action.html


 2299
2299

 被折叠的 条评论
为什么被折叠?
被折叠的 条评论
为什么被折叠?
 到【灌水乐园】发言


