


Coherence通过EntryProcessor API支持无锁编程模型。 此功能通过减少网络访问并在条目上执行隐式的低级锁定来提高系统性能。 此隐式低级锁定功能与ConcurrentMap API提供的显式lock(key)不同。
显式锁定,Transaction Framework API和Coherence资源适配器是其他作为入口处理器的Coherence事务选项。 有关Coherence交易选项的详细信息,请参阅参考部分。 另外,对于Coherence显式锁定实现,可以建议使用Oracle Coherence文章中的分布式数据管理 。
可移植对象格式(POF)是独立于平台的序列化格式。 它允许将等效的Java,.NET和C ++对象编码为相同的字节序列。 建议使用POF来提高系统性能,因为POF的序列化和反序列化性能要优于Standart Java序列化(根据Coherence参考文档,在具有String,long和3个整数的简单测试类中,(反序列化)为7比Standart Java序列化快十倍)。
Coherence提供了多种缓存类型,例如分布式(或分区),复制,乐观,近,本地和远程缓存。 分布式缓存定义为在任意数量的群集节点之间分布(或分区)的数据的集合,这样,群集中的一个节点就对缓存中的每个数据负责,并且责任是分布式的(或,负载均衡)。 请注意,本文中使用了分布式缓存类型。 由于其他缓存类型不在本文范围之内,请查看“参考”部分或“ Coherence参考”文档。 它们的配置与分布式缓存配置非常相似。
如何通过使用覆盖显式锁定的 Coherence文章分发Spring Bean –建议将Java Standart序列化比较两个不同的实现( EntryProcessor –便携式对象格式(POF)和显式锁定– Java Standart序列化 )。
在本文中,创建了一个名为OTV的新集群,并通过使用一个名为user-cache的缓存对象分发了一个spring bean。 它已分布在集群的两个成员之间。
让我们看一下实现AbsctractProcessor的实现, 该实现为集群中JVM之间的Spring Bean分配实现EntryProcessor接口和PortableObject接口 。
二手技术:
JDK 1.6.0_31
春天3.1.1
连贯性3.7.0 SolarisOS 5.10 Maven的3.0.2
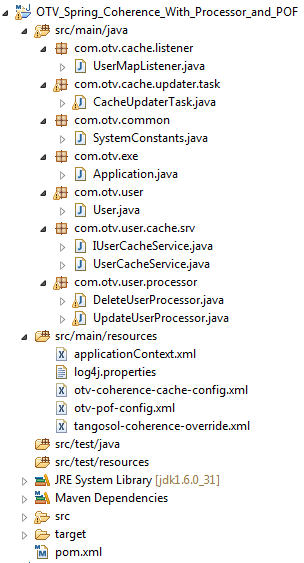
步骤1:建立已完成的专案
创建一个Maven项目,如下所示。 (可以使用Maven或IDE插件来创建它)。
第2步:相干套餐
步骤3:图书馆
首先,将Spring依赖项添加到Maven的pom.xml中。 请注意,Coherence库已安装到Local Maven Repository,并且其描述如下添加到pom.xml中。 另外,如果未使用Maven,则可以将coherence.jar文件添加到classpath。
<properties>
  <spring.version>3.1.1.RELEASE</spring.version>
 </properties>

 <dependencies>

  <!-- Spring 3 dependencies -->
  <dependency>
   <groupId>org.springframework</groupId>
   <artifactId>spring-core</artifactId>
   <version>${spring.version}</version>
  </dependency>
  <dependency>
   <groupId>org.springframework</groupId>
   <artifactId>spring-context</artifactId>
   <version>${spring.version}</version>
  </dependency>

  <!-- Coherence library(from local repository) -->
  <dependency>
   <groupId>com.tangosol</groupId>
   <artifactId>coherence</artifactId>
   <version>3.7.0</version>
  </dependency>

  <!-- Log4j library -->
  <dependency>
   <groupId>log4j</groupId>
   <artifactId>log4j</artifactId>
   <version>1.2.16</version>
  </dependency>

 </dependencies>
以下maven插件可用于创建runnable-jar。
<plugin>
  <groupId>org.apache.maven.plugins</groupId>
  <artifactId>maven-shade-plugin</artifactId>
  <version>1.3.1</version>

  <executions>
   <execution>
    <phase>package</phase>
    <goals>
     <goal>shade</goal>
    </goals>
    <configuration>
     <transformers>
      <transformer
       implementation="org.apache.maven.plugins.shade.resource.ManifestResourceTransformer">
       <mainClass>com.otv.exe.Application</mainClass>
      </transformer>
      <transformer
       implementation="org.apache.maven.plugins.shade.resource.AppendingTransformer">
       <resource>META-INF/spring.handlers</resource>
      </transformer>
      <transformer
       implementation="org.apache.maven.plugins.shade.resource.AppendingTransformer">
       <resource>META-INF/spring.schemas</resource>
      </transformer>
     </transformers>
    </configuration>
   </execution>
  </executions>
 </plugin>
步骤4:建立otv-pof-config.xml
otv-pof-config.xml涵盖了使用可移植对象格式(POF)功能进行序列化的类。 在这个例子中; User,UpdateUserProcessor和DeleteUserProcessor类实现com.tangosol.io.pof.PortableObject接口。
-Dtangosol.pof.config参数可用于在启动脚本中定义otv-pof-config.xml路径。
<?xml version="1.0"?>
<!DOCTYPE pof-config SYSTEM "pof-config.dtd">
<pof-config>
 <user-type-list>
  <!-- coherence POF user types -->
  <include>coherence-pof-config.xml</include>
  <!-- The definition of classes which use Portable Object Format -->
  <user-type>
   <type-id>1001</type-id>
   <class-name>com.otv.user.User</class-name>
  </user-type>
  <user-type>
   <type-id>1002</type-id>
   <class-name>com.otv.user.processor.UpdateUserProcessor</class-name>
  </user-type>
  <user-type>
   <type-id>1003</type-id>
   <class-name>com.otv.user.processor.DeleteUserProcessor</class-name>
  </user-type>
 </user-type-list>
 <allow-interfaces>true</allow-interfaces>
 <allow-subclasses>true</allow-subclasses>
</pof-config>
步骤5:创建otv-coherence-cache-config.xml
otv-coherence-cache-config.xml包含(分布式或复制的)缓存方案和缓存方案映射配置。 创建的缓存配置应添加到coherence-cache-config.xml中 。
<?xml version="1.0"?>

<cache-config xmlns:xsi="http://www.w3.org/2001/XMLSchema-instance"
     xmlns="http://xmlns.oracle.com/coherence/coherence-cache-config"
           xsi:schemaLocation="http://xmlns.oracle.com/coherence/coherence-cache-config
                     coherence-cache-config.xsd">

 <caching-scheme-mapping>
  <cache-mapping>
   <cache-name>user-cache</cache-name>
   <scheme-name>UserDistributedCacheWithPof</scheme-name>
  </cache-mapping>
 </caching-scheme-mapping>

    <caching-schemes>

  <distributed-scheme>
   <scheme-name>UserDistributedCacheWithPof</scheme-name>
   <service-name>UserDistributedCacheWithPof</service-name>

   <serializer>
    <instance>
     <class-name>com.tangosol.io.pof.SafeConfigurablePofContext
     </class-name>
     <init-params>
      <init-param>
       <param-type>String</param-type>
       <param-value>
           <!-- pof-config.xml path should be set-->
        otv-pof-config.xml
       </param-value>
      </init-param>
     </init-params>
    </instance>
   </serializer>
   <backing-map-scheme>
    <local-scheme />
   </backing-map-scheme>
   <autostart>true</autostart>
  </distributed-scheme>
 </caching-schemes>

</cache-config>
步骤6:创建tangosol-coherence-override.xml
tangosol-coherence-override.xml涵盖了集群,成员身份和可配置的缓存工厂配置。 另外,以下配置xml文件显示了群集的第一个成员。 -Dtangosol.coherence.override参数可用于在启动脚本中定义tangosol-coherence-override.xml路径。
集群的第一个成员的tangosol-coherence-override.xml:
<?xml version='1.0'?>

<coherence xmlns:xsi="http://www.w3.org/2001/XMLSchema-instance"
   xmlns="http://xmlns.oracle.com/coherence/coherence-operational-config"
   xsi:schemaLocation="http://xmlns.oracle.com/coherence/coherence-operational-config coherence-operational-config.xsd">

   <cluster-config>

      <member-identity>
         <cluster-name>OTV</cluster-name>
   <!-- Name of the first member of the cluster -->
         <role-name>OTV1</role-name>
      </member-identity>

      <unicast-listener>
       <well-known-addresses>
         <socket-address id="1">
     <!-- IP Address of the first member of the cluster -->
           <address>x.x.x.x</address>
           <port>8089</port>
         </socket-address>
         <socket-address id="2">
     <!-- IP Address of the second member of the cluster -->
           <address>y.y.y.y</address>
           <port>8089</port>
         </socket-address>
       </well-known-addresses>

    <!-- Name of the first member of the cluster -->
       <machine-id>OTV1</machine-id>
    <!-- IP Address of the first member of the cluster -->
        <address>x.x.x.x</address>
        <port>8089</port>
        <port-auto-adjust>true</port-auto-adjust>
      </unicast-listener>

   </cluster-config>

   <configurable-cache-factory-config>
      <init-params>
         <init-param>
            <param-type>java.lang.String</param-type>
            <param-value system-property="tangosol.coherence.cacheconfig">
     <!-- coherence-cache-config.xml path should be set-->
              otv-coherence-cache-config.xml
   </param-value>
         </init-param>
      </init-params>
   </configurable-cache-factory-config>

</coherence>
集群的第二个成员的tangosol-coherence-override.xml:
<?xml version='1.0'?>

<coherence xmlns:xsi="http://www.w3.org/2001/XMLSchema-instance"
   xmlns="http://xmlns.oracle.com/coherence/coherence-operational-config"
   xsi:schemaLocation="http://xmlns.oracle.com/coherence/coherence-operational-config coherence-operational-config.xsd">

   <cluster-config>

      <member-identity>
         <cluster-name>OTV</cluster-name>
   <!-- Name of the second member of the cluster -->
         <role-name>OTV2</role-name>
      </member-identity>

      <unicast-listener>

       <well-known-addresses>
         <socket-address id="1">
     <!-- IP Address of the first member of the cluster -->
           <address>x.x.x.x</address>
           <port>8089</port>
         </socket-address>
         <socket-address id="2">
     <!-- IP Address of the second member of the cluster -->
           <address>y.y.y.y</address>
           <port>8089</port>
         </socket-address>
       </well-known-addresses>

    <!-- Name of the second member of the cluster -->
       <machine-id>OTV2</machine-id>
    <!-- IP Address of the second member of the cluster -->
        <address>y.y.y.y</address>
        <port>8089</port>
        <port-auto-adjust>true</port-auto-adjust>

      </unicast-listener>

   </cluster-config>

   <configurable-cache-factory-config>
      <init-params>
         <init-param>
            <param-type>java.lang.String</param-type>
            <param-value system-property="tangosol.coherence.cacheconfig">
     <!-- coherence-cache-config.xml path should be set-->
              otv-coherence-cache-config.xml</param-value>
         </init-param>
      </init-params>
   </configurable-cache-factory-config>

</coherence>
步骤7:创建applicationContext.xml
applicationContext.xml已创建。
<beans xmlns="http://www.springframework.org/schema/beans"
 xmlns:xsi="http://www.w3.org/2001/XMLSchema-instance"
 xsi:schemaLocation="http://www.springframework.org/schema/beans

http://www.springframework.org/schema/beans/spring-beans-3.0.xsd">

 <!-- Beans Declaration -->
 <bean id="User" class="com.otv.user.User" scope="prototype" />
    <bean id="UserCacheService" class="com.otv.user.cache.srv.UserCacheService" />
    <bean id="CacheUpdaterTask" class="com.otv.cache.updater.task.CacheUpdaterTask">
     <property name="userCacheService" ref="UserCacheService" />
    </bean>
</beans>
步骤8:建立SystemConstants类别
SystemConstants类已创建。 此类涵盖所有系统常数。
package com.otv.common;

/**
 * System Constants
 *
 * @author  onlinetechvision.com
 * @since   2 Jun 2012
 * @version 1.0.0
 *
 */
public class SystemConstants {

 public static final String APPLICATION_CONTEXT_FILE_NAME = "applicationContext.xml";

 //Named Cache Definition...
 public static final String USER_CACHE = "user-cache";

 //Bean Names...
 public static final String BEAN_NAME_CACHE_UPDATER_TASK = "CacheUpdaterTask";
 public static final String BEAN_NAME_USER = "User";

}
步骤9:创建用户豆
创建了一个新的User Spring bean。 该bean将分布在OTV集群中的两个节点之间。 可以实现PortableObject进行序列化。 PortableObject Interface有两个未实现的方法,如readExternal和writeExternal 。 必须定义仅序列化的属性。 在此示例中,所有属性(用户的id,名称和姓氏)都已序列化。
package com.otv.user;

import java.io.IOException;

import com.tangosol.io.pof.PofReader;
import com.tangosol.io.pof.PofWriter;
import com.tangosol.io.pof.PortableObject;

/**
 * User Bean
 *
 * @author  onlinetechvision.com
 * @since   2 Jun 2012
 * @version 1.0.0
 *
 */
public class User implements PortableObject {

 private String id;
 private String name;
 private String surname;

 /**
     * Gets User Id
     *
     * @return String id
     */
 public String getId() {
  return id;
 }

 /**
     * Sets User Id
     *
     * @param String id
     */
 public void setId(String id) {
  this.id = id;
 }

 /**
     * Gets User Name
     *
     * @return String name
     */
 public String getName() {
  return name;
 }

 /**
     * Sets User Name
     *
     * @param String name
     */
 public void setName(String name) {
  this.name = name;
 }

 /**
     * Gets User Surname
     *
     * @return String surname
     */
 public String getSurname() {
  return surname;
 }

 /**
     * Sets User Surname
     *
     * @param String surname
     */
 public void setSurname(String surname) {
  this.surname = surname;
 }

 @Override
 public String toString() {
  StringBuilder strBuilder = new StringBuilder();
  strBuilder.append("Id : ").append(id);
  strBuilder.append(", Name : ").append(name);
  strBuilder.append(", Surname : ").append(surname);
  return strBuilder.toString();
 }

 /**
  * Restore the contents of a user type instance by reading its state
  * using the specified PofReader object.
  *
  * @param PofReader in
  */
 public void readExternal(PofReader in) throws IOException {
  this.id = in.readString(0);
  this.name = in.readString(1);
  this.surname = in.readString(2);
 }

 /**
  * Save the contents of a POF user type instance by writing its state
  * using the specified PofWriter object.
  *
  * @param PofWriter out
  */
 public void writeExternal(PofWriter out) throws IOException {
  out.writeString(0, id);
  out.writeString(1, name);
  out.writeString(2, surname);
 }
}
步骤10:建立IUserCacheService接口
创建了一个新的IUserCacheService接口以执行缓存操作。
package com.otv.user.cache.srv;

import com.otv.user.User;
import com.otv.user.processor.DeleteUserProcessor;
import com.otv.user.processor.UpdateUserProcessor;
import com.tangosol.net.NamedCache;

/**
 * User Cache Service Interface
 *
 * @author  onlinetechvision.com
 * @since   2 Jun 2012
 * @version 1.0.0
 *
 */
public interface IUserCacheService {

 /**
     * Gets Distributed User Cache
     *
     * @return NamedCache User Cache
     */
 NamedCache getUserCache();

 /**
     * Adds user to cache
     *
     * @param User user
     */
 void addUser(User user);

 /**
     * Updates user on the cache
     *
     * @param String userId
     * @param UpdateUserProcessor processor
     *
     */
 void updateUser(String userId, UpdateUserProcessor processor);

 /**
     * Deletes user from the cache
     *
     * @param String userId
     * @param DeleteUserProcessor processor
     *
     */
 void deleteUser(String userId, DeleteUserProcessor processor);

}
步骤11:创建UserCacheService类
通过实现IUserCacheService接口创建UserCacheService类。
package com.otv.user.cache.srv;

import com.otv.cache.listener.UserMapListener;
import com.otv.common.SystemConstants;
import com.otv.user.User;
import com.otv.user.processor.DeleteUserProcessor;
import com.otv.user.processor.UpdateUserProcessor;
import com.tangosol.net.CacheFactory;
import com.tangosol.net.NamedCache;

/**
 * User Cache Service
 *
 * @author  onlinetechvision.com
 * @since   2 Jun 2012
 * @version 1.0.0
 *
 */
public class UserCacheService implements IUserCacheService {

 private NamedCache userCache = null;

 public UserCacheService() {
  setUserCache(CacheFactory.getCache(SystemConstants.USER_CACHE));
  //UserMap Listener is registered to listen user-cache operations
  getUserCache().addMapListener(new UserMapListener());
 }

 /**
     * Adds user to cache
     *
     * @param User user
     */
 public void addUser(User user) {
  getUserCache().put(user.getId(), user);
 }

 /**
     * Deletes user from the cache
     *
     * @param String userId
     * @param DeleteUserProcessor processor
     *
     */
 public void deleteUser(String userId, DeleteUserProcessor processor) {
  getUserCache().invoke(userId, processor);
 }

 /**
     * Updates user on the cache
     *
     * @param String userId
     * @param UpdateUserProcessor processor
     *
     */
 public void updateUser(String userId, UpdateUserProcessor processor) {
  getUserCache().invoke(userId, processor);
 }

 /**
     * Gets Distributed User Cache
     *
     * @return NamedCache User Cache
     */
 public NamedCache getUserCache() {
  return userCache;
 }

 /**
     * Sets User Cache
     *
     * @param NamedCache userCache
     */
 public void setUserCache(NamedCache userCache) {
  this.userCache = userCache;
 }
}
步骤12:建立USERMAPLISTENER类别
创建一个新的UserMapListener类。 该侦听器接收分布式用户缓存事件。
package com.otv.cache.listener;

import org.apache.log4j.Logger;

import com.tangosol.util.MapEvent;
import com.tangosol.util.MapListener;

/**
 * User Map Listener
 *
 * @author  onlinetechvision.com
 * @since   2 Jun 2012
 * @version 1.0.0
 *
 */
public class UserMapListener implements MapListener {

 private static Logger logger = Logger.getLogger(UserMapListener.class);

 /**
     * This method is invoked when an entry is deleted from the cache...
     *
     * @param MapEvent me
     */
 public void entryDeleted(MapEvent me) {
   logger.debug("Deleted Key = " + me.getKey() + ", Value = " + me.getOldValue());
 }

 /**
     * This method is invoked when an entry is inserted to the cache...
     *
     * @param MapEvent me
     */
 public void entryInserted(MapEvent me) {
  logger.debug("Inserted Key = " + me.getKey() + ", Value = " + me.getNewValue());
 }

 /**
     * This method is invoked when an entry is updated on the cache...
     *
     * @param MapEvent me
     */
 public void entryUpdated(MapEvent me) {
  logger.debug("Updated Key = " + me.getKey() + ", New_Value = " + me.getNewValue() + ", Old Value = " + me.getOldValue());
 }
}
步骤13:创建UpdateUserProcessor类
AbstractProcessor是位于com.tangosol.util.processor包下的抽象类。 它实现EntryProcessor接口。
创建UpdateUserProcessor类以处理缓存上的用户更新操作。 当为密钥调用UpdateUserProcessor时 ,首先在集群中找到包含该密钥的成员。 之后,从包含相关键的成员中调用UpdateUserProcessor ,并更新其值(用户对象)。 因此,减少了网络流量。
package com.otv.user.processor;

import java.io.IOException;

import org.apache.log4j.Logger;

import com.otv.user.User;
import com.tangosol.io.pof.PofReader;
import com.tangosol.io.pof.PofWriter;
import com.tangosol.io.pof.PortableObject;
import com.tangosol.util.InvocableMap.Entry;
import com.tangosol.util.processor.AbstractProcessor;

/**
 * Update User Processor
 *
 * @author  onlinetechvision.com
 * @since   2 Jun 2012
 * @version 1.0.0
 *
 */
public class UpdateUserProcessor extends AbstractProcessor implements PortableObject {

 private static Logger logger = Logger.getLogger(UpdateUserProcessor.class);
 private User newUser;

 /**
     * This empty constructor is added for Portable Object Format(POF).
     *
     */
 public UpdateUserProcessor() {

 }

 public UpdateUserProcessor(User newUser) {
  this.newUser = newUser;
 }

 /**
     * Processes a Map.Entry object.
     *
     * @param Entry entry
     * @return Object newUser
     */
 public Object process(Entry entry) {
  Object newValue = null;
  try {
   newValue = getNewUser();
   entry.setValue(newValue);
      } catch (Exception e) {
       logger.error("Error occured when entry was being processed!", e);
  }

  return newValue;
 }

 /**
     * Gets new user
     *
     * @return User newUser
     */
 public User getNewUser() {
  return newUser;
 }

 /**
     * Sets new user
     *
     * @param User newUser
     */
 public void setNewUser(User newUser) {
  this.newUser = newUser;
 }

 /**
  * Restore the contents of a user type instance by reading its state
  * using the specified PofReader object.
  *
  * @param PofReader in
  */
 public void readExternal(PofReader in) throws IOException {
  setNewUser((User) in.readObject(0));
 }

 /**
  * Save the contents of a POF user type instance by writing its state
  * using the specified PofWriter object.
  *
  * @param PofWriter out
  */
 public void writeExternal(PofWriter out) throws IOException {
  out.writeObject(0, getNewUser());
 }
}
步骤14:创建DeleteUserProcessor类别
创建DeleteUserProcessor类以处理缓存上的用户删除操作。 当为密钥调用DeleteUserProcessor时 ,首先在集群中找到包含该密钥的成员。 然后,从包含相关密钥的成员中调用DeleteUserProcessor 。 因此,减少了网络流量。
package com.otv.user.processor;

import java.io.IOException;

import org.apache.log4j.Logger;

import com.otv.user.User;
import com.tangosol.io.pof.PofReader;
import com.tangosol.io.pof.PofWriter;
import com.tangosol.io.pof.PortableObject;
import com.tangosol.util.InvocableMap.Entry;
import com.tangosol.util.processor.AbstractProcessor;

/**
 * Delete User Processor
 *
 * @author  onlinetechvision.com
 * @since   2 Jun 2012
 * @version 1.0.0
 *
 */
public class DeleteUserProcessor extends AbstractProcessor implements PortableObject {

 private static Logger logger = Logger.getLogger(DeleteUserProcessor.class);

 /**
     * Processes a Map.Entry object.
     *
     * @param Entry entry
     * @return Object user
     */
 public Object process(Entry entry) {
  User user = null;
  try {
   user = (User) entry.getValue();
   entry.remove(true);
      } catch (Exception e) {
       logger.error("Error occured when entry was being processed!", e);
  }

  return user;
 }

 /**
  * Restore the contents of a user type instance by reading its state
  * using the specified PofReader object.
  *
  * @param PofReader in
  */
 public void readExternal(PofReader in) throws IOException {

 }

 /**
  * Save the contents of a POF user type instance by writing its state
  * using the specified PofWriter object.
  *
  * @param PofWriter out
  */
 public void writeExternal(PofWriter out) throws IOException {

 }
}
步骤15:创建CacheUpdaterTask类别
创建CacheUpdaterTask类以执行缓存操作(添加,更新和删除)并监视缓存内容。
package com.otv.cache.updater.task;

import java.util.Collection;

import org.apache.log4j.Logger;
import org.springframework.beans.BeansException;
import org.springframework.beans.factory.BeanFactory;
import org.springframework.beans.factory.BeanFactoryAware;

import com.otv.common.SystemConstants;
import com.otv.user.User;
import com.otv.user.cache.srv.IUserCacheService;
import com.otv.user.processor.DeleteUserProcessor;
import com.otv.user.processor.UpdateUserProcessor;

/**
 * Cache Updater Task
 *
 * @author  onlinetechvision.com
 * @since   2 Jun 2012
 * @version 1.0.0
 *
 */
public class CacheUpdaterTask implements BeanFactoryAware, Runnable {

 private static Logger log = Logger.getLogger(CacheUpdaterTask.class);
 private IUserCacheService userCacheService;
 private BeanFactory beanFactory;

 public void run() {
  try {
   while(true) {
    /**
     * Before the project is built for the first member,
     * this code block should be used instead of
     * method processRequestsOnSecondMemberOfCluster.
     */
    processRequestsOnFirstMemberOfCluster();

    /**
     * Before the project is built for the second member,
     * this code block should be used instead of
     * method processRequestsOnFirstMemberOfCluster.
     */
//    processRequestsOnSecondMemberOfCluster();
   }
  } catch (InterruptedException e) {
   e.printStackTrace();
  }
 }

 /**
   * Processes the cache requests on the first member of cluster...
   *
   * @throws InterruptedException
   */
 private void processRequestsOnFirstMemberOfCluster() throws InterruptedException {
  //Entry is added to cache...
  getUserCacheService().addUser(getUser("1", "Bruce", "Willis"));

  //Cache Entries are being printed...
  printCacheEntries();

  Thread.sleep(10000);

  User newUser = getUser("1", "Client", "Eastwood");
  //Existent Entry is updated on the cache...
  getUserCacheService().updateUser(newUser.getId(), new UpdateUserProcessor(newUser));

  //Cache Entries are being printed...
  printCacheEntries();

  Thread.sleep(10000);

  //Entry is deleted from cache...
  getUserCacheService().deleteUser(newUser.getId(), new DeleteUserProcessor());

  //Cache Entries are being printed...
  printCacheEntries();

  Thread.sleep(10000);
 }

 /**
   * Processes the cache requests on the second member of cluster...
   *
   * @throws InterruptedException
   */
 private void processRequestsOnSecondMemberOfCluster() throws InterruptedException {
  //Entry is added to cache...
  getUserCacheService().addUser(getUser("2", "Nathalie", "Portman"));

  Thread.sleep(15000);

  User newUser = getUser("2", "Sharon", "Stone");
  //Existent Entry is updated on the cache...
  getUserCacheService().updateUser(newUser.getId(), new UpdateUserProcessor(newUser));

  User newUser2 = getUser("1", "Maria", "Sharapova");
  //Existent Entry is updated on the cache...
  getUserCacheService().updateUser(newUser2.getId(), new UpdateUserProcessor(newUser2));

  Thread.sleep(15000);

  //Entry is deleted from cache...
  getUserCacheService().deleteUser(newUser.getId(), new DeleteUserProcessor());

  Thread.sleep(15000);
 }

 /**
     * Prints cache entries
     *
     */
 private void printCacheEntries() {
  Collection<User> userCollection = (Collection<User>)getUserCacheService().getUserCache().values();
  for(User user : userCollection) {
   log.debug("Cache Content : "+user);
  }
 }

 /**
     * Gets new user instance
     *
     * @param String user id
     * @param String user name
     * @param String user surname
     * @return User user
     */
 private User getUser(String id, String name, String surname) {
  User user = getNewUserInstance();
  user.setId(id);
  user.setName(name);
  user.setSurname(surname);

  return user;
 }

 /**
     * Gets user cache service...
     *
     * @return IUserCacheService userCacheService
     */
 public IUserCacheService getUserCacheService() {
  return userCacheService;
 }

 /**
     * Sets user cache service...
     *
     * @param IUserCacheService userCacheService
     */
 public void setUserCacheService(IUserCacheService userCacheService) {
  this.userCacheService = userCacheService;
 }

 /**
     * Gets a new instance of User Bean
     *
     * @return User
     */
    public User getNewUserInstance() {
        return  (User) getBeanFactory().getBean(SystemConstants.BEAN_NAME_USER);
    }

    /**
     * Gets bean factory
     *
     * @return BeanFactory
     */
    public BeanFactory getBeanFactory() {
  return beanFactory;
 }

    /**
     * Sets bean factory
     *
     * @param BeanFactory beanFactory
     * @throws BeansException
     */
 public void setBeanFactory(BeanFactory beanFactory) throws BeansException {
  this.beanFactory = beanFactory;
 }
}
步骤16:创建应用程序类
创建应用程序类以运行应用程序。
package com.otv.exe;

import org.springframework.context.ApplicationContext;
import org.springframework.context.support.ClassPathXmlApplicationContext;

import com.otv.cache.updater.task.CacheUpdaterTask;
import com.otv.common.SystemConstants;

/**
 * Application Class
 *
 * @author  onlinetechvision.com
 * @since   2 Jun 2012
 * @version 1.0.0
 *
 */
public class Application {

 /**
  * Starts the application
  *
  * @param  String[] args
  *
  */
 public static void main(String[] args) {
  ApplicationContext context = new ClassPathXmlApplicationContext(SystemConstants.APPLICATION_CONTEXT_FILE_NAME);

  CacheUpdaterTask cacheUpdaterTask = (CacheUpdaterTask) context.getBean(SystemConstants.BEAN_NAME_CACHE_UPDATER_TASK);
  Thread cacheUpdater = new Thread(cacheUpdaterTask);
  cacheUpdater.start();
 }
}
步骤17:建立专案
在构建OTV_Spring_Coherence_With_Processor_and_POF项目之后,将创建OTV_Spring_Coherence-0.0.1-SNAPSHOT.jar 。
请注意,集群成员的Coherence配置不同,因此应为每个成员分别构建项目。
步骤18:在集群的第一个成员上运行项目
在集群成员上运行了已创建的OTV_Spring_Coherence-0.0.1-SNAPSHOT.jar文件后,以下输出日志将显示在第一个成员的控制台上:
--After A new cluster is created and First Member joins the cluster, a new entry is added to the cache.
02.06.2012 14:21:45 DEBUG (UserMapListener.java:33) - Inserted Key = 1, Value = Id : 1, Name : Bruce, Surname : Willis
02.06.2012 14:21:45 DEBUG (CacheUpdaterTask.java:116) - Cache Content : Id : 1, Name : Bruce, Surname : Willis
.......
--After Second Member joins the cluster, a new entry is added to the cache.
02.06.2012 14:21:45 DEBUG (UserMapListener.java:33) - Inserted Key = 2, Value = Id : 2, Name : Nathalie, Surname : Portman
.......
--Cache operations go on both first and second members of the cluster:
02.06.2012 14:21:55 DEBUG (UserMapListener.java:42) - Updated Key = 1, New_Value = Id : 1, Name : Client, Surname : Eastwood,
                                                                       Old Value = Id : 1, Name : Bruce, Surname : Willis

02.06.2012 14:21:55 DEBUG (CacheUpdaterTask.java:116) - Cache Content : Id : 2, Name : Nathalie, Surname : Portman
02.06.2012 14:21:55 DEBUG (CacheUpdaterTask.java:116) - Cache Content : Id : 1, Name : Client, Surname : Eastwood

02.06.2012 14:22:00 DEBUG (UserMapListener.java:42) - Updated Key = 2, New_Value = Id : 2, Name : Sharon, Surname : Stone,
                    Old Value = Id : 2, Name : Nathalie, Surname : Portman

02.06.2012 14:22:00 DEBUG (UserMapListener.java:42) - Updated Key = 1, New_Value = Id : 1, Name : Maria, Surname : Sharapova,
                                                                       Old Value = Id : 1, Name : Client, Surname : Eastwood

02.06.2012 14:22:05 DEBUG (UserMapListener.java:24) - Deleted Key = 1, Value = Id : 1, Name : Maria, Surname : Sharapova
02.06.2012 14:22:05 DEBUG (CacheUpdaterTask.java:116) - Cache Content : Id : 2, Name : Sharon, Surname : Stone
02.06.2012 14:22:15 DEBUG (UserMapListener.java:24) - Deleted Key = 2, Value = Id : 2, Name : Sharon, Surname : Stone
02.06.2012 14:22:15 DEBUG (UserMapListener.java:33) - Inserted Key = 1, Value = Id : 1, Name : Bruce, Surname : Willis
02.06.2012 14:22:15 DEBUG (CacheUpdaterTask.java:116) - Cache Content : Id : 1, Name : Bruce, Surname : Willis
步骤19:下载
OTV_Spring_Coherence_With_Processor_and_POF
进一步阅读:
连贯地执行交易
在一致性中使用可移植对象格式
Spring Framework参考3.x
参考: Online Technology Vision博客上来自JCG合作伙伴 Eren Avsarogullari的Oracle Coherence中的EntryProcessor和PortableObject特性如何分发Spring Bean 。
翻译自: https://www.javacodegeeks.com/2012/06/distribute-spring-beans-in-oracle.html


 122
122

 被折叠的 条评论
为什么被折叠?
被折叠的 条评论
为什么被折叠?
 到【灌水乐园】发言


