


maven osgi
简而言之, OSGi是一组规范,这些规范支持模块化组装使用Java技术构建的软件。 它定义了组件-服务的创建和注册(在启用OSGi的容器中),以便进行内部通信。 OSGi的另一个好处是,所有这些服务都可以在运行时安装/卸载/启动/停止(即可以在运行时热部署代码)。 与在诸如WebSphere , JBoss , WebLogic的流行J2EE应用程序服务器中找到的Tomcat和EJB容器之类的Servlet容器实现类似, OSGi也有一些流行的容器实现,例如Equinox (这是Eclipse的基础), Apache Felix …等
面向服务的方法是OSGi的强项之一,但是当您不得不处理带有大量依赖关系的应用程序时,我觉得这很重要。 OSGi解决了“地狱”的问题。
一个例子。 假设您在应用程序中使用两个库libX和libY。 我们还假设它们每个在libZ中都有一个依赖关系,但是版本不同。 libX取决于libZ 2.0,而libY取决于libZ 1.0
如果libZ 2.0与libZ 1.0不兼容,则在同一应用程序中同时使用它们时,可能会遇到难以解决的问题。 OSGi可以处理此类问题。 OSGi支持Import-Package指令,该指令可用于为应用程序-服务应使用的任何Java包指定一个版本。 OSGi类加载器能够根据此信息找到正确的包/罐。 在我之前的示例中,如果库libX,libY和libZ与OSGi兼容,则可以将它们全部加载到同一JVM中而不会出现问题: libZ 1.0将使用Export-Package指令org.libz; 版本= 1.0 libZ 2.0将使用Export-Package指令org.libz; 版本= 2.0 libX将使用Import-Package指令org.libz; 版本= 2.0 libY将使用Import-Package指令org.libz; 版本= 1.0 OSGi还为Java应用程序带来了更强大的模块化概念。 在捆绑包之外只能使用使用Export-Package指令导出的包。
在本文中,我将解释使用Eclipse Equinox容器的OSGi 。 在其计算机上安装了Eclipse IDE的任何人,也在Eclipse插件的文件夹中也安装了OSGi容器。
OSGi容器jar文件的名称类似于org.eclipse.osgi_ <version> .jar
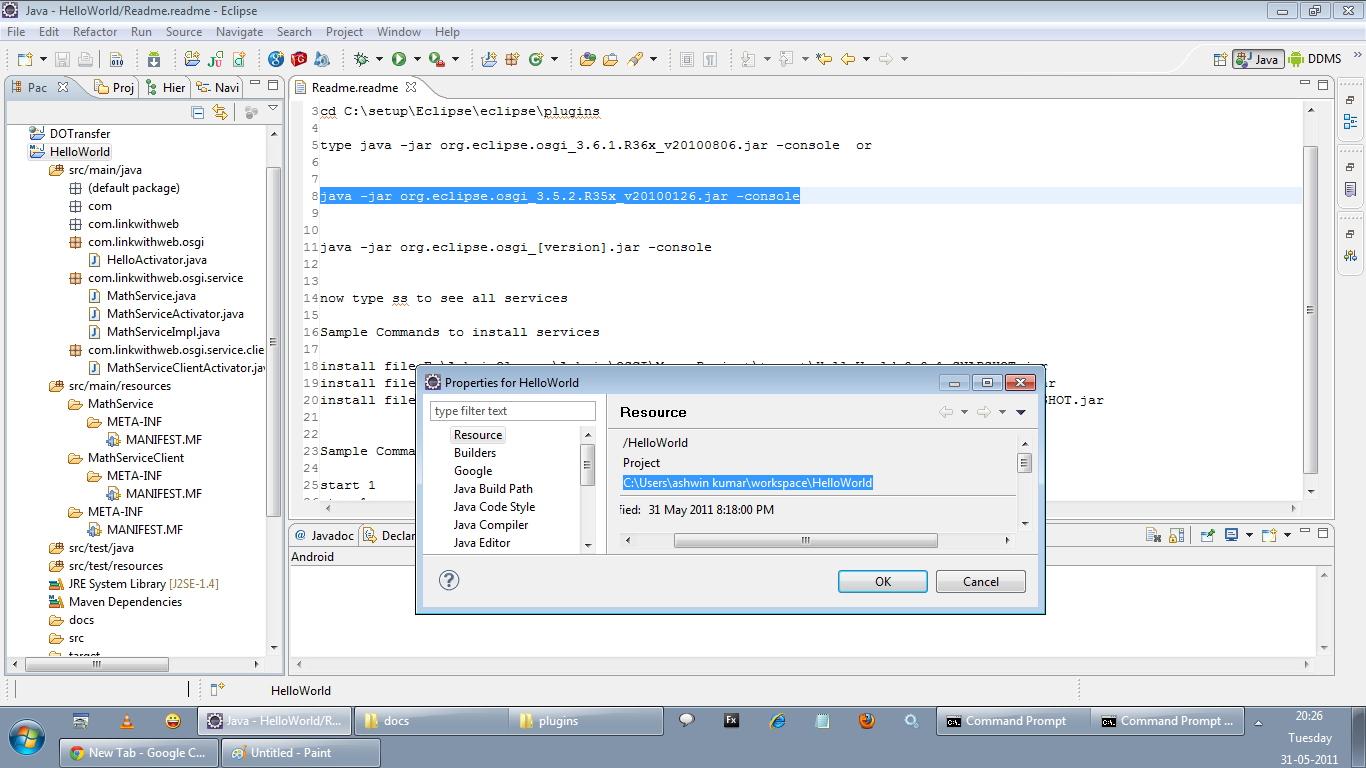
您可以像这样启动OSGi
java -jar org.eclipse.osgi_3.5.2.R35x_v20100126.jar -console附件是我如何启动OSGi容器的示例屏幕截图(类似于启动Tomcat )

现在,我们已经启动了OSGi容器,让我们使用Maven创建一个“ HelloWorld” OSGi应用程序。 项目结构如下所示:
以下是该项目的pom.xml 。 pom.xml还添加了2个配置文件,以便创建2个新模块( MathService和MathServiceClient ),本文稍后将对此进行说明。
<project xmlns="http://maven.apache.org/POM/4.0.0" xmlns:xsi="http://www.w3.org/2001/XMLSchema-instance"
	xsi:schemaLocation="http://maven.apache.org/POM/4.0.0 http://maven.apache.org/xsd/maven-4.0.0.xsd">
	<modelVersion>4.0.0</modelVersion>
	<groupId>com.linkwithweb.osgi</groupId>
	<artifactId>HelloWorld</artifactId>
	<version>0.0.1-SNAPSHOT</version>
	<name>HelloWorld</name>
	<dependencies>
		<dependency>
			<groupId>org.osgi</groupId>
			<artifactId>org.osgi.core</artifactId>
			<version>4.2.0</version>
		</dependency>
	</dependencies>

	<build>
		<finalName>HelloWorld-${version}</finalName>
		<plugins>
			<plugin>
				<groupId>org.apache.maven.plugins</groupId>
				<artifactId>maven-compiler-plugin</artifactId>
				<version>2.3.1</version>
				<configuration>
					<source>1.5</source>
					<target>1.5</target>
				</configuration>
			</plugin>

			<plugin>
				<groupId>org.apache.maven.plugins</groupId>
				<artifactId>maven-jar-plugin</artifactId>
				<configuration>
					<archive>
						<manifestFile>src/main/resources/META-INF/MANIFEST.MF</manifestFile>
					</archive>
				</configuration>
			</plugin>
		</plugins>
	</build>

	<profiles>
		<profile>
			<id>MathService</id>
			<build>
				<finalName>MathService-${version}</finalName>
				<plugins>
					<plugin>
						<groupId>org.apache.maven.plugins</groupId>
						<artifactId>maven-compiler-plugin</artifactId>
						<version>2.3.1</version>
						<configuration>
							<source>1.5</source>
							<target>1.5</target>
						</configuration>
					</plugin>

					<plugin>
						<groupId>org.apache.maven.plugins</groupId>
						<artifactId>maven-jar-plugin</artifactId>
						<configuration>

							<excludes>
								<exclude>**/*.xml</exclude>
								<exclude>**/*.bsh</exclude>
								<exclude>**/*.properties</exclude>
							</excludes>
							<archive>
								<manifestFile>src/main/resources/MathService/META-INF/MANIFEST.MF</manifestFile>
							</archive>
						</configuration>
					</plugin>

				</plugins>
			</build>
		</profile>
		<profile>
			<id>MathServiceClient</id>
			<build>
				<finalName>MathServiceClient-${version}</finalName>
				<plugins>
					<plugin>
						<groupId>org.apache.maven.plugins</groupId>
						<artifactId>maven-compiler-plugin</artifactId>
						<version>2.3.1</version>
						<configuration>
							<source>1.5</source>
							<target>1.5</target>
						</configuration>
					</plugin>

					<plugin>
						<groupId>org.apache.maven.plugins</groupId>
						<artifactId>maven-jar-plugin</artifactId>
						<configuration>

							<excludes>
								<exclude>**/*.xml</exclude>
								<exclude>**/*.bsh</exclude>
								<exclude>**/*.properties</exclude>
							</excludes>
							<archive>
								<manifestFile>src/main/resources/MathServiceClient/META-INF/MANIFEST.MF</manifestFile>
							</archive>
						</configuration>
					</plugin>

				</plugins>
			</build>
		</profile>
	</profiles>

</project>如果仔细观察pom.xml,您将看到我们创建的每个OSGi捆绑包都有3个MANIFEST.MF定义。 这么说,让我解释一下OSGi捆绑包是什么。 OSGi软件包本质上与标准Java“ jar”文件相同,但其特定配置在“ jar的”清单文件中定义。 OSGi容器读取“罐子”清单文件中所有OSGi特定的条目,以激活捆绑包。 那不是很酷吗? 使用OSGi,我们避免像其他框架一样学习任何新的元数据格式!
这是我为MathServiceClient 捆绑包定义的示例Manifest.MF
Manifest-Version: 1.0
Bundle-Name: MathServiceClient
Bundle-Activator: com.linkwithweb.osgi.service.client.MathServiceClientActivator
Bundle-SymbolicName: MathServiceClient
Bundle-Version: 1.0.0
Import-Package: org.osgi.framework,com.linkwithweb.osgi.service如您所见,除Manifest-Version以外的所有条目都是OSGi特定的。 这些条目定义了如何激活捆绑软件,捆绑软件的名称和版本,其所有从属库以及暴露给其他服务使用的扩展点。
让我向您展示如何将“ HelloWorld”捆绑软件安装到Equinox OSGi Container中。 以下是“ HelloWorld”捆绑包的MANIFEST.MF文件和Activator类。
package com.linkwithweb.osgi;

import org.osgi.framework.BundleActivator;
import org.osgi.framework.BundleContext;

/**
 * @author Ashwin Kumar
 *
 */
public class HelloActivator implements BundleActivator {
	public void start(BundleContext context) {
		System.out.println("Hello World");
	}

	public void stop(BundleContext context) {
		System.out.println("Goodbye All");
	}
}
Manifest-Version: 1.0
Bundle-Name: HelloWorld
Bundle-Activator: com.linkwithweb.osgi.HelloActivator
Bundle-SymbolicName: HelloWorld
Bundle-Version: 1.0.0
Import-Package: org.osgi.framework要构建捆绑包,请运行“ mvn clean package”
它将在您的Maven项目的目标文件夹中创建HelloWorld-0.0.1-SNAPSHOT.jar 。 这是显示如何在Equinox中安装和启动“ HelloWorld”捆绑软件的图像

如您所见,我们使用install命令安装捆绑软件,并使用start命令,使用捆绑软件安装后容器返回的捆绑软件ID启动捆绑软件。
现在,就捆绑软件的生命周期而言,启动捆绑软件将触发对捆绑软件的Activator类的“ start ”方法的调用,而停止捆绑软件将触发对捆绑软件的Activator类的“ stop ”方法的调用。 我们可以在容器的终端中看到上述行为的结果,该终端在模块启动时显示“ Hello World”消息!
恭喜,您已经了解了OSGi的基础知识,并且已经部署了第一个捆绑软件!
曝光和消费服务
为了解释这一点,我将实现一个非常简单的示例,在该示例中,我将发布一个可以添加两个数字的服务。
首先,我们需要定义一个接口,以向外部捆绑包(客户端)公开“添加”功能
package com.linkwithweb.osgi.service;

/**
 * @author Ashwin Kumar
 *
 */
public interface MathService {

	/**
	 * @param a
	 * @param b
	 * @return
	 */
	public int add(int a, int b);
}
现在执行类
package com.linkwithweb.osgi.service;

/**
 * @author Ashwin Kumar
 *
 */
public class MathServiceImpl implements MathService {

	/* (non-Javadoc)
	 * @see com.linkwithweb.osgi.service.MathService#add(int, int)
	 */
	public int add(int a, int b) {
		// TODO Auto-generated method stub
		return a+b;
	}

}接下来是Activator类,该类将“添加”服务注册到OSGi容器。
package com.linkwithweb.osgi.service;

import org.osgi.framework.BundleActivator;
import org.osgi.framework.BundleContext;

/**
 * @author Ashwin Kumar
 *
 */
public class MathServiceActivator implements BundleActivator {
	/*
	 * (non-Javadoc)
	 *
	 * @see org.osgi.framework.BundleActivator#start(org.osgi.framework.BundleContext)
	 */
	public void start(BundleContext context) {
		MathService service = new MathServiceImpl();
		// Third parameter is a hashmap which allows to configure the service
		// Not required in this example
		context.registerService(MathService.class.getName(), service, null);
		System.out.println("Math Service Registered");
	}

	/*
	 * (non-Javadoc)
	 *
	 * @see org.osgi.framework.BundleActivator#stop(org.osgi.framework.BundleContext)
	 */
	public void stop(BundleContext context) {
		System.out.println("Goodbye From math service");
	}
}
以下是“添加”服务包的清单文件。
Manifest-Version: 1.0
Bundle-Name: MathService
Bundle-Activator: com.linkwithweb.osgi.service.MathServiceActivator
Bundle-SymbolicName: MathService
Bundle-Version: 1.0.0
Import-Package: org.osgi.framework
Export-Package: com.linkwithweb.osgi.service
如果您观察上面的清单,您会注意到我们正在导出一些软件包,以便以后使用。 同样,必须在此处定义所有运行时所需的软件包(使用Import-Package指令)。
就像本文的上一节一样,使用以下命令来构建jar文件
mvn -PMathService软件包
您可以在下面看到安装和启动OSGi捆绑软件的命令。

以下是“添加”服务的使用者的实现。 消费者打包在OSGi捆绑激活器类中,仅用于演示目的。 您可以自由地将使用者作为单独的OSGi服务实施,因为OSGi服务可以相互通信!
package com.linkwithweb.osgi.service.client;

import org.osgi.framework.BundleActivator;
import org.osgi.framework.BundleContext;
import org.osgi.framework.ServiceReference;

import com.linkwithweb.osgi.service.MathService;

/**
 * @author Ashwin Kumar
 *
 */
public class MathServiceClientActivator implements BundleActivator {
	MathService service;
	private BundleContext context;

	/*
	 * (non-Javadoc)
	 *
	 * @see org.osgi.framework.BundleActivator#start(org.osgi.framework.BundleContext)
	 */
	public void start(BundleContext context) {
		this.context = context;
		// Register directly with the service
		ServiceReference reference = context
				.getServiceReference(MathService.class.getName());
		service = (MathService) context.getService(reference);
		System.out.println(service.add(1, 2));
	}	/*
	 * (non-Javadoc)
	 *
	 * @see org.osgi.framework.BundleActivator#stop(org.osgi.framework.BundleContext)
	 */
	public void stop(BundleContext context) {
		System.out.println(service.add(5, 6));
	}
}
跟随是“添加”服务使用者捆绑包的清单文件。
Manifest-Version: 1.0
Bundle-Name: MathServiceClient
Bundle-Activator: com.linkwithweb.osgi.service.client.MathServiceClientActivator
Bundle-SymbolicName: MathServiceClient
Bundle-Version: 1.0.0
Import-Package: org.osgi.framework,com.linkwithweb.osgi.service
要创建,安装并启动“添加”服务客户端捆绑包,请遵循以下步骤:
mvn -PMathServiceClient软件包

就这样! 希望你喜欢它!
您可以在此处下载本文的源代码
参考:来自Felicitas和Beatitudo博客的 JCG合作伙伴 Aswin的OSGI,适合初学者使用Maven和Equinox(HowTo) 。
翻译自: https://www.javacodegeeks.com/2011/06/osgi-using-maven-equinox.html
maven osgi


 6798
6798

 被折叠的 条评论
为什么被折叠?
被折叠的 条评论
为什么被折叠?
 到【灌水乐园】发言


