


Intelli IDEA是目前比较流行的开发环境,可以配置Maven进行项目管理,非常便捷,受到很多开发者的青睐。除了Intellij IDEA外,JetBrains推出了一系列的开发IDE,如PyCharm用于python开发,也是墙裂推荐。
0 预备工作
-
Java环境配置
-
Intellij IDEA安装,旗舰版(Ultimate)
-
Tomcat Server下载与解压(本文使用Tomcat 8)
环境配置

1 创建:基于Maven管理的Java Web工程
创建Java Web工程方式有不止一种方法,这里记录下通过Java的Web Applicaiton方式和Maven工程方式创建。推荐Java Web Application方式。
注意:Intellij的Community版是没有Tomcat等J2EE的工具的,需要下载Ultimate版本。
1.1 Java 的 Web Applicaiton方式(不推荐)
新建工程

完成工程创建。但有一个问题,工程没有maven管理,是一个Intellij工程,需要增加Maven管理。
项目右击:

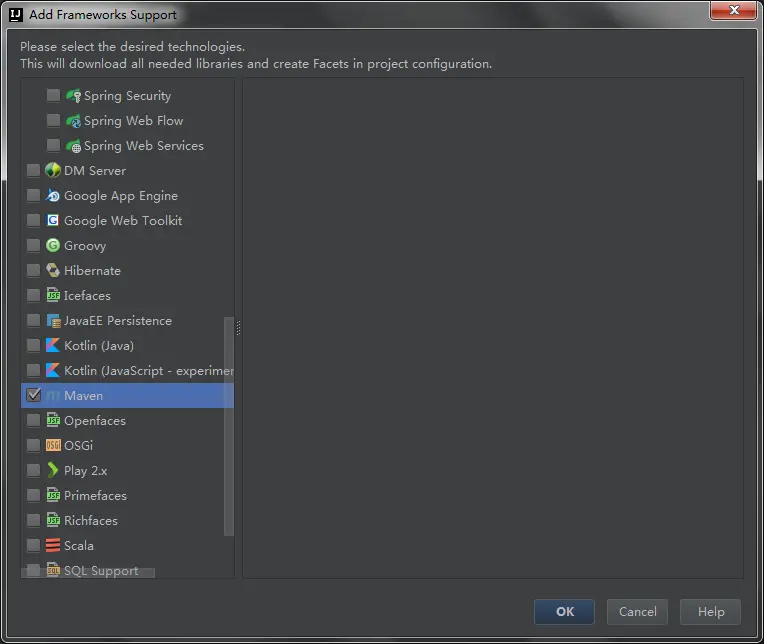
完成Maven的添加。
1.2 Maven方式(推荐)


录入GroupID和ArtifactID,这里说明下这两个的作用:
GroupID是项目组织唯一的标识符,即[组名],实际对应JAVA的包的结构,是main目录里java的目录结构。ArtifactID就是项目的唯一的标识符,即本工程的[工程名称],实际对应项目的名称,就是项目根目录的名称。

一个特殊处理,加快工程创建进度


特殊处理部分参考:
archetypeCatalog表示插件使用的archetype元数据,不加这个参数时默认为remote,local,即中央仓库archetype元数据,由于中央仓库的archetype太多了,所以导致很慢,指定internal来表示仅使用内部元数据。
填入工程名称

Finish之后,完成工程创建。
第一次建立Java Web工程时,需要下载一些依赖,因为使用了archetype。
完成后的工程目录:

此时,仅仅完成了第一步,后面需要一系列的配置。
2 配置相关参数
主要进行项目的目录配置、依赖添加、web配置等。
项目上右击:

2.1 添加java代码目录:


2.2 pom.xml里添加相关依赖
添加依赖,由于使用maven管理项目,因此在pom.xml里进行依赖管理。添加的基本依赖主要包括了jstl、servlet-api以及诸如数据库、测试框架、json包以及其他第三方框架等等。如果用刀spring framework,也在pom.xml里添加,这个就稍复杂些,后续再作介绍
    <dependencies>
        <dependency>
            <groupId>junit</groupId>
            <artifactId>junit</artifactId>
            <version>3.8.1</version>
            <scope>test</scope>
        </dependency>
        <dependency>
            <groupId>javax.servlet</groupId>
            <artifactId>jstl</artifactId>
            <version>1.2</version>
        </dependency>
        <dependency>
            <groupId>javax.servlet</groupId>
            <artifactId>javax.servlet-api</artifactId>
            <version>4.0.0-b01</version>
        </dependency>
        <!-- https://mvnrepository.com/artifact/mysql/mysql-connector-java -->
        <dependency>
            <groupId>mysql</groupId>
            <artifactId>mysql-connector-java</artifactId>
            <version>6.0.4</version>
        </dependency>
</dependencies>所需依赖可以在https://mvnrepository.com/进行查询依赖编写方式。输入包的名称、框架名称即可查询。
2.3 web配置: web.xml
web.xml需要自己进行配置,否则是个空白的,没有任何价值的:

<?xml version="1.0" encoding="UTF-8"?>
<web-app xmlns:xsi="http://www.w3.org/2001/XMLSchema-instance"         xmlns="http://xmlns.jcp.org/xml/ns/javaee"         xsi:schemaLocation="http://xmlns.jcp.org/xml/ns/javaee         http://xmlns.jcp.org/xml/ns/javaee/web-app_3_1.xsd"         id="WebApp_ID" version="3.1">
    <display-name>JavaWebDemoPro</display-name>
    <welcome-file-list>
        <welcome-file>index.html</welcome-file>
        <welcome-file>index.htm</welcome-file>
        <welcome-file>index.jsp</welcome-file>
        <welcome-file>default.html</welcome-file>
        <welcome-file>default.htm</welcome-file>
        <welcome-file>default.jsp</welcome-file>
    </welcome-file-list>
</web-app>
3 配置Tomcat并部署
主要进行工程到Tomcat的部署过程,包括启动配置。
tip:社区版的尴尬:没有相关工具
Intellij的Community版是没有Tomcat等J2EE的工具的,需要下载Ultimate版本。


好久没用,一打开,果然没有了。
参考
http://qizixuan.blog.51cto.com/5648927/1851334 , 进行配置了下。
3.1 tomcat参数配置:
通过intellij顶部菜单,run -> edit configurations

刚刚新建项目,没有任何启动配置,需要新增:

没找到Tomcat Server,就选择更多:

新建一个Tomcat Server 本地Local的,如果有远程的,也是可以配置的,这里先不介绍远程配置。
配置本地Tomcat:
Intellij需要配置一个自己下载的tomcat,到tomcat官方网站下载即可:
Tomcat官网:http://tomcat.apache.org/
通过configure...进行选择本地tomcat位置:

配置发布的artifact:(很重要)

选择exploded:
war包直接部署,war exploded是展开后部署,区别就是,展开后部署,可以更快的同步资源,及时更新,实现调试时资源及时更新重新加载。
最终部署项目时,一般部署第一个war包。

填写发布的路径

这里需要注意,修改这两个地方,用于发布时同步到本地server下面:

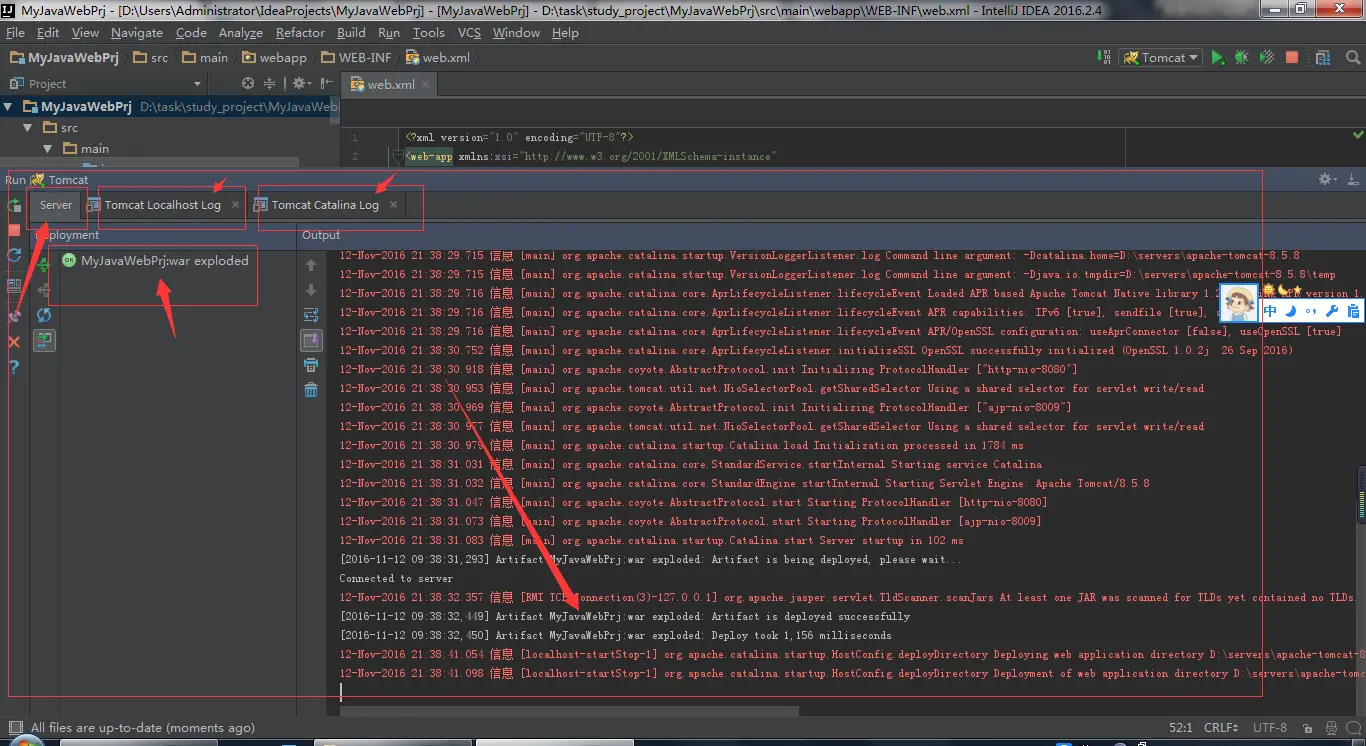
4 运行
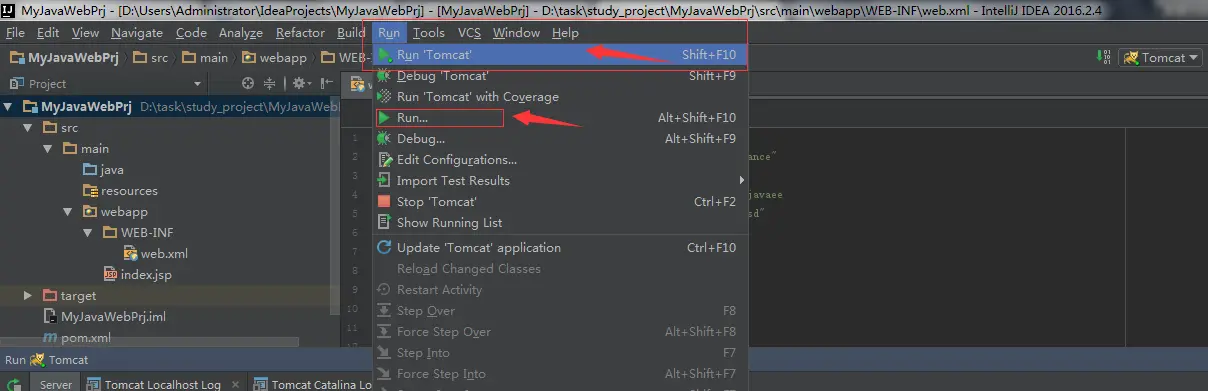
可以看到,server启动,log开始输出啦:
浏览器会自动打开默认页面:

5 大功告成!
到此为止,已经完成了最基本的Java Web工程的建立。俗话说万事开头难,虽然工程里面啥都没有,仅仅是一个简简单单的架子,但Java Web的Hello World已经搞定了~
6 进阶阶段:Spring Framework配置
使用maven进行项目管理后,很多东西,仅仅是pom.xml的一个依赖添加动作。Spring Framework也是如此。
6.1 添加Spring Framework
pom.xml内添加依赖:
    <!-- Spring Framework-->
    <dependency>
      <groupId>org.springframework</groupId>
      <artifactId>spring-web</artifactId>
      <version>${spring.version}</version>
    </dependency>
    <dependency>
      <groupId>org.springframework</groupId>
      <artifactId>spring-core</artifactId>
      <version>${spring.version}</version>
    </dependency>
    <dependency>
      <groupId>org.springframework</groupId>
      <artifactId>spring-context</artifactId>
      <version>${spring.version}</version>
    </dependency>
    <dependency>
      <groupId>org.springframework</groupId>
      <artifactId>spring-beans</artifactId>
      <version>${spring.version}</version>
    </dependency>
    <dependency>
      <groupId>org.springframework</groupId>
      <artifactId>spring-jdbc</artifactId>
      <version>${spring.version}</version>
    </dependency>
    <dependency>
      <groupId>org.springframework</groupId>
      <artifactId>spring-webmvc</artifactId>
      <version>${spring.version}</version>
    </dependency>
    <dependency>
      <groupId>org.springframework</groupId>
      <artifactId>spring-tx</artifactId>
      <version>${spring.version}</version>
    </dependency>
转载地址:http://www.jianshu.com/p/5a2a32af2b4a


 757
757


 被折叠的 条评论
为什么被折叠?
被折叠的 条评论
为什么被折叠?
 到【灌水乐园】发言


