


1. 复杂对象参数绑定
对于普通的对象参数绑定,我们只需要对象成员变量名与请求参数名一一对应即可完成绑定。
而求对于组合对象,我们可以使用级联的方式来绑定方法参数。见下面实例:
我们先定义两个POJO类:User,Article其中Atricle是User的成员属性:
- 1
- 2
- 3
- 4
- 5
- 6
- 7
- 8
- 9
- 10
- 11
- 12
- 13
- 14
- 15
- 16
- 17
- 18
- 19
- 20
- 21
- 22
- 23
- 24
- 1
- 2
- 3
- 4
- 5
- 6
- 7
- 8
- 9
- 10
- 11
- 12
- 13
- 14
- 15
- 16
- 17
- 18
- 19
- 20
- 21
- 22
- 23
- 24
下面是我们的测试前端表单:
- 1
- 2
- 3
- 4
- 5
- 6
- 7
- 8
- 9
- 10
- 11
- 12
- 13
- 14
- 15
- 16
- 17
- 18
- 1
- 2
- 3
- 4
- 5
- 6
- 7
- 8
- 9
- 10
- 11
- 12
- 13
- 14
- 15
- 16
- 17
- 18
下面是我们的控制层方法:
- 1
- 2
- 3
- 4
- 5
- 6
- 7
- 8
- 1
- 2
- 3
- 4
- 5
- 6
- 7
- 8
我们在前端表单输入参数如下所示:
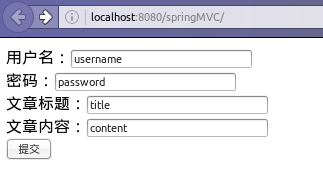
点击提交后,页面输出:
或者我们也可直接通过访问如下链接得到相同结果:
http://localhost:8080/springMVC/saveUser?userName=username&password=password&article.title=title&article.content=content

从上可知,对于User的成员属性article,如果我们绑定其对应的参数,可以通过级联article.title,article.content来完成。
在这里,如果我在控制器的方法入参中,同时定义多个user,或者有多个不同的类实例对象。只要它们的成员属性名和参数名相同,都会完成绑定
2. 数组参数绑定
数组参数分为普通类型数组和复杂对象数组两种,但由于没有复杂对象数组的构造方法,springMVC只能绑定普通类型数组。
普通类型数组是指Integer、Stirng、Long等基本数据类型的包装类,下面通过实例来看如何完成绑定工作:
控制器方法:
- 1
- 2
- 3
- 4
- 5
- 1
- 2
- 3
- 4
- 5
前端表单定义:
- 1
- 2
- 3
- 4
- 5
- 6
- 1
- 2
- 3
- 4
- 5
- 6
提交如下数据:
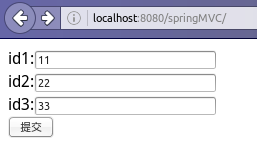
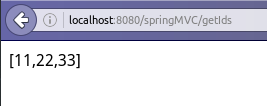
或我们也可直接在游览器地址栏访问:http://localhost:8080/springMVC/getIds?ids=11&ids=22&ids=33
此时游览器输出:
集合类型参数绑定
对于list、Set、Map等的参数绑定,如果我们尝试直接绑定,是会失败的,必须将其作为一个具体类对象的成员属性,这个时候我们也可称这个具体类对象为一个包装类。先看下面失败实例:
- 1
- 2
- 3
- 4
- 5
- 1
- 2
- 3
- 4
- 5
我们的请求url和输出结果如下图所示:
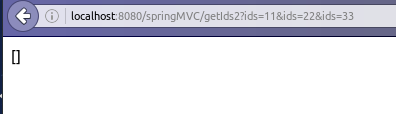
它的输出结果为空json数组,说明我们的绑定失败了。
这里遇到的一个主要问题是,如果我们绑定Set类型参数时,必须先为Set添加预定大小的容器,否则会报错。而且也不支持基本数据类型包装类的Set绑定,**如果需要完成这一转换,需要我们自定义转换器来实现。
下面我们通过一个完整的综合例子来展示集合类型的参数绑定:
1. POJO类
- 1
- 2
- 3
- 4
- 5
- 6
- 7
- 8
- 9
- 10
- 11
- 12
- 13
- 14
- 15
- 16
- 17
- 18
- 19
- 20
- 21
- 22
- 23
- 24
- 25
- 26
- 27
- 1
- 2
- 3
- 4
- 5
- 6
- 7
- 8
- 9
- 10
- 11
- 12
- 13
- 14
- 15
- 16
- 17
- 18
- 19
- 20
- 21
- 22
- 23
- 24
- 25
- 26
- 27
2. 控制层配置
我们的控制层方法极为简单:
- 1
- 2
- 3
- 4
- 5
- 1
- 2
- 3
- 4
- 5
3. 测试表单代码:
- 1
- 2
- 3
- 4
- 5
- 6
- 7
- 8
- 9
- 10
- 11
- 12
- 13
- 14
- 15
- 16
- 17
- 18
- 19
- 20
- 21
- 22
- 23
- 24
- 25
- 26
- 27
- 28
- 29
- 1
- 2
- 3
- 4
- 5
- 6
- 7
- 8
- 9
- 10
- 11
- 12
- 13
- 14
- 15
- 16
- 17
- 18
- 19
- 20
- 21
- 22
- 23
- 24
- 25
- 26
- 27
- 28
- 29
3. 测试参数输入
我们输入如下图所示的参数:
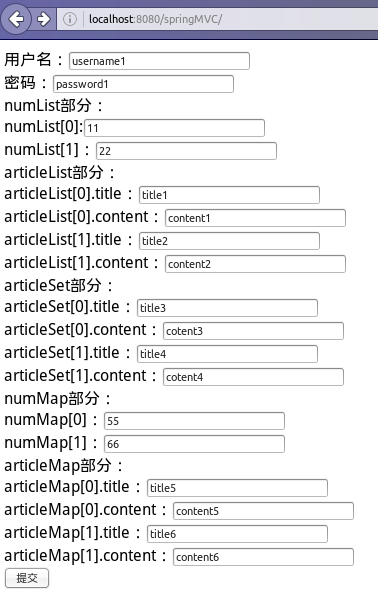
点击提交按钮,获得输出数据:
或者我们也可以通过游览器地址访问:
http://localhost:8080/springMVC/getAll?userName=username1&password=password1&numList[0]=11&numList[1]=22&articleList[0].title=title1&articleList[0].content=content1&articleList[1].title=title2&articleList[1].content=content2&articleSet[0].title=title3&articleSet[0].content=cotent3&articleSet[1].title=title4&articleSet[1].content=cotent4&numMap[%27num1%27]=55&numMap[%27num2%27]=66&articleMap[%27article1%27].title=title5&articleMap[%27article1%27].content=content5&articleMap[%27article2%27].title=title6&articleMap[%27article2%27].content=content6
从上面我们可以看到,使用绑定List和Set入参都是以成员属性名[索引](.级联成员属性名)的形式完成绑定,使用Map的话则以成员属性名[键名](.级联成员属性名)的形式完成绑定


 411
411

 被折叠的 条评论
为什么被折叠?
被折叠的 条评论
为什么被折叠?
 到【灌水乐园】发言


