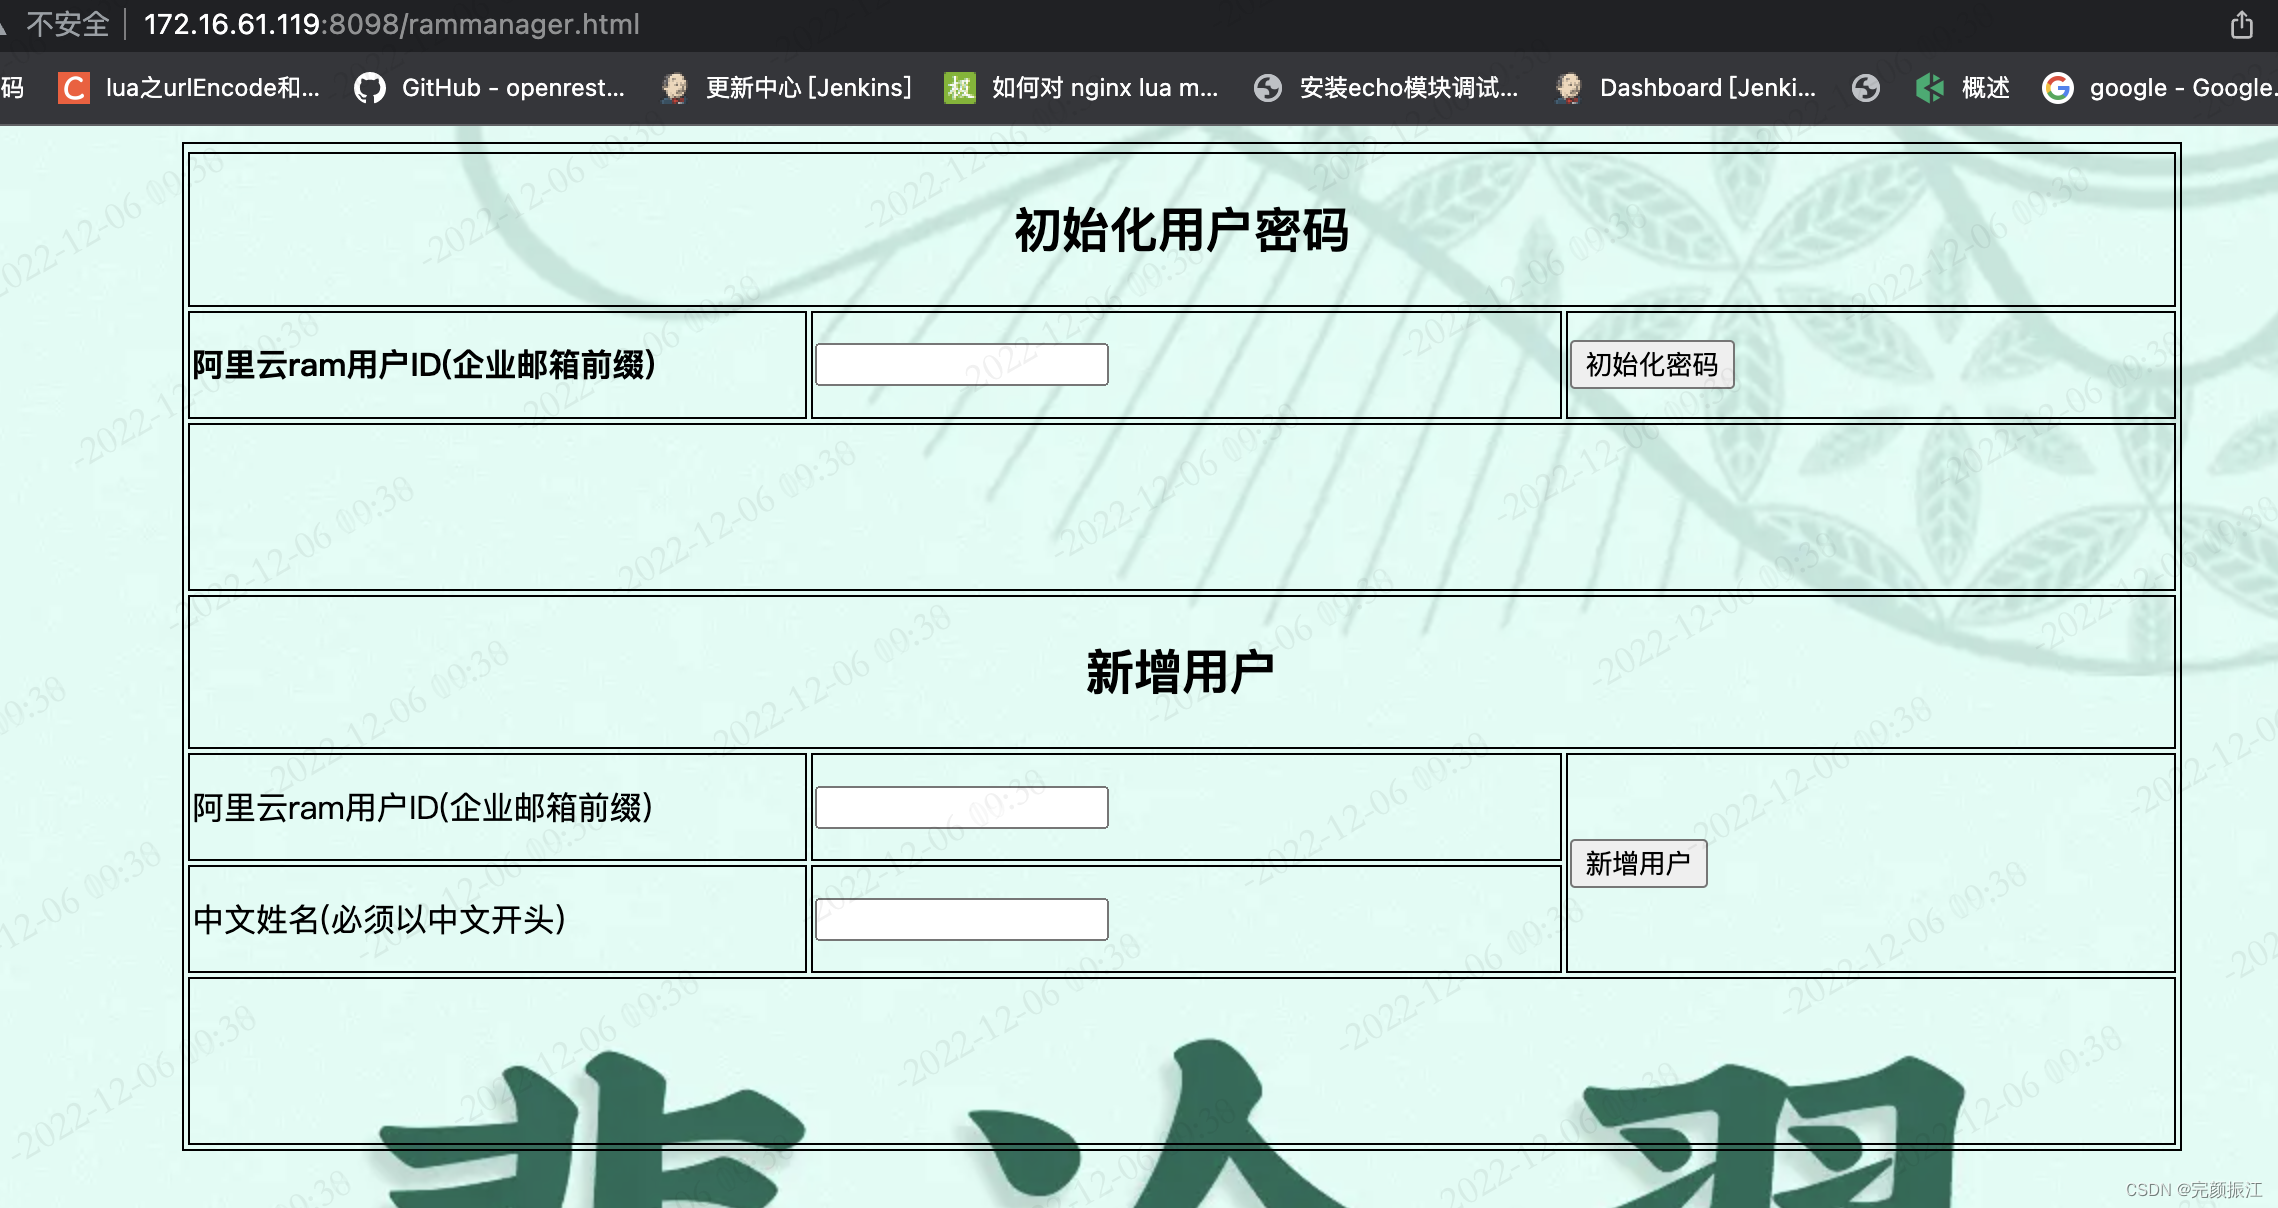
首先安装apache服务,采用yum的方式即可,因为用到的都是apache的基本功能,不需要编译安装
yum -y install httpd然后准备html页面,这个页面其实就是调用bash脚本的页面,提供页面操作然后调用服务器上的脚步文件
网页布局建议用adobe的软件操作
<!DOCTYPE html PUBLIC "-//W3C//DTD XHTML 1.0 Transitional//EN" "http://www.w3.org/TR/xhtml1/DTD/xhtml1-transitional.dtd">
<html xmlns="http://www.w3.org/1999/xhtml">
<head>
<meta http-equiv="Content-Type" content="text/html; charset=utf-8" />

<script>
function httpGet(url)
{
        var xmlHttp = new XMLHttpRequest();
        xmlHttp.open("GET", url, false); // false: wait respond
        xmlHttp.send(null);
        return xmlHttp.responseText;
}
function f()
{
        var url = "http://172.16.61.119:8098/cgi-bin/shell?ram%20"+ document.getElementById('in').value;
        document.getElementById('out_f').innerHTML = httpGet(url);
}
function h()
{
        var url = "http://172.16.61.119:8098/cgi-bin/shell?addram%20"+ document.getElementById('ID').value+ document.getElementById('NAME').value;
        document.getElementById('out_h').innerHTML = httpGet(url);
}
</script>

<title>阿里云RAM用户管理平台</title>
</head>

<body background="img/feicui.jpg">
<table align="center" width="1000" height="500" border="1" bordercolor="black">

  <tr>    <tr>
    <td colspan="3" height="10"><div align="center">
      <h2>初始化用户密码<h2/></div>      <div align="justify"></div>      <div align="left"></div></td>
  </tr>
    <th width="700" height="50" scope="col"><div align="left"><span > 阿里云ram用户ID(企业邮箱前缀) </span></div></th>
    <th width="700" scope="col"><div align="left"><input id='in'></input></div></th>
    <th width="700" scope="col"><div align="left"><button onclick='f()'>初始化密码</button></div></th>
  </tr>
  <tr>
    <td colspan="3" height="80"><div align="left"><pre id='out_f'></pre></div>      <div align="justify"></div>      <div align="left"></div></td>
  </tr>
      <tr>
    <td colspan="3"><div align="center">
    <h2>新增用户<h2/></div>      <div align="justify"></div>      <div align="center"></div></td>
  </tr>
  <tr>
    <td height="50"><div align="left">
      <div align="left"><span>阿里云ram用户ID(企业邮箱前缀)</span></div>
    </div></td>
    <td height="50"><div align="left"><input id='ID'></input></div></td>
    <td rowspan="2"><div align="left"><button onclick='h()'>新增用户</button></div></td>
  </tr>
    <tr>
    <td height="50"><div align="left">
      <div align="left"><span>中文姓名(必须以中文开头)</span></div>
    </div></td>
    <td><div align="left"><input id='NAME'></input></div></td>
  </tr>
    <tr>
    <td colspan="3" height="80"><div align="left">
      <pre id='out_h'>
</pre></div>      <div align="justify"></div>      <div align="left"></div></td>
  </tr>
</table>
</body>
</html>
注释
1、这里调用的脚本其实有两个(定义了两个函数)
1.1 这里要实现的功能就是初始化ram用户的密码
可以which ram可以查询到这个脚本文件(可以理解脚本必须在全局变量(PATH里))
function f()
{
        var url = "http://172.16.61.119:8098/cgi-bin/shell?ram%20"+ document.getElementById('in').value;
        document.getElementById('out_f').innerHTML = httpGet(url);
}
脚本其实就是(这里调用的aliyun的工具是阿里云提供的,我们按照要求配置好即可)
/usr/local/bin/ram
#cat  /usr/local/bin/ram
#!/bin/bash
Password=`openssl rand -base64 16`
UserName=$1
Check_User=`aliyun ram ListUsers --pager  --region cn-hangzhou|grep -w $UserName`
if [ "$Check_User" != "" ];then
	/usr/bin/aliyun ram UpdateLoginProfile --region cn-hangzhou --UserName $UserName --Password $Password  2>&1  >/tmp/ram.txt
	if [ "$?" == 0 ];then
		echo  "登录地址: https://signin.aliyun.com/yysj.onaliyun.com/login.htm";
		echo  "登录账号: $UserName@yysj.onaliyun.com";
		echo  "登录密码(首次登录需要更新密码): $Password";
		echo  "登录地址: https://signin.aliyun.com/yysj.onaliyun.com/login.htm ; 登录账号: $UserName@yysj.onaliyun.com ; 登录密码(首次登录需要更新密码): $Password" | mailx -s "阿里云ram账号管理" $UserName@taetea.com.cn 2>/dev/null
	fi
else
	echo "$UserName 并非阿里云子用户 请联系熊运龙添加";
fi
1.2这里要实现的功能就是新增ram用户
可以which addram可以查询到这个脚本文件(可以理解脚本必须在全局变量(PATH里))
这里要实现的功能就是新增ram用户
function h()
{
        var url = "http://172.16.61.119:8098/cgi-bin/shell?addram%20"+ document.getElementById('ID').value+ document.getElementById('NAME').value;
        document.getElementById('out_h').innerHTML = httpGet(url);
}
脚本其实就是
/usr/local/bin/addram(这里调用的aliyun的工具是阿里云提供的,我们按照要求配置好即可)
#cat  /usr/local/bin/addram
#!/bin/bash
Parameter=$1
UserName=`echo $Parameter|sed 's/[A-Za-z]\+/& /'|awk '{print $1}'`
DisplayName=`echo $Parameter|sed 's/[A-Za-z]\+/& /'|awk '{print $2}'`
Password=`openssl rand -base64 16`
if [ "$UserName" == "" ] || [ "$DisplayName" == "" ];then
	echo "Please Enter ID And Name of  User!!"
else
	Check_User_Id=`aliyun ram ListUsers --pager  --region cn-hangzhou|grep -w $UserName` >/dev/null 2>&1
	if [ "$Check_User_Id" == "" ];then
		###创建子用户
		aliyun ram CreateUser --region cn-hangzhou --UserName $UserName --DisplayName  "$DisplayName" >/dev/null 2>&1
		###创建AK SK
		###开启自主管理密码
		aliyun ram SetSecurityPreference --region cn-hangzhou --AllowUserToChangePassword true >/dev/null 2>&1
		###设置密码,并且要求首次登录之后必须修改密码
		aliyun ram CreateLoginProfile --region cn-hangzhou --UserName $UserName --PasswordResetRequired true --Password "$Password" >/dev/null 2>&1
		echo "登录地址:https://signin.aliyun.com/yysj.onaliyun.com/login.htm";
		echo "登录账号:$UserName@yysj.onaliyun.com";
		echo "登录密码(首次登录需要更新密码):$Password"
	else
		echo "$UserName is  exist!!!!"
	fi
fi
实际效果图

PS: 在配置aliyun这个工具的时候有个容易遗漏的地方
就是 /.aliyun/config.json 阿里云的配置文件需要在根目录下,否则调用不成功


 832
832


 被折叠的 条评论
为什么被折叠?


