


(1)Struts2.3

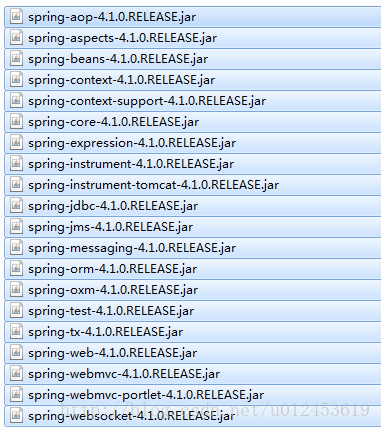
(2)Spring包
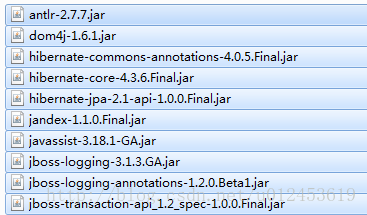
(3)Hibernate包
(1)导Struts2包
(2)配Struts2文件
新建struts.xml文件,默认在项目的src根目录
- <?xml version="1.0" encoding="UTF-8"?>
- <!DOCTYPE struts PUBLIC
- "-//Apache Software Foundation//DTD Struts Configuration 2.0//EN"
- "http://struts.apache.org/dtds/struts-2.0.dtd">
- <struts>
- <!-- 将Action的创建交给spring来管理 -->
- <constant name="struts.objectFactory" value="spring" />
- <!-- 更改struts2请求Action的后缀名,默认为action。若想去掉后缀,设为","即可
- <constant name="struts.action.extension" value=","></constant>
- -->
- <package namespace="/" name="struts2" extends="struts-default">
- <!-- package中的标签必须按照如下顺序配置
- result-types,interceptors,default-interceptor-ref,default-action-ref,default-class-ref,global-results,global-exception-mappings,action*(就是所有的action放到最后)
- -->
- <!-- 自定义拦截器 ,如果有拦截器,必须放在package标签内的第一位-->
- <interceptors>
- <!--
- <interceptor name="myInterceptor" class="自定义pojo类"></interceptor>
- -->
- <interceptor-stack name="myInterceptorStack">
- <!--
- <interceptor-ref name="myInterceptor"></interceptor-ref>
- -->
- <interceptor-ref name="defaultStack"></interceptor-ref>
- </interceptor-stack>
- </interceptors>
- <global-results>
- <result></result>
- </global-results>
- </package>
- <!-- 包含的配置文件
- <include file="/configs/struts-user.xml"></include>
- -->
- </struts>
配置web.xml文件
- <filter>
- <filter-name>struts2</filter-name>
- <filter-class>
- org.apache.struts2.dispatcher.ng.filter.StrutsPrepareAndExecuteFilter
- </filter-class>
- <init-param>
- <param-name>configs</param-name>
- <!-- 默认位置
- <param-value>struts.xml</param-value>
- -->
- <param-value>classpath:configs/struts.xml</param-value>
- </init-param>
- </filter>
- <filter-mapping>
- <filter-name>struts2</filter-name>
- <url-pattern>/*</url-pattern>
- </filter-mapping>
(1)导入Spring相关文件
(2)配置Spring
新建aplicationContext.xml文件,默认在项目的src根目录
- <?xml version="1.0" encoding="UTF-8"?>
- <beans xmlns="http://www.springframework.org/schema/beans"
- xmlns:xsi="http://www.w3.org/2001/XMLSchema-instance"
- xmlns:aop="http://www.springframework.org/schema/aop"
- xmlns:tx="http://www.springframework.org/schema/tx"
- xsi:schemaLocation="
- http://www.springframework.org/schema/beans http://www.springframework.org/schema/beans/spring-beans-2.5.xsd
- http://www.springframework.org/schema/tx http://www.springframework.org/schema/tx/spring-tx-2.5.xsd
- http://www.springframework.org/schema/aop http://www.springframework.org/schema/aop/spring-aop-2.5.xsd">
- </beans>
配置web.xml文件
- <!-- spring -->
- <listener>
- <listener-class>org.springframework.web.context.ContextLoaderListener</listener-class>
- </listener>
- <context-param>
- <param-name>contextConfigLocation</param-name>
- <param-value>classpath:configs/applicationContext*.xml</param-value>
- </context-param>
(1)导Hibernate包
(2)配置Hibernate
(1)Hibernate与Spring之间的整合
- <!-- datasource -->
- <bean id="dataSource" class="org.springframework.jdbc.datasource.DriverManagerDataSource">
- <property name="driverClassName" value="com.mysql.jdbc.Driver" />
- <property name="url" value="jdbc:mysql://localhost:3306/lfdcwtjxt?characterEncoding=UTF-8" />
- <property name="username" value="root" />
- <property name="password" value="root" />
- </bean>
- <!-- spring与hibernate整合
- spring来管理session的创建、打开和关闭
- -->
- <bean id="sessionFactory" class="org.springframework.orm.hibernate4.LocalSessionFactoryBean">
- <!-- 通过配置文件的方式获取数据源,出现异常,未解决
- <property name="configLocation">
- <value>classpath:configs/hibernate.cfg.xml</value>
- </property>
- -->
- <property name="dataSource" ref="dataSource" />
- </bean>
- <!-- 定义事物管理器,并位事物管理器配置上述所定义的session-->
- <bean id="transactionManager" class="org.springframework.orm.hibernate4.HibernateTransactionManager">
- <property name="sessionFactory">
- <ref bean="sessionFactory"/>
- </property>
- </bean>
- <!-- 对事物管理器进行设置
- 表示对save、del、update开头的方法应用事物
- -->
- <tx:advice id="txAdvice" transaction-manager="transactionManager">
- <tx:attributes>
- <tx:method name="save*" propagation="REQUIRED"/>
- <tx:method name="del*" propagation="REQUIRED"/>
- <tx:method name="update*" propagation="REQUIRED"/>
- </tx:attributes>
- </tx:advice>
(2)整合Spring与Structs2
struts2.xml中添加:
- <action name="login" class="login">
- <result name="success">/index.jsp</result>
- </action>
- <bean id="login" class="com.action.LoginAction">
- </bean>


 387
387

 被折叠的 条评论
为什么被折叠?
被折叠的 条评论
为什么被折叠?
 到【灌水乐园】发言


