


在Android开发中,我们通常需要在不同的Activity之间传递数据,下面我们就来总结一下在Activity之间数据传递的几种方式。
1. 使用Intent来传递数据
Intent表示意图,很多时候我们都会利用Android的Intent来在各个Activity之间传递数据,这也是Android比较官方的一种数据传递的方式
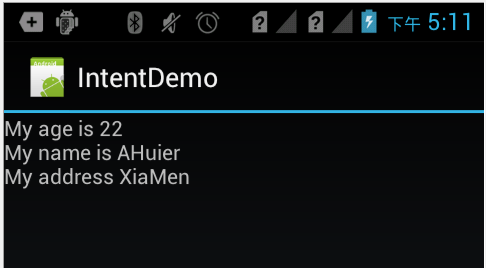
需求1:从一个Activity(IntentDemo)跳转到另外一个Activity(Other),其中利用Intent来传递数据
程序Demo如下:
IntentDemo.java
- package com.android.intentdemo;
- import android.app.Activity;
- import android.content.Intent;
- import android.os.Bundle;
- import android.view.View;
- import android.widget.Button;
- public class IntentDemo extends Activity {
- private Button button;
- @Override
- public void onCreate(Bundle savedInstanceState) {
- super.onCreate(savedInstanceState);
- setContentView(R.layout.main);
- initComponent();
- button.setOnClickListener(new View.OnClickListener() {
- @Override
- public void onClick(View v) {
- Intent intent = new Intent(IntentDemo.this, Other.class);
- // 在Intent中传递数据
- intent.putExtra("name", "AHuier");
- intent.putExtra("age", 22);
- intent.putExtra("address", "XiaMen");
- // 启动Intent
- startActivity(intent);
- }
- });
- }
- private void initComponent() {
- button = (Button) findViewById(R.id.button);
- }
- }
other.java
- package com.android.intentdemo;
- import android.app.Activity;
- import android.content.Intent;
- import android.os.Bundle;
- import android.widget.TextView;
- public class Other extends Activity {
- private TextView textView;
- @Override
- protected void onCreate(Bundle savedInstanceState) {
- // TODO Auto-generated method stub
- super.onCreate(savedInstanceState);
- setContentView(R.layout.other);
- initComponent();
- Intent intent = getIntent();
- int age = intent.getIntExtra("age", 0);
- String name = intent.getStringExtra("name");
- String address = intent.getStringExtra("address");
- textView.setText("My age is " + age + "\n" + "My name is " + name + "\n" + "My address "
- + address);
- }
- private void initComponent() {
- textView = (TextView) findViewById(R.id.msg);
- }
- }
——>
2. 在Activity之间使用静态变量传递数据
在上例中使用Intent可以很方便的在不同的Activity之间传递数据,这个也是官方推荐的方式,但是也有一定的局限性,就是Intent无法传递不能序列化的对象。我们可以使用静态变量来解决这个问题。
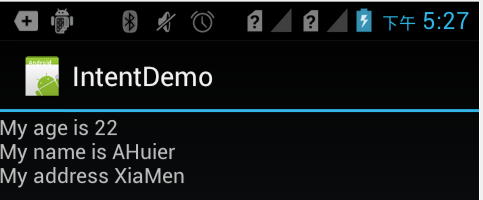
需求1:从一个Activity(IntentDemo)跳转到另外一个Activity(Other),其中利用静态变量来传递数据
程序Demo:
IntentDemo.java
- Intent intent = new Intent();
- intent.setClass(IntentDemo.this, Other.class);
- Other.age = 22;
- Other.name = "AHuier";
- Other.address = "XiaMen";
- startActivity(intent);
Other.java
- private TextView textView;
- public static int age;
- public static String name;
- public static String address;
- @Override
- protected void onCreate(Bundle savedInstanceState) {
- // TODO Auto-generated method stub
- super.onCreate(savedInstanceState);
- setContentView(R.layout.other);
- initComponent();
- textView.setText("My age is " + age + "\n" + "My name is " + name + "\n" + "My address "
- + address);
- }
——>
3. 通剪切板传递数据
在Activity之间数据传递还可以利用一些技巧,不管是Windows还是Linux操作系统,都会支持一种剪切板的技术,也就是一个程序将一些数据复制到剪切板上,然后其他的任何程序都可以从剪切板中获取数据。
1) 利用剪切板传递普通的数据,如字符串
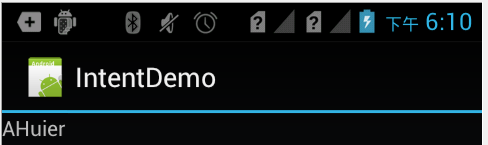
需求1:从一个Activity(IntentDemo)跳转到另外一个Activity(Other),通过剪切板传递数据
程序Demo:
IntentDemo.java
Other.java
- ClipboardManager clipboardManager = (ClipboardManager) getSystemService(Context.CLIPBOARD_SERVICE);
- String name = "AHuier";
- clipboardManager.setText(name);
- Intent intent = new Intent(IntentDemo.this, Other.class);
- startActivity(intent);
- ClipboardManager clipboardManager = (ClipboardManager) getSystemService(Context.CLIPBOARD_SERVICE);
- String msgString = clipboardManager.getText().toString();
- textView.setText(msgString);
——>
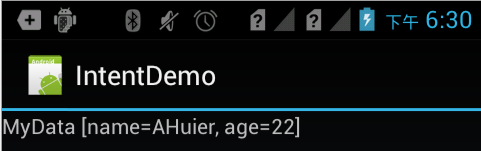
1) 利用剪切板传递复杂的数据,如对象
需求1:从一个Activity(IntentDemo)跳转到另外一个Activity(Other),通过剪切板传递数据
新建一个MyData.java
IntentDemo.java
- package com.android.intentdemo;
- import java.io.Serializable;
- public class MyData implements Serializable {
- private String name;
- private int age;
- public MyData(String name, int age) {
- super();
- this.name = name;
- this.age = age;
- }
- // 提供一个toString()方法
- @Override
- public String toString() {
- return "MyData [name=" + name + ", age=" + age + "]";
- }
- public String getName() {
- return name;
- }
- public void setName(String name) {
- this.name = name;
- }
- public int getAge() {
- return age;
- }
- public void setAge(int age) {
- this.age = age;
- }
- }
- MyData myData = new MyData("AHuier", 22);
- //将对象转换成字符串
- ByteArrayOutputStream byteArrayOutputStream = new ByteArrayOutputStream();
- String base64String = "";
- try {
- ObjectOutputStream objectOutputStream = new ObjectOutputStream(byteArrayOutputStream);
- objectOutputStream.writeObject(myData);
- //使用Android中提供的 Base64 工具类,这个类主要是用来对对象进行压缩也解码的过程,使用默认方式
- base64String = Base64.encodeToString(byteArrayOutputStream.toByteArray(), Base64.DEFAULT);
- objectOutputStream.close();
- } catch (Exception e) {
- // TODO: handle exception
- }
- ClipboardManager clipboardManager = (ClipboardManager)getSystemService(Context.CLIPBOARD_SERVICE);
- clipboardManager.setText(base64String);
- Intent intent = new Intent(IntentDemo.this, Other.class);
- startActivity(intent);
Other.java
- ClipboardManager clipboardManager = (ClipboardManager) getSystemService(Context.CLIPBOARD_SERVICE);
- String msgString = clipboardManager.getText().toString();
- //将字符串 msgString 还原为对象
- byte[] base64_byte = Base64.decode(msgString, Base64.DEFAULT);
- ByteArrayInputStream byteArrayInputStream = new ByteArrayInputStream(base64_byte);
- try {
- ObjectInputStream objectInputStream = new ObjectInputStream(byteArrayInputStream);
- MyData myData = (MyData)objectInputStream.readObject();
- textView.setText(myData.toString());
- } catch (Exception e) {
- // TODO: handle exception
- }
——>
4.Intent中使用全局变量来传递数据
需求1:从一个Activity(Main)跳转到另外一个Activity(Other),通过全局变量来传递数据
Main.java
- private Button button;
- private MyApp myApp;
- ...
- myApp = (MyApp)getApplication();
- myApp.setName("kunhuixu"); //修改之后的名称
- Intent intent = new Intent(Main.this, Other.class);
- startActivity(intent);
Other.java
- private MyApp myApp;
- private TextView textView;
- ...
- myApp = (MyApp)getApplication();
- textView.setText("--- The app name ---" + myApp.getName());
MyApp.java
- package com.android.intentglobal;
- import android.app.Application;
- /*
- * 查看Android官方文档。
- * Application 是所有那些需要维护全局application状态的基类。你可以提供你自己的实现机制通过在在AndroidManifest.xml中提供你自己的需要声明
- * 的标记你自己的标签。
- * onCreate()方法是在应用程序启动的时候被回调的。
- */
- public class MyApp extends Application {
- public String name;
- public String getName() {
- return name;
- }
- public void setName(String name) {
- this.name = name;
- }
- @Override
- public void onCreate() {
- // TODO Auto-generated method stub
- super.onCreate();
- setName("AHuier");
- }
- }
Andr oidManifest.xml
- <application
- android:name=".MyApp"
- android:icon="@drawable/ic_launcher"
- android:label="@string/app_name" >
- <activity
- android:name="com.android.intentglobal.Main"
- android:label="@string/app_name" >
- <intent-filter>
- <action android:name="android.intent.action.MAIN" />
- <category android:name="android.intent.category.LAUNCHER" />
- </intent-filter>
- </activity>
- <activity android:name="com.android.intentglobal.Other"></activity>
- </application>
[注意]:使用 android:name=".MyApp" 来 指定全局变量名称。
——>
http://blog.csdn.net/ahuier/article/details/8953017
【补充】
3. 不同Activity之间的数据传递
Bundle对象的实现
范例说明
在上一个范例里,介绍了如何在Activity中调用另一个Activity,但若需要在调用另外一个Activity的同时传递数据,那么就需要利用android.os.Bundle对象封装数据的能力,将欲传递的数据或参数,通过Bundle来传递不同Intent之间的数据。
本范例的设计为一个简易表单的范例,在Activity1中收集User输入的数据,在离开Activity1的同时,将User选择的结果传递至下一个Activity2,以一个简单BMI"标准体重计算器"示范如何传递数据到下一个Activity里。
运行结果
范例程序

(点击查看大图)图3-10 在两个Activity间做数据的传递
- src/irdc.ex03_10/EX03_10.java
在第一个Activity1主程序中,定义了"性别"选项的RadioGroup以及输入身高的"EditText",并运用Intent及Bundle对象,在调用Activity2(EX03_10_1)时,同时将数据传入。关于EditText对象的使用在此仅供参考,详细的应用以及属性方法,将会在未来讨论控件时,再详细解说。
- package irdc.ex03_10;
- /* import相关class */
- import android.app.Activity;
- import android.content.Intent;
- import android.os.Bundle;
- import android.view.View;
- import android.widget.Button;
- import android.widget.EditText;
- import android.widget.RadioButton;
- public class EX03_10 extends Activity
- {
- /** Called when the activity is first created. */
- @Override
- public void onCreate(Bundle savedInstanceState)
- {
- super.onCreate(savedInstanceState);
- /* 载入main.xml Layout */
- setContentView(R.layout.main);
- /* 以findViewById()取得Button对象,并添加onClickListener */
- Button b1 = (Button) findViewById(R.id.button1);
- b1.setOnClickListener(new Button.OnClickListener()
- {
- public void onClick(View v)
- {
- /*取得输入的身高*/
- EditText et = (EditText) findViewById(R.id.height);
- double height=Double.parseDouble(et.getText().toString());
- /*取得选择的性别*/
- String sex="";
- RadioButton rb1 = (RadioButton) findViewById(R.id.sex1);
- if(rb1.isChecked())
- {
- sex="M";
- }
- else
- {
- sex="F";
- }
- /*new一个Intent对象,并指定class*/
- Intent intent = new Intent();
- intent.setClass(EX03_10.this,EX03_10_1.class);
- /*new一个Bundle对象,并将要传递的数据传入*/
- Bundle bundle = new Bundle();
- bundle.putDouble("height",height);
- bundle.putString("sex",sex);
- /*将Bundle对象assign给Intent*/
- intent.putExtras(bundle);
- /*调用Activity EX03_10_1*/
- startActivity(intent);
- }
- });
- }
- }
src/irdc.ex03_10/EX03_10_1.java
那么,在Activity2(EX03_10_1)要如何接收来自Activity1(EX03_10)传递来的数据呢?试想,在Activity1是以Bundle封装对象,自然在Activity2亦是以Bundle的方式解开封装的数据;程序中以getIntent().getExtras() 方法取得随着Bundle对象传递过来的性别与身高,经过计算之后,显示在屏幕上。
- package irdc.ex03_10;
- /* import相关class */
- import java.text.DecimalFormat;
- import java.text.NumberFormat;
- import android.app.Activity;
- import android.os.Bundle;
- import android.widget.TextView;
- public class EX03_10_1 extends Activity
- {
- /** Called when the activity is first created. */
- @Override
- public void onCreate(Bundle savedInstanceState)
- {
- super.onCreate(savedInstanceState);
- /* 加载main.xml Layout */
- setContentView(R.layout.myalyout);
- /* 取得Intent中的Bundle对象 */
- Bundle bunde = this.getIntent().getExtras();
- /* 取得Bundle对象中的数据 */
- String sex = bunde.getString("sex");
- double height = bunde.getDouble("height");
- /* 判断性别 */
- String sexText="";
- if(sex.equals("M"))
- {
- sexText="男性";
- }
- else
- {
- sexText="女性";
- }
- /* 取得标准体重 */
- String weight=this.getWeight(sex, height);
- /* 设置输出文字 */
- TextView tv1=(TextView) findViewById(R.id.text1);
- tv1.setText("你是一位"+sexText+"\n你的身高是"
- +height+"厘米\n你的标准体重是"+weight+"公斤");
- }
- /* 四舍五入的method */
- private String format(double num)
- {
- NumberFormat formatter = new DecimalFormat("0.00");
- String s=formatter.format(num);
- return s;
- }
- /* 以findViewById()取得Button对象,并添加onClickListener */
- private String getWeight(String sex,double height)
- {
- String weight="";
- if(sex.equals("M"))
- {
- weight=format((height-80)*0.7);
- }
- else
- {
- weight=format((height-70)*0.6);
- }
- return weight;
- }
- }
res/layout/mylayout.xml
mylayout.xml为(EX03_10_1)的Layout,定义了显示计算结果的TextView。
- <?xml version="1.0" encoding="utf-8"?>
- <AbsoluteLayout
- android:layout_width="fill_parent"
- android:layout_height="fill_parent"
- xmlns:android="http://schemas.android.com/apk/res/android"
- >
- <TextView
- android:id="@+id/text1"
- android:layout_width="wrap_content"
- android:layout_height="wrap_content"
- android:textSize="20sp"
- android:layout_x="50px"
- android:layout_y="72px"
- >
- </TextView>
- </AbsoluteLayout>
AndroidManifest.xml
由于本范例中有两个Activity,所以文件中必须有两个activity的声明,否则系统将无法运行,请看以下的描述。
- <?xml version="1.0" encoding="utf-8"?>
- <manifest
- xmlns:android="http://schemas.android.com/apk/res/android"
- package="irdc.ex03_10"
- android:versionCode="1"
- android:versionName="1.0.0">
- <application
- android:icon="@drawable/icon"
- android:label="@string/app_name">
- <activity
- android:name=".EX03_10"
- android:label="@string/app_name">
- <intent-filter>
- <action android:name="android.intent.action.MAIN" />
- <category android:name="android.intent.category.LAUNCHER" />
- </intent-filter>
- </activity>
- <activity android:name="EX03_10_1"></activity>
- </application>
- </manifest>
扩展学习
Bundle对象针对了不同的数据类型提供了许多的方法,例如,此范例中传递String类型的数据,使用的方法为Bundle.putString(stringName,stringValue):
- bundle.putDouble("sex",sex);
而要传递Double类型的数据,使用的方法为Bundle.putDouble(doubleName,doubleValue),如下:
- bundle.putString("height",height);
反之,若要由Bundle对象中取出数据,则使用Bundle.getString(stringName)、Bundle.getDouble(doubleName) 等相对应的方法即可。
除了上述简单的传递类型之外,尚有String[] 与ArrayList<String> 等封装的方式可供使用
参考。


 3044
3044


 被折叠的 条评论
为什么被折叠?
被折叠的 条评论
为什么被折叠?
 到【灌水乐园】发言


