


Vue 常用的三种传值方式
1.父传子
2.子传父
3.非父子传值
父子组件的关系
首先,我们要使用Vue的组件传值,我们要知道组件之间的关系。
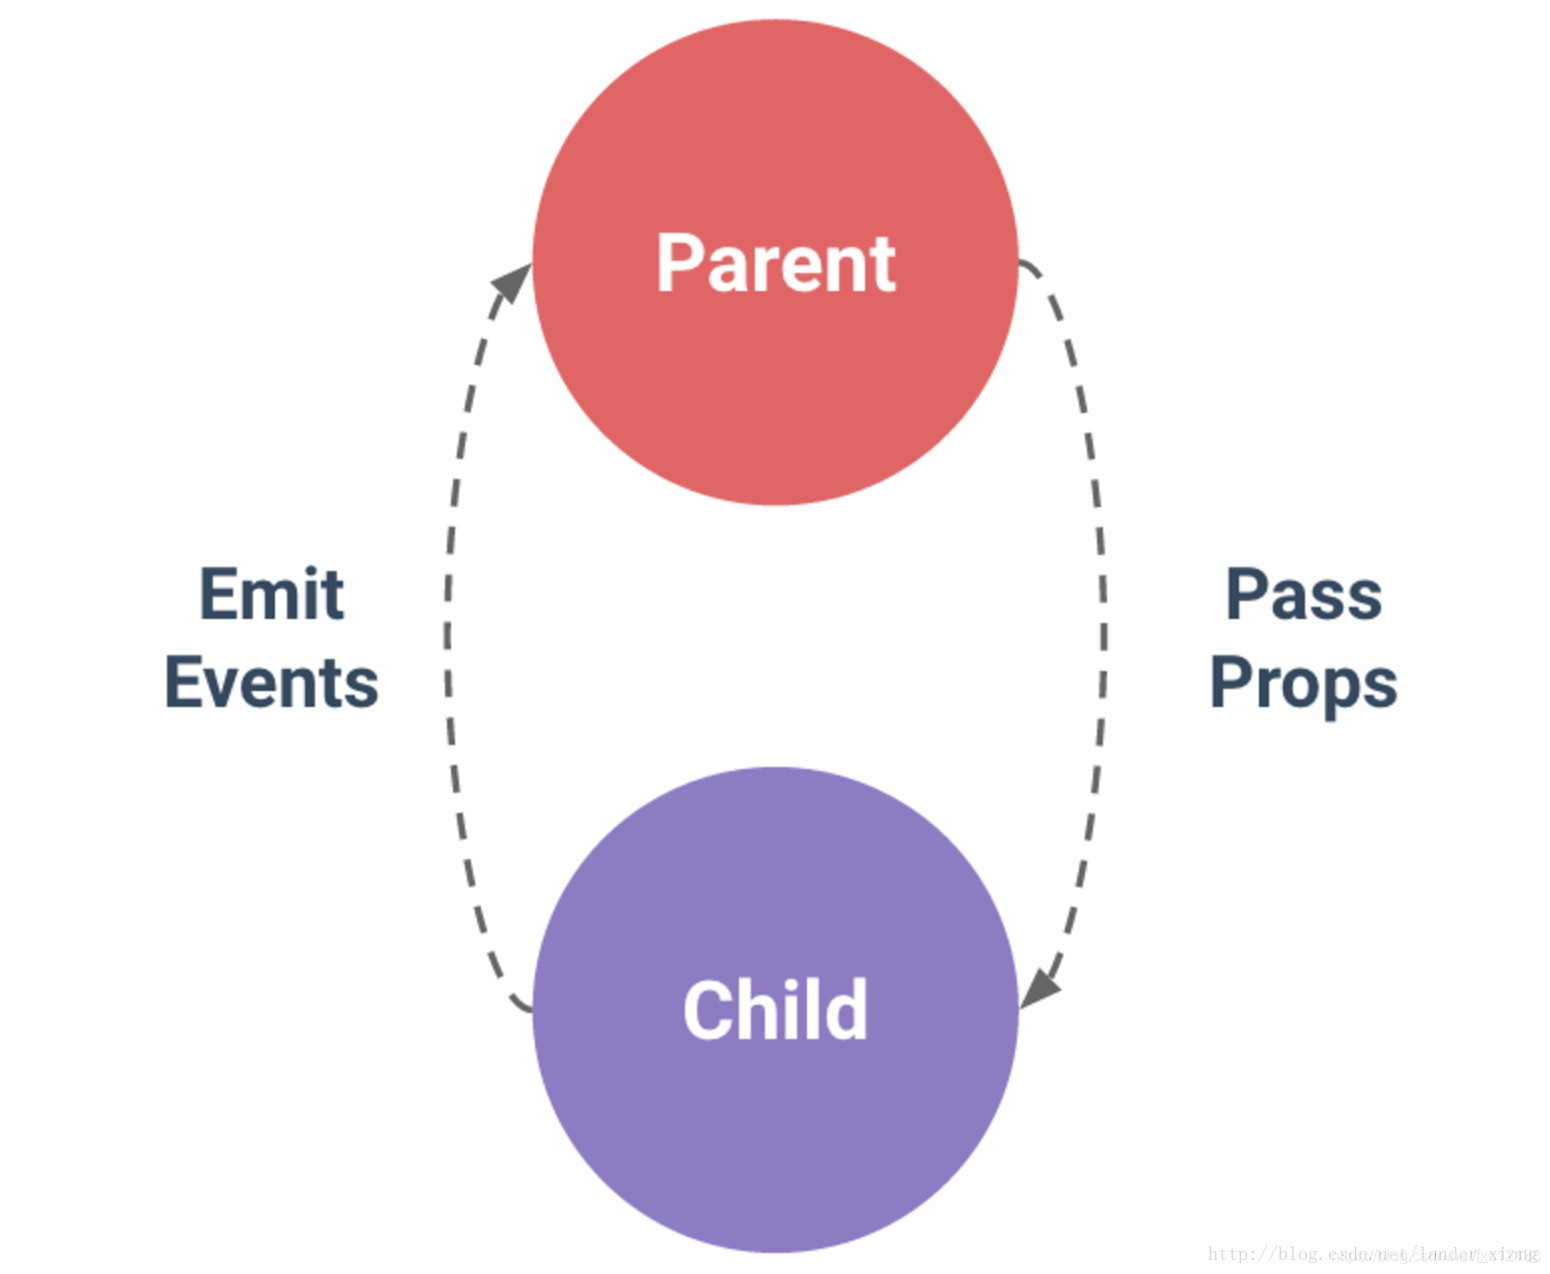
父子组件的关系可以总结为 prop 向下传递,事件向上传递。父组件通过 prop 给子组件下发数据,子组件通过事件给父组件发送消息,如下图所示
什么是Prop
要实现组件传值,我们要了解什么是prop。
Prop是用来传递数据的一种自定义属性。
Prop是单向数据流。所有的 prop 都使得其父子 prop 之间形成了一个单向下行绑定:父级 prop 的更新会向下流动到子组件中,但是反过来则不行。这样会防止从子组件意外改变父级组件的状态,从而导致你的应用的数据流向难以理解。
额外的,每次父级组件发生更新时,子组件中所有的 prop 都将会刷新为最新的值。这意味着你不应该在一个子组件内部改变 prop。如果你这样做了,Vue 会在浏览器的控制台中发出警告。
父传子
父组件的内容传递给子组件其实很简单
首先建立俩个Vue的组件,例father.vue,child.vue
在father.vue的组件写上
<template>
  <div>
    <span>父组件:</span>
  </div>
</template>
记住,我们的template下,只能拥有一个标签
在child.vue的组件写上
<template>
  <div>
    <span>子组件:</span>
  </div>
</template>
我们把子组件的内容引入到父组件里
于是,我们在father.vue导入
import child from './child.vue' // 引入子组件
然后,我们开始注册自定义标签
  export default {
    name: "father",
    components:{
      child    //这个名字是上面我们引进来的child.vue,俩个名字需相同
    }
  }
<template>
  <div>
    <span>父组件:</span>
    <child></child>
  </div>
</template>
我们开始v-model绑定数据
在data数据里写上name
  export default {
    name: "father",
    data() {
      return {
        name: ''
      }
    },
    components:{
      child    //这个名字是上面我们引进来的child.vue,俩个名字需相同
    }
  }
data里的数据为什么要return出来呢?
1.不使用return 出来的数据会在项目的全局可见,会污染全局
2.使用return 出来的数据只能在当前组件中使用,不会影响其他组件
当一个组件被定义, data 必须声明为返回一个初始数据对象的函数,因为组件可能被用来创建多个实例。如果 data 仍然是一个纯粹的对象,则所有的实例将共享引用同一个数据对象!通过提供 data 函数,每次创建一个新实例后,我们能够调用 data 函数,从而返回初始数据的一个全新副本数据对象。
我们在组件中绑定data数据的name,在自定义标签中传递要传递的值
<template>
  <div>
    <span>父组件:</span>
    <input type="text" v-model="name">
    <child :notice="name"></child>
  </div>
</template>
最后,在child.vue组件中利用props来接收传递来的参数
  export default {
    name: "child",
    data() {
      return {}
    },
    props: ['notice']
  }
在上面的模板中运用传递来的参数
<template>
  <div>
    <span>子组件:{{notice}}</span>
  </div>
</template>
父传子所有的代码
father.vue
<template>
  <div>
    <span>父组件:</span>
    <input type="text" v-model="name">
    <child :notice="name"></child>
  </div>
</template>

<script>
  import child from './child.vue'   // 引入子组件
  export default {
    name: "father",
    data() {
      return {
        name: ''
      }
    },
    components:{
      child    //这个名字是上面我们引进来的child.vue,俩个名字需相同
    }
  }
</script>

<style scoped>

</style>
child.vue的代码
<template>
  <div>
    <span>子组件:{{notice}}</span>
  </div>
</template>

<script>
  export default {
    name: "child",
    data() {
      return {}
    },
    props: ['notice']
  }
</script>

<style scoped>

</style>
子传父
首先,我们要点击一个按钮,使子组件的值传到父组件。
于是,我们在子组件,写点击事件。
(这里在input的标签上绑定数据,还是和之前的一样)
<template>
  <div>
    <span>子组件:</span>
    <input type="text" v-model="childvalue">    //双向绑定childvalue
    <input type="button" value="传值到父亲" @click="childclick"> //点击事件
  </div>
</template>
  export default {
    name: "child",
    props: ['notice'],   //接收父组件传递的值
    data() {
      return {
        childvalue:this.notice
      }
    },
    methods: {
      childclick() {
        this.$emit("childByvalue", this.childvalue)   // 利用$emit的方法把值传递给父组件
      }
    }
  }
我们在父组件中接收传递的值利用的是v-on:,简写用@
<child :notice="name" @childByvalue="childByvalue"></child>
在下面的methods写方法
   methods : {
      childByvalue (val) {
        this.name=val
      }
    },
这时候细心的同学会发现子传父可以了,但父传子不能用了。
这时候就用到了watch来监听了。
在父组件中监听传递过了的值。
  watch:{
      notice () {
        this.childvalue=this.notice
      }
    },
这样父子组件的通信就完成了。
父组件的完整代码
<template>
  <div>
    <span>父组件:</span>
    <input type="text" v-model="name">
    <child :notice="name" @childByvalue="childByvalue"></child>
  </div>
</template>

<script>
  import child from './child.vue'   // 引入子组件
  export default {
    name: "father",
    data() {
      return {
        name: ''
      }
    },
    methods : {
      childByvalue (val) {
        this.name=val
      }
    },
    components:{
      child    //这个名字是上面我们引进来的child.vue,俩个名字需相同
    }
  }
</script>

<style scoped>

</style>
子组件的完整代码
<template>
  <div>
    <span>子组件:</span>
    <input type="text" v-model="childvalue">
    <input type="button" value="传值到父亲" @click="childclick">
  </div>
</template>

<script>
  export default {
    name: "child",
    props: ['notice'],
    data() {
      return {
        childvalue:this.notice
      }
    },
    watch:{
      notice () {
        this.childvalue=this.notice
      }
    },
    methods: {
      childclick() {
        this.$emit("childByvalue", this.childvalue)
        // 利用$emit的方法把值传递给父组件
      }
    }
  }
</script>

<style scoped>

</style>
非父子传值(兄弟组件传参)
非父子传参,需要有共同的父组件。需要定义公共的公共实例文件,作为中间仓库。不然达不到传值效果。
创建bus.js做为公共的仓库文件
bus.js内容为
import Vue from 'Vue'
export default new Vue
创建child1.vue,child2.vue
child1.vue内容为
<template>
  <div>
    <span>child1</span>
    <span>{{msg}}</span>
    <button @click="childclick">点击</button>
  </div>
</template>

<script>
import bus from './bus.js'
  export default {
    name: "child1",
    data () {
      return {
        msg :'123'
      }
    },
    methods : {
      childclick () {
        bus.$emit('val',this.msg)
      }
    }
  }
</script>

<style scoped>

</style>
child2的内容为
<template>
  <div>
    <span>child2</span>
    <span>{{cmsg}}</span>
  </div>
</template>

<script>
  import bus from './bus.js'
  export default {
    name: "child2",
    data () {
      return {
        cmsg : ''
      }
    },
    mounted () {
      let that =this
      bus.$on('val',(data)=>{
        console.log(data);
        this.cmsg=data
      })
    }
  }
</script>

<style scoped>

</style>
在父组件中导入注册
 import child1 from './child1.vue'
  import child2 from './child2.vue'
  components:{
      child1,
      child2
    }
    <child1></child1>
    <child2></child2>
Vue 的三种传值方式介绍完毕。


 4137
4137


 被折叠的 条评论
为什么被折叠?
被折叠的 条评论
为什么被折叠?
 到【灌水乐园】发言


