


集群概念
HA(High Available)高可用集群是减少服务中断时间为目的的服务器集群技术,也是保证业务连续性的有效解决方案。集群,一般有两个或者两个以上的计算机组成,这些组成集群的计算机被称为节点。
其中由两个节点组成的集群被称为双机热备,即使用两台服务器互相备份,当其中一台服务器出现问题时,另一台服务器马上接管服务,来保护用户的业务程序对外不间断提供的服务,当然集群系统更可以支持两个以上的节点,提供比双机热备更多、更高级的功能,把因软件/硬件/人为造成的故障对业务的影响降低到最小程度。
在集群中为了防止服务器出现“脑裂”的现象,集群中一般会添加Fence设备,有的是使用服务器本身的的硬件接口称为内部Fence,有的则是外部电源设备称为外部Fence,当一台服务出现问题响应超时的时候,Fence设备会对服务器直接发出硬件管理指令,将服务器重启或关机,并向其他节点发出信号接管服务。
在红帽系统中我们通过luci和ricci来配置管理集群,其中luci安装在一台独立的计算机上或者节点上,luci只是用来通过web访问来快速的配置管理集群的,它的存在与否并不影响集群。ricci是安装在每个节点上,它是luci与集群给节点通信的桥梁。
Fence概念
在HA集群坏境中,每个节点之间互相发送探测包进行判断节点的存活性。一般会有专门的线路进行探测,这条线路称为“心跳线”。假设node1的心跳线出问题,则node2和node3会认为node1出问题,然后就会把资源调度在node2或者node3上运行,但node1会认为自己没问题不让node2或者node3抢占资源,此时就出现了脑裂(split brain)。
此时如果在整个环境里有一种设备直接把node1断电,则可以避免脑裂的发生,这种设备叫做fence或者stonith(Shoot The Other Node In The Head爆头哥)。
实验前提
在server1与server4中配置高可用yum源
[rhel-source]
name=Red Hat Enterprise Linux $releasever - $basearch - Source
baseurl=http://172.25.14.250/source6.5
enabled=1
gpgcheck=1
gpgkey=file:///etc/pki/rpm-gpg/RPM-GPG-KEY-redhat-release

[LoadBalancer]
name=LoadBalancer
baseurl=http://172.25.14.250/source6.5/LoadBalancer
gpgcheck=0

[HighAvailability]
name=HighAvailability
baseurl=http://172.25.14.250/source6.5/HighAvailability
gpgcheck=0

[ResilientStorage]
name=ResilientStorage
baseurl=http://172.25.14.250/source6.5/ResilientStorage
gpgcheck=0

[ScalableFileSystem]
name=ScalableFileSystem
baseurl=http://172.25.14.250/source6.5/ScalableFileSystem
gpgcheck=0
主机解析:
[root@foundation14 ~]# vim /etc/hosts
172.25.14.100   www.westos.org
实验:配置高可用集群
在server1中:
[root@server1 ~]# yum install -y ricci luci
[root@server1 ~]# passwd ricci #设置密码
Changing password for user ricci.
New password:
BAD PASSWORD: it is based on a dictionary word
BAD PASSWORD: is too simple
Retype new password:
passwd: all authentication tokens updated successfully.
[root@server1 ~]# /etc/init.d/ricci start
Starting system message bus: [ OK ]
Starting oddjobd: [ OK ]
generating SSL certificates... done
Generating NSS database... done
Starting ricci: [ OK ]
[root@server1 ~]# chkconfig ricci on ##开机自启动
[root@server1 ~]# chkconfig luci on
[root@server1 ~]# /etc/init.d/luci start
Adding following auto-detected host IDs (IP addresses/domain names), corresponding to `server1' address, to the configuration of self-managed certificate `/var/lib/luci/etc/cacert.config' (you can change them by editing `/var/lib/luci/etc/cacert.config', removing the generated certificate `/var/lib/luci/certs/host.pem' and restarting luci):
(none suitable found, you can still do it manually as mentioned above)
Generating a 2048 bit RSA private key
writing new private key to '/var/lib/luci/certs/host.pem'
Start luci... [ OK ]
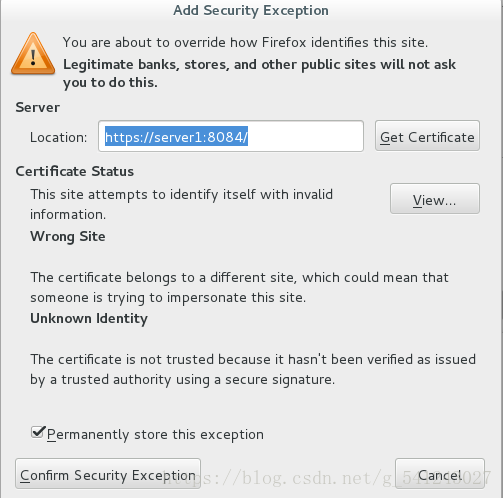
Point your web browser to https://server1:8084 (or equivalent) to access luci
#会自动生成一个地址https://server1:8084在server4中:
[root@server4 ~]# yum install -y ricci
[root@server4 ~]# passwd ricci
[root@server4 ~]# /etc/init.d/ricci start
[root@server4 ~]# chkconfig ricci on
打开firefox
web访问luci配置集群,https://server1:8084

username : root
Password : ##刚才设置的ricci的密码

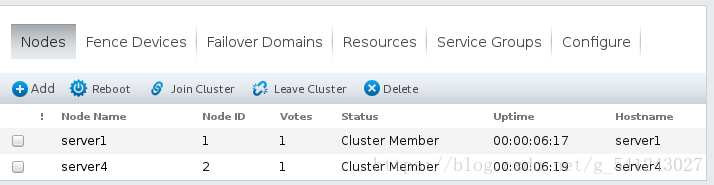
创建集群并添加两个节点

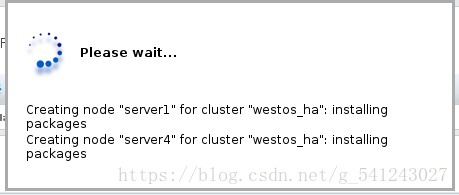
集群添加成功
在server1中添加nginx脚本
[root@server1 init.d]# vim nginx
#!/bin/sh
#
# nginx - this script starts and stops the nginx daemon
#
# chkconfig:   - 85 15
# description:  Nginx is an HTTP(S) server, HTTP(S) reverse \
#               proxy and IMAP/POP3 proxy server
# processname: nginx
# config:      /usr/local/nginx/conf/nginx.conf
# pidfile:     /usr/local/nginx/logs/nginx.pid

# Source function library.
. /etc/rc.d/init.d/functions

# Source networking configuration.
. /etc/sysconfig/network

# Check that networking is up.
[ "$NETWORKING" = "no" ] && exit 0

ngi
最低0.47元/天 解锁文章


 888
888


 被折叠的 条评论
为什么被折叠?
被折叠的 条评论
为什么被折叠?
 到【灌水乐园】发言


