模板抽离
我们已经学习过了Vue模板的另外定义形式,使用<template></template>。
<template id="home">
<div>首页</div>
</template>
<template id="news">
<div>新闻</div>
</template>
然后js里定义路由组件的时候:
const Home = { template: '#home' };
const News = { template: '#news' };
路由嵌套
实际应用界面,通常由多层嵌套的组件组合而成。
比如,我们 “首页”组件中,还嵌套着 “登录”和 “注册”组件,那么URL对应就是/home/login和/home/reg。
<template id="home">
<div>
<h2>首页</h2>
<router-link to="/home/login">登录</router-link>
<router-link to="/home/reg">注册</router-link>
<router-view></router-view>
</div>
</template>
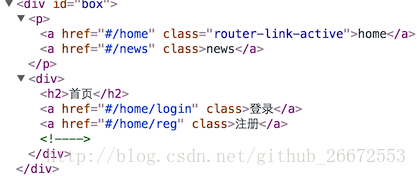
这是访问/home后的模板,其中我们需要把/home/login和/home/reg渲染进来。
完成上面代码后,HTML结构如下图:
- 登录和注册2个组件
    <template id="login">
        <div>登录界面</div>
    </template>
    <template id="reg">
        <div>注册界面</div>
    </template>
const Login = { template: '#login' };
const Reg = { template: '#reg' };
3.定义路由
const routes = [
{ path: '/', redirect: '/home' },
{
path: '/home',
component: Home,
children:[
{ path: '/home/login', component: Login},
{ path: '/home/reg', component: Reg}
]
},
{ path: '/news', component: News}
]
注意我们在home路由配置了它的children。这就是嵌套路由。
4.案例全部代码如下:
<!DOCTYPE html>
<html>
<head>
<title></title>
<meta charset="utf-8">
<script src="http://unpkg.com/vue/dist/vue.js"></script>
<script src="https://unpkg.com/vue-router/dist/vue-router.js"></script>
</head>
<body>
<div id="box">
<p>
<router-link to="/home">home</router-link>
<router-link to="/news">news</router-link>
</p>
<router-view></router-view>
</div>
<template id="home">
<div>
<h2>首页</h2>
<router-link to="/home/login">登录</router-link>
<router-link to="/home/reg">注册</router-link>
<router-view></router-view>
</div>
</template>
<template id="news">
<div>新闻</div>
</template>
<template id="login">
<div>登录界面</div>
</template>
<template id="reg">
<div>注册界面</div>
</template>
<script type="text/javascript">
const Home = { template: '#home' };
const News = { template: '#news' };
const Login = { template: '#login' };
const Reg = { template: '#reg' };
const routes = [
{ path: '/', redirect: '/home' },
{
path: '/home',
component: Home,
children:[
{ path: '/home/login', component: Login},
{ path: '/home/reg', component: Reg}
]
},
{ path: '/news', component: News}
]
const router = new VueRouter({
routes
})
const app = new Vue({
router
}).$mount('#box')
</script>
</body>
</html>
- 1
- 2
- 3
- 4
- 5
- 6
- 7
- 8
- 9
- 10
- 11
- 12
- 13
- 14
- 15
- 16
- 17
- 18
- 19
- 20
- 21
- 22
- 23
- 24
- 25
- 26
- 27
- 28
- 29
- 30
- 31
- 32
- 33
- 34
- 35
- 36
- 37
- 38
- 39
- 40
- 41
- 42
- 43
- 44
- 45
- 46
- 47
- 48
- 49
- 50
- 51
- 52
- 53
- 54
- 55
- 56
- 57
- 58
- 59
- 60
- 61
- 62
- 63
- 64
- 65
- 66
- 67
- 68
- 69
- 70
- 71
- 72
- 73
- 74
- 75
- 76
- 77
- 78
- 79


 266
266

 被折叠的 条评论
为什么被折叠?
被折叠的 条评论
为什么被折叠?
 到【灌水乐园】发言


