


今天博主带小伙伴们来围观下Dynamics 365 Web API和Organization Service的区别,对于还不知道Dynamics 365是什么的小伙伴可以去思过崖面壁思过了。Dynamics 365是微软新一代的企业级应用平台,它把CRM和ERP进行了整合并作为一款统一的企业级平台软件为企业级客户提供服务,在上面我们不但能使用之前Dynamics CRM的功能,而且还能使用Dynamics AX的功能,并且CRM 和 ERP之间的数据交互也会变得非常便捷,因为它们都使用统一的数据定义格式。
闲话不多说,我们直奔今天的主题API。对于有Dynamics CRM开发经验的小伙伴们来说,提到API,大家第一时间想到的肯定是Organization Service这套基于WCF开发的API,它功能强大,而且有SDK,使用非常方便。但是,博主今天却打算给大家介绍我们下一代的API -- Web API,它目前不仅涵盖95%的Organization Service 功能,而且调用方式非常灵活方便,特别是在表单页面,不需要在本地构造任何的Proxy,只需要通过HTTP协议即可完成对它的调用。那么这两者之间具体有哪些差异呢?博主将给各位一一道来。
首先来看在轻客户端的API调用方式,很多时候我们需要在实体表单上面用JS去调用API去做一些比较复杂的业务逻辑。例如,用JS调用一个自定义的Action。那么我们来看看,用这两种API去做这样的事情都需要做哪些步骤呢?
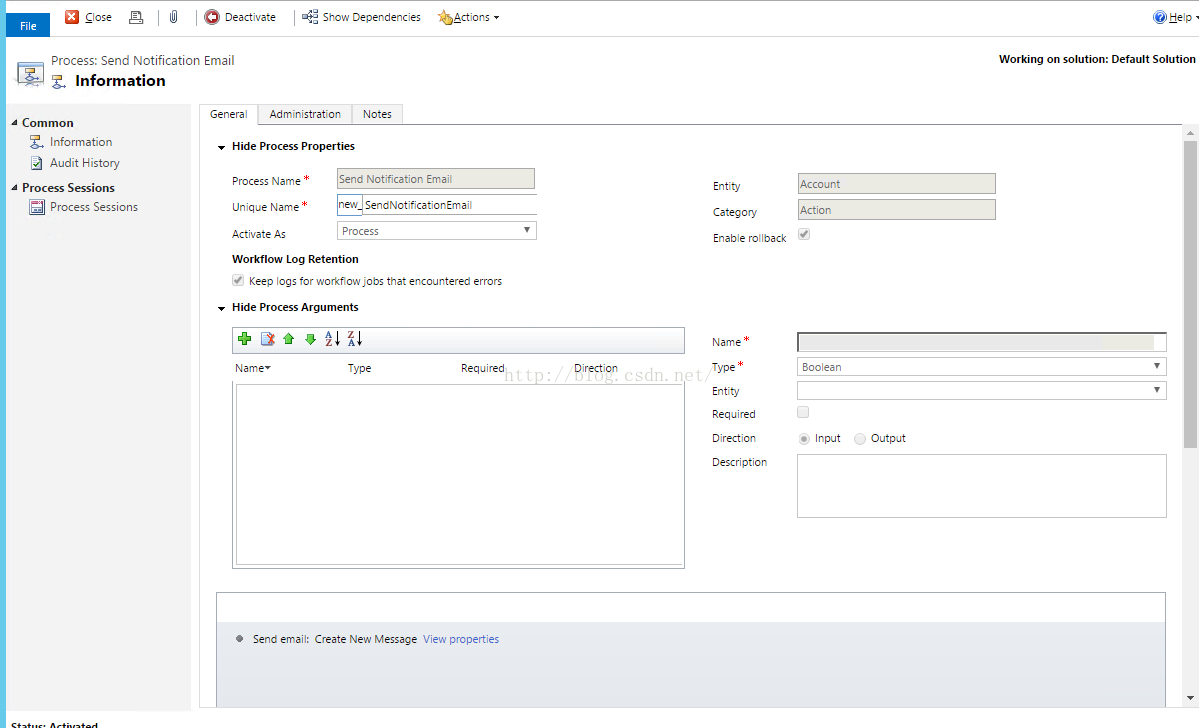
我们在客户实体上定义一个Custom Action,这个action用来向该客户的联系人发送一封测试邮件。Action的定义如下:
现在我们要在表单上面调用这个Action,我们先来看看通过Organization Service来实现该功能的JS代码:
function sendNotificationThroughSOAP()
{
    var url="https://crmhomedev06.crm6.dynamics.com/xrmservices/2011/organization.svc/web";
    var action = "Execute";
    var accountid = Xrm.Page.data.entity.getId();
    var msg = ["<s:Envelope xmlns:s='http://schemas.xmlsoap.org/soap/envelope/'>",
                "<s:Body>",
                "<Execute xmlns='http://schemas.microsoft.com/xrm/2011/Contracts/Services' xmlns:i='http://www.w3.org/2001/XMLSchema-instance'>",
                    "<request xmlns:a='http://schemas.microsoft.com/xrm/2011/Contracts'>",
                    "<a:Parameters xmlns:b='http://schemas.datacontract.org/2004/07/System.Collections.Generic'>",
                        "<a:KeyValuePairOfstringanyType>",
                        "<b:key>Target</b:key>",
                        " <b:value i:type='a:EntityReference'>",
                            "<a:Id>"+accountid+"</a:Id>",
                            " <a:KeyAttributes xmlns:c='http://schemas.microsoft.com/xrm/7.1/Contracts' />",
                            "<a:LogicalName>account</a:LogicalName>",
                            "<a:Name i:nil='true' />",
                            "<a:RowVersion i:nil='true' />",
                        "</b:value>",
                        "</a:KeyValuePairOfstringanyType>",
                    "</a:Parameters>",
                    "<a:RequestId i:nil='true' />",
                    "<a:RequestName>new_SendNotificationEmail</a:RequestName>",
                    "</request>",
                "</Execute>",
                "</s:Body>",
            "</s:Envelope>"].join("");
    var xrmHelper = XrmHelper.getInstance(true);
    xrmHelper.ExecuteSOAP(url,msg,action);

}
可以看出来,这里我们需要拼接SOAP报文,然后再将其提交到Organization Service中。接下来我们再看看通过Web API来实现该功能的代码:
function sendNotification()
{

    var xrmHelper = XrmHelper.getInstance(true);
    var accountId=Xrm.Page.data.entity.getId().replace("{","").replace("}","");
    var url="/api/data/v8.2/accounts("+accountId+")/Microsoft.Dynamics.CRM.new_SendNotificationEmail";
    xrmHelper.ExecuteWebAPI("POST",url,{},callbackHandler);


}
是不是觉得代码量很少,而且不用去拼接复杂的SOAP报文呢?各位同学要知道,如果我们用Organization Service去实现类似的功能,SOAP报文的复杂度会随着Custom Action功能的复杂度成正比的增加,也就是说各位犯错误的机会将会大大增加。因此,在这局的的比较中,我们的Web API从实现代码的简易性上胜出,加一分!
接下来我们再来看看,如何在重客户端调用这两种API来执行该Action,并比较它们的区别。首先看看使用Organization Service 来实现该功能,它的实现代码如下:
OrganizationRequest req = new OrganizationRequest("new_SendNotificationEmail");
req["Target"] = new EntityReference("account", Guid.Parse("9381B8B5-55A6-E611-80F9-1458D05A2AB0"));
crmService.Execute(req); string accountid = await CreateAccountAsync();
HttpRequestMessage custBoundActionReq = new HttpRequestMessage(HttpMethod.Post, accountid+ "/Microsoft.Dynamics.CRM.new_SendNotificationEmail");
JObject custBoundActionContent = new JObject();
custBoundActionReq.Content = new StringContent(JsonConvert.SerializeObject(custBoundActionContent), Encoding.UTF8, "application/json");
HttpResponseMessage custBoundActionResp = await _client.SendAsync(custBoundActionReq);在重客户端上面,这两种API的开发体验相差不大,都不需要构造特别复杂的请求报文,所以这一局Web API和Organization Service各加一分。
接下来,我们来试个比较复杂的业务场景,并看看如何用这两种API去完成这个需求,并比较它们的区别。在大家编写数据同步脚本的时候,很多时候我们会同时插入一批有主从关系的数据(1:N)。如果我们用Organization Service实现这样的需求,我想需要先创建主数据,然后再创建子数据并将其关联上主数据。完成这样的数据录入,我们至少需要请求服务器两次,并且请求次数会随着子数据的数量而递增。下面是使用Organizaiton Service实现该场景的例子:
Entity acc = new Entity("account");
            acc.Attributes.Add("name", "this is a demo account created by organization services");

            Guid accid = CrmSvc_Online.Create(acc);

            Entity contact = new Entity("contact");
            contact.Attributes.Add("lastname", "this is a contact");
            contact.Attributes.Add("parentcustomerid", new EntityReference("account", accid));

            Guid contactid = CrmSvc_Online.Create(contact);

            Entity opportunity = new Entity("opportunity");
            opportunity.Attributes.Add("name", "this is a opportunity");
            opportunity.Attributes.Add("parentaccountid", new EntityReference("account", accid));

            Guid oppid = CrmSvc_Online.Create(opportunity);

            Entity task = new Entity("task");
            task.Attributes.Add("subject", "this is a task");
            task.Attributes.Add("regardingobjectid", new EntityReference("opportunity", oppid));

            Guid taskid = CrmSvc_Online.Create(task);
但是如果我们Web API去实现该功能,那么我们就可以使用它的深度插入功能,在一次请求中将具有主从关系的数据全部录入,是不是很厉害呢?我们来看下例子吧:
JObject account = new JObject();
            account.Add("name", "this is account");

            JObject primaryContact = new JObject();
            primaryContact.Add("lastname", "primary contact");

            JArray opps = new JArray();
            JObject opp1 = new JObject();
            opp1.Add("name", "related opportunity");
            opps.Add(opp1);

            JArray opps_tasks = new JArray();
            JObject task1 = new JObject();
            task1.Add("subject","related task");
            opps_tasks.Add(task1);

            opp1.Add("Opportunity_Tasks", opps_tasks);

            account.Add("primarycontactid", primaryContact);
            account.Add("opportunity_customer_accounts", opps);

            HttpRequestMessage req = new HttpRequestMessage(HttpMethod.Post, "accounts");
            req.Content = new StringContent(JsonConvert.SerializeObject(account), Encoding.UTF8, "application/json");

            HttpResponseMessage resp = await _client.SendAsync(req);
在这个例子中,我们在一次请求中,分别创建了一个客户记录,一个该客户的主联系人,一个该客户记录下面的商机记录以及该商机下的任务实体记录。也就是说,我们在一次请求中,分别创建了4条记录,是不是很牛啊?在这局的比较上,Web API以压倒性的数据录入性能优势完胜Organization Service,Web API又加一分。
接下来我们再看看数据查询场景吧,大家可以自行脑补下,如果我们想查看一条主记录下面的子记录(1:N关系)应该怎么做呢?在没有用Web API之前,博主在完成该场景至少要多次向服务器进行查询并将得到的结果进行合并才能完成该需求。但是现在,我们是需要使用Web API的查询功能向服务器查询一次即可完成该复杂的数据查询场景,是不是很神奇呢?大家跟着博主来看看具体情况吧:
使用Organization Service查询主记录并带出与其相关的子记录:
 Entity acc = new Entity("account");
            acc.Attributes.Add("name", "this is a demo account created by organization services");

            Guid accid = CrmSvc_Online.Create(acc);

            Entity contact1 = new Entity("contact");
            contact1.Attributes.Add("lastname", "this is a contact1");
            contact1.Attributes.Add("parentcustomerid", new EntityReference("account", accid));

            Guid contactid1 = CrmSvc_Online.Create(contact1);

            Entity contact2 = new Entity("contact");
            contact2.Attributes.Add("lastname", "this is a contact2");
            contact2.Attributes.Add("parentcustomerid", new EntityReference("account", accid));

            Guid contactid2 = CrmSvc_Online.Create(contact2);

            Entity contact3 = new Entity("contact");
            contact3.Attributes.Add("lastname", "this is a contact3");
            contact3.Attributes.Add("parentcustomerid", new EntityReference("account", accid));

            Guid contactid3 = CrmSvc_Online.Create(contact3);


            FetchExpression fetchExp = new FetchExpression(string.Format(@"<fetch version='1.0' output-format='xml-platform' mapping='logical' distinct='false'>
                                                                                <entity name='contact'>
                                                                                <attribute name='fullname' />
                                                                                <attribute name='telephone1' />
                                                                                <attribute name='contactid' />
                                                                                <order attribute='fullname' descending='false' />
                                                                                <filter type='and'>
                                                                                    <condition attribute='parentcustomerid' operator='eq' value='{0}' />
                                                                                </filter>
                                                                                </entity>
                                                                            </fetch>", accid.ToString("B")));
            EntityCollection result = CrmSvc_Online.RetrieveMultiple(fetchExp);

            FetchExpression fetchExp2 = new FetchExpression(string.Format(@"<fetch version='1.0' output-format='xml-platform' mapping='logical' distinct='false'>
                                                                                <entity name='account'>
                                                                                <attribute name='name' />
                                                                                <filter type='and'>
                                                                                    <condition attribute='accountid' operator='eq' value='{0}' />
                                                                                </filter>
                                                                                </entity>
                                                                            </fetch>", accid.ToString("B")));
            EntityCollection result2 = CrmSvc_Online.RetrieveMultiple(fetchExp);
使用Web API查询主记录以及它的子记录:
JObject mainAccount = new JObject();
mainAccount.Add("name", StringGenerator(NumberGenerator()));
JArray contacts = new JArray();
JObject contact1 = new JObject();
contact1.Add("lastname", StringGenerator(NumberGenerator()));
JObject contact2 = new JObject();
contact2.Add("lastname", StringGenerator(NumberGenerator()));
JObject contact3 = new JObject();
contact3.Add("lastname", StringGenerator(NumberGenerator()));
contacts.Add(contact1);
contacts.Add(contact2);
contacts.Add(contact3);
mainAccount.Add("contact_customer_accounts", contacts);
HttpRequestMessage crtReq = new HttpRequestMessage(HttpMethod.Post, "accounts");
crtReq.Content = new StringContent(JsonConvert.SerializeObject(mainAccount), Encoding.UTF8, "application/json");
HttpResponseMessage crtResp = await _client.SendAsync(crtReq);
if (crtResp.IsSuccessStatusCode)
{
var accountUri = crtResp.Headers.GetValues("OData-EntityId").FirstOrDefault();
HttpRequestMessage retReq = new HttpRequestMessage(HttpMethod.Get, string.Format("{0}?$expand=contact_customer_accounts($select=fullname)",accountUri));
HttpResponseMessage retResp = await _client.SendAsync(retReq);
if (retResp.IsSuccessStatusCode)
{
var result = JsonConvert.DeserializeObject<JObject>(await retResp.Content.ReadAsStringAsync());
if (result != null && result["contact_customer_accounts@odata.nextLink"] != null)
{
HttpRequestMessage retChdReq = new HttpRequestMessage(HttpMethod.Get, result["contact_customer_accounts@odata.nextLink"].Value<string>());
HttpResponseMessage retChdResp = await _client.SendAsync(retChdReq);
return retChdResp.IsSuccessStatusCode;
}
else if (result != null && result["contact_customer_accounts"] != null)
{
return true;
}
}
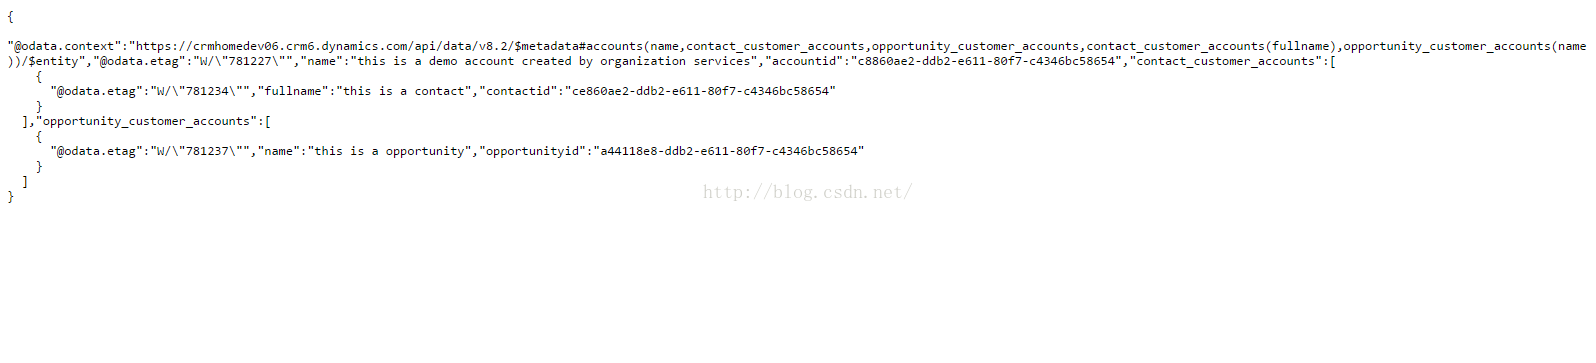
}在这里呢,我们的web api可以使用$expand关键字多次,也就是说我们可以再一次查询中返回多个1:N关系子记录,如下图所示,是不是很酷呢?反过来看Organization Service,它并不支持这类灵活的数据查询方式,所以在这一局中,Web API胜出,加一分。
经过这些比较,Web API 共得4分,Organization Service 共得1分,由此可见,Web API的功能和开发体验都完胜Organization Service!给位小伙伴呢,还在等什么呢?赶紧把你们的代码换成Web API吧。


 2339
2339


 被折叠的 条评论
为什么被折叠?
被折叠的 条评论
为什么被折叠?
 到【灌水乐园】发言


