


一.说明
马上就要出5.5Laravel版本了,据说这是继5.1LTS之后第二个LTS版本。不过今天的重点是说一下5.4版本的注册以及登陆。我们知道在Laravel5.2版本开始,Laravel框架就自带了登录注册功能。5.1是没有的,当然今天要说的是5.4.不过先说一下这几个版本的差距,小小提一下5.2之中的
Route::controllers([]);
这个使用方法已经废除了。其他的核心内容差距不大。下面开始5.4版本。防止有些同学刚接触,我们从头说起。
二.开始
1.下载5.4Laravel框架,推荐是使用composer,不懂得可以看Laravel第一篇怎么使用composer。直接在终端你的存放项目的路径下输入
想要下载制定版本的可以百度 Laravel学院或者 Laravel中国,两个比较权威的Laravel社区。composer create-project --prefer-dist laravel/laravel 项目名称2.快速生成认证所需要的路由和视图(相关的artisan命令可自行百度学习)
这时候你会发现你的app\Http\Controllers目录下多了一个Auth文件夹,就是刚刚生成的以及resources\views目录下多了一个home.blade.php文件和一个存储认证需要的试图文件。相关的路由也已经为你全部生成,在routes目录下的web.php文件中。database\migrations目录下会有两个数据表迁移文件,暂时不用理会干嘛用的。php artisan make:auth3.数据库迁移填充。这一块留到以后详细说明。现在你只需要在根目录路径下在终端中运行。这个命令平时不要随便使用,它是回滚再重新运行所有迁移的 migrate:refresh 命令来填充数据库。这个命令在彻底重构数据库时非常有用。
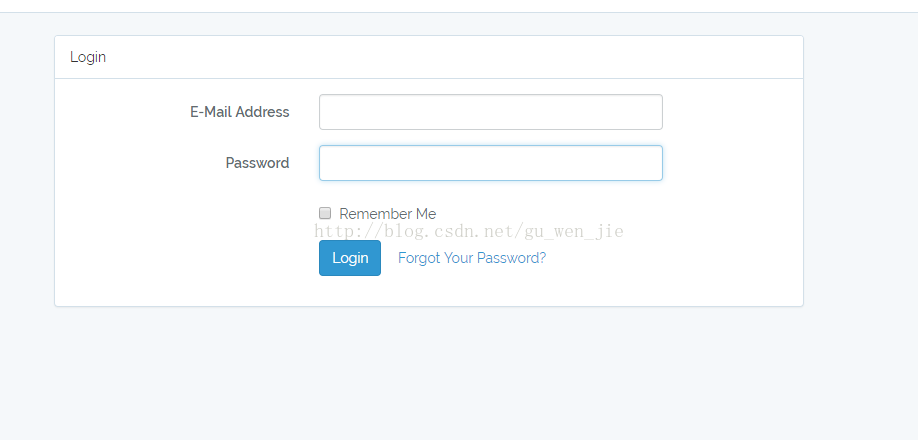
这样你的数据库中就生成了两个目前有用的表,一个users,一个password表。还有一个,不用理会。前提是你有一个数据库, 在根目录下的.env文件中配置即可,没有的话就把.env.axample文件复制一份改名为.envphp artisan migrate:refresh --seed如果你需要表前缀,可在config/databases.php文件中设置。DB_CONNECTION=mysql DB_HOST=127.0.0.1 DB_PORT=3306 DB_DATABASE=laraveldb DB_USERNAME=root DB_PASSWORD=root4.现在一切就绪,在你自己的开发环境之中配置好访问名称(建议配置到public目录中的index.php,有利于Laravel的安全机制保护代码)。按照路由文件中的路由访问/home或者可以直接访问/login。你会看到这样一个类似页面
就来到了登陆页面。我们先说注册这一块。
三.注册
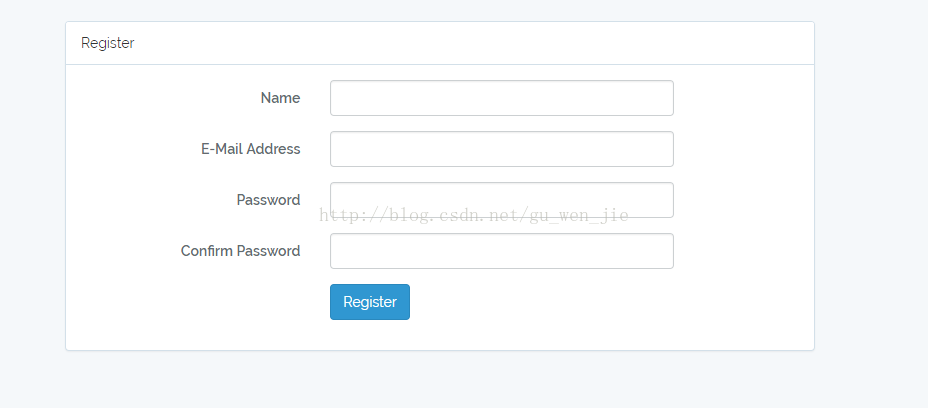
1.点击右上角的Register按钮来到注册页面。
怎么来到这个页面的呢。我们可以看路由文件中
发现和我们平时写的路由不太一样。它其实是定义在 vendor/laravel/framework/src/Illuminate/Support/Facades/Auth.php文件中。这里我建议大家使用PHPStrom编辑器啊。按住 Ctrl+鼠标左键可以追踪类,方法等的源文件其他有相同功能的也可以,个人喜好。Auth::routes();这里调用了了 Illuminate\Routing\Router 这个类,再调用里面的 a uth() 方法。它存放在 vendor/laravel/framework/src/Illuminate/Routing/Router.php文件中。内容量很多,大概在1005行。/** * Register the typical authentication routes for an application. * * @return void */ public static function routes() { static::$app->make('router')->auth(); }这里定义了 登陆 、 退出 、注册 和 密码重置 的路由 。我们可以看到其中Registration Routes...这部分就是注册的路由。/** * Register the typical authentication routes for an application. * * @return void */ public function auth() { // Authentication Routes... $this->get('login', 'Auth\LoginController@showLoginForm')->name('login'); $this->post('login', 'Auth\LoginController@login'); $this->post('logout', 'Auth\LoginController@logout')->name('logout'); // Registration Routes... $this->get('register', 'Auth\RegisterController@showRegistrationForm')->name('register'); $this->post('register', 'Auth\RegisterController@register'); // Password Reset Routes... $this->get('password/reset', 'Auth\ForgotPasswordController@showLinkRequestForm')->name('password.request'); $this->post('password/email', 'Auth\ForgotPasswordController@sendResetLinkEmail')->name('password.email'); $this->get('password/reset/{token}', 'Auth\ResetPasswordController@showResetForm')->name('password.reset'); $this->post('password/reset', 'Auth\ResetPasswordController@reset'); }2.开始注册
我们看到上方的不管是get或者post方法注册都走了Auth\RegisterController控制器。我们可以到app\Http\Controllers\Auth的下面打开RegisterController控制器
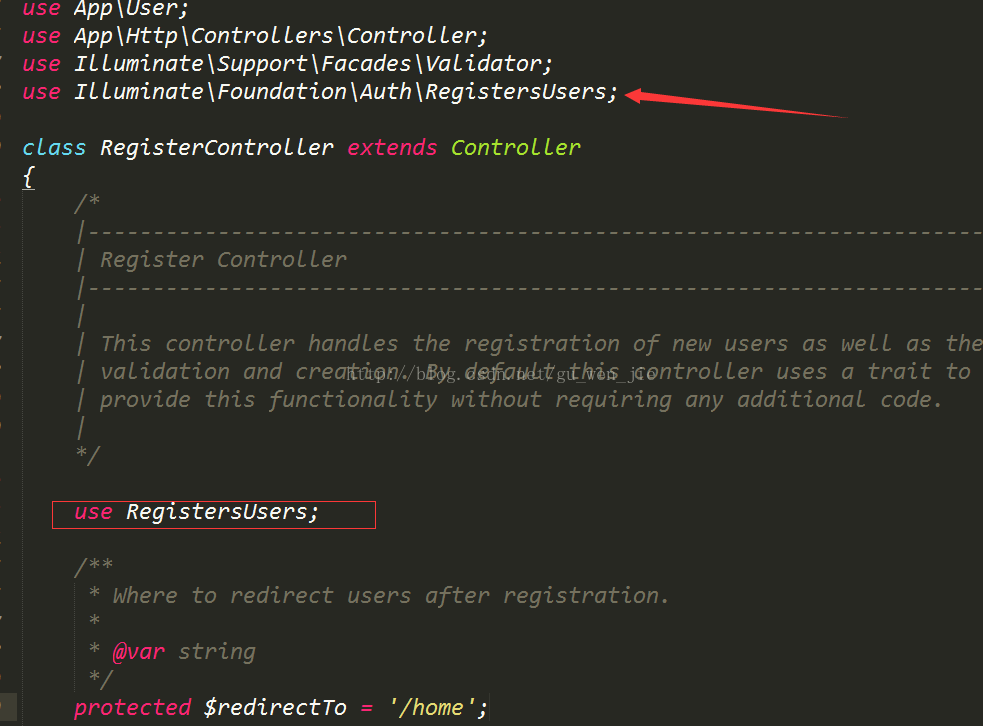
这个RegistersUsers定义在vendor\laravel\framework\src\Illuminate\Foundation\Auth\RegistersUsers.php文件中
看这个地方use RedirectsUsers; /** * Show the application registration form. * * @return \Illuminate\Http\Response */ public function showRegistrationForm() { return view('auth.register'); }
/register走的showRegistrationForm()方法来到注册视图页面。然后通过post方法提交:register(Request $request)方法
首先调用 validator()返回一个验证对象,再调用 validate() 验证表单内容是否被规则允许。 App\Http\Controllers\Auth\RegisterController/** * Handle a registration request for the application. * * @param \Illuminate\Http\Request $request * @return \Illuminate\Http\Response */ public function register(Request $request) { $this->validator($request->all())->validate(); event(new Registered($user = $this->create($request->all()))); $this->guard()->login($user); return $this->registered($request, $user) ?: redirect($this->redirectPath()); }假如你的注册表单中需要加入其他字段,如性别等,需要在这里添加字段规则验证/** * Get a validator for an incoming registration request. * * @param array $data * @return \Illuminate\Contracts\Validation\Validator */ protected function validator(array $data) { return Validator::make($data, [ 'name' => 'required|string|max:255', 'email' => 'required|string|email|max:255|unique:users', 'password' => 'required|string|min:6|confirmed', ]); }上面这个方法返回一个对象。然后我们看到一个 new Registered($user = $this->create($request->all())这个执行事件其实是在$this->guard()->login($user);后面执行的。等同于$this->guard()->login($this->create($request->all()));
this->guard() 又会去调用 vendor\laravel\framework\src\Illuminate\Foundation\Auth\RegistersUsers.php 里的 guard()方法
这里直接return Auth::guard();返回一个默认的 guard ,在 config/auth.php中配置。这里不展示了可以自行查看。/** * Get the guard to be used during registration. * * @return \Illuminate\Contracts\Auth\StatefulGuard */ protected function guard() { return Auth::guard(); }接下来执行了括号中的$this->create($request->all())。create()方法在App\Http\Controllers\Auth\RegisterController.php中。
同上:假如你的注册表单中需要加入其他字段,如性别等,需要在这里添加字段/** * Create a new user instance after a valid registration. * * @param array $data * @return \App\User */ protected function create(array $data) { return User::create([ 'name' => $data['name'], 'email' => $data['email'], 'password' => bcrypt($data['password']), ]); }最后调用一个redirect()方法;该方法也在vendor\laravel\framework\src\Illuminate\Foundation\Auth\目录下是,不过在RedireectsUsers.php中
我们看到用了一个三元运算符判断,如果定义了redirectTo属性就返回这个属性定义的值,不然就返回/home./** * Get the post register / login redirect path. * * @return string */ public function redirectPath() { if (method_exists($this, 'redirectTo')) { return $this->redirectTo(); } return property_exists($this, 'redirectTo') ? $this->redirectTo : '/home'; }最终注册完成。

四.登陆
1.挺长时间了,今天赶快把登陆部分给补上~~~
2.首先登陆部分的路由部分和(三.注册-1)相同,可以回过头看下那部分代码。
3.通过代码我们知道登陆认证走的认证路由是:
$this->get('login', 'Auth\LoginController@showLoginForm')->name('login'); $this->post('login', 'Auth\LoginController@login');4.登陆控制器所在的文件是:vendor/laravel/framework/src/Illuminate/Foundation/Auth/AuthenticatesUsers.php
5.登陆方法:/** * Show the application's login form. * * @return \Illuminate\Http\Response */ public function showLoginForm() { return view('auth.login'); } /** * Handle a login request to the application. * * @param \Illuminate\Http\Request $request * @return \Illuminate\Http\RedirectResponse|\Illuminate\Http\Response */ public function login(Request $request) { $this->validateLogin($request);//数据验证 // If the class is using the ThrottlesLogins trait, we can automatically throttle // the login attempts for this application. We'll key this by the username and // the IP address of the client making these requests into this application. if ($this->hasTooManyLoginAttempts($request)) { $this->fireLockoutEvent($request); return $this->sendLockoutResponse($request); } if ($this->attemptLogin($request)) { return $this->sendLoginResponse($request);//身份验证 } // If the login attempt was unsuccessful we will increment the number of attempts // to login and redirect the user back to the login form. Of course, when this // user surpasses their maximum number of attempts they will get locked out. $this->incrementLoginAttempts($request); return $this->sendFailedLoginResponse($request); }数据验证部分是该控制器下另一个方法,就是验证邮箱(用户名)和密码:
/**
 * Validate the user login request.
 *
 * @param  \Illuminate\Http\Request  $request
 * @return void
 */
protected function validateLogin(Request $request)
{
    $this->validate($request, [
        $this->username() => 'required|string',
        'password' => 'required|string',
    ]);
}
身份验证是使用系统的 guard方法进行认证:/** * Attempt to log the user into the application. * * @param \Illuminate\Http\Request $request * @return bool */ protected function attemptLogin(Request $request) { return $this->guard()->attempt(//调取guard方法,往下找 $this->credentials($request), $request->has('remember') ); } /** * *中间忽略。。。 * */ /** * Get the guard to be used during authentication. * * @return \Illuminate\Contracts\Auth\StatefulGuard */ protected function guard() { return Auth::guard(); }
注意,上方使用的调取:$this->guard()->attempt
这个attempt方法指向:vendor/laravel/framework/src/Illuminate/Contracts/Auth/StatefulGuard.php中的attempt()方法
最终指向:vendor/laravel/framework/src/Illuminate/Auth/SessionGuard.php中的attempt方法
/**
 * Attempt to authenticate a user using the given credentials.
 *
 * @param  array  $credentials
 * @param  bool   $remember
 * @return bool
 */
public function attempt(array $credentials = [], $remember = false)
{
    $this->fireAttemptEvent($credentials, $remember);

    $this->lastAttempted = $user = $this->provider->retrieveByCredentials($credentials);

    // If an implementation of UserInterface was returned, we'll ask the provider
    // to validate the user against the given credentials, and if they are in
    // fact valid we'll log the users into the application and return true.
    if ($this->hasValidCredentials($user, $credentials)) {
        $this->login($user, $remember);

        return true;
    }

    // If the authentication attempt fails we will fire an event so that the user
    // may be notified of any suspicious attempts to access their account from
    // an unrecognized user. A developer may listen to this event as needed.
    $this->fireFailedEvent($user, $credentials);

    return false;
}
上方方法中调用了一个方法:
hasValidCredentials()这个方法中调用了另一个方法:
validateCredentials($user, $credentials)你如果使用的是PHPstorm编辑器,CTRL键+鼠标左键点击这个方法追踪会发现
它最终使用的是:vendor/laravel/framework/src/Illuminate/Auth/EloquentUserProvider.php中的validateCredentials方法
/**
 * Validate a user against the given credentials.
 *
 * @param  \Illuminate\Contracts\Auth\Authenticatable  $user
 * @param  array  $credentials
 * @return bool
 */
public function validateCredentials(UserContract $user, array $credentials)
{
    $plain = $credentials['password'];

    return $this->hasher->check($plain, $user->getAuthPassword());
}
最终进行密码验证,验证成功登陆。


 791
791


 被折叠的 条评论
为什么被折叠?
被折叠的 条评论
为什么被折叠?
 到【灌水乐园】发言


