


搭建过程
软件及版本
官网提前下好软件包:
MySQL:https://www.mysql.com/
Nginx:http://nginx.org/
PHP:https://www.php.net/downloads
WordPress:https://cn.wordpress.org/download/
| 软件 | 版本 | 作用 |
|---|---|---|
| MySQL | 5.6.33 | 数据库 |
| Nginx | 1.14.2 | web服务器 |
| php | 7.2.12 | 处理动态页面 |
| WordPress | 5.9.1 | 个人博客系统 |
| keepalived | 1.3.5 | web高可用 |
| mycat | 1.6.5 | mysql读写分离 |
LNMP架构搭建
MySQL源码安装
准备MySQL源码包
[root@server01 ~]# hostnamectl set-hostname mysql
[root@server01 ~]# su
[root@mysql ~]# mkdir /WP
[root@mysql ~]# cd /WP/
[root@mysql WP]# ls
mysql-5.6.33.tar.gz

编写安装脚本
[root@server2 WP]# vim mysql_install.sh
#!/bin/bash
#源码编译安装MySQL
mysql_install() {
#1、创建用户
`id mysql` &>/dev/null
[ $? -ne 0 ] && useradd -s /sbin/nologin -M mysql
#2、解决依赖
yum install -y cmake gcc gcc-c++
yum install -y ncurses-devel
#3、编译安装
cd /WP
tar zxvf mysql-5.6.33.tar.gz
cd mysql-5.6.33
cmake \
-DCMAKE_INSTALL_PREFIX=/usr/local/mysql \
-DMYSQL_DATADIR=/usr/local/mysql/data \
-DSYSCONFDIR=/etc \
-DENABLED_LOCAL_INFILE=1 \
-DWITH_PARTITION_STORAGE_ENGINE=1 \
-DEXTRA_CHARSETS=all \
-DDEFAULT_CHARSET=utf8mb4 \
-DDEFAULT_COLLATION=utf8mb4_general_ci \
-DWITH_SSL=bundled
make && make install
#配置文件
rm -rf /etc/my.cnf
cp /usr/local/mysql/support-files/my-default.cnf /etc/my.cnf
#授权并初始化数据库
chown -R mysql:mysql /usr/local/mysql
/usr/local/mysql/scripts/mysql_install_db --basedir=/usr/local/mysql --datadir=/usr/local/mysql/data --user=mysql
#配置服务、自启动和环境变量
cp /usr/local/mysql/support-files/mysql.server /etc/init.d/mysqld
service mysqld start
chkconfig --add mysqld
echo 'PATH=/usr/local/mysql/bin:$PATH' >> /etc/profile
#删除匿名用户
#设置root域名的密码
rpm -qa|grep expect
if [ $? -ne 0 ];then
   yum -y install expect
fi
#导入环境变量PATH
export PATH=/usr/local/mysql/bin:$PATH
#初始化root密码 删除匿名用户
echo '#!/usr/bin/expect
set timeout 60
spawn mysql_secure_installation
expect {
"enter for none" { send "\r"; exp_continue}
"Y/n" { send "Y\r" ; exp_continue}
"password" { send "123456\r"; exp_continue}
"Cleaning up" { send "\r"}
}
interact ' > mysql_secure_installation.exp
chmod +x mysql_secure_installation.exp
./mysql_secure_installation.exp
}
mysql_install

执行脚本
[root@server2 WP]# chmod +x mysql_install.sh
[root@server2 WP]# source mysql_install.sh
Nginx安装
- 准备软件包
[root@server02 ~]# hostnamectl set-hostname nginx
[root@server02 ~]# su
[root@nginx ~]# mkdir /WP
[root@nginx ~]# cd /WP
[root@nginx WP]# ls
nginx-1.16.0.tar.gz
- 安装脚本
[root@server2 WP]# vim nginx_install.sh
[root@server2 WP]# cat nginx_install.sh
#!/bin/bash
#编译安装Nginx
nginx_install(){
#创建软件运行用户
`id www` &>>/dev/null
if [ $? -ne 0 ];then
useradd -s/sbin/nologin -M www
fi
#安装依赖
yum -y install pcre-devel zlib-devel openssl-devel gcc gcc-c++
#编译安装
cd /WP
tar xvf nginx-1.14.2.tar.gz
cd nginx-1.14.2
./configure --prefix=/usr/local/nginx --user=www --group=www --with-http_ssl_module --with-http_stub_status_module --with-http_realip_module && make && make install
#导入环境变量PATH
export PATH=/usr/local/nginx/sbin:$PATH
}
nginx_install


[root@server2 WP]# chmod +x nginx_install.sh
[root@server2 WP]# source nginx_install.sh
- 启动
[root@server2 nginx-1.16.0]# cd /usr/local/nginx/
[root@server2 nginx]# cd sbin/
[root@server2 sbin]# ./nginx
[root@server2 sbin]# ps -ef|grep nginx
root      89154      1  0 20:27 ?        00:00:00 nginx: master process ./nginx
www       89155  89154  0 20:27 ?        00:00:00 nginx: worker process
[root@server2 sbin]# cd /etc/init.d/
[root@server2 init.d]# rz
# 传入启动脚本
[root@server2 init.d]# chmod +x nginx
[root@server2 init.d]# chkconfig --add nginx
[root@server2 init.d]# chkconfig nginx on
PHP安装
- 安装
[root@nginx WP]# vim php_install.sh
[root@nginx WP]# cat php_install.sh
#!/bin/bash
php_install(){
#php编译安装
#和nginx使用相同的用户,如果没有就创建
`id www` &> /dev/null
[ $? -ne 0 ] && useradd -s /sbin/nologin -M www
#解决依赖
yum -y install libxml2-devel libjpeg-devel libpng-devel freetype-devel curl-devel openssl-devel
#解压
cd /WP
tar xvf php-7.2.12.tar.gz
cd php-7.2.12
#编译安装php
./configure --prefix=/usr/local/php --with-config-file-path=/usr/local/php/etc --enable-fpm --with-fpm-user=www --with-fpm-group=www --with-mysqli=mysqlnd --with-pdo-mysql=mysqlnd --with-iconv-dir --with-freetype-dir --with-jpeg-dir --with-png-dir --with-zlib --with-libxml-dir --enable-xml --disable-rpath --enable-bcmath --enable-shmop --enable-sysvsem --enable-inline-optimization --with-curl --enable-mbregex --enable-mbstring --enable-ftp --with-gd --with-openssl --with-mhash --enable-pcntl --enable-sockets --with-xmlrpc --with-libzip --enable-soap --without-pear --with-gettext --disable-fileinfo --enable-maintainer-zts && make && make install
#配置文件初始化
cp php.ini-development /usr/local/php/etc/php.ini
#php-fpm服务配置文件
cp /usr/local/php/etc/php-fpm.conf.default /usr/local/php/etc/php-fpm.conf
#php-fpm服务子配置文件
cp /usr/local/php/etc/php-fpm.d/www.conf.default /usr/local/php/etc/php-fpm.d/www.conf
#配置服务及其环境变量
cp /WP/php-7.2.12/sapi/fpm/init.d.php-fpm /etc/init.d/php-fpm
chmod +x /etc/init.d/php-fpm
service php-fpm start
chkconfig --add php-fpm
echo 'PATH=/usr/local/php/bin:$PATH' >> /etc/profile
}
php_install

[root@nginx WP]# chmod +x php_install.sh
[root@nginx WP]# source php_install.sh
- 连接nginx
[root@nginx php-7.2.12]# vim /usr/local/nginx/html/index.php
<?php
phpinfo();
?/
[root@nginx sbin]# vim /usr/local/nginx/conf/nginx.conf
[root@nginx sbin]# cat /usr/local/nginx/conf/nginx.conf
server {
listen 80;
server_name 192.168.139.102;
root /usr/local/nginx/html;
index index.html index.htm index.php;
location / {
index index.html index.htm index.php;
}
#error_page 404 /404.html;
# redirect server error pages to the static page /50x.html
#
error_page 500 502 503 504 /50x.html;
location = /50x.html {
root html;
}
# proxy the PHP scripts to Apache listening on 127.0.0.1:80
#
#location ~ \.php$ {
#proxy_pass http://127.0.0.1;
#}
# pass the PHP scripts to FastCGI server listening on 127.0.0.1:9000
#
location ~ \.php$ {
root /usr/local/nginx/html;
fastcgi_pass 127.0.0.1:9000;
fastcgi_index index.php;
fastcgi_param SCRIPT_FILENAME /usr/local/nginx/html$fastcgi_script_name;
include fastcgi_params;
}
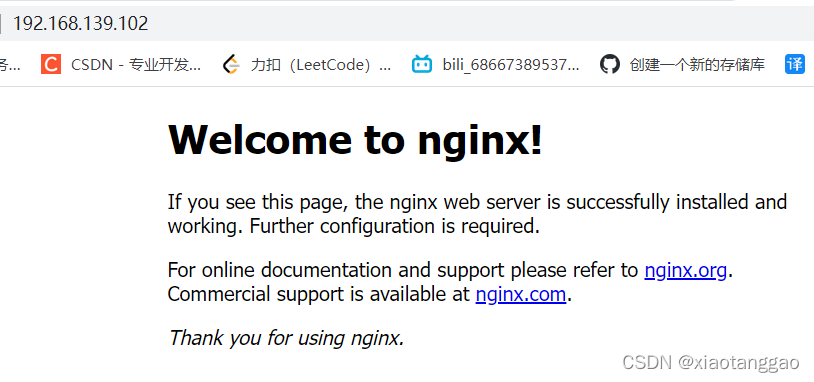
[root@nginx sbin]# /usr/local/nginx/sbin/nginx -s reload
安装WordPress
- 创建授权数据库
mysql> create database wordpress;
mysql> use wordpress;
mysql> grant all privileges on wordpress.* to 'www'@'192.168.139.%' identified by '123456';
- 安装
[root@nginx WP]# tar -xf wordpress-5.9.1-zh_CN.tar.gz -C /usr/local/nginx/html/

    server {
        listen       80;
        server_name  192.168.139.102;
		root	/usr/local/nginx/html/wordpress;
		index index.html index.htm index.php;

        location / {
            #root   html;
            #root   /usr/local/nginx/html/wordpress;
            index  index.html index.htm index.php;
        }

        #error_page  404              /404.html;

        # redirect server error pages to the static page /50x.html
        #
        error_page   500 502 503 504  /50x.html;
        location = /50x.html {
            root   html;
        }

        # proxy the PHP scripts to Apache listening on 127.0.0.1:80
        #
        #location ~ \.php$ {
            #proxy_pass   http://127.0.0.1;
        #}

        # pass the PHP scripts to FastCGI server listening on 127.0.0.1:9000
        #
        location ~ \.php$ {
            root           /usr/local/nginx/html/wordpress;
            fastcgi_pass   127.0.0.1:9000;
            fastcgi_index  index.php;
            fastcgi_param  SCRIPT_FILENAME  /usr/local/nginx/html/wordpress$fastcgi_script_name;
            include        fastcgi_params;
        }
- 连接数据库
[root@nginx wordpress]# mv wp-congig-sample.php wp-congig.php
[root@nginx wordpress]# vim wp-config.php
[root@nginx wordpress]# cat /usr/local/nginx/conf/nginx.conf
define( 'DB_NAME', 'wordpress' );

/** Database username */
define( 'DB_USER', 'www' );

/** Database password */
define( 'DB_PASSWORD', '123456' );

/** Database hostname */
define( 'DB_HOST', '192.168.139.101' );

/** Database charset to use in creating database tables. */
define( 'DB_CHARSET', 'utf8' );

/** The database collate type. Don't change this if in doubt. */
define( 'DB_COLLATE', '' );
[root@nginx wordpress]# /usr/local/nginx/sbin/nginx -s reload
- 浏览器访问
用户名:qq邮箱
密码:&FMZrcpqYJKKQLSUii
Nginx负载均衡
- 基于已有的web服务器,再克隆一个新的web服务器,取名为nginx2
[root@nginx2 ~]# vim /usr/local/nginx/conf/nginx.conf
# 修改监听地址为192.168.139.107
server_name  192.168.139.107;

[root@nginx2 ~]# /usr/local/nginx/sbin/nginx -s reload
- 新建负载均衡服务器
负载均衡配置
[root@lb ~]# vim /usr/local/nginx/conf/nginx.conf

http {
    include       mime.types;
    default_type  application/octet-stream;
    upstream wordpress {
        server 192.168.139.102;
        server 192.168.139.107;
        }
    sendfile        on;
    keepalive_timeout  65;

    server {
        listen       80;
        server_name  192.168.139.103;

        location / {
            proxy_pass http://wordpress;
            proxy_set_header Host $host;
        }

[root@lb ~]# /usr/local/nginx/sbin/nginx
Keepalived实现负载均衡服务器高可用
- 基于lb克隆lb2,用于实现高可用
- 安装keepalived
安装
yum install -y keepalived

备份配置文件
cp /etc/keepalived/keepalived.conf /etc/keepalived/keepalived.conf.bak

修改Master配置文件
[root@lb ~]# vim /etc/keepalived/keepalived.conf
 29     virtual_ipaddress {
 30         192.168.139.100
 31     }
 32 }

修改Backup配置文件
[root@lb2 ~]# vim /etc/keepalived/keepalived.conf

 19 vrrp_instance VI_1 {
 20     state BACKUP
 21     interface ens33
 22     virtual_router_id 51
 23     priority 100
 24     advert_int 1
 25     authentication {
 26         auth_type PASS
 27         auth_pass 1111
 28     }
 29     virtual_ipaddress {
 30         192.168.139.100
 31     }

按Master——Backup的顺序启动keepalived
systemctl start keepalived.service
systemctl enable keepalived.service

查看
[root@lb ~]# ip a
1: lo: <LOOPBACK,UP,LOWER_UP> mtu 65536 qdisc noqueue state UNKNOWN group default qlen 1000
    link/loopback 00:00:00:00:00:00 brd 00:00:00:00:00:00
    inet 127.0.0.1/8 scope host lo
       valid_lft forever preferred_lft forever
    inet6 ::1/128 scope host
       valid_lft forever preferred_lft forever
2: ens33: <BROADCAST,MULTICAST,UP,LOWER_UP> mtu 1500 qdisc pfifo_fast state UP group default qlen 1000
    link/ether 00:0c:29:36:bc:b7 brd ff:ff:ff:ff:ff:ff
    inet 192.168.139.102/24 brd 192.168.139.255 scope global noprefixroute ens33
       valid_lft forever preferred_lft forever
    inet 192.168.139.100/32 scope global ens33
       valid_lft forever preferred_lft forever
    inet6 fe80::86e3:1bed:c399:2d81/64 scope link tentative noprefixroute dadfailed
       valid_lft forever preferred_lft forever
    inet6 fe80::fb0:bfc2:7451:bc8/64 scope link tentative noprefixroute dadfailed
       valid_lft forever preferred_lft forever
    inet6 fe80::1c37:df98:e416:4d07/64 scope link tentative noprefixroute dadfailed
       valid_lft forever preferred_lft forever
# 确有192.168.139.100
- 将wordpress的监听地址改为192.168.139.100
[root@lb ~]# vim /usr/local/nginx/conf/nginx.conf

server_name  192.168.139.100;

[root@lb ~]# scp /usr/local/nginx/conf/nginx.conf 192.168.139.104:/usr/local/nginx/conf/

[root@lb ~]# /usr/local/nginx/sbin/nginx -s reload
[root@lb2 ~]# /usr/local/nginx/sbin/nginx
MySQL主从复制
- 基于已安装mysql的主机进行克隆
- 在master节点配置
允许从节点复制
[root@mysql ~]# mysql -uroot -p123456
mysql> grant replication slave on *.* to 'slave'@'192.168.139.%'identified by '123456';

打开binlog日志
[root@mysql ~]# vim /etc/my.cnf
[root@mysql ~]# cat /etc/my.cnf
[client]
port=3306
socket=/tmp/mysql.sock

[mysqld]
user=mysql
basedir=/usr/local/mysql
datadir=/usr/local/mysql/data
server_id=6
socket=/tmp/mysql.sock
log-bin=mysql-index
server-id=1
[root@mysql bin]# service mysql restart

备份数据
[root@mysql ~]# mysqldump -uroot -p123456 --all-databases > /root/mysql.sql

查看master状态
mysql> show master status;
+--------------------+----------+
| File               | Position |
+--------------------+----------+
| mysql-index.000001 |      154 |
+--------------------+----------+
- slave上配置
修改配置文件
[root@mysql2 ~]# vim /etc/my.cnf
[root@mysql2 ~]# cat /etc/my.cnf
[client]
port=3306
socket=/tmp/mysql.sock

[mysqld]
user=mysql
basedir=/usr/local/mysql
datadir=/usr/local/mysql/data
server_id=6
socket=/tmp/mysql.sock
server-id=2

[root@mysql2 ~]# rm -rf /usr/local/mysql/data/auto.cnf

[root@mysql2 ~]# pkill mysql
[root@mysql2 ~]# service mysql start

配置主从
mysql> stop slave;
mysql> change master to
    -> master_host='192.168.139.101',
    -> master_user='slave',
    -> master_password='123456',
    -> master_log_file='mysql-index.000001',
    -> master_log_pos=154;
mysql>  start slave;
mysql> show slave status\G
*************************** 1. row ***************************
               Slave_IO_State: Waiting for master to send event
                  Master_Host: 192.168.139.101
                  Master_User: slave
                  Master_Port: 3306
                Connect_Retry: 60
              Master_Log_File: mysql-index.000001
          Read_Master_Log_Pos: 154
               Relay_Log_File: mysql2-relay-bin.000002
                Relay_Log_Pos: 322
        Relay_Master_Log_File: mysql-index.000001
             Slave_IO_Running: Yes
            Slave_SQL_Running: Yes
MySQL读写分离
解决根分区满了,磁盘空间不够的问题:
[root@mycat ~]# lsblk
NAME            MAJ:MIN RM  SIZE RO TYPE MOUNTPOINT
sda               8:0    0   10G  0 disk
├─sda1            8:1    0    1G  0 part /boot
└─sda2            8:2    0    4G  0 part
  ├─centos-root 253:0    0  3.5G  0 lvm  /
  └─centos-swap 253:1    0  512M  0 lvm  [SWAP]
sdb               8:16   0    5G  0 disk
sr0              11:0    1  973M  0 rom
[root@mycat ~]# df -h
文件系统                 容量  已用  可用 已用% 挂载点
devtmpfs                 1.9G     0  1.9G    0% /dev
tmpfs                    1.9G     0  1.9G    0% /dev/shm
tmpfs                    1.9G   12M  1.9G    1% /run
tmpfs                    1.9G     0  1.9G    0% /sys/fs/cgroup
/dev/mapper/centos-root  3.5G  3.4G   95M   98% /
/dev/sda1               1014M  150M  865M   15% /boot
tmpfs                    378M     0  378M    0% /run/user/0
- 新添加磁盘sdb
格式化
[root@mycat ~]# mkfs.xfs /dev/sdb
meta-data=/dev/sdb               isize=512    agcount=4, agsize=327680 blks
         =                       sectsz=512   attr=2, projid32bit=1
         =                       crc=1        finobt=0, sparse=0
data     =                       bsize=4096   blocks=1310720, imaxpct=25
         =                       sunit=0      swidth=0 blks
naming   =version 2              bsize=4096   ascii-ci=0 ftype=1
log      =internal log           bsize=4096   blocks=2560, version=2
         =                       sectsz=512   sunit=0 blks, lazy-count=1
realtime =none                   extsz=4096   blocks=0, rtextents=0

挂载
[root@mycat ~]# mkdir /mnt/sdb
[root@mycat ~]# mount /dev/sdb /mnt/sdb
[root@mycat ~]# vim /etc/fstab
[root@mycat ~]# tail -1 /etc/fstab
/dev/sdb	/mnt/sdb	xfs	defaults	0 0

查看大文件
[root@mycat ~]# du -sh /*
0	/bin
118M	/boot
0	/dev
32M	/etc
0	/home
0	/lib
0	/lib64
0	/media
0	/mnt
0	/opt
du: 无法访问"/proc/1657/task/1657/fd/4": 没有那个文件或目录
du: 无法访问"/proc/1657/task/1657/fdinfo/4": 没有那个文件或目录
du: 无法访问"/proc/1657/fd/4": 没有那个文件或目录
du: 无法访问"/proc/1657/fdinfo/4": 没有那个文件或目录
0	/proc
360M	/root
12M	/run
0	/sbin
0	/srv
0	/sys
8.0K	/tmp
2.8G	/usr
192M	/var
0	/WP
# 发现/usr/大

[root@mycat ~]# du -sh /usr/*
61M	/usr/bin
0	/usr/etc
0	/usr/games
36K	/usr/include
695M	/usr/lib
126M	/usr/lib64
12M	/usr/libexec
1.7G	/usr/local
42M	/usr/sbin
257M	/usr/share
0	/usr/src
0	/usr/tmp
# 发现/usr/local大

[root@mycat ~]# du -sh /usr/local/*
0	/usr/local/bin
0	/usr/local/etc
0	/usr/local/games
0	/usr/local/include
0	/usr/local/lib
0	/usr/local/lib64
0	/usr/local/libexec
1.7G	/usr/local/mysql
0	/usr/local/sbin
0	/usr/local/share
0	/usr/local/src
# 发现/usr/local/mysql大

将/usr/local/mysql迁移至/mnt/sdb
[root@mycat ~]# mv /usr/local/mysql /mnt/sdb/
[root@mycat ~]# df -h
文件系统                 容量  已用  可用 已用% 挂载点
devtmpfs                 1.9G     0  1.9G    0% /dev
tmpfs                    1.9G     0  1.9G    0% /dev/shm
tmpfs                    1.9G   12M  1.9G    1% /run
tmpfs                    1.9G     0  1.9G    0% /sys/fs/cgroup
/dev/mapper/centos-root  3.5G  2.3G  1.3G   64% /
/dev/sda1               1014M  150M  865M   15% /boot
tmpfs                    378M     0  378M    0% /run/user/0
/dev/sdb                 5.0G  1.7G  3.4G   34% /mnt/sdb

修改/etc/profile
[root@mycat ~]# vim /etc/profile
[root@mycat ~]# tail -1 /etc/profile
export PATH=/mnt/sdb/mysql/bin:$PATH
[root@mycat ~]# source /etc/profile
- 安装jdk
[root@mycat ~]# tar -xzf jdk-8u192-linux-x64.tar.gz
[root@mycat ~]# mv jdk1.8.0_192/ /usr/local/java
[root@mycat ~]# echo "PATH=/usr/local/java/bin:$PATH" >> /etc/profile
[root@mycat ~]# source /etc/profile
[root@mycat ~]# java -version
java version "1.8.0_192"
Java(TM) SE Runtime Environment (build 1.8.0_192-b12)
Java HotSpot(TM) 64-Bit Server VM (build 25.192-b12, mixed mode)
- 安装mycat
[root@mycat ~]# tar -xzf Mycat-server-1.6.5-release-20180122220033-linux.tar.gz
[root@mycat ~]# mv mycat/ /usr/local/mycat
[root@mycat ~]# cd /usr/local/mycat
[root@mycat mycat]# cd bin/
[root@mycat bin]#

[root@mycat bin]# cat >> /etc/hosts <<EOF
	192.168.139.101 mysql
	192.168.139.102 nginx
	192.168.139.103 lb
	192.168.139.104 lb2
	192.168.139.105 mysql2
	192.168.139.106 mycat
	EOF

测试启动
[root@mycat bin]# ./mycat console
- 配置
[root@mycat ~]# cd /usr/local/mycat/conf
[root@mycat conf]# vim schema.xml
[root@mycat conf]# cat schema.xml
<?xml version="1.0"?>
<!DOCTYPE mycat:schema SYSTEM "schema.dtd">
<mycat:schema xmlns:mycat="http://io.mycat/">

	<schema name="TESTDB" checkSQLschema="false" sqlMaxLimit="100" dataNode="dn1"></schema>
	<dataNode name="dn1" dataHost="localhost1" database="wordpress" />
	<dataHost name="localhost1" maxCon="1000" minCon="10" balance="0"
			  writeType="0" dbType="mysql" dbDriver="native" switchType="1"  slaveThreshold="100">
		<heartbeat>select user()</heartbeat>
		<writeHost host="hostM1" url="192.168.139.101:3306" user="www"
				   password="123456">
			<readHost host="hostS2" url="192.168.139.105:3306" user="www" password="123456" />
		</writeHost>
	</dataHost>
</mycat:schema>

启动
[root@mycat bin]# ./mycat start
Starting Mycat-server...
[root@mycat bin]# ss -tnalp|grep 8066
LISTEN     0      100       [::]:8066                  [::]:*                   users:(("java",pid=3351,fd=81))
[root@mycat bin]# ss -tnalp|grep 9066
LISTEN     0      100       [::]:9066                  [::]:*                   users:(("java",pid=3351,fd=77))
- 本机验证
8066端口
[root@mycat conf]# mysql -h127.0.0.1 -uroot -p123456 -P8066
mysql>  show databases;
+----------+
| DATABASE |
+----------+
| TESTDB   |
+----------+

mysql> use TESTDB;

mysql> show tables;
+-----------------------+
| Tables_in_wordpress   |
+-----------------------+
| wp_commentmeta        |
| wp_comments           |
| wp_links              |
| wp_options            |
| wp_postmeta           |
| wp_posts              |
| wp_term_relationships |
| wp_term_taxonomy      |
| wp_termmeta           |
| wp_terms              |
| wp_usermeta           |
| wp_users              |
+-----------------------+

9066端口
[root@mycat bin]# mysql -h127.0.0.1 -uroot -p123456 -P9066

查看帮助
mysql> show @@help;

查看服务器状态
mysql> show @@heartbeat;

- 业务代码配置
[root@lb ~]# vim /usr/local/nginx/html/wordpress/wp-config.php

define( 'DB_NAME', 'TESTDB' );

/** Database username */
define( 'DB_USER', 'root' );

/** Database password */
define( 'DB_PASSWORD', '123456' );

/** Database hostname */
define( 'DB_HOST', '192.168.139.106' );
define( 'DB_PORT', '8066' );

/** Database charset to use in creating database tables. */
define( 'DB_CHARSET', 'utf8' );

/** The database collate type. Don't change this if in doubt. */
define( 'DB_COLLATE', '' );

[root@lb ~]# /usr/local/nginx/sbin/nginx -s reload
[root@lb ~]# scp /usr/local/nginx/html/wordpress/wp-config.php 192.168.139.104:/usr/local/nginx/html/wordpress/

[root@lb2 ~]# /usr/local/nginx/sbin/nginx -s reload
nfs存储图片
- 创建共享目录
[root@nfs ~]# mkdir /upload
[root@nfs ~]# vim /etc/exports
[root@nfs ~]# cat /etc/exports
/upload 192.168.139.0/24(rw,no_root_squash)
[root@nfs ~]# chmod -R 766 /upload
- 安装并开启nfs
[root@nfs ~]# yum install -y nfs-utils.x86_64
[root@nfs ~]# systemctl start rpcbind
[root@nfs ~]# systemctl start nfs
[root@nfs ~]# ss -tnalp |grep 111
LISTEN     0      128          *:111                      *:*                   users:(("rpcbind",pid=2560,fd=8))
LISTEN     0      128       [::]:111                   [::]:*                   users:(("rpcbind",pid=2560,fd=11))

[root@nfs ~]# systemctl enable rpcbind
[root@nfs ~]# systemctl enable nfs
- web服务器(两个)创建共享目录并挂载
yum install rpcbind.x86_64 nfs-utils.x86_64 -y

mkdir /usr/local/nginx/html/wordpress/wp-content/uploads

mount -t nfs 192.168.139.108:/upload /usr/local/nginx/html/wordpress/wp-content/uploads/
内网穿透
- 目的:实现互联互通,除本机外,其他机器也可以通过互联网访问
- 小蝴蝶内网穿透平台,免费内网穿透,可惜只能使用一天
- 又尝试了网传云平台
小蝴蝶安装方式
[root@lb WP]# ls
Linux.zip
[root@lb WP]# yum install -y unzip
已加载插件:fastestmirror
Loading mirror speeds from cached hostfile
 * base: mirrors.bupt.edu.cn
[root@lb WP]# unzip Linux.zip
Archive:  Linux.zip
  inflating: npc/conf/npc.conf
  inflating: npc/conf/multi_account.conf
  inflating: npc/npc

[root@lb WP]# cd npc/
[root@lb npc]# ls
conf  npc
[root@lb npc]# vim npc
[root@lb npc]# chmod +x npc

网穿云安装方式
[root@lb ~]# chmod +x wyc_linux_64
[root@lb ~]# ls
anaconda-ks.cfg  wyc_linux_64
[root@lb ~]# ./wyc_linux_64


Info[2022-03-04 02:11:15]:网云穿启动中
请输入令牌:2wlp8t0i

检测更新中: 当前为最新版本,无需更新 (1.0)

请求数据中: 请求成功

数据解析中: 解析完成

当前时间: 2022-03-04 02:11:53

隧道连接中: 连接成功,正在登录...

Info[2022-03-04 02:11:53]:登录成功,现在您可访问lkub29t0.dongtaiyuming.net.xiaomy.net,将直接映射到您本地的192.168.139.100:80
透平台,免费内网穿透,可惜只能使用一天
- 又尝试了网传云平台
小蝴蝶安装方式
[root@lb WP]# ls
Linux.zip
[root@lb WP]# yum install -y unzip
已加载插件:fastestmirror
Loading mirror speeds from cached hostfile
 * base: mirrors.bupt.edu.cn
[root@lb WP]# unzip Linux.zip
Archive:  Linux.zip
  inflating: npc/conf/npc.conf
  inflating: npc/conf/multi_account.conf
  inflating: npc/npc

[root@lb WP]# cd npc/
[root@lb npc]# ls
conf  npc
[root@lb npc]# vim npc
[root@lb npc]# chmod +x npc

网穿云安装方式
[root@lb ~]# chmod +x wyc_linux_64
[root@lb ~]# ls
anaconda-ks.cfg  wyc_linux_64
[root@lb ~]# ./wyc_linux_64


Info[2022-03-04 02:11:15]:网云穿启动中
请输入令牌:2wlp8t0i

检测更新中: 当前为最新版本,无需更新 (1.0)

请求数据中: 请求成功

数据解析中: 解析完成

当前时间: 2022-03-04 02:11:53

隧道连接中: 连接成功,正在登录...

Info[2022-03-04 02:11:53]:登录成功,现在您可访问lkub29t0.dongtaiyuming.net.xiaomy.net,将直接映射到您本地的192.168.139.100:80


 7667
7667


 被折叠的 条评论
为什么被折叠?
被折叠的 条评论
为什么被折叠?
 到【灌水乐园】发言


