


QQ互联注册一个账号
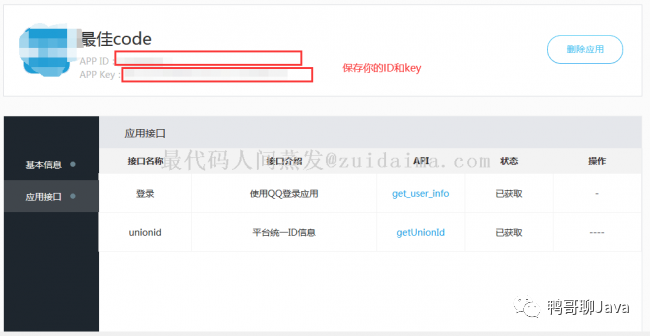
网站地址:https://connect.qq.com/,添加一个应用,具体怎么申请以及需要填写的信息,腾讯官网有详细文档。注册并完成相应信息填写后,可以在应用管理中查到应用的APP ID和APP Key。(注,这个申请还是比较麻烦的,申请了好几次,可能是脸黑吧)成功后如下图:
还需要添加一个回调地址,如下图:

加入jar包
<!-- 第三方QQ登录 --><dependency><groupId>com.qq</groupId><artifactId>Sdk4J</artifactId><version>2</version></dependency>
登录页面
<button type="submit" class="btn btn-default" onclick="qqLogin()">qq登录</button>function qqLogin() {window.open("/login/qqLogin","TencentLogin");}
Controller编写
package com.gbq.boot.web.controller;import cn.hutool.core.util.StrUtil;import com.alibaba.fastjson.JSONObject;import com.gbq.boot.web.bean.User;import com.gbq.boot.web.comment.qqLoginComment.AuthComment;import com.gbq.boot.web.service.UserService;import org.springframework.web.bind.annotation.*;import org.springframework.web.servlet.ModelAndView;import org.springframework.web.servlet.mvc.support.RedirectAttributes;import javax.annotation.Resource;import javax.servlet.http.HttpServletResponse;/*** 登录Controller* @author 阿前* 2019年1月4日09:48:21*/@RestController@RequestMapping("/login")public class LoginController {@Resourceprivate UserService userService;@Resourceprivate AuthComment authComment;@RequestMapping("/index")public ModelAndView index(@ModelAttribute("user") User user) {return new ModelAndView("/shop/index","user",user);}@RequestMapping("/login.html")public ModelAndView toLogin() {return new ModelAndView("login");}@RequestMapping("/qqLogin")public void qqLogin(HttpServletResponse response)throws Exception{//随机产生字符串String state = StrUtil.uuid();String url = authComment.getAuthUrl(state);System.out.println(url);//重定向response.sendRedirect(url);}@GetMapping("/redirect")public ModelAndView getData(@RequestParam(value = "code") String code, RedirectAttributes model){//获取tokenString accessToken = authComment.getAccessToken(code);System.out.println("accessToken"+accessToken);//获取openIdString openId = authComment.getOpenId(accessToken);System.out.println("openId"+openId);//获取用户信息JSONObject userInfo = authComment.getUserInfo(accessToken, openId);String myName = userInfo.getString("nickname");User user = new User(null, "","111111",myName, System.currentTimeMillis(),"是",userInfo.getString("figureurl_2"), userInfo.getString("gender"),1,1,"", "", openId);//通过openId查询User usr = userService.findUsrByOpenId(openId);if (null != usr){user.setId(usr.getId());userService.updateById(user);}else {userService.insert(user);}model.addFlashAttribute("user", user);//重定向return new ModelAndView("redirect:/login/index");}}
AuthComment类编写
package com.gbq.boot.web.comment.qqLoginComment;import com.alibaba.fastjson.JSON;import com.alibaba.fastjson.JSONObject;import org.springframework.stereotype.Component;import java.io.IOException;import java.io.InputStream;import java.net.HttpURLConnection;import java.net.URL;import java.util.regex.Matcher;import java.util.regex.Pattern;import static org.apache.commons.io.IOUtils.toByteArray;@Componentpublic class AuthComment {//QQ 登陆页面的URLprivate final static String AUTHORIZATION_URL ="https://graph.qq.com/oauth2.0/authorize?response_type=code&client_id=%s&redirect_uri=%s&scope=%s";//获取token的URLprivate final static String ACCESS_TOKEN_URL = "https://graph.qq.com/oauth2.0/token?grant_type=authorization_code&client_id=%s&client_secret=%s&code=%s&redirect_uri=%s";// 获取用户 openid 的 URLprivate static final String OPEN_ID_URL = "https://graph.qq.com/oauth2.0/me?access_token=%s";// 获取用户信息的 URL,oauth_consumer_key 为 apiKeyprivate static final String USER_INFO_URL = "https://graph.qq.com/user/get_user_info?access_token=%s&oauth_consumer_key=%s&openid=%s";// 下面的属性可以通过配置读取// QQ 在登陆成功后回调的 URL,这个 URL 必须在 QQ 互联里填写过private static final String CALLBACK_URL = "http://127.0.0.1:8080/login/redirect";// QQ 互联应用管理中心的 APP IDprivate static final String APP_ID = "你的id";// QQ 互联应用管理中心的 APP Keyprivate static final String APP_SECRET = "你的key";/*** QQ 登陆页面的URL* @param scope* @return*/public String getAuthUrl(String scope) {return String.format(AUTHORIZATION_URL, APP_ID, CALLBACK_URL, scope);}/*** 获取Access Token值*/public String getAccessToken(String code){String ur = String.format(ACCESS_TOKEN_URL, APP_ID, APP_SECRET,code, CALLBACK_URL);String compile = "access_token=(\\w*)&";String result = this.getUrl(ur);return this.getMatcher(result,compile);}/*** 获取openId* @param accessToken* @return*/public String getOpenId(String accessToken) {String url = String.format(OPEN_ID_URL, accessToken);String compile = "openid\":\"(\\w*)\"";String result = this.getUrl(url);return this.getMatcher(result,compile);}/*** 获取qq用户信息* @param accessToken* @param openId* @return*/public JSONObject getUserInfo(String accessToken, String openId) {String url = String.format(USER_INFO_URL, accessToken, APP_ID, openId);String result = this.getUrl(url);return JSON.parseObject(result);}private String getMatcher(String result,String compile) {//使用正则表达式解析网址Pattern p = Pattern.compile(compile);Matcher m = p.matcher(result);m.find();return m.group(1);}//解析urlprivate String getUrl(String ur) {try {URL url = new URL(ur);HttpURLConnection conn = null;conn = (HttpURLConnection) url.openConnection();conn.setConnectTimeout(5 * 1000);conn.setRequestMethod("GET");InputStream inStream = conn.getInputStream();byte[] data = toByteArray(inStream);String result = new String(data, "UTF-8");System.out.println(result);return result;} catch (IOException e) {e.printStackTrace();}return null;}}
此处不再编写userService
成功会返回json串

其中主要需要的是,nickname——qq名称,figureurl_qq_x——不同尺寸的qq头像,等等等等!
登录成功跳转到页面


成功后的页面index
<span>欢迎你,${user.name}</span>freemarker配置
注意我使用的是freemarker模板,给大家贴上freemarker配置,已经mvc配置
<dependency><groupId>org.springframework.boot</groupId><artifactId>spring-boot-starter-freemarker</artifactId></dependency>freemarker:template-loader-path: classpath:/templates/# 是否启用模板缓存。suffix: .ftlcache: false# 模板编码。charset: UTF-8# 是否检查模板位置是否存在。check-template-location: truecontent-type: text/html#是否启用freemarkerenabled: truemvc:view:prefix: /templates/suffix: .htmlstatic-path-pattern: /static/**


 869
869


 被折叠的 条评论
为什么被折叠?
被折叠的 条评论
为什么被折叠?
 到【灌水乐园】发言


