


参考:https://github.com/IntelRealSense/librealsense/blob/development/doc/depth-from-stereo.md
Stereoscopic Vision
Depth from Stereo is a classic computer vision algorithm inspired by human binocular vision system. It relies on two parallel view-ports and calculates depth by estimating disparities between matching key-points in the left and right images:
立体深度是一种受人类双目视觉系统启发的经典计算机视觉算法。它依赖于两个平行视图端口,通过估计左右图像中匹配关键点之间的差异来计算深度:
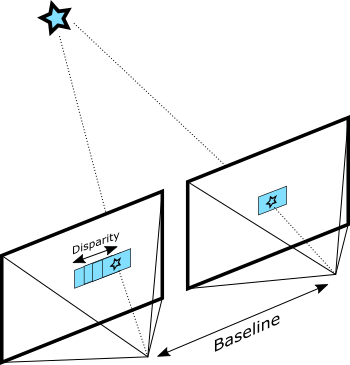
Depth from Stereo algorithm finds disparity by matching blocks in left and right images
立体深度算法通过左右图像的块匹配来寻找视差
Most naive implementation of this idea is the SSD (Sum of Squared Differences) block-matching algorithm:
这种想法最简单的实现是ssd(平方差之和)块匹配算法:
import numpy

fx = 942.8        # lense focal length透镜焦距
baseline = 54.8   # distance in mm between the two cameras两台摄像机之间的距离(mm)
disparities = 128 # num of disparities to consider要考虑的差异数
block = 31        # block size to match要匹配的块大小
units = 0.512     # depth units, adjusted for the output to fit in one byte深度单位,调整为适合一个字节的输出

for i in xrange(block, left.shape[0] - block - 1):
    for j in xrange(block + disparities, left.shape[1] - block - 1):
        ssd = numpy.empty([disparities, 1])

        # calc SSD at all possible disparities
        l = left[(i - block):(i + block), (j - block):(j + block)]
        for d in xrange(0, disparities):
            r = right[(i - block):(i + block), (j - d - block):(j - d + block)]
            ssd[d] = numpy.sum((l[:,:]-r[:,:])**2)

        # select the best match
        disparity[i, j] = numpy.argmin(ssd)

# Convert disparity to depth
depth = np.zeros(shape=left.shape).astype(float)
depth[disparity > 0] = (fx * baseline) / (units * disparity[disparity > 0])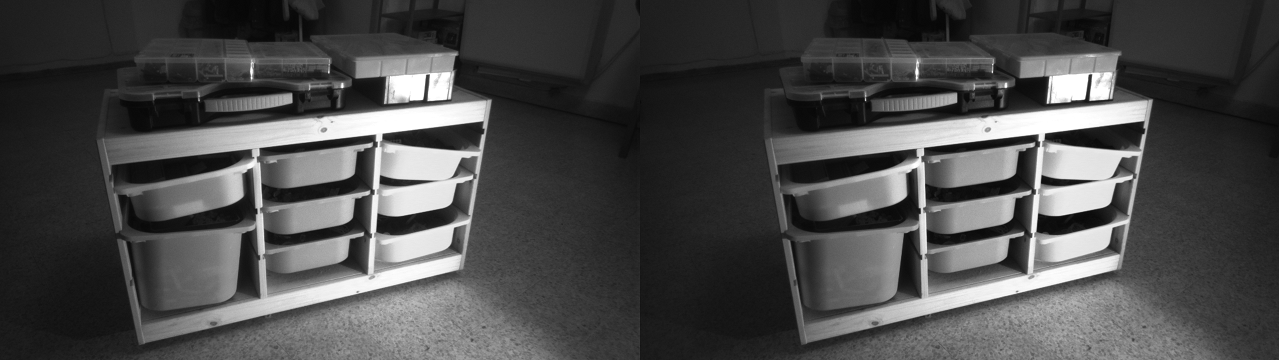
Rectified image pair used as input to the algorithm
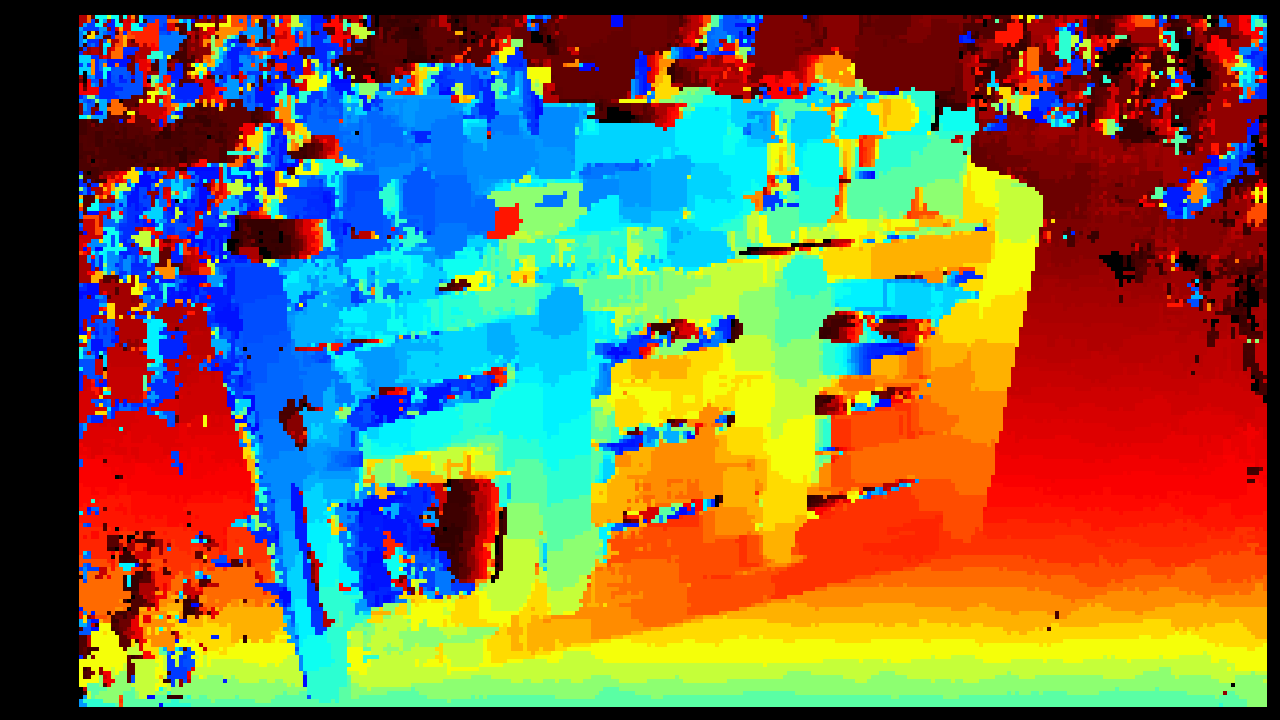
Depth map produced by the naive SSD block-matching implementation
Point-cloud reconstructed using SSD block-matching
There are several challenges that any actual product has to overcome:
- Ensuring that the images are in fact coming from two parallel views
- Filtering out bad pixels where matching failed due to occlusion
- Expanding the range of generated disparities from fixed set of integers to achieve sub-pixel accuracy
任何实际产品都必须克服以下几个挑战:
1.确保图像实际上来自两个平行视图
2.滤除因遮挡导致匹配失败的坏像素
3.扩展固定整数集产生的差异范围以达到亚像素精度
Calibration and Rectification
In reality having two exactly parallel view-ports is challenging. While it is possible to generalize the algorithm to any two calibrated cameras (by matching along epipolar lines), the more common approach is image rectification. During this step left and right images are reprojected to a common virtual plane:
校准和校正
实际上,拥有两个完全平行的视图端口是一项挑战。虽然可以将该算法推广到任意两个标定相机(通过沿极线匹配),但更常见的方法是图像校正。在此步骤中,左图像和右图像将重新投影到公共虚拟平面:
Image Rectification illustrated, source: Wikipedia
Software Stereo
opencv library has everything you need to get started with depth:
- calibrateCamera can be used to generate extrinsic calibration between any two arbitrary view-ports
- stereorectify will help you rectify the two images prior to depth generation
- stereobm and stereosgbm can be used for disparity calculation
- reprojectimageto3d to project disparity image to 3D space
import numpy
import cv2

from matplotlib import pyplot as plt
from matplotlib import cm

left  = cv2.imread("l_active.png", cv2.IMREAD_GRAYSCALE)
right = cv2.imread("r_active.png", cv2.IMREAD_GRAYSCALE)

fx = 942.8        # lense focal length透镜焦距
baseline = 54.8   # distance in mm between the two cameras两台摄像机之间的距离(mm)
disparities = 128 # num of disparities to consider要考虑的差异数
block = 31        # block size to match要匹配的块大小
units = 0.512     # depth units, adjusted for the output to fit in one byte深度单位,调整为适合一个字节的输出

sbm = cv2.StereoBM_create(numDisparities=disparities,
                          blockSize=block)#numDisparities:即最大视差值与最小视差值之差, 窗口大小必须是16的整数倍,int 型。blockSize:匹配的块大小。它必须是> = 1的奇数。通常情况下,它应该在3--11的范围内。这里设置为大于11也可以,但必须为奇数。

# calculate disparities计算差异
disparity = sbm.compute(left, right)
valid_pixels = disparity > 0

# calculate depth data计算深度数据
depth = numpy.zeros(shape=left.shape).astype("uint8")
depth[valid_pixels] = (fx * baseline) / (units * disparity[valid_pixels])

# visualize depth data可视化深度数据
depth = cv2.equalizeHist(depth)
colorized_depth = numpy.zeros((left.shape[0], left.shape[1], 3), dtype="uint8")
temp = cv2.applyColorMap(depth, cv2.COLORMAP_JET)
colorized_depth[valid_pixels] = temp[valid_pixels]
plt.imshow(colorized_depth)
plt.show()


 1655
1655

 被折叠的 条评论
为什么被折叠?
被折叠的 条评论
为什么被折叠?
 到【灌水乐园】发言


