


iBase4J部署总结
序言
最近看到个分布式框架,只有一个字:好。所以部署起来看看。开始的时候说实话遇到了点困难。去码云上看了下,貌似想得到指导要加入一个群,而且需要收费的,反正闲来无事,索性自己搞好了。就当学习了。这里把经验分享一下。希望作者看到不要生气。我只是记录下学习经验。
启动iBase4J前需要做一些准备工作。如安装zookeeper,启动dubbo,配置nginx等。
1 、准备工作
- 安装虚拟机(有点穷,用不起阿里云)
虚拟机我这里用的vmware workstation9,安装挺简单的,我这里就不赘述了。网上一搜一大片。
下载地址:http://www.linuxidc.com/Linux/2012-11/73743.htm linux安装 centos 7。
下载centos7镜像 :
下载地址
:http://www.centoscn.com/CentosSoft/iso/2015/0402/5070.html查看网络地址: centos7取消了ifconfig命令,使用ip addr命令查看IP地址,但是貌似ip addr和ifconfig都能用。前提是需要安装ifconfig。
如果遇到ifconfig command not found,解决方法:yum install net-tools.x86_64(安装ifconfig)配置网络
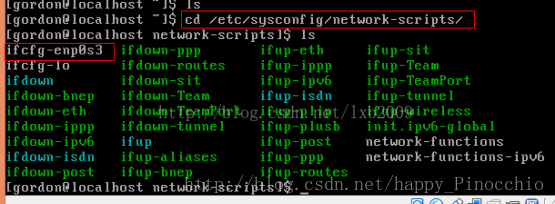
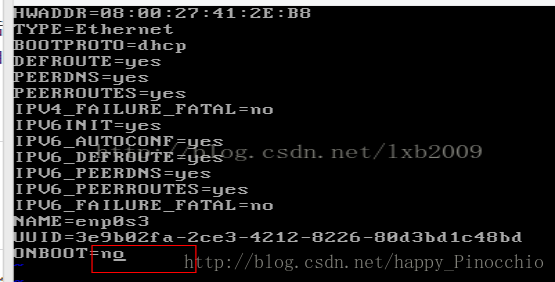
找到以太网卡配置文件/etc/sysconfig/network-scripts/ifcfg-enp**文件,后面的数字好像是随机生成的。
使用Root打开并编辑些文件,将onboot的”no”改为“yes”,然后重启网络。
最后输入:wq 保存并退出,再重启一下network:重启网络命令:# service network restart 这样再启动系统时,网络也会自动启动。
JDK安装配置
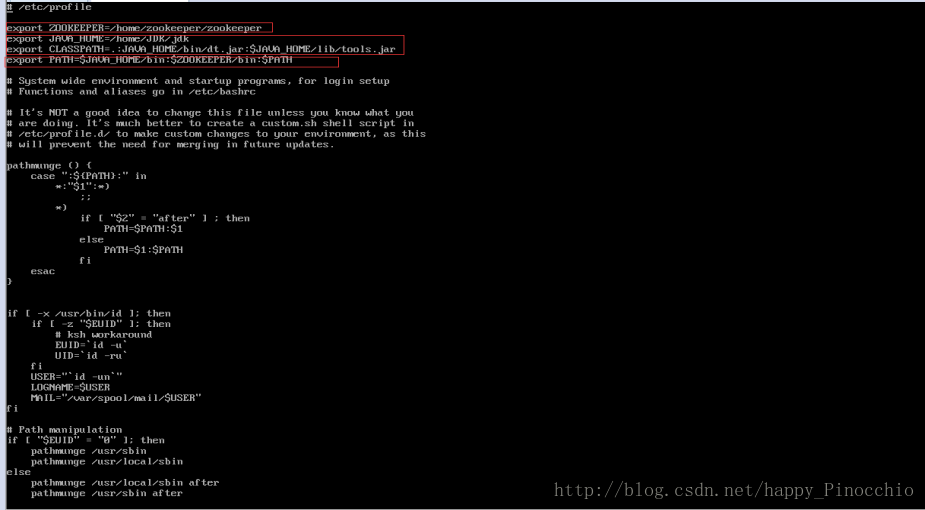
- vi /etc/profile
export JAVA_HOME=/usr/local/jdk1.7.0
export CLASSPATH=.: JAVAHOME/lib/tools.jar: JAVA_HOME/lib/dt.jar
export PATH= JAVAHOME/bin: PATH
使环境变量生效
source /etc/profile
- vi /etc/profile
安装zookeeper
下载zookeeper-3.4.6.tar.gz,
下载地址:http://pan.baidu.com/s/1jIi9nUY解压到/home/zookeeper/,解压命令:tar –zxvf zookeeper-3.4.6.tar.gz ,重命名为zookeeper,重命名命令 :mv zookeeper-3.4.6.tar.gz zookeeper
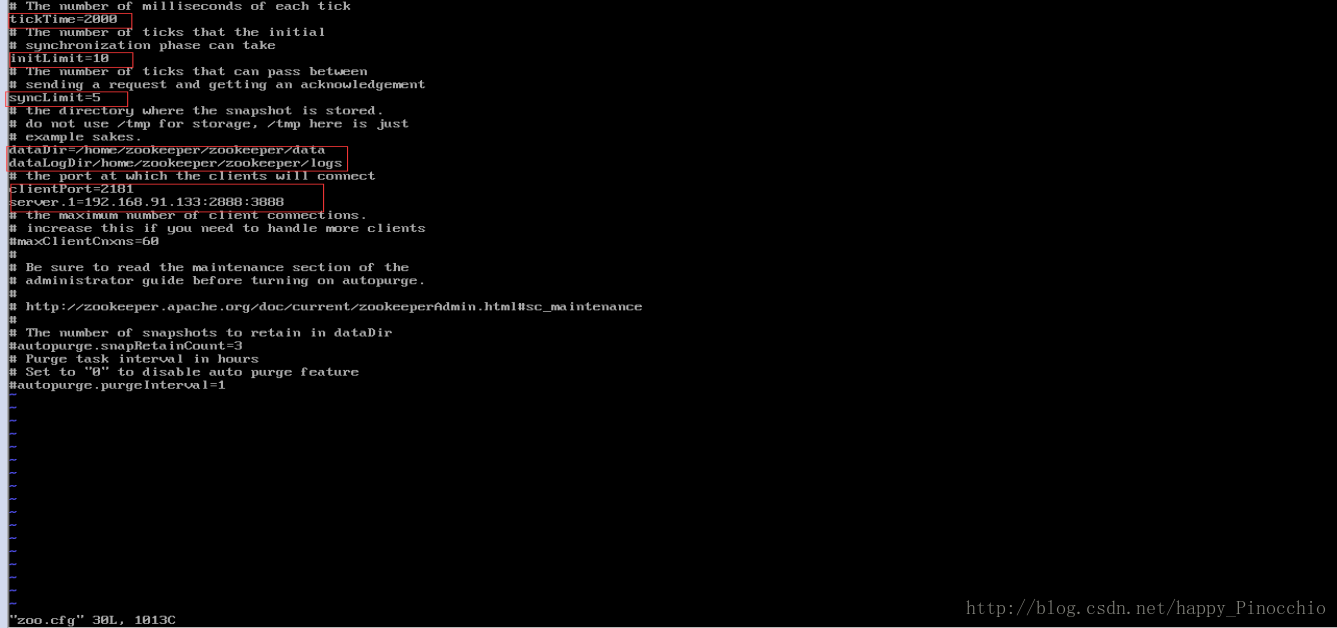
进入/home/zookeeper/zookeeper/conf下,复制zoo_sample.cfg, 命令为cp zoo_sample.cfg zoo.cfg,然后编辑zoo.cfg, 命令为:vi zoo.cfg。
然后保存退出。
•tickTime:这个时间是作为Zookeeper 服务器之间或客户端与服务器之间维持心跳的时间间隔,也就是每个 tickTime 时间就会发送一个心跳。
•dataDir:顾名思义就是 Zookeeper保存数据的目录,默认情况下,Zookeeper 将写数据的日志文件也保存在这个目录里。
•dataLogDir:顾名思义就是Zookeeper 保存日志文件的目录
•clientPort:这个端口就是客户端连接Zookeeper 服务器的端口,Zookeeper 会监听这个端口,接受客户端的访问请求从配置可以看出,需要到zookeeper根目录下创建两个文件夹data,logs。命令:mkdir data/mkdir logs。创建好之后进入data目录。创建myid文件,命令:vi myid,编辑内容:1。如图:
这里的1对应zoo.cfg配置里的server.1=ip:2888:3888配置环境变量
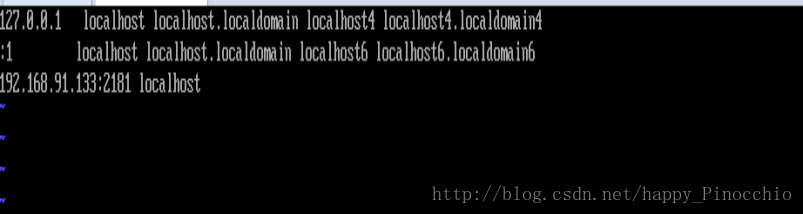
进入到/etc目录下,编辑profile文件(配置环境变量)。命令:vi profile,如图:然后编辑/etc/hosts进行路径映射。vi hosts,本机编辑好如图。
- 接下来启动zookeeper。进入到/home/zookeeper/zookeeper/bin ,启动./zkServer.sh start
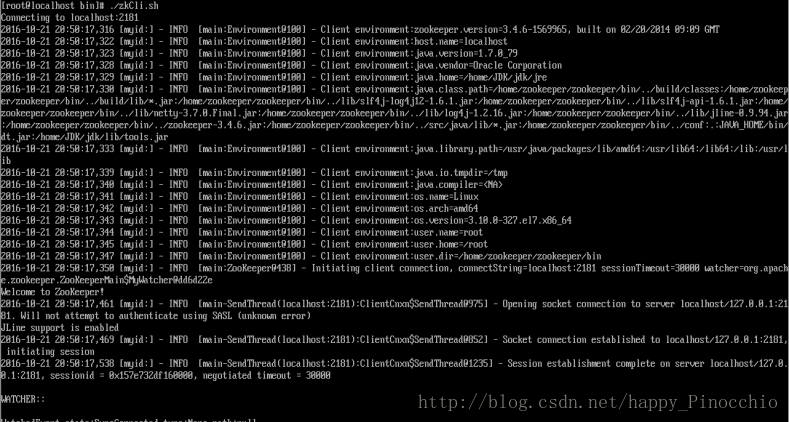
- 启动客户端:./zkCli.sh,出现如下界面
启动成功。
Dubbo启动
- 下载dubbo-admin-2.5.3的war包
下载地址:http://pan.baidu.com/s/1bpzIyvH
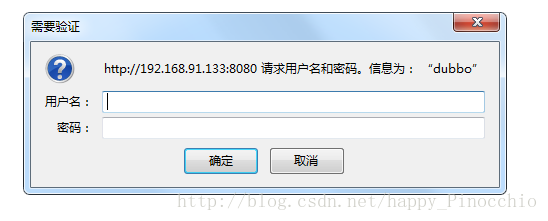
将下载下来的文件解压,找到war包直接放入到tomcat 6下webapps目录,删除ROOT下的所以文件。像部署正常项目一样启动,不再赘述。启动好之后,访问http://192.168.91.133:8080/。出现如下界面:
。输入账号root,密码root进入显示如下界面:
- 下载dubbo-admin-2.5.3的war包
安装redis
- 下载:http://download.redis.io/releases/redis-3.0.1.tar.gz
放到/home/redis目录下解压:tar -zxvf redis-3.0.1.tar.gz,重命名:mv redis-3.0.1 redis。进入到:/home/redis/redis/src
Make
Make install
新建bin和conf目录。
mkdir –p /home/redis/redis/bin
mkdir –p /home/redis/redis/conf
移动/home/redis/redis/redis.conf到/home/redis/redis/conf下。移动/home/redis/redis/src下7个绿色文件到/home/redis/redis/bin下。
进入到conf下,编辑redis.conf
使用linux快捷键查找”:/”,文档内查找快捷键。
daemonize no改为yes:以守护进程方式运行,即后台运行,redis默认启动方式是占用操作界面的。
dir ./改为 /home/redis/redis/data
端口,log,data,pid都需要修改路径。
appendonly no改为yes:指定每次更新之后进行日志记录
bing ip:这里的ip是要连接的客户端机器ip.如果ip为:00.00.00.00则不限制连接客户端ip
备机设置:1、修改备机redis.conf,找到# slaveof改为 slaveof 192.168.132.157 6379(主机地址,备机启动,自动设置为备机)
2、登陆备机客户端(登陆某台redis客户端:redis-cli –h 192.168.132.157 –p 6380
),slaveof 192.168.132.157 6379(主机地址,备机启动,不会自动设置为备机)
将redis添加到开机自启动:
echo “/home/redis/redis/bin/redis-server /home/redis/redis/conf/redis.conf”>>/etc/rc.d/rc.local
启动redis:进入到bin目录,./redis-server /…./conf/redis.conf
redis连接客户端:redisDesktopManager: 链接:http://pan.baidu.com/s/1geM41KR 密码:73gr
- 下载:http://download.redis.io/releases/redis-3.0.1.tar.gz
nginx安装(nginx说实话在linux下映射项目没有成功,所以后来我直接配置到window下的。这里就当做个笔记,学习一下。只惧参考价值,因为都差不多)
安装nginx之前,需要安装几个必备软件。
1、GCC编译器:可用来编译C语言程序。yum install –y gcc
2、GCC是必需的编译工具,还需要C++编译器。yum install –y gcc-c++
3、PCRE库函数库,支持正则表达式。yum install –y pcre pcre-devel
4、Zlib库,zlib库用于对HTTP包的内容做gzip格式压缩。yum install –y zlib zlib-devel
5、OpenSSL开发库。yum install –y openssl openssl-devel下载nginx源码包:http://nginx.org/en/download.html
2、放到/home/nginx下,解压tar –zxvf nginx-1.10.3.tar.gz,重命名mv nginx-1.10.3 nginx,进入nginx,./configure&&make&&make install
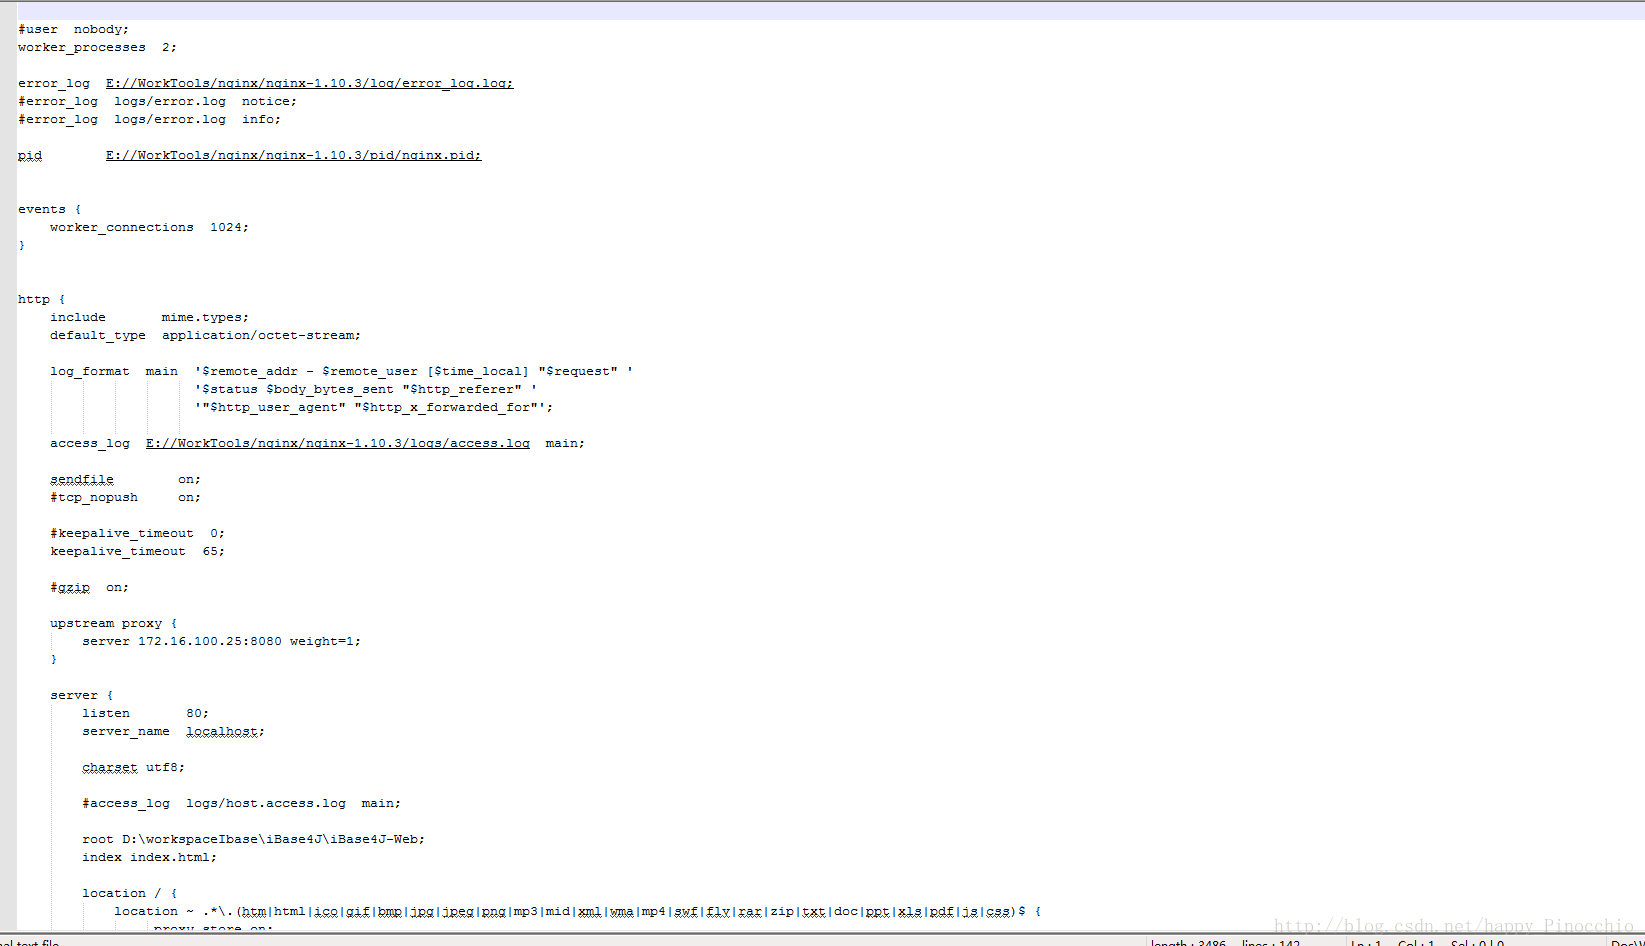
3、编辑/usr/local/nginx/conf/nginx.conf
- 安装虚拟机(有点穷,用不起阿里云)
worker_processes  2;

error_log  /usr/local/nginx/logs/error.log;
 #error_log  logs/error.log  notice;
 #error_log  logs/error.log  info;

pid        /usr/local/nginx/pid/nginx.pid;


events {
    worker_connections  1024;
}
http {
 include mime.types;
 default_type application/octet-stream;
log_format  main  '$remote_addr - $remote_user [$time_local] "$request" '
                  '$status $body_bytes_sent "$http_referer" '
                  '"$http_user_agent" "$http_x_forwarded_for"';

access_log  /usr/local/nginx/logs/access.log  main;

sendfile        on;
#tcp_nopush     on;

#keepalive_timeout  0;
keepalive_timeout  65;

#gzip  on;

upstream proxy {
    server 192.168.132.157:8088 weight=1;
    server 192.168.132.158:8088 weight=1;
}

server {
    listen       80;
    server_name  192.168.132.157;

    charset utf8;

    #access_log  logs/host.access.log  main;

    location / {
        proxy_pass http://proxy;
        proxy_set_header Host      $host;

        proxy_set_header X-Real-IP $remote_addr;

        proxy_set_header X-Forwarded-For $proxy_add_x_forwarded_for;
       # root   html;
       # index  index.html index.htm;
    }

    #error_page  404              /404.html;

    # redirect server error pages to the static page /50x.html
    #
    error_page   500 502 503 504  /50x.html;
    location = /50x.html {
        root   html;
    }

    # proxy the PHP scripts to Apache listening on 127.0.0.1:80
    #
    #location ~ \.php$ {
    #    proxy_pass   http://127.0.0.1;
    #}

    # pass the PHP scripts to FastCGI server listening on 127.0.0.1:9000
    #
    #location ~ \.php$ {
    #    root           html;
    #    fastcgi_pass   127.0.0.1:9000;
    #    fastcgi_index  index.php;
    #    fastcgi_param  SCRIPT_FILENAME  /scripts$fastcgi_script_name;
    #    include        fastcgi_params;
    #}

    # deny access to .htaccess files, if Apache's document root
    # concurs with nginx's one
    #
    #location ~ /\.ht {
    #    deny  all;
    #}
}


# another virtual host using mix of IP-, name-, and port-based configuration
#
#server {
#    listen       8000;
#    listen       somename:8080;
#    server_name  somename  alias  another.alias;

#    location / {
#        root   html;
#        index  index.html index.htm;
#    }
#}


# HTTPS server
#
#server {
#    listen       443 ssl;
#    server_name  localhost;

#    ssl_certificate      cert.pem;
#    ssl_certificate_key  cert.key;

#    ssl_session_cache    shared:SSL:1m;
#    ssl_session_timeout  5m;

#    ssl_ciphers  HIGH:!aNULL:!MD5;
#    ssl_prefer_server_ciphers  on;

#    location / {
#        root   html;
#        index  index.html index.htm;
#    }
#}
}
以上为自己的简单配置,很多都没有配置,如动静分离,数据压缩等。
- 启动nginx,/usr/local/nginx/sbin/nginx –c /usr/local/nginx/conf/nginx.conf
2 、配置iBase4J
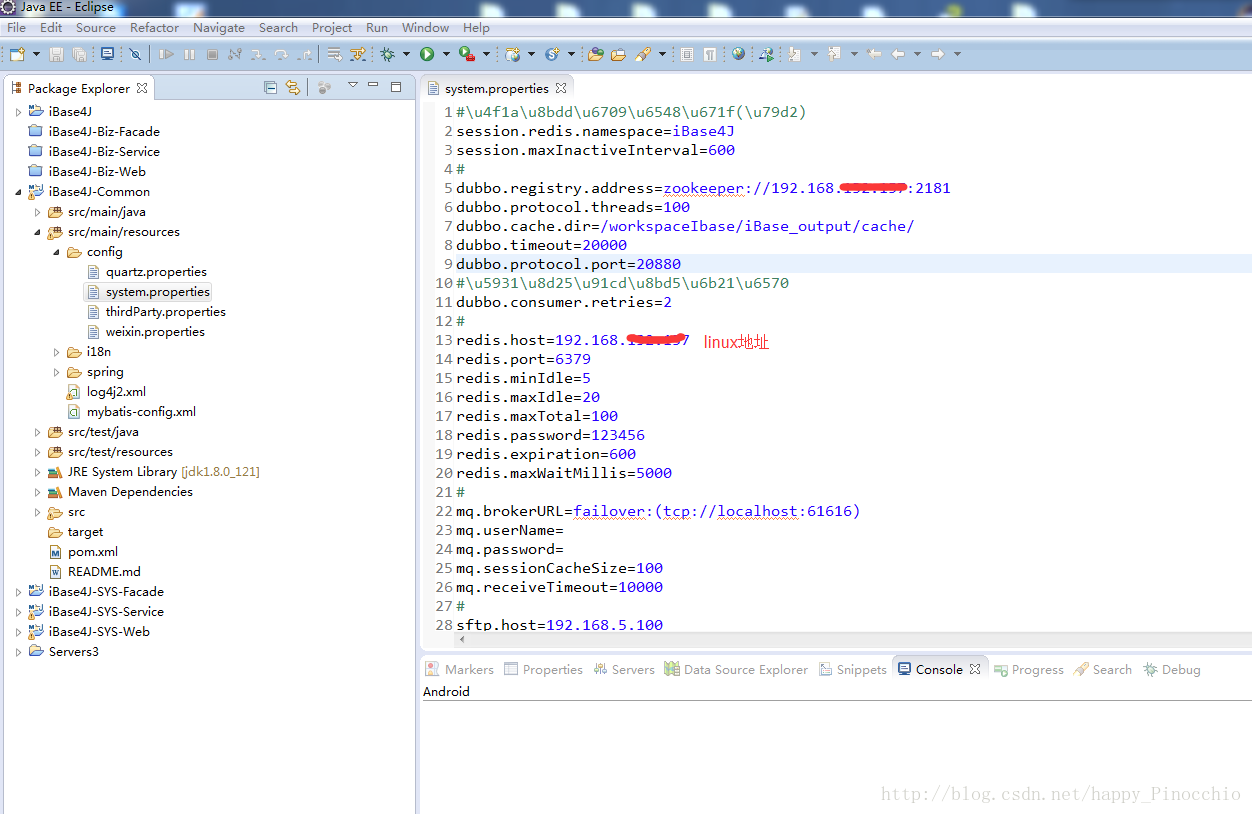
- 从码云上下载下来项目,导入到eclipse里面。配置iBase4J-Common下资源包里面的system.properties文件。直接上图吧:
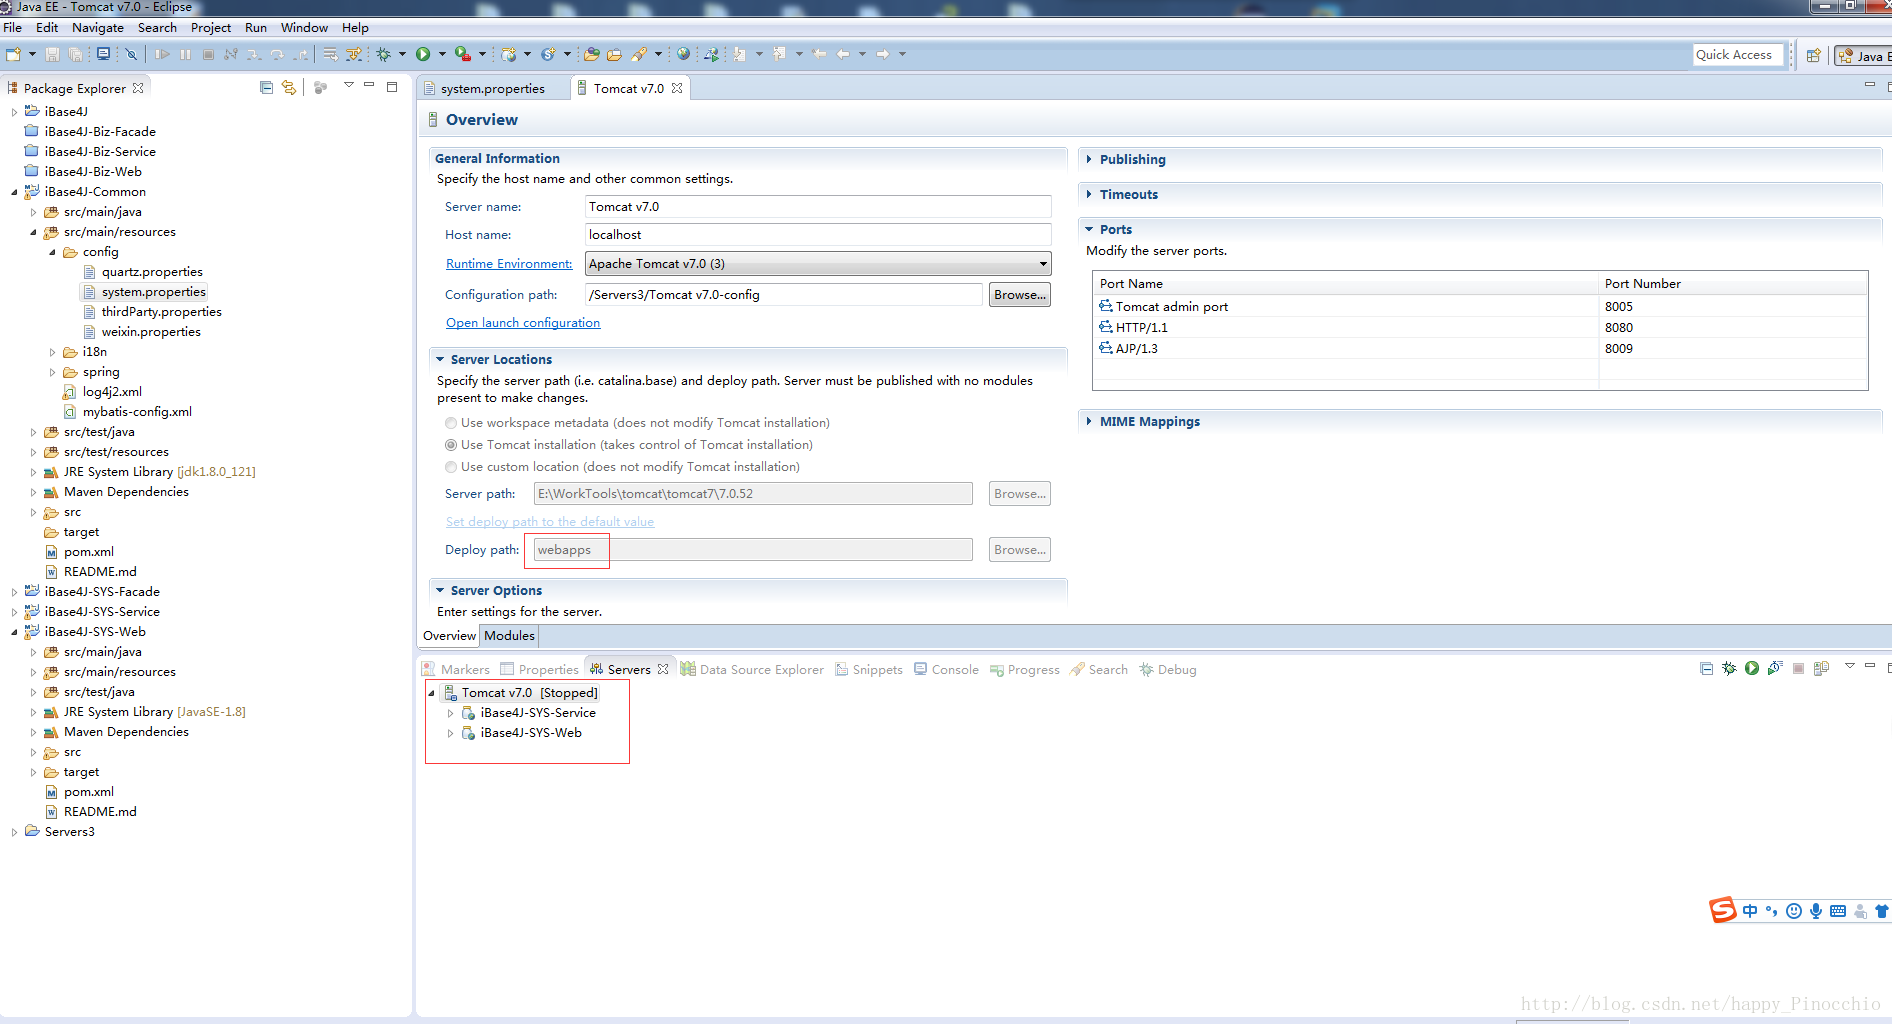
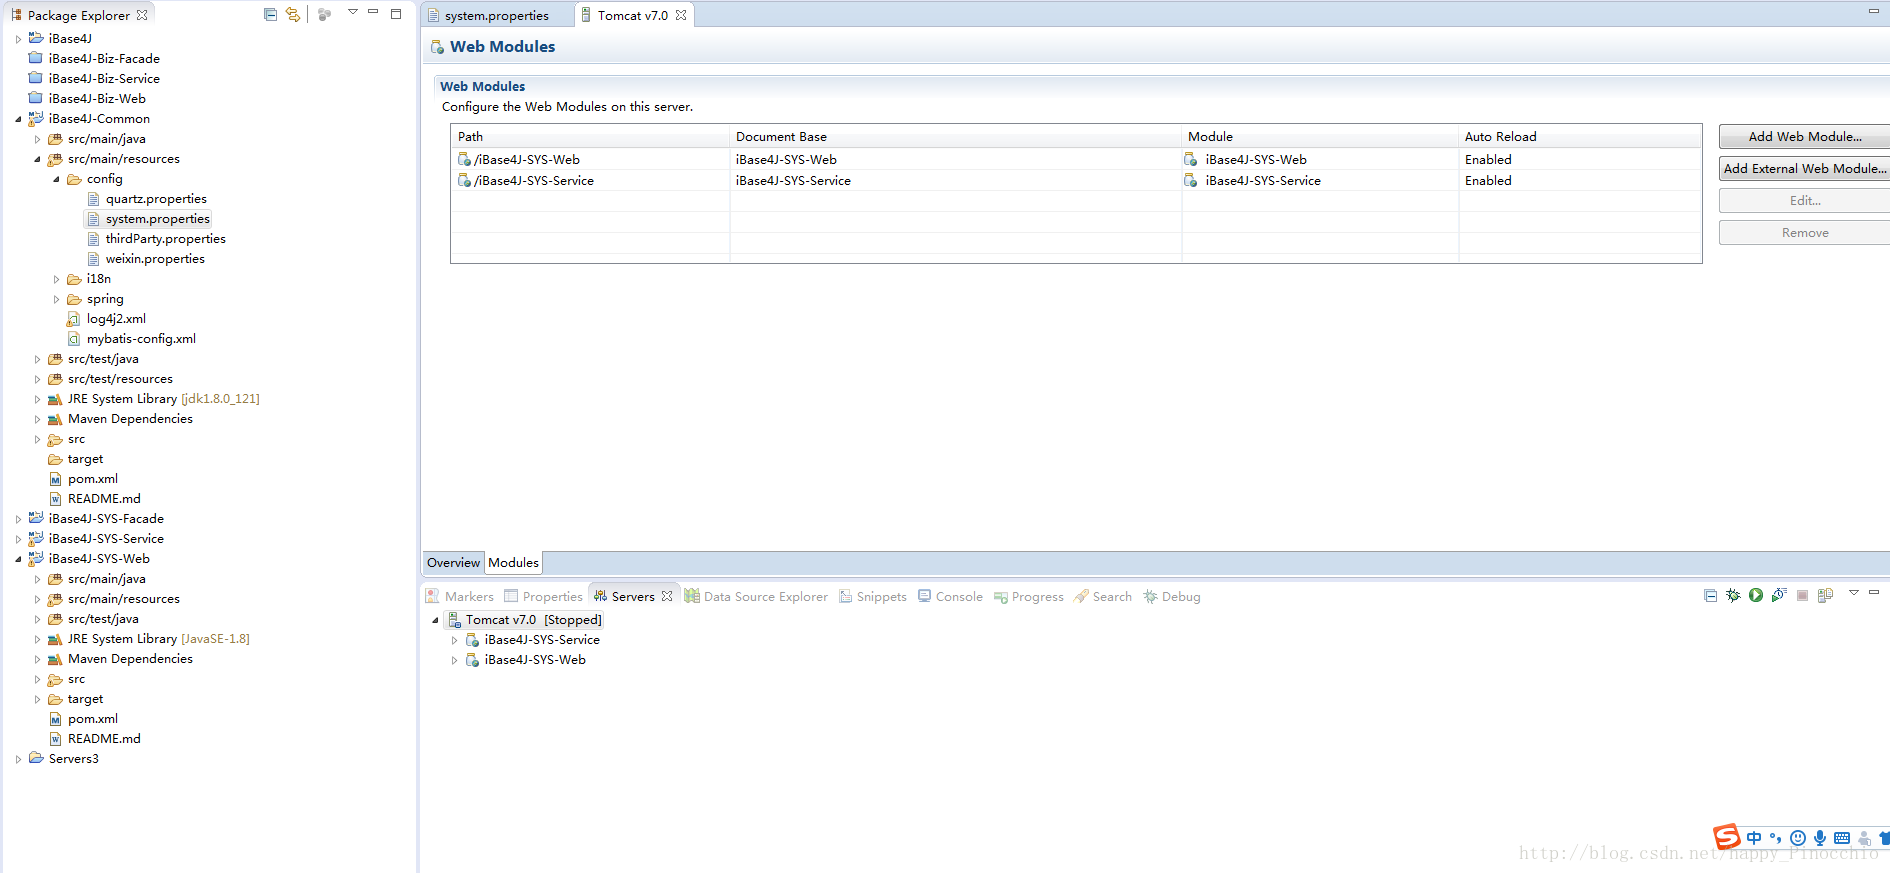
- 启动的条件是JDK必须是1.8,tomcat7。其他的我试了,不行。
- 配置完成之后,直接用普通的启动方式就可以。
- nginx配置
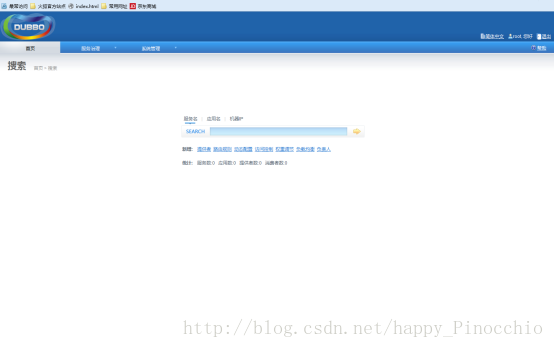
- 配置没有问题,直接启动就可以。启动起来,直接访问localhost应该可以的。
3、总结
- 重要的还是准备工作,项目并不难。这个项目很有学习价值。之前自己也高了个分布式框架,只用到了zookeeper,dubbo,本来也打算放到晒晒,但是看到这个框架之后就彻底放弃了,上传到自己git上就行了,不晒了,有点丢人。。。。试试部署吧,不知道行不行,反正我是行,哈哈。。。开个玩笑。。。。。


 9940
9940


 被折叠的 条评论
为什么被折叠?
被折叠的 条评论
为什么被折叠?
 到【灌水乐园】发言


