


Introduction
Hi everyone again. Today I am going to share my experience with the addJavaScriptInterface method in Android. This class basically helps us call any activity method inside your JavaSscript function. Some of the points I want to mention below:
addJavaScriptInterfacemethod helps us pass values from a webpage to your android XML view or vice-versa.- You can invoke your activity class method form your webpage and vice-versa.
- It can be a very useful feature, or a dangerous security issue when the HTML in the WebView is untrustworthy because an attacker could inject HTML that will execute your code and possibly any code of the attacker's choosing.
- Do not use
addJavascriptInterface()unless all of the HTML in a WebView was written by you.
This article covers the following points:
- Implementation of
JavaScriptInterfaceand the methods. - Using this interface, I am going to bind a textview control.
- Source code of my demo app.
Background
Click here to know more about Webview and the addJavascriptInterface method.
Using the Code
I am going to use an eclipse IDE and I suppose that you have some experience in Android development using the Eclipse IDE. I am going to create a new project named JavaScriptInterfaceDemo. After creating it I am going to add user permission for internet in my AndroidManifest.xml file.
<uses-permission android:name="android.permission.INTERNET"/>
Then I created a folder named www within my asset folder. After that I created a file index.html within the wwwfolder. I have used webview and textview controls in my layout file named main.xml. My main.xml code is given below.
<?xml version="1.0" encoding="utf-8"?>
<LinearLayout xmlns:android="http://schemas.android.com/apk/res/android"
    android:layout_width="fill_parent"
    android:layout_height="fill_parent"
    android:orientation="vertical" >
    <WebView
        android:id="@+id/webView1"
        android:layout_width="match_parent"
        android:layout_height="match_parent"
        android:layout_weight="1" />

    <LinearLayout
	    android:layout_width="fill_parent"
	    android:layout_height="fill_parent"
	    android:orientation="vertical"
	    android:layout_weight="1">
     <TextView

        android:id="@+id/textView1"
        android:layout_width="wrap_content"
        android:layout_height="match_parent"
        android:textAppearance="?android:attr/textAppearanceLarge" />
   </LinearLayout>
</LinearLayout>
In the main.xml file, I have used a parent layout. It's a linear layout and within this layout I have used some child controls and layout which are known as webview, textview controls and linear layout.
Now I am going to write a few more lines in my JavaScriptInterfaceDemoActivity.java class. Let me show my code.
package my.demo;
import my.demo.R;
import android.app.Activity;
import android.content.Context;
import android.os.Bundle;
import android.os.Handler;
import android.webkit.WebView;
import android.widget.TextView;
import android.widget.Toast;


public class JavaScriptInterfaceDemoActivity extends Activity {
	private WebView Wv;
	private TextView myTextView;
	final Handler myHandler = new Handler();

    /** Called when the activity is first created. */
    @Override
    public void onCreate(Bundle savedInstanceState) {
        super.onCreate(savedInstanceState);

        setContentView(R.layout.main);
        Wv = (WebView)findViewById(R.id.webView1);
        myTextView = (TextView)findViewById(R.id.textView1);
        final JavaScriptInterface myJavaScriptInterface
     	= new JavaScriptInterface(this);

        Wv.getSettings().setLightTouchEnabled(true);
        Wv.getSettings().setJavaScriptEnabled(true);
        Wv.addJavascriptInterface(myJavaScriptInterface, "AndroidFunction");
        Wv.loadUrl("file:///android_asset/www/index.html");
    }

    public class JavaScriptInterface {
		Context mContext;

	    JavaScriptInterface(Context c) {
	        mContext = c;
	    }

	    public void showToast(String webMessage){
	    	final String msgeToast = webMessage;
	    	 myHandler.post(new Runnable() {
	             @Override
	             public void run() {
	                 // This gets executed on the UI thread so it can safely modify Views
	                 myTextView.setText(msgeToast);
	             }
	         });

	       Toast.makeText(mContext, webMessage, Toast.LENGTH_SHORT).show();
	    }
    }
}
In my Java class file, I have written some code in the oncreate method. In this method, I find my webview and textview controls using the findViewById method. Then I create a JavaScriptInterface class. This class has a constructor and that constructor initializes the Context class. Now suddenly a question raises in your mind, what is a Context Class?
Context Class is an abstract class whose implementation is provided by the Android system. It allows access to application-specific resources and classes, as well as up-calls for application-level operations such as launching activities, broadcasting and receiving intents, etc.
After the initialization of the constructor, I create a method named showToast with a string parameter. This method has a variable msgeToast string and then I created a Handler named myHandler. Click here to know more about Handlers. This handler has a Post method. In the method declaration, I create a new instance of the Runnable thread class and inside this class I override a run method. This run method sets the value for the textview control.
Now I create an instance of my JavaScriptInterface class in my OnCreate method.
final JavaScriptInterface myJavaScriptInterface = new JavaScriptInterface(this);After the initialization of the JavaScriptInterface class, I added one more line in my OnCreate method:
Wv.addJavascriptInterface(myJavaScriptInterface, "AndroidFunction");Webview provides the addJavascriptInterface method. This method contains two parameters:
- The class instance to bind to JavaScript.
- The name to be used to expose the instance in JavaScript.
For webview, we need to call some settings to enable the JavaScript.
Wv.getSettings().setJavaScriptEnabled(true);And finally, you need to provide a web URL in your web view:
Wv.loadUrl("file:///android_asset/www/index.html");Then I created an HTML file named index.html. This HTML file has a textbox and a Submit button. The HTML file code is given below:
<!DOCTYPE >
<html xmlns="http://www.w3.org/1999/xhtml" debug="true">
    <head>
        <meta http-equiv="Content-Type" content="text/html; charset=utf-8" />
        <meta name="viewport"
          content="width=device-width, initial-scale=1.0, maximum-scale=1.0, user-scalable=0">
        <meta name="apple-mobile-web-app-capable" content="yes">
        <meta name="viewport" content="target-densitydpi=device-dpi" />
        <script type="text/javascript">
           function init()
           {
        	   var testVal = document.getElementById('mytextId').value;
        	   AndroidFunction.showToast(testVal);
           }
        </script>
    </head>
    <body>
        <div style="float: left;width: 50%;">
           <input type="text" style="width: 180px;"
                   name="myText" id="mytextId" />

        </div>
        <div style="clear: both;height: 3px;"> </div>
        <div>
          <input value="submit" type="button" name="submit"
            id="btnSubmit" onclick="javascript:return init();" />
        </div>
    </body>
</html>
This HTML file has a JavaScript function named init. This function calls the activity method.
AndroidFunction.showToast(testVal); AndroidFunction is the same name used to expose the instance in JavaScript. We have already given this name in our addJavascriptInterface method.
Now finally run your app.
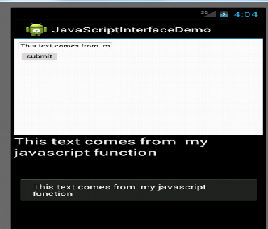
I have also added a toast message in my view.
Points of Interest
This is a very good feature provided by a addJavascriptInterface method. But you must be more careful when you implement this approach. Otherwise the hacker can inject bad HTML inside code. This is the good thing that I have learned during my development phase. I hope you guys will enjoy it and it will help you out in your problems.
Conclusion
For more details on the source code, please download the source code from the link at the top of this article. The source code is easy and well commented.
Hope this tutorial is useful.


 1039
1039


 被折叠的 条评论
为什么被折叠?
被折叠的 条评论
为什么被折叠?
 到【灌水乐园】发言


