


CXF与Spring整合,分两个方面给大家介绍:
1,在传统ssh项目基础上添加Web Service
赋值CXF的jar包
在web.xml配置文件中导入CXF的核心控制器:CXFServlet
在Spring配置文件中导入CXF提供Schema,xml配置文件
在Spring配置文件中使用jaxws:endpoint元素来暴露Web Service
如果要添加拦截器,在jaxws:endpoint元素里添加
inInterceptors,outInterceptors子元素
2,远程调用Web Service服务(让Action依赖远程Web Service的接口)
复制CXF的jar包
在Spring配置文件中导入CXF提供Schema,xml配置文件
在Spring配置文件中使用jaxws:client元素来配置远程Web Service代理
如果要添加拦截器。在jaxws:client元素里添加
inInterceptors,outInterceptors子元素
第一个方面:提供Web Service的服务
服务端:
项目结构:
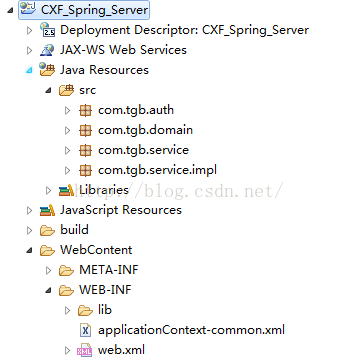
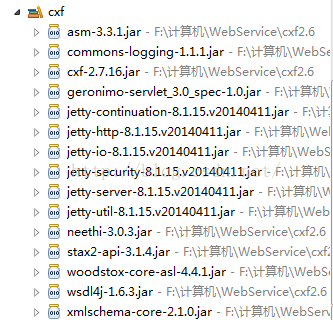
在相应的SSH项目中添加CXF的相关jar包:
Web.xml
<?xml version="1.0" encoding="UTF-8"?>
<web-app xmlns:xsi="http://www.w3.org/2001/XMLSchema-instance"
	xmlns="http://java.sun.com/xml/ns/javaee"
	xsi:schemaLocation="http://java.sun.com/xml/ns/javaee http://java.sun.com/xml/ns/javaee/web-app_2_5.xsd"
	version="2.5">
	<listener>
        <listener-class>org.springframework.web.context.ContextLoaderListener</listener-class>
    </listener>

    <context-param>
        <param-name>contextConfigLocation</param-name>
        <param-value>/WEB-INF/applicationContext-common.xml</param-value>
    </context-param>
      <!--所有来自/*的请求,都交由 CXFServlet来处理-->
    <servlet>
        <servlet-name>HelloWorldService</servlet-name>
        <servlet-class>org.apache.cxf.transport.servlet.CXFServlet</servlet-class>
        <load-on-startup>1</load-on-startup>
    </servlet>
    <servlet-mapping>
        <servlet-name>HelloWorldService</servlet-name>
        <url-pattern>/*</url-pattern>
    </servlet-mapping>

</web-app>
applicationContext-common.xml:
<?xml version="1.0" encoding="UTF-8"?>
<beans xmlns="http://www.springframework.org/schema/beans"
    xmlns:xsi="http://www.w3.org/2001/XMLSchema-instance"
    xmlns:jaxws="http://cxf.apache.org/jaxws"
    xsi:schemaLocation="
		http://www.springframework.org/schema/beans http://www.springframework.org/schema/beans/spring-beans.xsd
		http://cxf.apache.org/jaxws http://cxf.apache.org/schemas/jaxws.xsd">

	<import resource="classpath:META-INF/cxf/cxf.xml" />
    <import resource="classpath:META-INF/cxf/cxf-extension-soap.xml" />
    <import resource="classpath:META-INF/cxf/cxf-servlet.xml" />

    <bean id="helloWorld" class="com.tgb.service.impl.HelloWorldImpl">
    	<property name="userService" ref="userService"></property>
    </bean>

  <!-- 用户的Service -->
    <bean id="userService" class="com.tgb.service.impl.UserServiceImpl">
    </bean>
	<!-- implementor指定webservice的服务提供者 -->
	<!-- address为wsdl的访问地址 -->
    <jaxws:endpoint id="hello" implementor="#helloWorld" address="/hjy" >
		<!-- 添加了2个In拦截器,如果不添加拦截器可直接注释掉如下代码 -->
		<jaxws:inInterceptors>
			<bean class="org.apache.cxf.interceptor.LoggingInInterceptor"/>
			<bean class="com.tgb.auth.AuthInterceptor"/>
		</jaxws:inInterceptors>
		<!-- 如果要配置Out拦截器,使用outInterceptors -->
	</jaxws:endpoint>
</beans>
以上配置已经完成,对于接口和相应的实现参考之前的博客即可,实现中对于new的内容使用spring管理起来
HelloWorldImpl:
package com.tgb.service.impl;
import java.util.Date;
import java.util.List;
import java.util.Map;
import javax.jws.WebService;
import com.tgb.domain.Cat;
import com.tgb.domain.User;
import com.tgb.service.HelloWorld;
import com.tgb.service.UserService;
@WebService(endpointInterface="com.tgb.service.HelloWorld",serviceName="HelloWorldImpl")
public class HelloWorldImpl implements HelloWorld{
private UserService userService;
public UserService getUserService() {
return userService;
}
public void setUserService(UserService userService) {
this.userService = userService;
}
public String sayHi(String name) {
return name+"您好!现在时间为:"+new Date();
}
@Override
public List<Cat> getCatsByUser(User user) {
//在实际项目中,web service组件自己并不会去实现业务功能
//它只是调用业务逻辑组件的方法来暴露web service
// UserService us=new UserServiceImpl();
return userService.getCatsByUser(user);
}
@Override
public Map<String, Cat> getAllCats() {
// UserService us=new UserServiceImpl();
return userService.getAllCats();
}
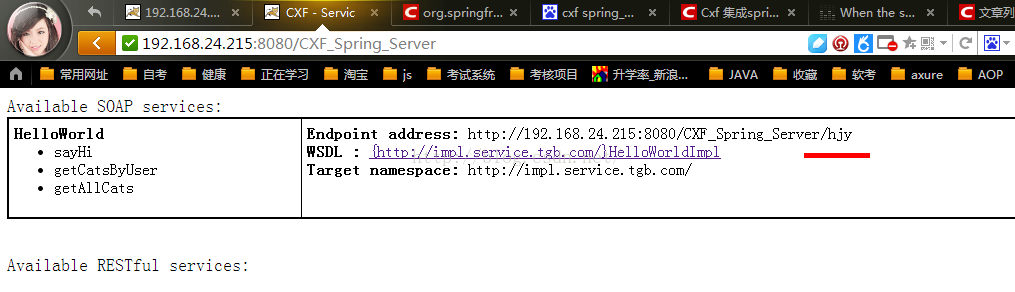
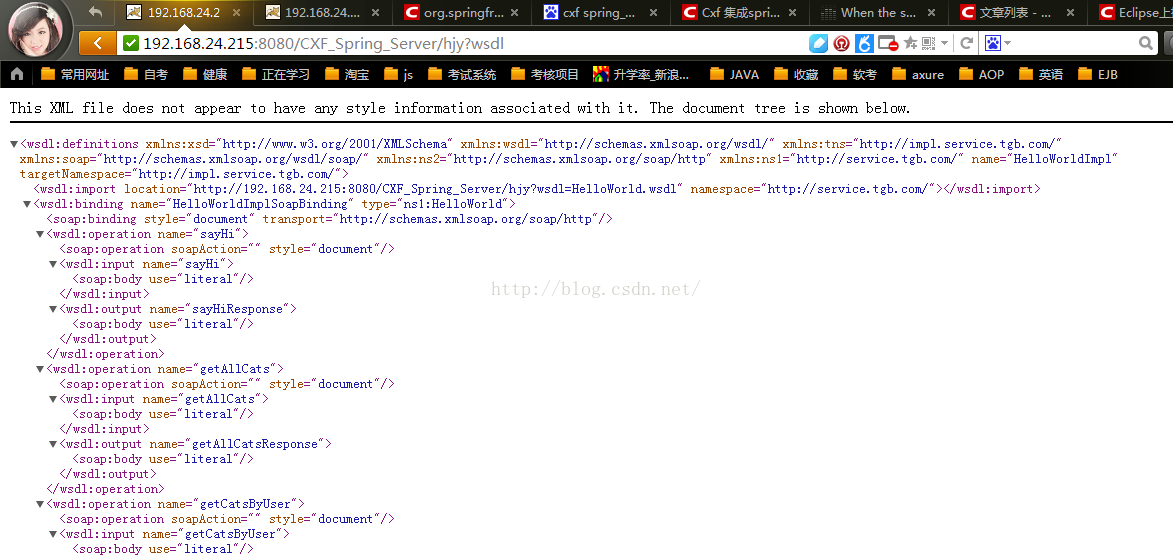
}启动tomcat服务器:
访问如下地址:http://192.168.24.215:8080/CXF_Spring_Server
新建客户端项目CXF_Spring_Client,生成客户端代码:
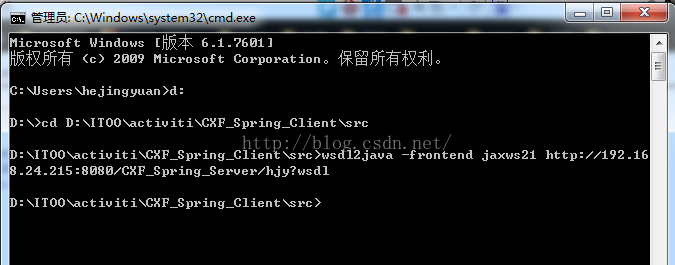
注意:
有些版本拷贝后,类中的super()会出错,要加上-frontendjaxws21,参看如上截图
客户端调用:
package com.tgb.client;
import java.util.List;
import org.apache.cxf.endpoint.Client;
import org.apache.cxf.frontend.ClientProxy;
import com.tgb.auth.AddHeaderInterceptor;
import com.tgb.service.Cat;
import com.tgb.service.HelloWorld;
import com.tgb.service.User;
import com.tgb.service.impl.HelloWorldImpl;
public class client {
public static void main(String[] args){
HelloWorldImpl factory=new HelloWorldImpl();
//此处返回的只是远程Web Service的代理
HelloWorld hw=factory.getHelloWorldImplPort();
/**
* 添加的拦截器
*/
Client client=ClientProxy.getClient(hw);
//参数为输入的用户名,密码
client.getOutInterceptors().add(new AddHeaderInterceptor("hejingyuan","hjy"));
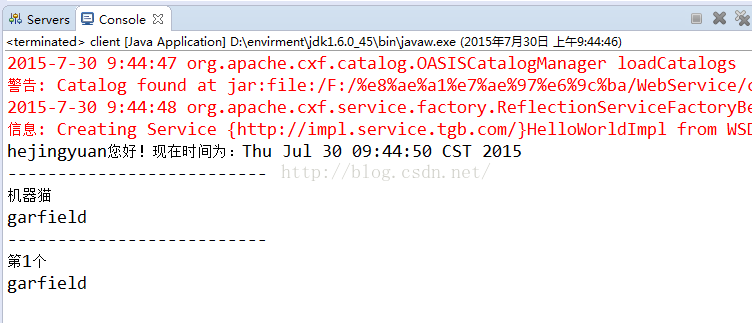
System.out.println(hw.sayHi("hejingyuan"));
System.out.println("--------------------------");
User user=new User();
user.setId(20);
user.setName("孙悟空");
user.setPass("111");
user.setAddress("花果山");
List<Cat> cats=hw.getCatsByUser(user);
for(Cat cat:cats){
System.out.println(cat.getName());
}
System.out.println("--------------------------");
System.out.println(hw.getAllCats().getEntry().get(0).getKey());
System.out.println(hw.getAllCats().getEntry().get(0).getValue().getName());
}
}
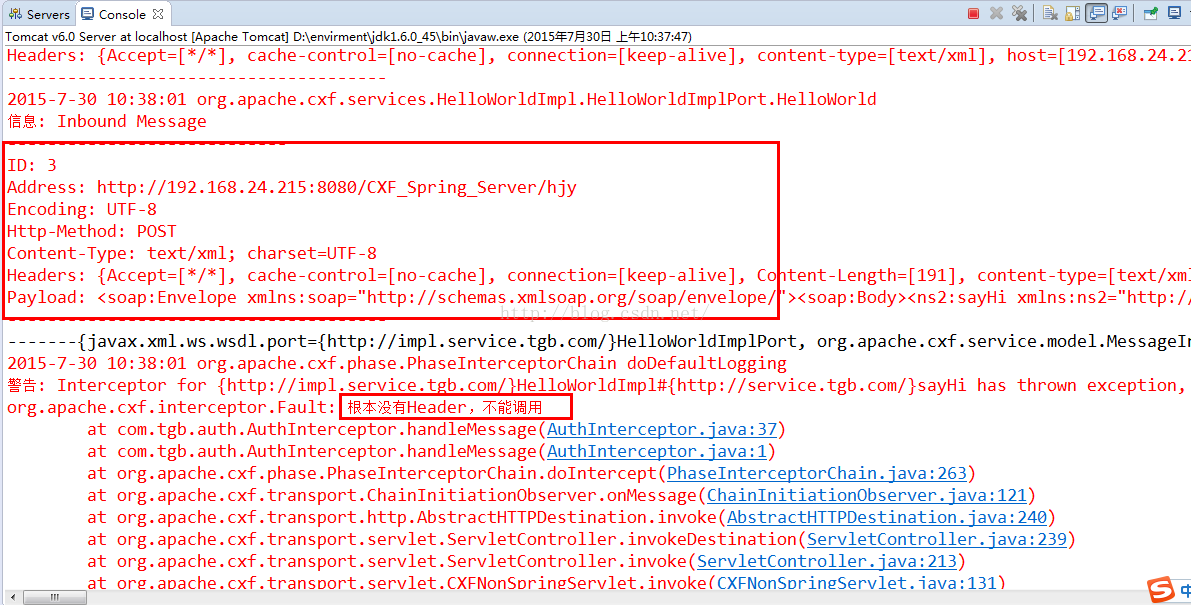
由于我们在服务端添加了拦截器,故客户端必须要添加相应的拦截器给服务端提供参数,否则客户端调用失败
另一个方面:调用远程的Web Service服务
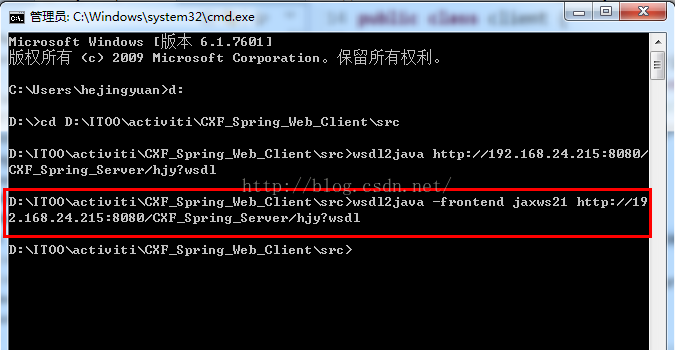
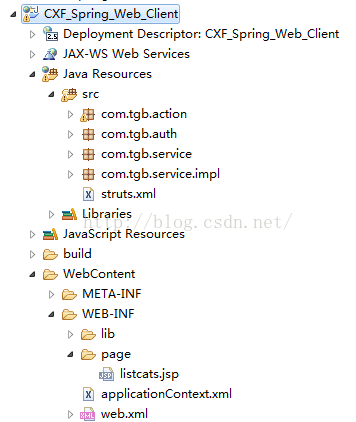
新建客户端项目CXF_Spring_Web_Client,生成客户端代码
web.xml:
<?xml version="1.0" encoding="UTF-8"?>
<web-app version="2.5" xmlns="http://java.sun.com/xml/ns/javaee"
	xmlns:xsi="http://www.w3.org/2001/XMLSchema-instance"
	xsi:schemaLocation="http://java.sun.com/xml/ns/javaee
	http://java.sun.com/xml/ns/javaee/web-app_2_5.xsd">

	<context-param>
		<param-name>contextConfigLocation</param-name>
		<param-value>/WEB-INF/applicationContext.xml</param-value>
	</context-param>
	<listener>
		<listener-class>org.springframework.web.context.ContextLoaderListener</listener-class>
	</listener>

	<filter>
		<filter-name>struts2</filter-name>
		<filter-class>
			org.apache.struts2.dispatcher.ng.filter.StrutsPrepareAndExecuteFilter</filter-class>
	</filter>
	<filter-mapping>
		<filter-name>struts2</filter-name>
		<url-pattern>/*</url-pattern>
	</filter-mapping>

</web-app>
applicationContext.xml:
<?xml version="1.0" encoding="UTF-8"?>
<beans xmlns="http://www.springframework.org/schema/beans"
    xmlns:xsi="http://www.w3.org/2001/XMLSchema-instance"
    xmlns:jaxws="http://cxf.apache.org/jaxws"
    xsi:schemaLocation="
		http://www.springframework.org/schema/beans http://www.springframework.org/schema/beans/spring-beans.xsd
		http://cxf.apache.org/jaxws http://cxf.apache.org/schemas/jaxws.xsd">

	<import resource="classpath:META-INF/cxf/cxf.xml" />
	<import resource="classpath:META-INF/cxf/cxf-extension-soap.xml" />
	<import resource="classpath:META-INF/cxf/cxf-servlet.xml" />

	<bean id="listCatsAction" class="com.tgb.action.ListCatsAction">
		<property name="helloWorld" ref="helloWorld"></property>
	</bean>

	<!-- 配置远程webservice代理 -->
	<!-- id="helloWorld"对应 action setHelloWorld() -->
	<jaxws:client id="helloWorld"
		serviceClass="com.tgb.service.HelloWorld"
		address="http://localhost:8080/CXF_Spring_Server/hjy">
		<jaxws:outInterceptors>
		<!-- 配置输出拦截器  -->
			<bean class="com.tgb.auth.AddHeaderInterceptor" >
				<constructor-arg value="hejingyuan"/>
				<constructor-arg value="hjy"/>
			</bean>
		</jaxws:outInterceptors>
	</jaxws:client>

</beans>Struts.xml:
<?xml version="1.0" encoding="UTF-8" ?>
<!DOCTYPE struts PUBLIC "-//Apache Software Foundation//DTD Struts Configuration 2.1//EN" "http://struts.apache.org/dtds/struts-2.1.dtd">
<struts>

	<package name="default" namespace="/" extends="struts-default">
		<action name="listCats" class="com.tgb.action.ListCatsAction" >
			<result name="SUCCESS">/WEB-INF/page/listcats.jsp</result>
		</action>
	</package>
</struts>
调用代码:
package com.tgb.action;
import org.apache.cxf.endpoint.Client;
import org.apache.cxf.frontend.ClientProxy;
import com.opensymphony.xwork2.ActionSupport;
import com.tgb.auth.AddHeaderInterceptor;
import com.tgb.service.HelloWorld;
public class ListCatsAction extends ActionSupport{
private HelloWorld helloWorld;
public HelloWorld getHelloWorld() {
return helloWorld;
}
public void setHelloWorld(HelloWorld helloWorld) {
this.helloWorld = helloWorld;
}
@Override
public String execute() throws Exception {
/**
* 添加的拦截器
*/
Client client=ClientProxy.getClient(helloWorld);
//参数为输入的用户名,密码
client.getOutInterceptors().add(new AddHeaderInterceptor("hejingyuan","hjy"));
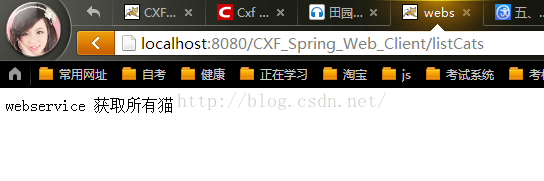
helloWorld.sayHi("hejingyuan");
return "SUCCESS";
}
}最终的项目结构:
总结:
以上与Spring的整合,概括的说,在应用Spring的框架过程中,一种是我们如何对外提供服务,另一种是我们如何获取已经提供好的服务。在整个过程中,只有几个关键点,很简单,但是要注意jar包的版本问题。


 1273
1273


 被折叠的 条评论
为什么被折叠?
被折叠的 条评论
为什么被折叠?
 到【灌水乐园】发言


