


今天简单的使用一下google analytics(分析)
官方网址http://www.google.com/analytics/
1.创建账号,用gmail邮件就可以
2.登录后应是以下界面,点击“管理”,点击“+新媒体资源(网络或应用版)”
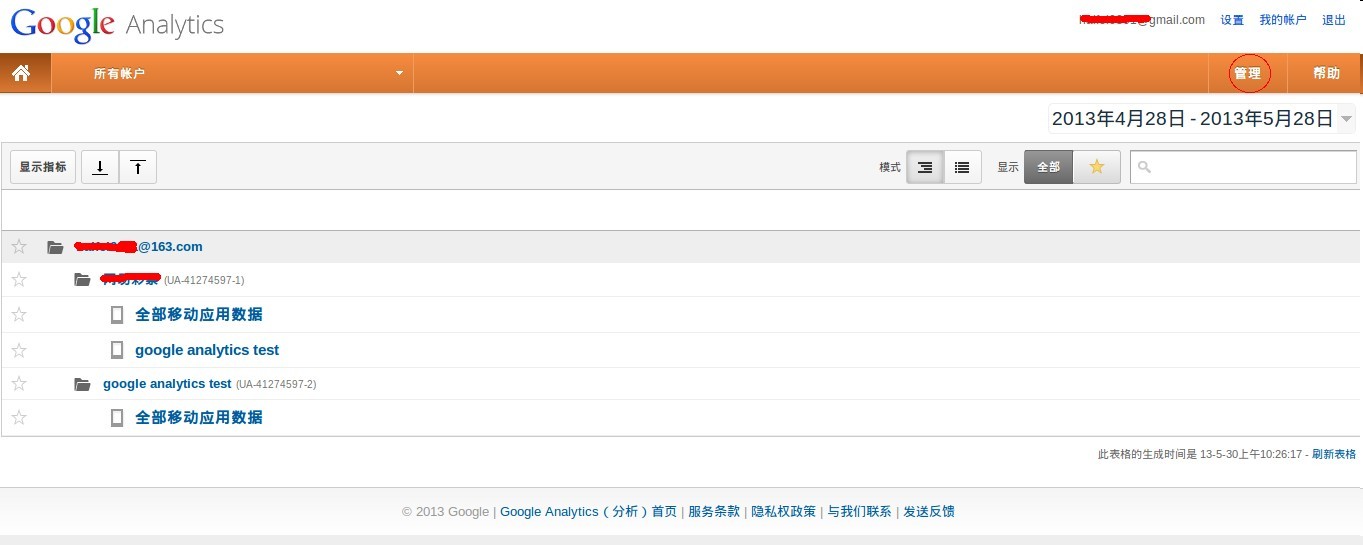
根据自己的需要新建完媒体资源后,显示如下:

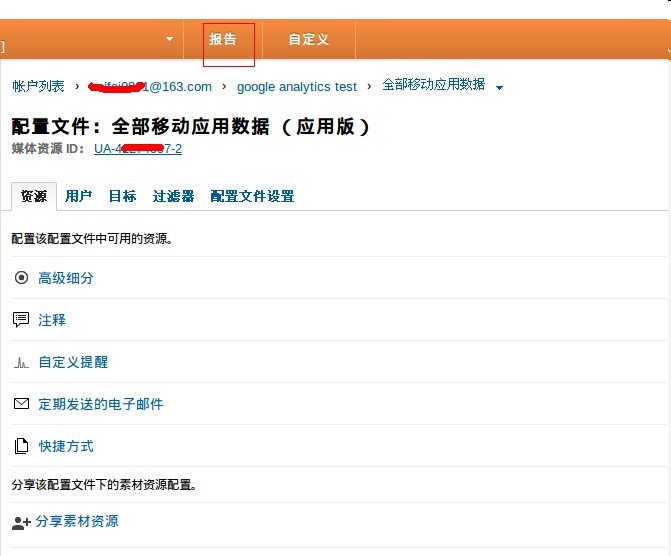
下载相应的SDK ,这里只用android sdk 。
三,新建 android apk 试用
1.点击上图的指南会有官方文档说明,可以根据官方的方法来测试(链接:https://developers.google.com/analytics/devguides/collection/android/v2/)
2.官方说明
新建一个android 工程
先把下载下来的sdk解压出来,将里面的libGoogleAnalyticsV2.jar放到 android工程下的lib中
1. Updating AndroidManifest.xml
Update your AndroidManifest.xml file by adding the followingpermissions:
<uses-permission android:name="android.permission.INTERNET" />
<uses-permission android:name="android.permission.ACCESS_NETWORK_STATE" />
2. Adding EasyTracker methods
Add the send methods to the onStart() andonStop() methods of each of your Activities as in thefollowing example:
/**
 * An example Activity in your app with Analytics
 * implemented.
 */
public class myTrackedActivity extends Activity {
  @Override
  public void onCreate(Bundle savedInstanceState) {
    super.onCreate(savedInstanceState);
  }

  @Override
  public void onStart() {
    super.onStart();
    ... // The rest of your onStart() code.
    EasyTracker.getInstance().activityStart(this); // Add this method.
  }

  @Override
  public void onStop() {
    super.onStop();
    ... // The rest of your onStop() code.
    EasyTracker.getInstance().activityStop(this); // Add this method.
  }
}
Note that EasyTracker requires Context before you can call itsmethods. In the above example, this line:
EasyTracker.getInstance.activityStart(this);
takes care of setting the context. However if you need to make EasyTrackercalls in other classes or methods, you'll need to call EasyTracker'ssetContext(Context ctx) method first:
// Set Context before using EasyTracker. Note that the SDK will
// use the application context.
EasyTracker.getInstance().setContext(this);

// EasyTracker is now ready for use.
3. Creating your analytics.xml file
In version 2 of the Google Analytics SDK for Android, configuration optionsare managed from an xml resource file, called analytics.xmlin this guide. You'll need to create this file in your project'sres/values directory and add your tracking ID. The followingexample shows how you can add your tracking ID, and enable Activityand exception measurement:
<?xml version="1.0" encoding="utf-8" ?>

<resources>
  <!--Replace placeholder ID with your tracking ID-->
  <string name="ga_trackingId">UA-XXXX-Y</string>

  <!--Enable automatic activity tracking-->
  <bool name="ga_autoActivityTracking">true</bool>

  <!--Enable automatic exception tracking-->
  <bool name="ga_reportUncaughtExceptions">true</bool>
</resources>
Your lint checker may warn you about the use of the figure dash ('-') in yourtracking ID. You can suppress that warning by adding additional attributes to your <resources> tag:
<resources xmlns:tools="http://schemas.android.com/tools"
tools:ignore="TypographyDashes">
Important: Do not encode dashes in the
ga_trackingId string. Doing so will prevent you from seeing anydata in your reports.
See the analytics.xml parameters reference for thecomplete list of parameters you can use to configure your implementation.
Congratulations! Your app is now setup to send data to GoogleAnalytics.
下面这个activity是我自己写的,大家可以参考
package com.example.androidtool;

import com.google.analytics.tracking.android.EasyTracker;
import com.google.analytics.tracking.android.GoogleAnalytics;
import com.google.analytics.tracking.android.Tracker;

import android.os.Bundle;
import android.app.Activity;

public class GoogleAnalyticsActivity extends Activity {
	 private Tracker mGaTracker;
	  private GoogleAnalytics mGaInstance;

	@Override
	protected void onCreate(Bundle savedInstanceState) {
		super.onCreate(savedInstanceState);
		setContentView(R.layout.activity_google_analytics);

		EasyTracker.getInstance().setContext(getApplicationContext());

		// Get the GoogleAnalytics singleton. Note that the SDK uses
	    // the application context to avoid leaking the current context.
	    mGaInstance = GoogleAnalytics.getInstance(this);

	    mGaInstance.setDebug(true);

	    // Use the GoogleAnalytics singleton to get a Tracker.
	    mGaTracker = mGaInstance.getTracker(getString(R.string.ga_trackingId)); // Placeholder tracking ID.
	     // The rest of your onCreate() code.

	}

	@Override
	public void onStart() {
		super.onStart();
		// The rest of your onStart() code.
		EasyTracker.getInstance().activityStart(this); // Add this method.

		 // Send a screen view when the Activity is displayed to the user.
	    mGaTracker.sendView("/HomeScreen");

	}

	@Override
	public void onStop() {
		super.onStop();
		// The rest of your onStop() code.
		EasyTracker.getInstance().activityStop(this); // Add this method.
	}


}
以上完成后,就可以安装apk 试验了
需要注意的几个地方:
1. resource 里面的<string name="ga_trackingId">UA-XXXX-Y</string> 需要改成自己的跟踪ID
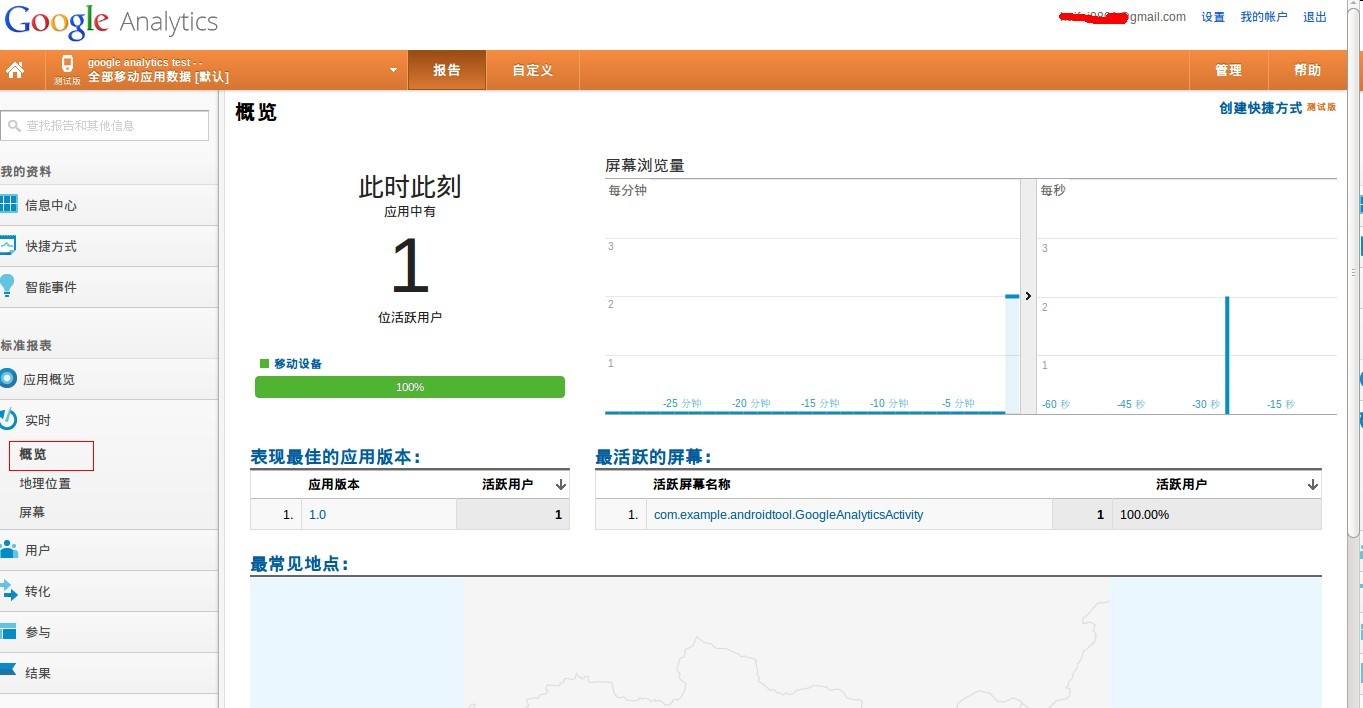
四。到 google analytics 查看报告
点击完报告完后,应该是下面内容
我这里选的是实时中的概览,如下图,如果你也显示1位活跃用户的话,恭喜你已经通了
在这里需要说明的一下是”时实“下是可以直接产生效果的
其它的“应用概览”,“用户”,之类的选项可能不会立即反映出来。第二天你再查看时会有分析数据


 4251
4251

 被折叠的 条评论
为什么被折叠?
被折叠的 条评论
为什么被折叠?
 到【灌水乐园】发言


