


文章目录
Spring Boot学习笔记-进阶(3)
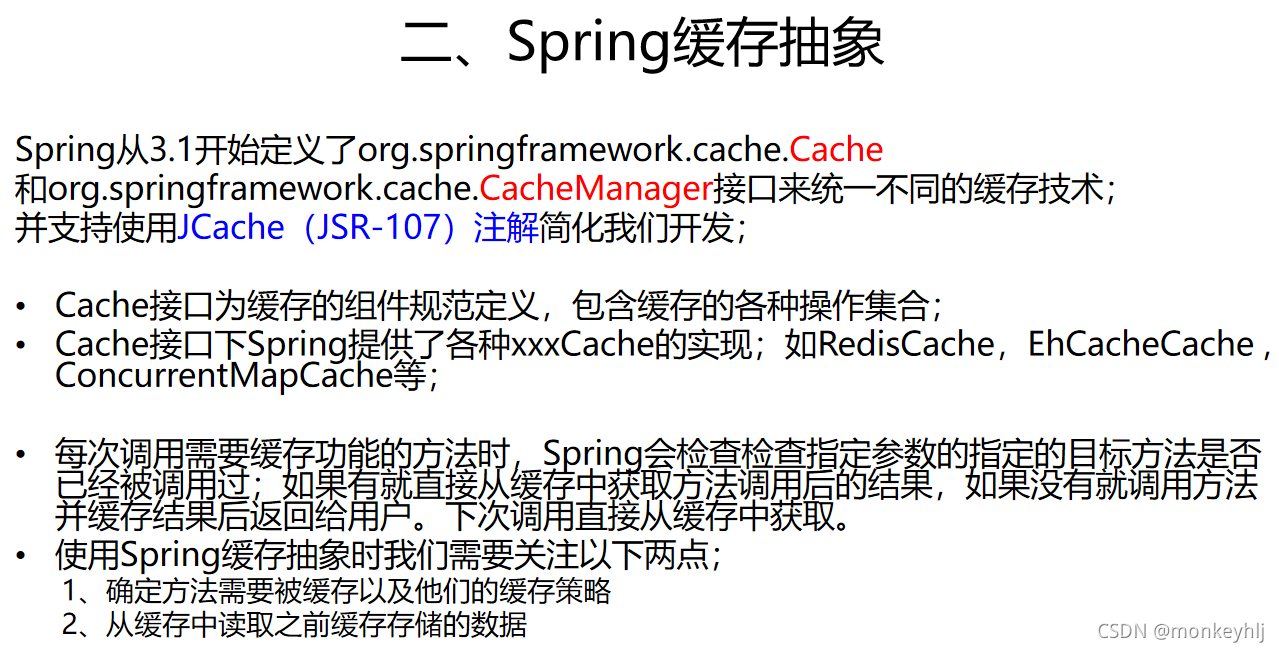
一、Spring Boot与缓存
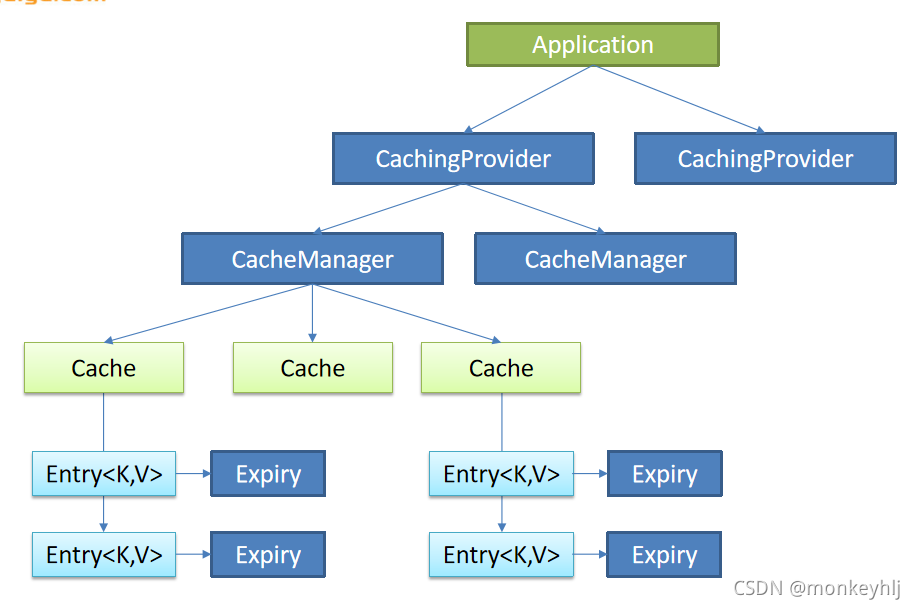
JSR-107、Spring缓存抽象、整合Redis

package com.atguigu.cache.service;
import com.atguigu.cache.bean.Employee;
import com.atguigu.cache.mapper.EmployeeMapper;
import org.springframework.beans.factory.annotation.Autowired;
import org.springframework.cache.annotation.*;
import org.springframework.stereotype.Service;
@CacheConfig(cacheNames="emp"/*,cacheManager = "employeeCacheManager"*/) //抽取缓存的公共配置
@Service
public class EmployeeService {
@Autowired
EmployeeMapper employeeMapper;
/**
* 将方法的运行结果进行缓存;以后再要相同的数据,直接从缓存中获取,不用调用方法;
* CacheManager管理多个Cache组件的,对缓存的真正CRUD操作在Cache组件中,每一个缓存组件有自己唯一一个名字;
*
*
* 原理:
* 1、自动配置类;CacheAutoConfiguration
* 2、缓存的配置类
* org.springframework.boot.autoconfigure.cache.GenericCacheConfiguration
* org.springframework.boot.autoconfigure.cache.JCacheCacheConfiguration
* org.springframework.boot.autoconfigure.cache.EhCacheCacheConfiguration
* org.springframework.boot.autoconfigure.cache.HazelcastCacheConfiguration
* org.springframework.boot.autoconfigure.cache.InfinispanCacheConfiguration
* org.springframework.boot.autoconfigure.cache.CouchbaseCacheConfiguration
* org.springframework.boot.autoconfigure.cache.RedisCacheConfiguration
* org.springframework.boot.autoconfigure.cache.CaffeineCacheConfiguration
* org.springframework.boot.autoconfigure.cache.GuavaCacheConfiguration
* org.springframework.boot.autoconfigure.cache.SimpleCacheConfiguration【默认】
* org.springframework.boot.autoconfigure.cache.NoOpCacheConfiguration
* 3、哪个配置类默认生效:SimpleCacheConfiguration;
*
* 4、给容器中注册了一个CacheManager:ConcurrentMapCacheManager
* 5、可以获取和创建ConcurrentMapCache类型的缓存组件;他的作用将数据保存在ConcurrentMap中;
*
* 运行流程:
* @Cacheable:
* 1、方法运行之前,先去查询Cache(缓存组件),按照cacheNames指定的名字获取;
* (CacheManager先获取相应的缓存),第一次获取缓存如果没有Cache组件会自动创建。
* 2、去Cache中查找缓存的内容,使用一个key,默认就是方法的参数;
* key是按照某种策略生成的;默认是使用keyGenerator生成的,默认使用SimpleKeyGenerator生成key;
* SimpleKeyGenerator生成key的默认策略;
* 如果没有参数;key=new SimpleKey();
* 如果有一个参数:key=参数的值
* 如果有多个参数:key=new SimpleKey(params);
* 3、没有查到缓存就调用目标方法;
* 4、将目标方法返回的结果,放进缓存中
*
* @Cacheable标注的方法执行之前先来检查缓存中有没有这个数据,默认按照参数的值作为key去查询缓存,
* 如果没有就运行方法并将结果放入缓存;以后再来调用就可以直接使用缓存中的数据;
*
* 核心:
* 1)、使用CacheManager【ConcurrentMapCacheManager】按照名字得到Cache【ConcurrentMapCache】组件
* 2)、key使用keyGenerator生成的,默认是SimpleKeyGenerator
*
*
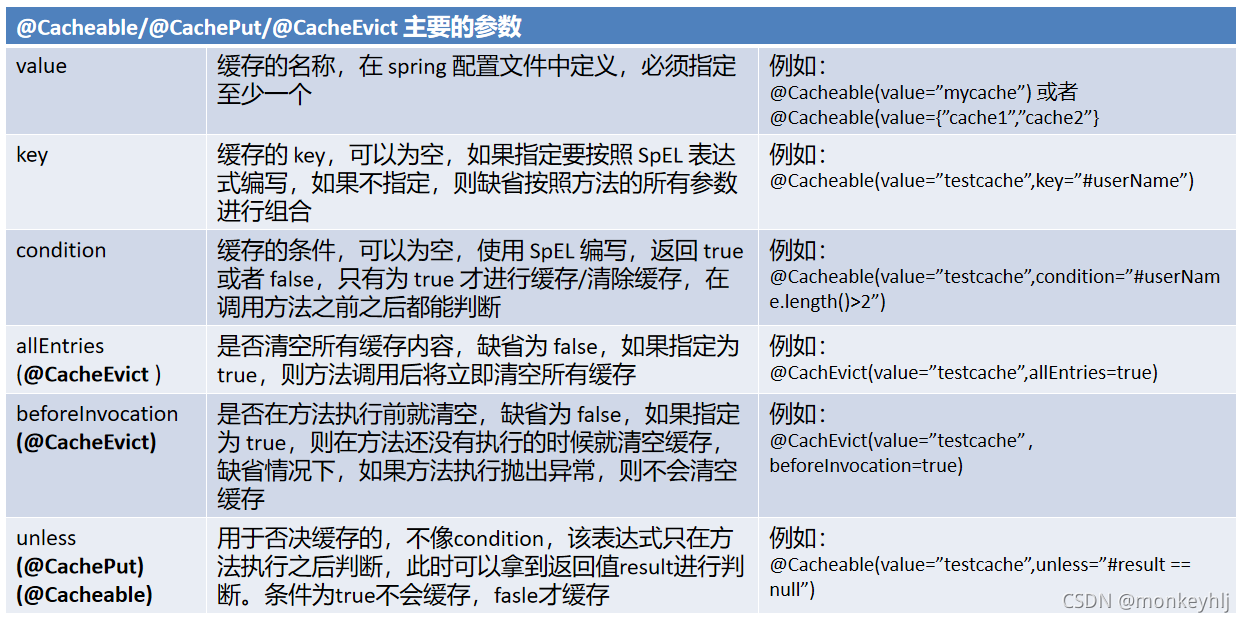
* 几个属性:
* cacheNames/value:指定缓存组件的名字;将方法的返回结果放在哪个缓存中,是数组的方式,可以指定多个缓存;
*
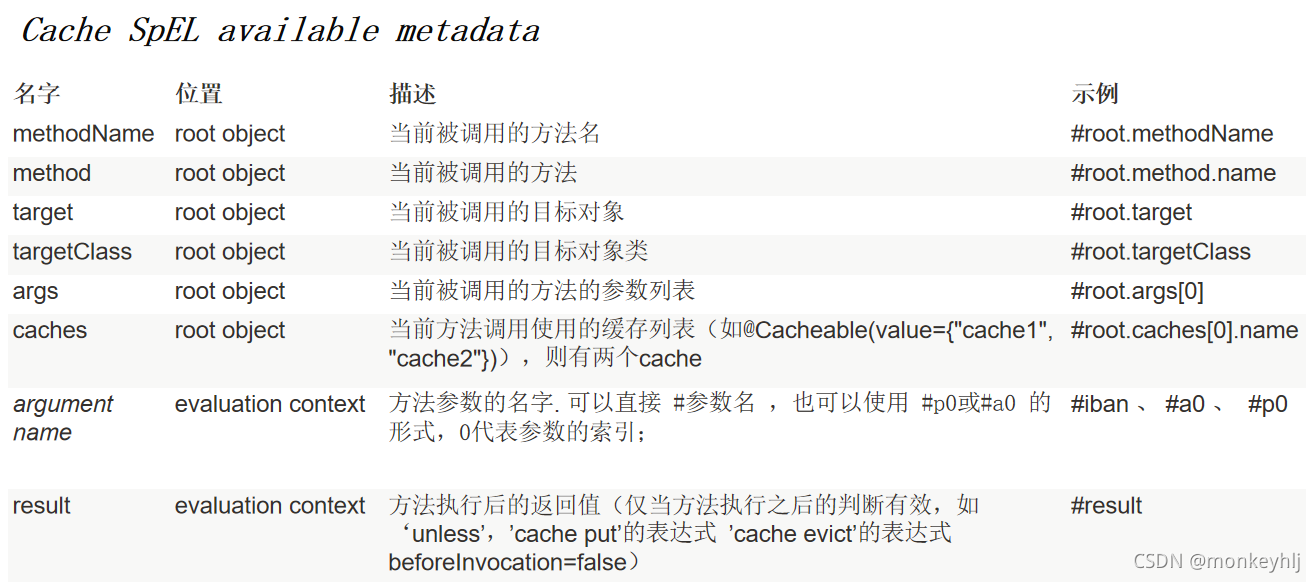
* key:缓存数据使用的key;可以用它来指定。默认是使用方法参数的值 1-方法的返回值
* 编写SpEL; #i d;参数id的值 #a0 #p0 #root.args[0]
* getEmp[2]
*
* keyGenerator:key的生成器;可以自己指定key的生成器的组件id
* key/keyGenerator:二选一使用;
*
*
* cacheManager:指定缓存管理器;或者cacheResolver指定获取解析器
*
* condition:指定符合条件的情况下才缓存;
* ,condition = "#id>0"
* condition = "#a0>1":第一个参数的值》1的时候才进行缓存
*
* unless:否定缓存;当unless指定的条件为true,方法的返回值就不会被缓存;可以获取到结果进行判断
* unless = "#result == null"
* unless = "#a0==2":如果第一个参数的值是2,结果不缓存;
* sync:是否使用异步模式
* @param id
* @return
*
*/
@Cacheable(value = {"emp"}/*,keyGenerator = "myKeyGenerator",condition = "#a0>1",unless = "#a0==2"*/)
public Employee getEmp(Integer id){
System.out.println("查询"+id+"号员工");
Employee emp = employeeMapper.getEmpById(id);
return emp;
}
/**
* @CachePut:既调用方法,又更新缓存数据;同步更新缓存
* 修改了数据库的某个数据,同时更新缓存;
* 运行时机:
* 1、先调用目标方法
* 2、将目标方法的结果缓存起来
*
* 测试步骤:
* 1、查询1号员工;查到的结果会放在缓存中;
* key:1 value:lastName:张三
* 2、以后查询还是之前的结果
* 3、更新1号员工;【lastName:zhangsan;gender:0】
* 将方法的返回值也放进缓存了;
* key:传入的employee对象 值:返回的employee对象;
* 4、查询1号员工?
* 应该是更新后的员工;
* key = "#employee.id":使用传入的参数的员工id;
* key = "#result.id":使用返回后的id
* @Cacheable的key是不能用#result
* 为什么是没更新前的?【1号员工没有在缓存中更新】
*
*/
@CachePut(/*value = "emp",*/key = "#result.id")
public Employee updateEmp(Employee employee){
System.out.println("updateEmp:"+employee);
employeeMapper.updateEmp(employee);
return employee;
}
/**
* @CacheEvict:缓存清除
* key:指定要清除的数据
* allEntries = true:指定清除这个缓存中所有的数据
* beforeInvocation = false:缓存的清除是否在方法之前执行
* 默认代表缓存清除操作是在方法执行之后执行;如果出现异常缓存就不会清除
*
* beforeInvocation = true:
* 代表清除缓存操作是在方法运行之前执行,无论方法是否出现异常,缓存都清除
*
*
*/
@CacheEvict(value="emp",beforeInvocation = true/*key = "#id",*/)
public void deleteEmp(Integer id){
System.out.println("deleteEmp:"+id);
//employeeMapper.deleteEmpById(id);
int i = 10/0;
}
// @Caching 定义复杂的缓存规则
@Caching(
cacheable = {
@Cacheable(/*value="emp",*/key = "#lastName")
},
put = {
@CachePut(/*value="emp",*/key = "#result.id"),
@CachePut(/*value="emp",*/key = "#result.email")
}
)
public Employee getEmpByLastName(String lastName){
return employeeMapper.getEmpByLastName(lastName);
}
}
package com.atguigu.cache;
import org.mybatis.spring.annotation.MapperScan;
import org.springframework.boot.SpringApplication;
import org.springframework.boot.autoconfigure.SpringBootApplication;
import org.springframework.cache.annotation.EnableCaching;
/**
* 一、搭建基本环境
* 1、导入数据库文件 创建出department和employee表
* 2、创建javaBean封装数据
* 3、整合MyBatis操作数据库
* 1.配置数据源信息
* 2.使用注解版的MyBatis;
* 1)、@MapperScan指定需要扫描的mapper接口所在的包
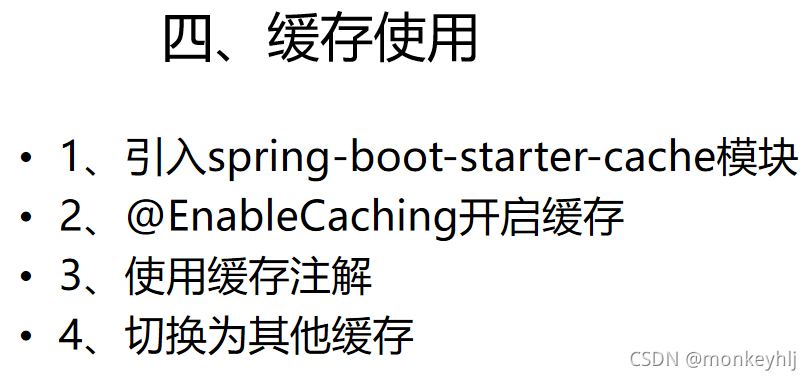
* 二、快速体验缓存
* 步骤:
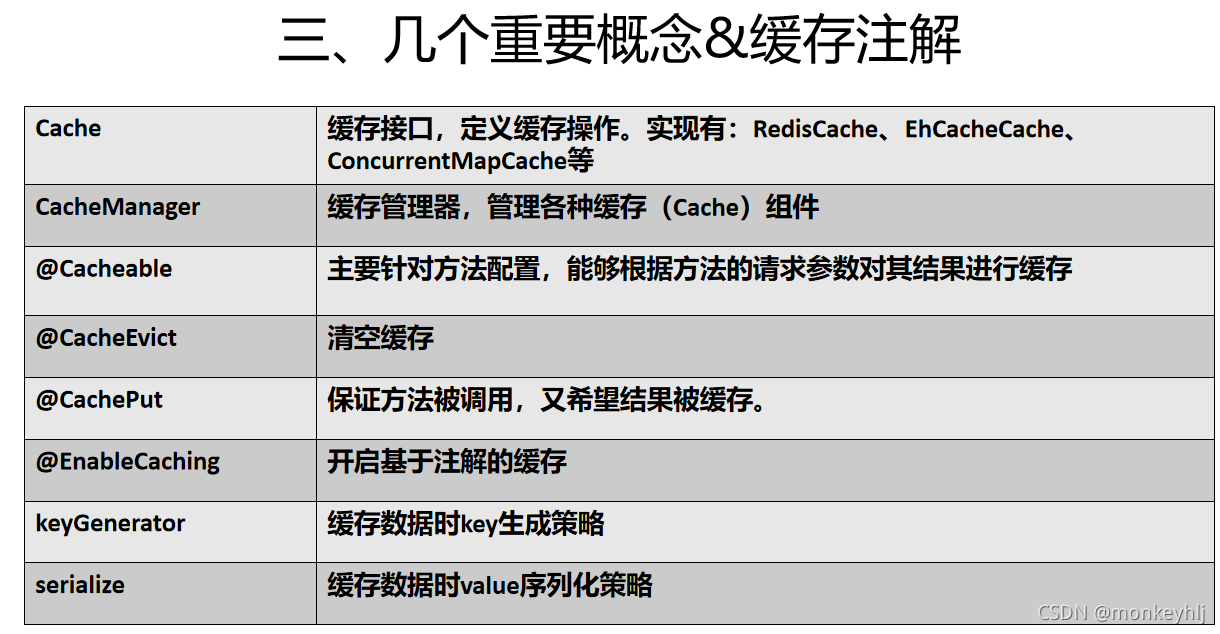
* 1、开启基于注解的缓存 @EnableCaching
* 2、标注缓存注解即可
* @Cacheable
* @CacheEvict
* @CachePut
*
*
* 默认使用的是ConcurrentMapCacheManager==ConcurrentMapCache;将数据保存在 ConcurrentMap<Object, Object>中
* 开发中使用缓存中间件;redis、memcached、ehcache;
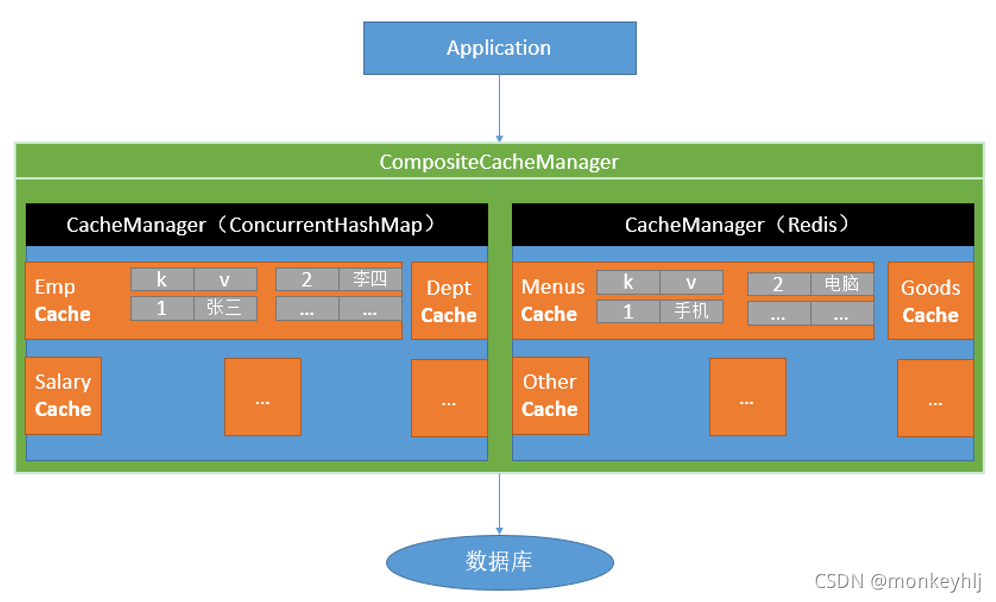
* 三、整合redis作为缓存
* Redis 是一个开源(BSD许可)的,内存中的数据结构存储系统,它可以用作数据库、缓存和消息中间件。
* 1、安装redis:使用docker;
* 2、引入redis的starter
* 3、配置redis
* 4、测试缓存
* 原理:CacheManager===Cache 缓存组件来实际给缓存中存取数据
* 1)、引入redis的starter,容器中保存的是 RedisCacheManager;
* 2)、RedisCacheManager 帮我们创建 RedisCache 来作为缓存组件;RedisCache通过操作redis缓存数据的
* 3)、默认保存数据 k-v 都是Object;利用序列化保存;如何保存为json
* 1、引入了redis的starter,cacheManager变为 RedisCacheManager;
* 2、默认创建的 RedisCacheManager 操作redis的时候使用的是 RedisTemplate<Object, Object>
* 3、RedisTemplate<Object, Object> 是 默认使用jdk的序列化机制
* 4)、自定义CacheManager;
*
*/
@MapperScan("com.atguigu.cache.mapper")
@SpringBootApplication
@EnableCaching
public class Springboot01CacheApplication {
public static void main(String[] args) {
SpringApplication.run(Springboot01CacheApplication.class, args);
}
}

【redis中文网】http://www.redis.cn/
package com.atguigu.cache.service;

import com.atguigu.cache.bean.Department;
import com.atguigu.cache.mapper.DepartmentMapper;
import org.springframework.beans.factory.annotation.Autowired;
import org.springframework.beans.factory.annotation.Qualifier;
import org.springframework.cache.Cache;
import org.springframework.cache.annotation.CacheConfig;
import org.springframework.cache.annotation.Cacheable;
import org.springframework.data.redis.cache.RedisCacheManager;
import org.springframework.stereotype.Service;


@Service
public class DeptService {

    @Autowired
    DepartmentMapper departmentMapper;

    @Qualifier("deptCacheManager")
    @Autowired
    RedisCacheManager deptCacheManager;


    /**
     *  缓存的数据能存入redis;
     *  第二次从缓存中查询就不能反序列化回来;
     *  存的是dept的json数据;CacheManager默认使用RedisTemplate<Object, Employee>操作Redis
     *
     *
     * @param id
     * @return
     */
//    @Cacheable(cacheNames = "dept",cacheManager = "deptCacheManager")
//    public Department getDeptById(Integer id){
//        System.out.println("查询部门"+id);
//        Department department = departmentMapper.getDeptById(id);
//        return department;
//    }

    // 使用缓存管理器得到缓存,进行api调用
    public Department getDeptById(Integer id){
        System.out.println("查询部门"+id);
        Department department = departmentMapper.getDeptById(id);

        //获取某个缓存
        Cache dept = deptCacheManager.getCache("dept");
        dept.put("dept:1",department);

        return department;
    }
}
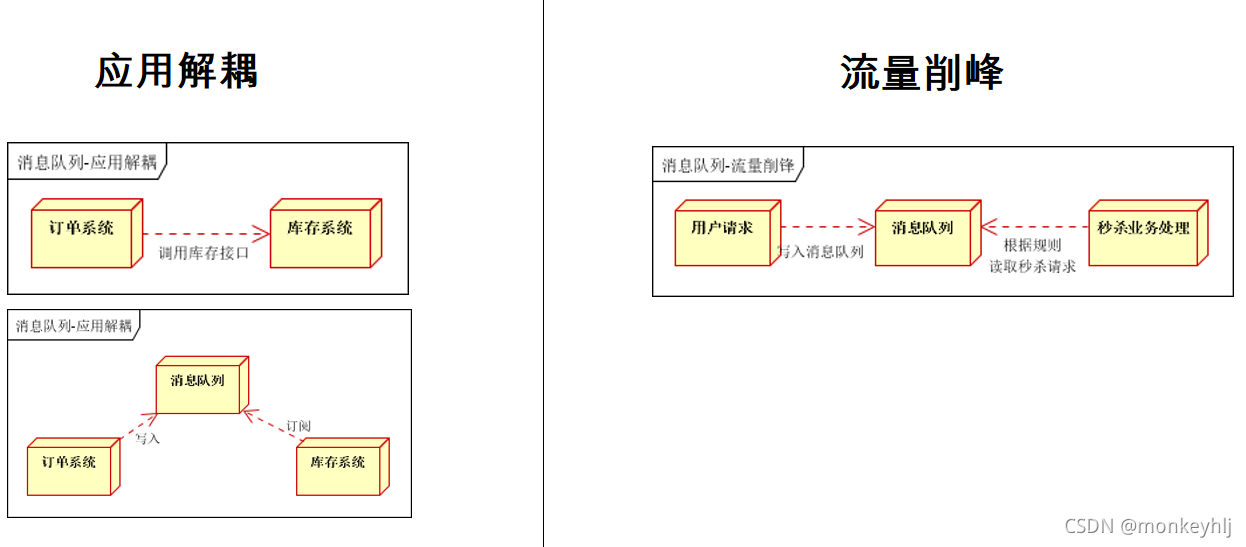
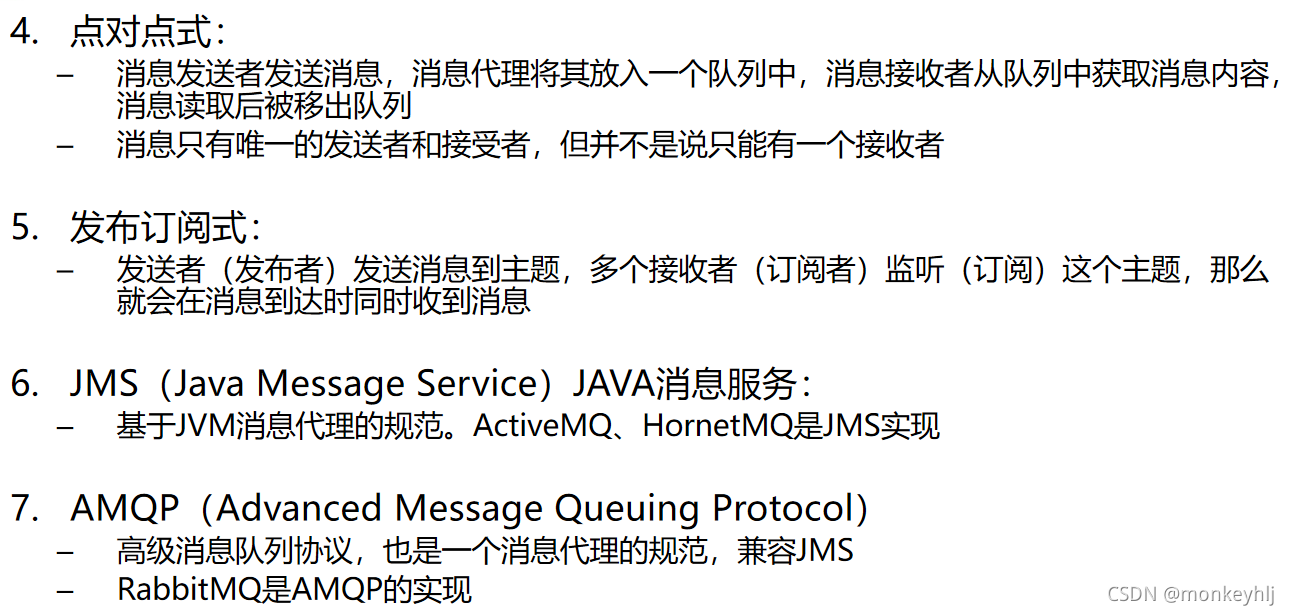
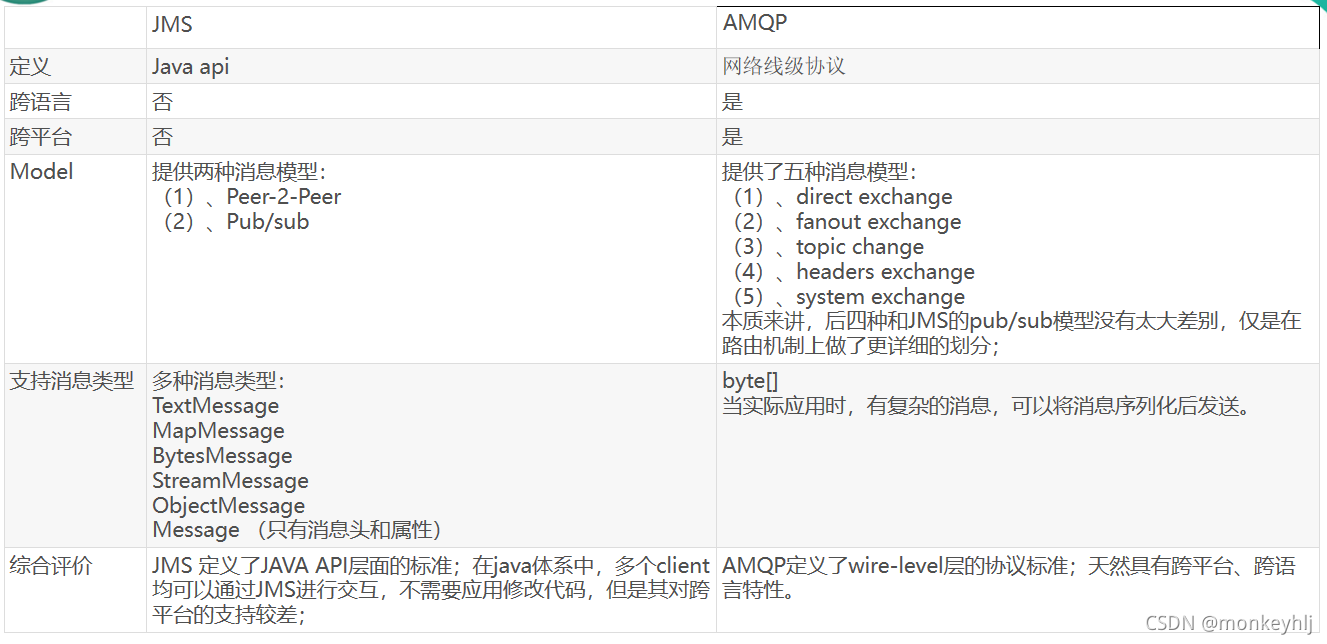
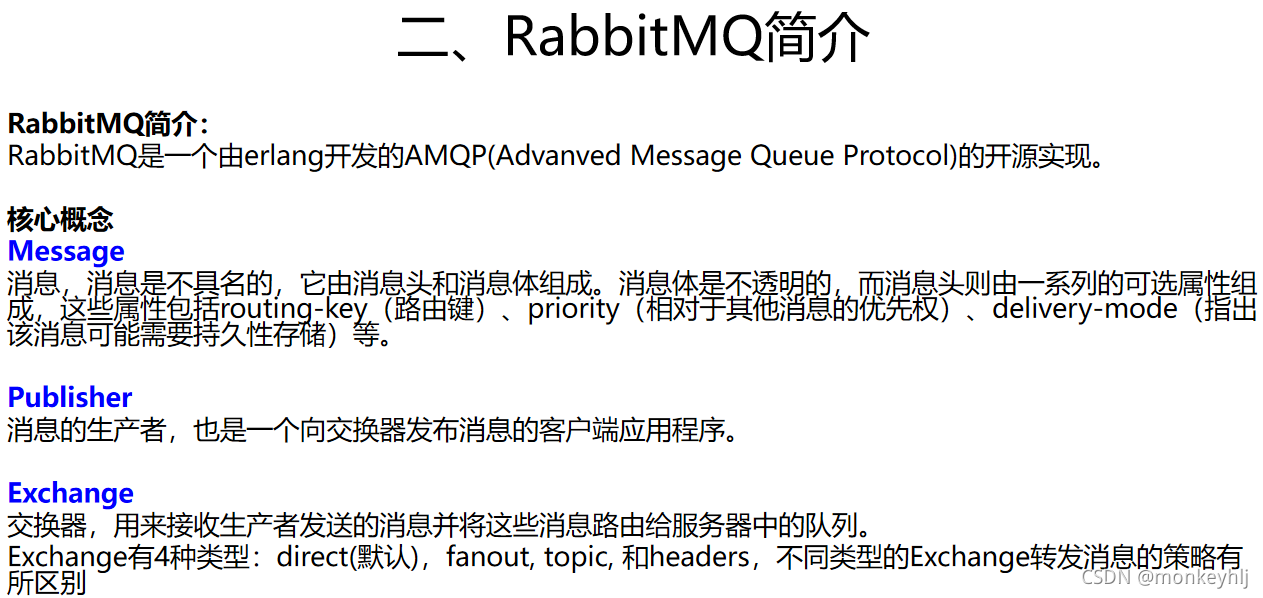
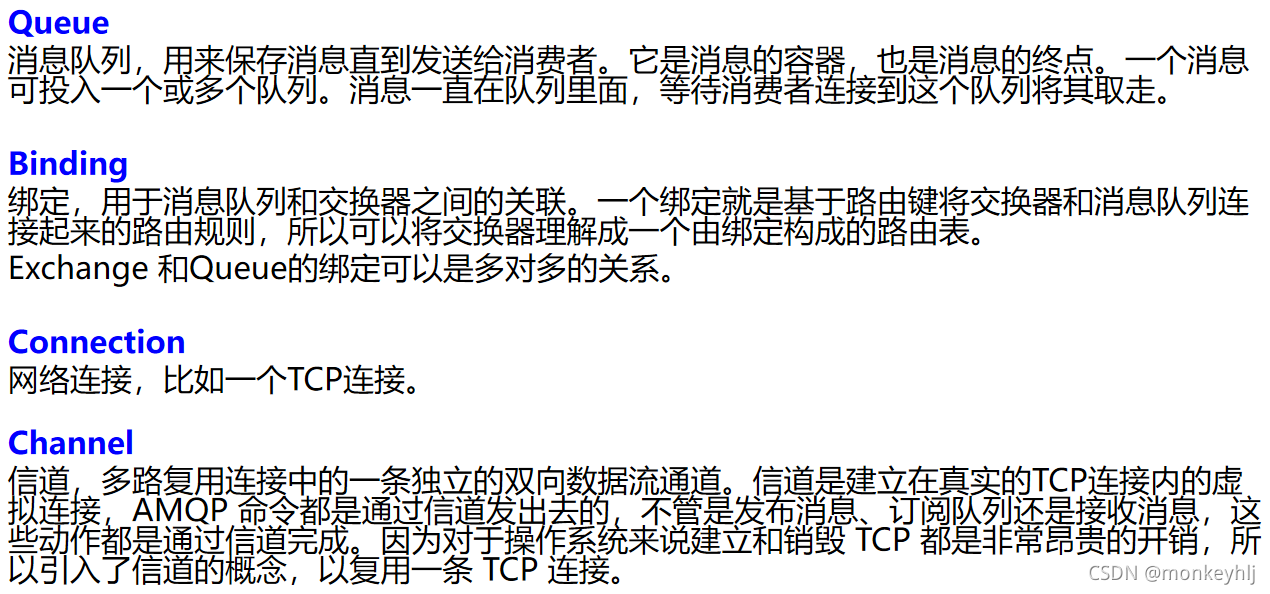
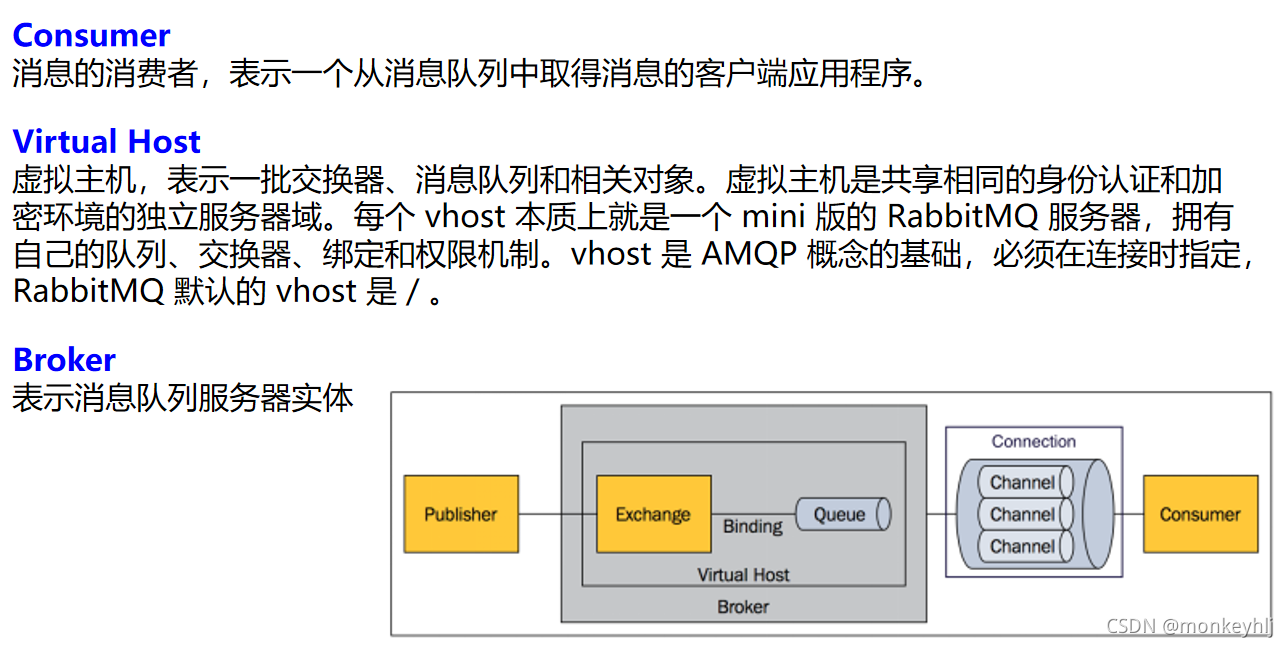
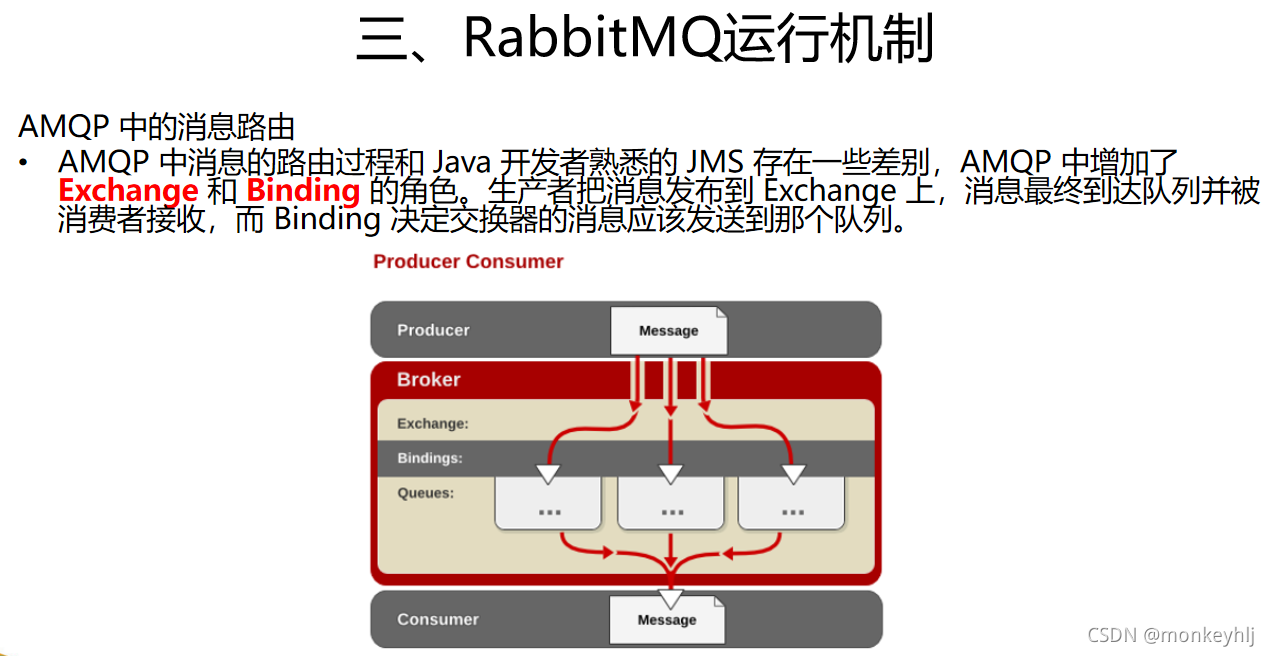
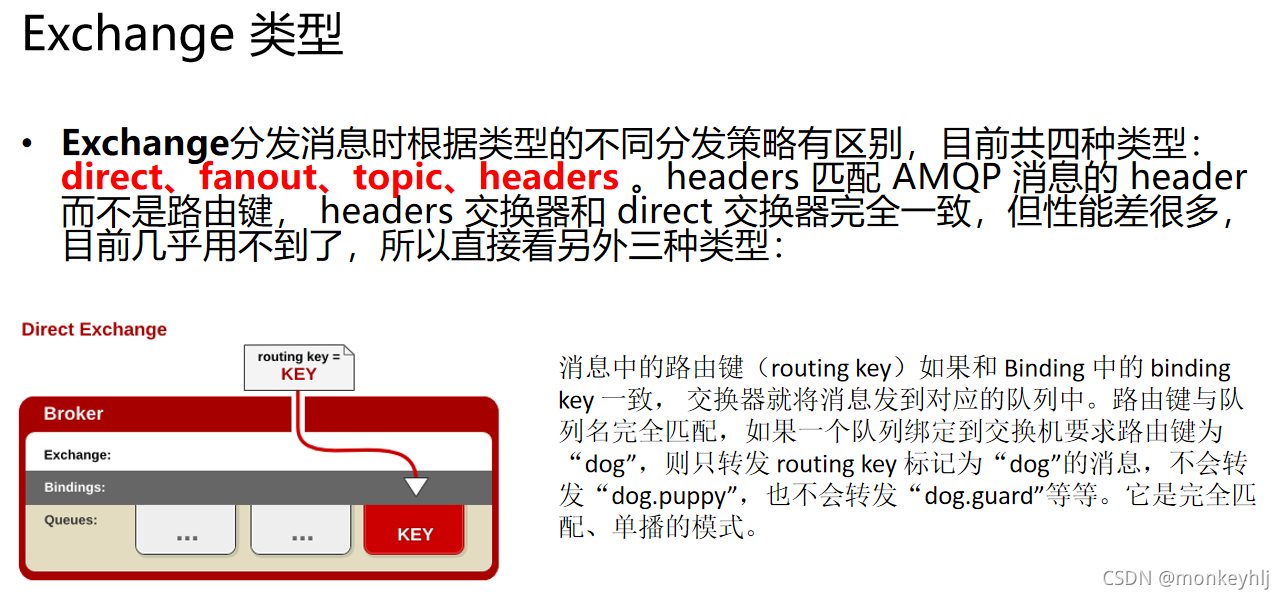
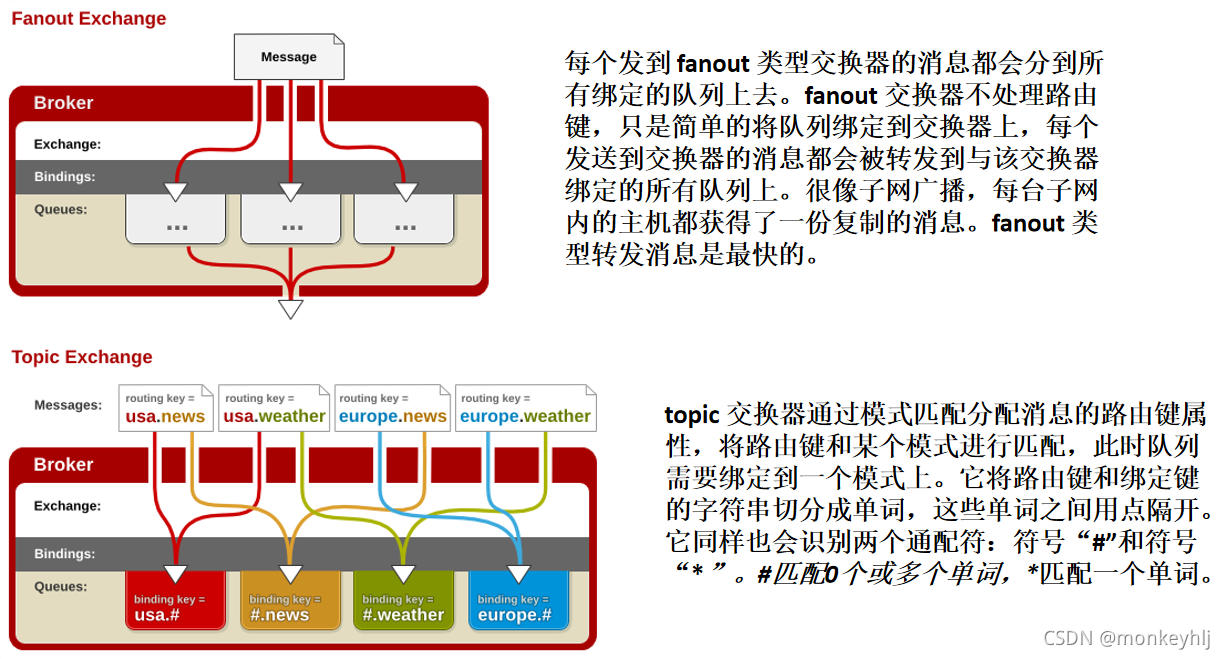
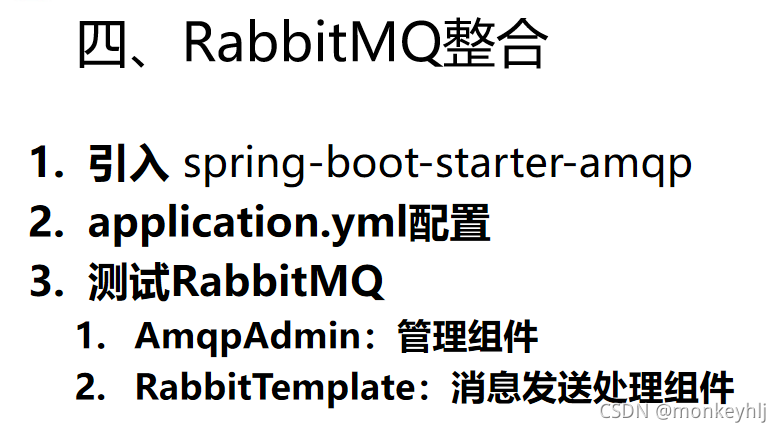
二、Spring Boot与消息

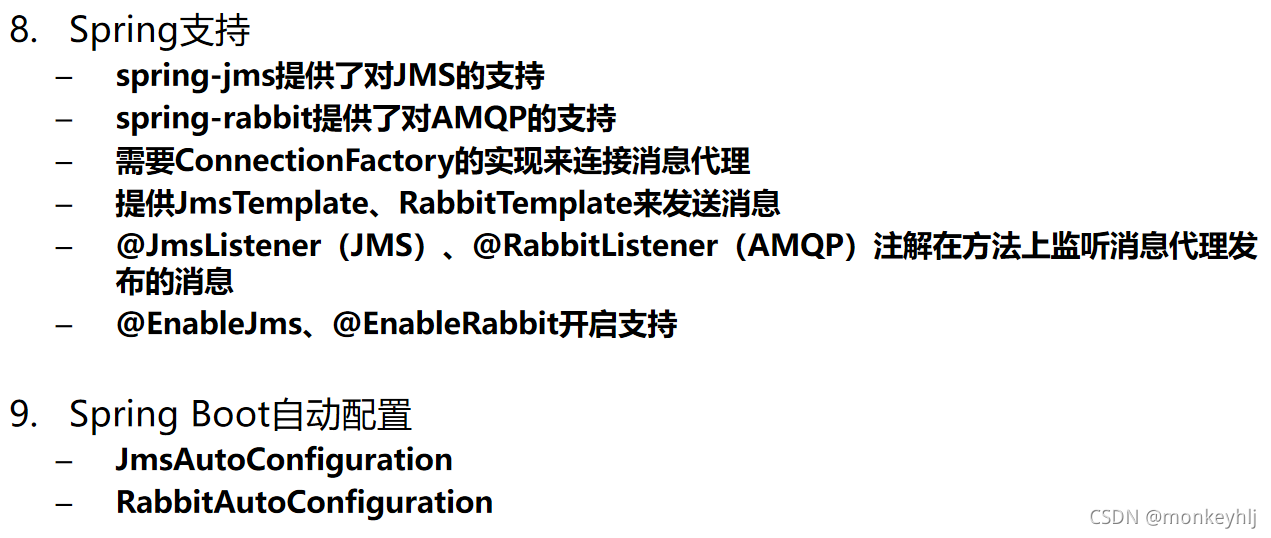

package com.atguigu.amqp;

import org.springframework.amqp.rabbit.annotation.EnableRabbit;
import org.springframework.boot.SpringApplication;
import org.springframework.boot.autoconfigure.SpringBootApplication;


/**
 * 自动配置
 *  1、RabbitAutoConfiguration
 *  2、有自动配置了连接工厂ConnectionFactory;
 *  3、RabbitProperties 封装了 RabbitMQ的配置
 *  4、 RabbitTemplate :给RabbitMQ发送和接受消息;
 *  5、 AmqpAdmin : RabbitMQ系统管理功能组件;
 *  	AmqpAdmin:创建和删除 Queue,Exchange,Binding
 *  6、@EnableRabbit +  @RabbitListener 监听消息队列的内容
 *
 */
@EnableRabbit  //开启基于注解的RabbitMQ模式
@SpringBootApplication
public class Springboot02AmqpApplication {

	public static void main(String[] args) {
		SpringApplication.run(Springboot02AmqpApplication.class, args);
	}
}
package com.atguigu.amqp;

import com.atguigu.amqp.bean.Book;
import org.junit.Test;
import org.junit.runner.RunWith;
import org.springframework.amqp.core.AmqpAdmin;
import org.springframework.amqp.core.Binding;
import org.springframework.amqp.core.DirectExchange;
import org.springframework.amqp.core.Queue;
import org.springframework.amqp.rabbit.core.RabbitTemplate;
import org.springframework.beans.factory.annotation.Autowired;
import org.springframework.boot.test.context.SpringBootTest;
import org.springframework.test.context.junit4.SpringRunner;

import java.util.Arrays;
import java.util.HashMap;
import java.util.Map;

@RunWith(SpringRunner.class)
@SpringBootTest
public class Springboot02AmqpApplicationTests {

	@Autowired
	RabbitTemplate rabbitTemplate;

	@Autowired
	AmqpAdmin amqpAdmin;

	@Test
	public void createExchange(){

//		amqpAdmin.declareExchange(new DirectExchange("amqpadmin.exchange"));
//		System.out.println("创建完成");

//		amqpAdmin.declareQueue(new Queue("amqpadmin.queue",true));
		//创建绑定规则

//		amqpAdmin.declareBinding(new Binding("amqpadmin.queue", Binding.DestinationType.QUEUE,"amqpadmin.exchange","amqp.haha",null));

		//amqpAdmin.de
	}

	/**
	 * 1、单播(点对点)
	 */
	@Test
	public void contextLoads() {
		//Message需要自己构造一个;定义消息体内容和消息头
		//rabbitTemplate.send(exchage,routeKey,message);

		//object默认当成消息体,只需要传入要发送的对象,自动序列化发送给rabbitmq;
		//rabbitTemplate.convertAndSend(exchage,routeKey,object);
		Map<String,Object> map = new HashMap<>();
		map.put("msg","这是第一个消息");
		map.put("data", Arrays.asList("helloworld",123,true));
		//对象被默认序列化以后发送出去
		rabbitTemplate.convertAndSend("exchange.direct","atguigu.news",new Book("西游记","吴承恩"));

	}

	//接受数据,如何将数据自动的转为json发送出去
	@Test
	public void receive(){
		Object o = rabbitTemplate.receiveAndConvert("atguigu.news");
		System.out.println(o.getClass());
		System.out.println(o);
	}

	/**
	 * 广播
	 */
	@Test
	public void sendMsg(){
		rabbitTemplate.convertAndSend("exchange.fanout","",new Book("红楼梦","曹雪芹"));
	}

}
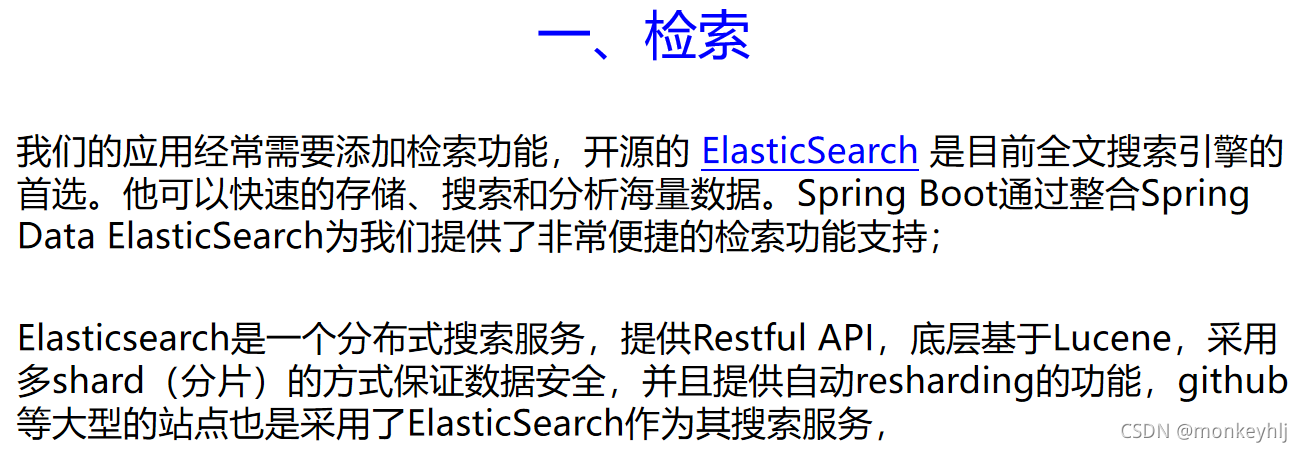
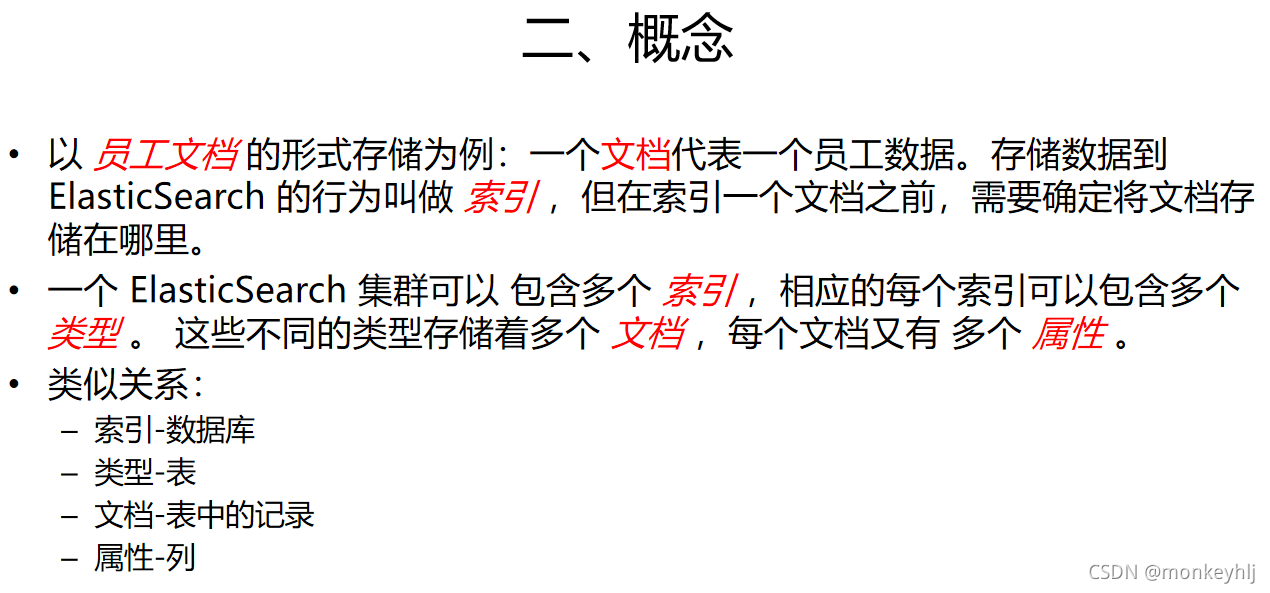
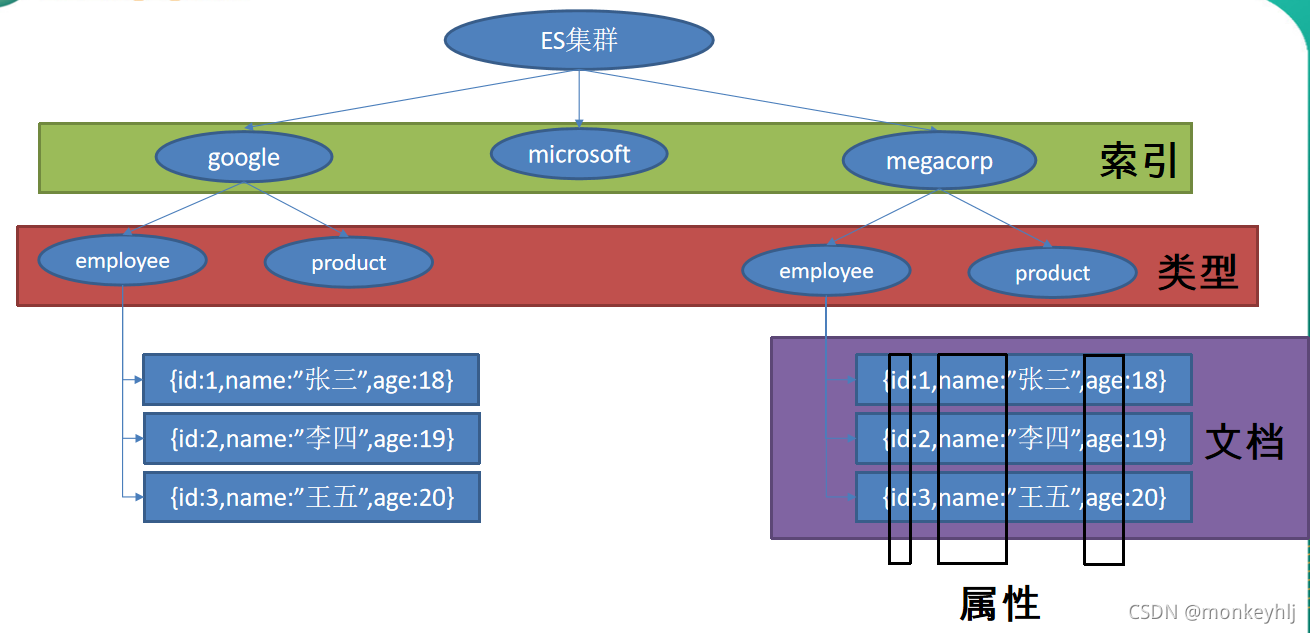
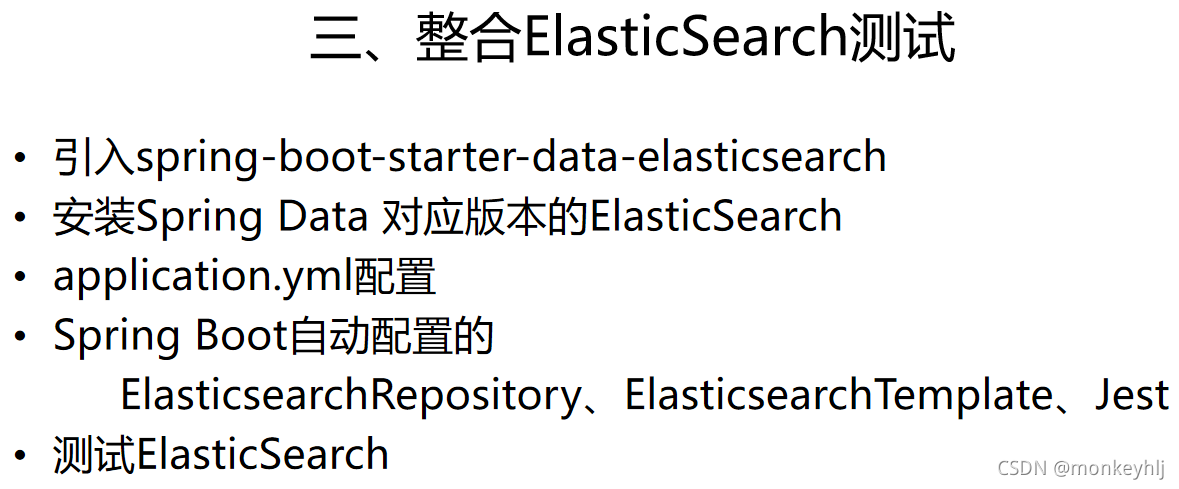
三、Spring Boot与检索
package com.atguigu.elastic;

import org.springframework.boot.SpringApplication;
import org.springframework.boot.autoconfigure.SpringBootApplication;

/**
 * SpringBoot默认支持两种技术来和ES交互;
 * 1、Jest(默认不生效)
 * 	需要导入jest的工具包(io.searchbox.client.JestClient)
 *
 * 2、SpringData ElasticSearch【ES版本有可能不合适】
 * 		版本适配说明:https://github.com/spring-projects/spring-data-elasticsearch
 *		如果版本不适配:2.4.6
 *			1)、升级SpringBoot版本
 *			2)、安装对应版本的ES
 *
 * 		1)、Client 节点信息clusterNodes;clusterName
 * 		2)、ElasticsearchTemplate 操作es
 *		3)、编写一个 ElasticsearchRepository 的子接口来操作ES;
 *	两种用法:https://github.com/spring-projects/spring-data-elasticsearch
 *	1)、编写一个 ElasticsearchRepository
 */
@SpringBootApplication
public class Springboot03ElasticApplication {

	public static void main(String[] args) {
		SpringApplication.run(Springboot03ElasticApplication.class, args);
	}
}
package com.atguigu.elastic.repository;

import com.atguigu.elastic.bean.Book;
import org.springframework.data.elasticsearch.repository.ElasticsearchRepository;

import java.util.List;


public interface BookRepository extends ElasticsearchRepository<Book,Integer> {

    //参照
    // https://docs.spring.io/spring-data/elasticsearch/docs/3.0.6.RELEASE/reference/html/
   public List<Book> findByBookNameLike(String bookName);

}
package com.atguigu.elastic;

import com.atguigu.elastic.bean.Article;
import com.atguigu.elastic.bean.Book;
import com.atguigu.elastic.repository.BookRepository;
import io.searchbox.client.JestClient;
import io.searchbox.core.Index;
import io.searchbox.core.Search;
import io.searchbox.core.SearchResult;
import org.junit.Test;
import org.junit.runner.RunWith;
import org.springframework.beans.factory.annotation.Autowired;
import org.springframework.boot.test.context.SpringBootTest;
import org.springframework.test.context.junit4.SpringRunner;

import java.io.IOException;
import java.util.List;

@RunWith(SpringRunner.class)
@SpringBootTest
public class Springboot03ElasticApplicationTests {

	@Autowired
	JestClient jestClient;

	@Autowired
	BookRepository bookRepository;

	@Test
	public void test02(){
//		Book book = new Book();
//		book.setId(1);
//		book.setBookName("西游记");
//		book.setAuthor("吴承恩");
//		bookRepository.index(book);


		for (Book book : bookRepository.findByBookNameLike("游")) {
			System.out.println(book);
		}
		;

	}

	@Test
	public void contextLoads() {
		//1、给Es中索引(保存)一个文档;
		Article article = new Article();
		article.setId(1);
		article.setTitle("好消息");
		article.setAuthor("zhangsan");
		article.setContent("Hello World");

		//构建一个索引功能
		Index index = new Index.Builder(article).index("atguigu").type("news").build();

		try {
			//执行
			jestClient.execute(index);
		} catch (IOException e) {
			e.printStackTrace();
		}
	}

	//测试搜索
	@Test
	public void search(){

		//查询表达式
		String json ="{\n" +
				"    \"query\" : {\n" +
				"        \"match\" : {\n" +
				"            \"content\" : \"hello\"\n" +
				"        }\n" +
				"    }\n" +
				"}";

		//更多操作:https://github.com/searchbox-io/Jest/tree/master/jest
		//构建搜索功能
		Search search = new Search.Builder(json).addIndex("atguigu").addType("news").build();

		//执行
		try {
			SearchResult result = jestClient.execute(search);
			System.out.println(result.getJsonString());
		} catch (IOException e) {
			e.printStackTrace();
		}
	}
}
四、Spring Boot与任务
package com.atguigu.task;

import org.springframework.boot.SpringApplication;
import org.springframework.boot.autoconfigure.SpringBootApplication;
import org.springframework.scheduling.annotation.EnableAsync;
import org.springframework.scheduling.annotation.EnableScheduling;

@EnableAsync  //开启异步注解功能
@EnableScheduling //开启基于注解的定时任务
@SpringBootApplication
public class Springboot04TaskApplication {

	public static void main(String[] args) {
		SpringApplication.run(Springboot04TaskApplication.class, args);
	}
}
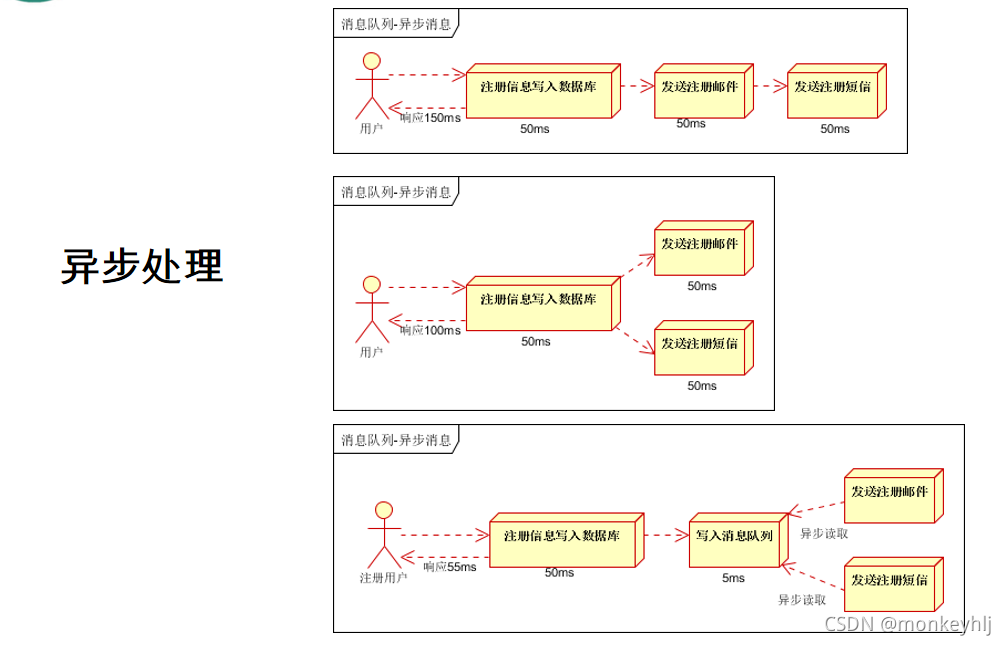
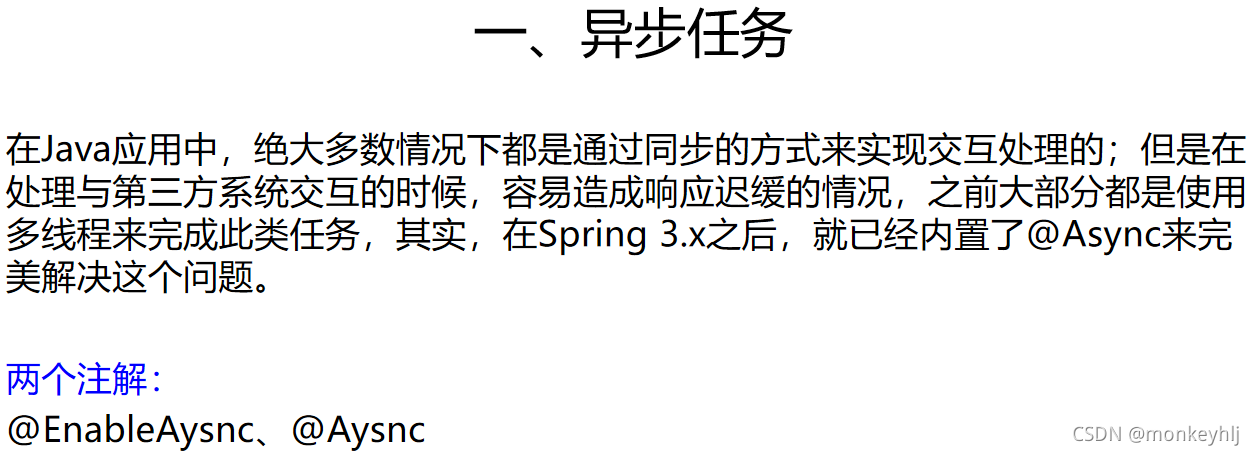
异步任务
package com.atguigu.task.service;

import org.springframework.scheduling.annotation.Async;
import org.springframework.stereotype.Service;

@Service
public class AsyncService {

    //告诉Spring这是一个异步方法
    @Async
    public void hello(){
        try {
            Thread.sleep(3000);
        } catch (InterruptedException e) {
            e.printStackTrace();
        }
        System.out.println("处理数据中...");
    }
}
package com.atguigu.task.controller;

import com.atguigu.task.service.AsyncService;
import org.springframework.beans.factory.annotation.Autowired;
import org.springframework.web.bind.annotation.GetMapping;
import org.springframework.web.bind.annotation.RestController;

@RestController
public class AsyncController {

    @Autowired
    AsyncService asyncService;

    @GetMapping("/hello")
    public String hello(){
        asyncService.hello();
        return "success";
    }
}
定时任务
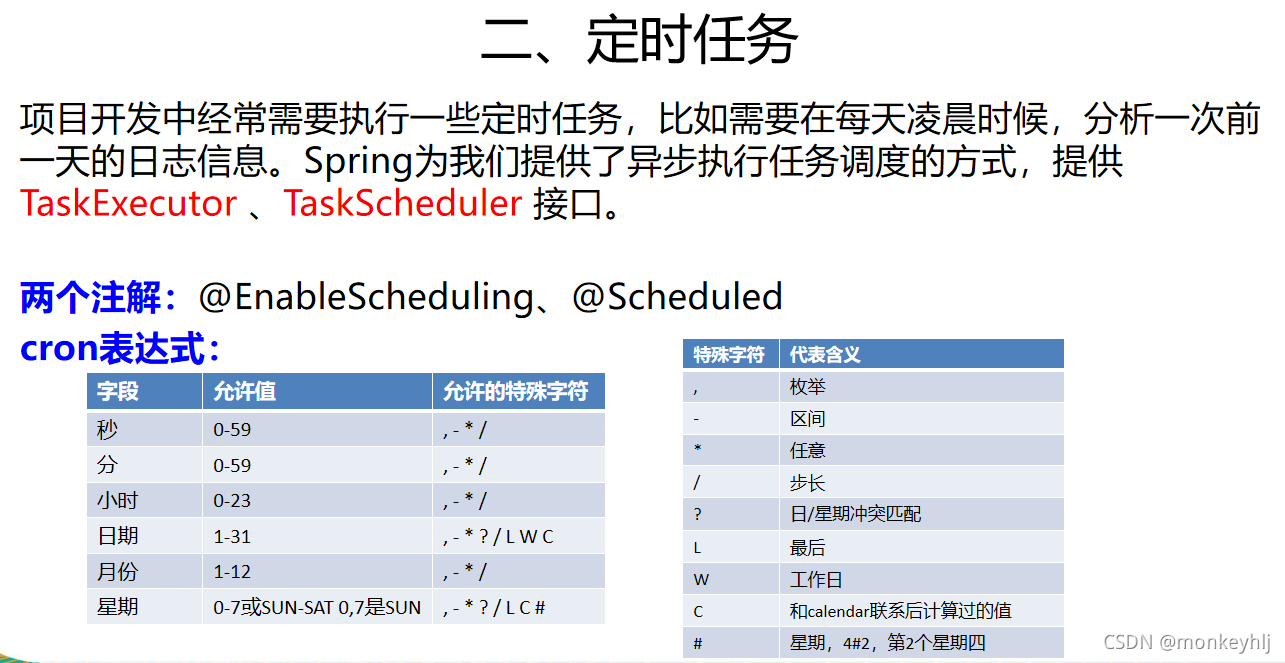
package com.atguigu.task.service;

import org.springframework.scheduling.annotation.Scheduled;
import org.springframework.stereotype.Service;

@Service
public class ScheduledService {

    /**
     * second(秒), minute(分), hour(时), day of month(日), month(月), day of week(周几).
     * 0 * * * * MON-FRI
     *  【0 0/5 14,18 * * ?】 每天14点整,和18点整,每隔5分钟执行一次
     *  【0 15 10 ? * 1-6】 每个月的周一至周六10:15分执行一次
     *  【0 0 2 ? * 6L】每个月的最后一个周六凌晨2点执行一次
     *  【0 0 2 LW * ?】每个月的最后一个工作日凌晨2点执行一次
     *  【0 0 2-4 ? * 1#1】每个月的第一个周一凌晨2点到4点期间,每个整点都执行一次;
     */
   // @Scheduled(cron = "0 * * * * MON-SAT")
    //@Scheduled(cron = "0,1,2,3,4 * * * * MON-SAT")
   // @Scheduled(cron = "0-4 * * * * MON-SAT")
    @Scheduled(cron = "0/4 * * * * MON-SAT")  //每4秒执行一次
    public void hello(){
        System.out.println("hello ... ");
    }
}
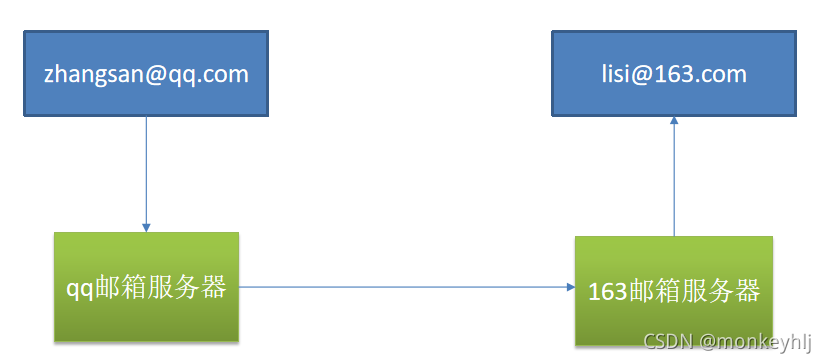
邮件任务
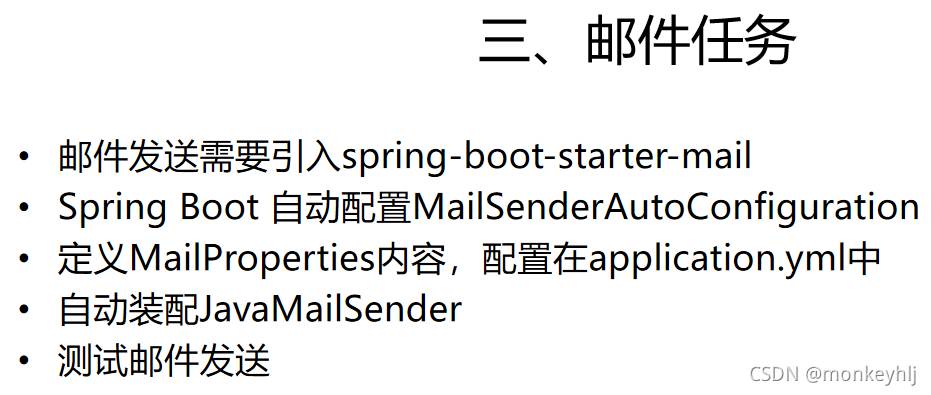
package com.atguigu.task;

import org.junit.Test;
import org.junit.runner.RunWith;
import org.springframework.beans.factory.annotation.Autowired;
import org.springframework.boot.test.context.SpringBootTest;
import org.springframework.mail.SimpleMailMessage;
import org.springframework.mail.javamail.JavaMailSenderImpl;
import org.springframework.mail.javamail.MimeMessageHelper;
import org.springframework.test.context.junit4.SpringRunner;

import javax.mail.internet.MimeMessage;
import java.io.File;

@RunWith(SpringRunner.class)
@SpringBootTest
public class Springboot04TaskApplicationTests {

	@Autowired
	JavaMailSenderImpl mailSender;

	@Test
	public void contextLoads() {
		SimpleMailMessage message = new SimpleMailMessage();
		//邮件设置
		message.setSubject("通知-今晚开会");
		message.setText("今晚7:30开会");

		message.setTo("17512080612@163.com");
		message.setFrom("534096094@qq.com");

		mailSender.send(message);
	}

	@Test
	public void test02() throws  Exception{
		//1、创建一个复杂的消息邮件
		MimeMessage mimeMessage = mailSender.createMimeMessage();
		MimeMessageHelper helper = new MimeMessageHelper(mimeMessage, true);

		//邮件设置
		helper.setSubject("通知-今晚开会");
		helper.setText("<b style='color:red'>今天 7:30 开会</b>",true);

		helper.setTo("17512080612@163.com");
		helper.setFrom("534096094@qq.com");

		//上传文件
		helper.addAttachment("1.jpg",new File("C:\\Users\\lfy\\Pictures\\Saved Pictures\\1.jpg"));
		helper.addAttachment("2.jpg",new File("C:\\Users\\lfy\\Pictures\\Saved Pictures\\2.jpg"));

		mailSender.send(mimeMessage);

	}
}
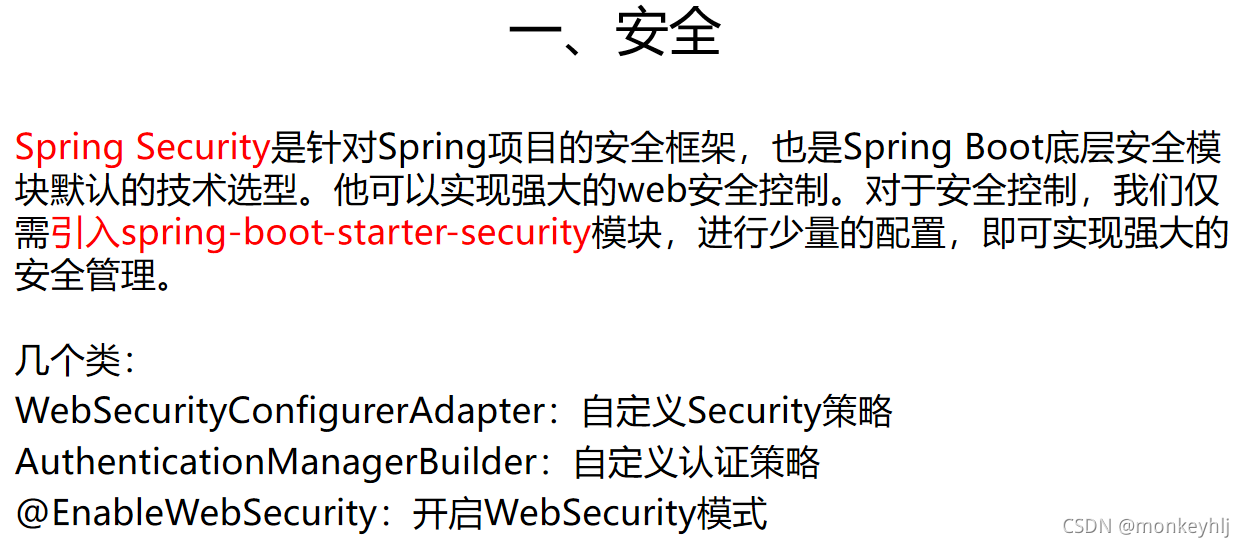
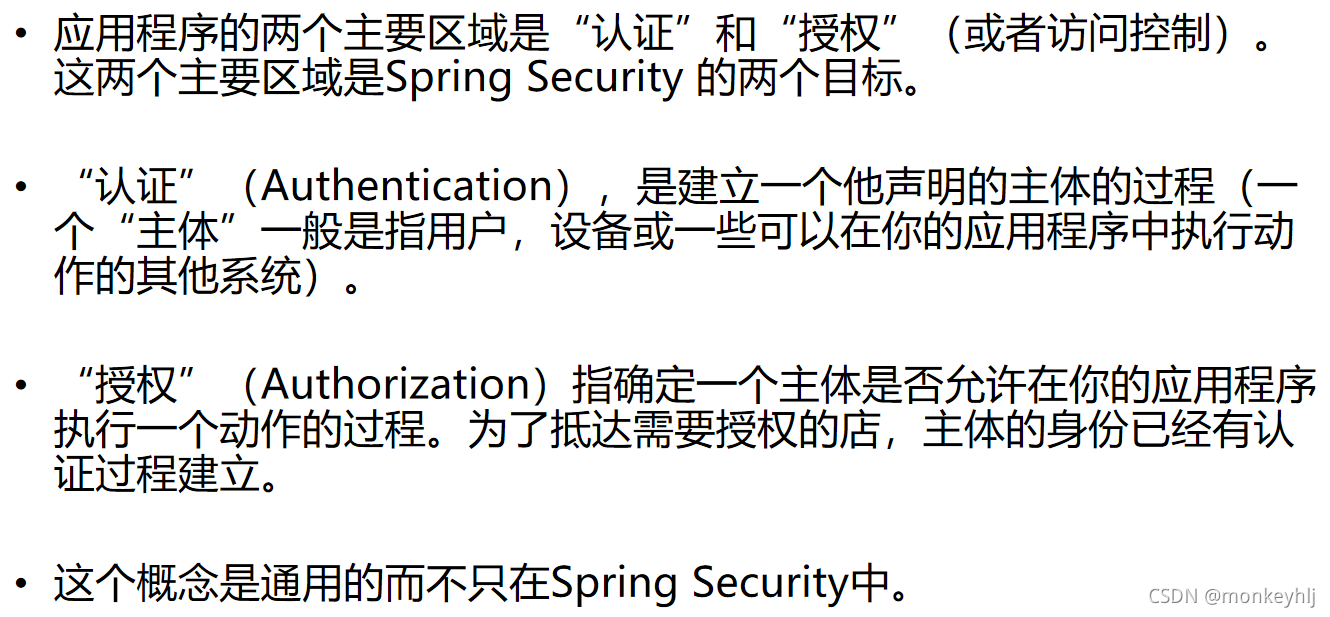
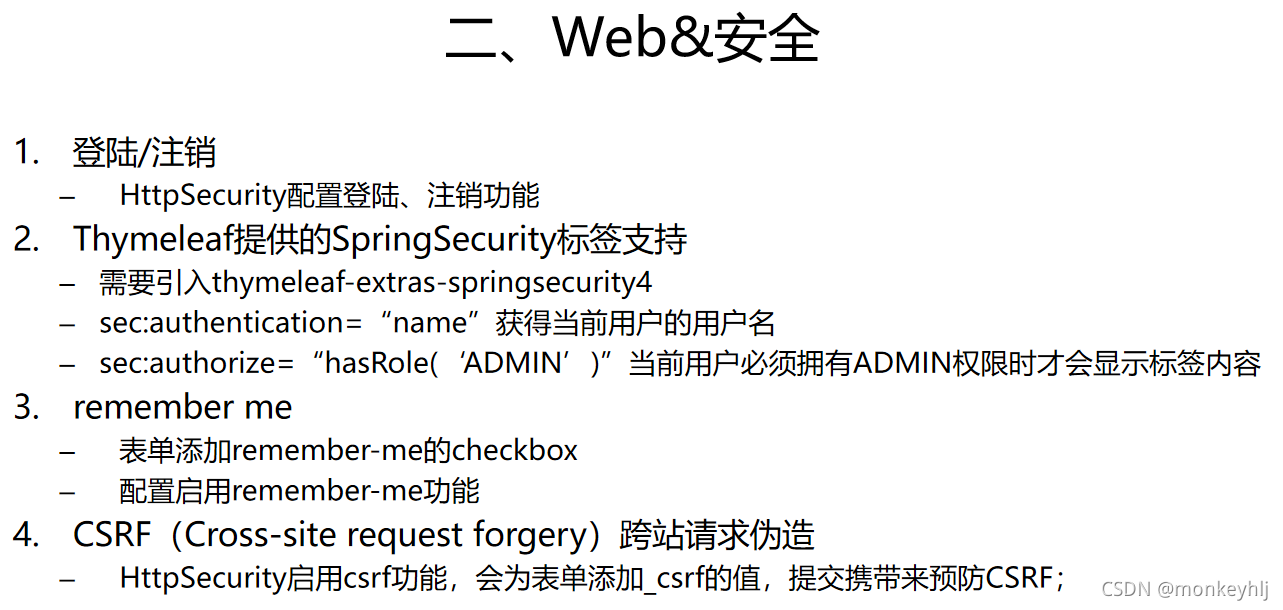
五、Spring Boot与安全
package com.atguigu.security;

import org.springframework.boot.SpringApplication;
import org.springframework.boot.autoconfigure.SpringBootApplication;

/**
 * 1、引入SpringSecurity;
 * 2、编写SpringSecurity的配置类;
 * 		@EnableWebSecurity   extends WebSecurityConfigurerAdapter
 * 3、控制请求的访问权限:
 * 		configure(HttpSecurity http) {
 * 		 	http.authorizeRequests().antMatchers("/").permitAll()
 * 		 		.antMatchers("/level1/**").hasRole("VIP1")
 * 		}
 * 4、定义认证规则:
 * 		configure(AuthenticationManagerBuilder auth){
 * 		 	auth.inMemoryAuthentication()
 * 		 		.withUser("zhangsan").password("123456").roles("VIP1","VIP2")
 * 		}
 * 5、开启自动配置的登陆功能:
 * 		configure(HttpSecurity http){
 * 		 	http.formLogin();
 * 		}
 * 6、注销:http.logout();
 * 7、记住我:Remeberme();
 */
@SpringBootApplication
public class Springboot05SecurityApplication {

	public static void main(String[] args) {
		SpringApplication.run(Springboot05SecurityApplication.class, args);
	}
}
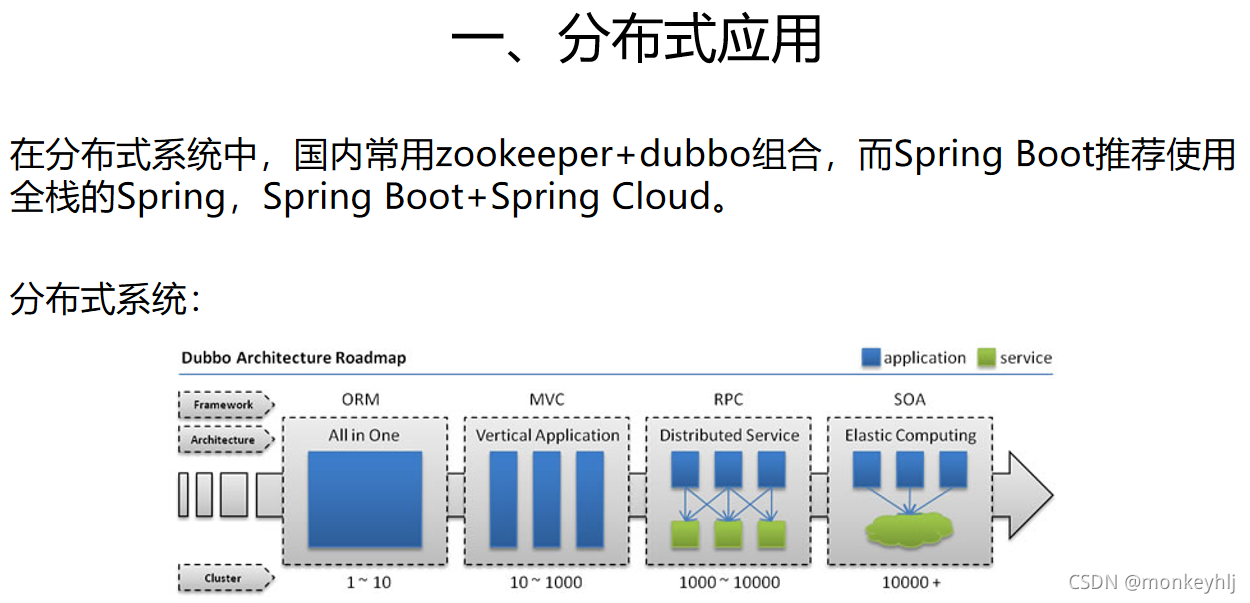
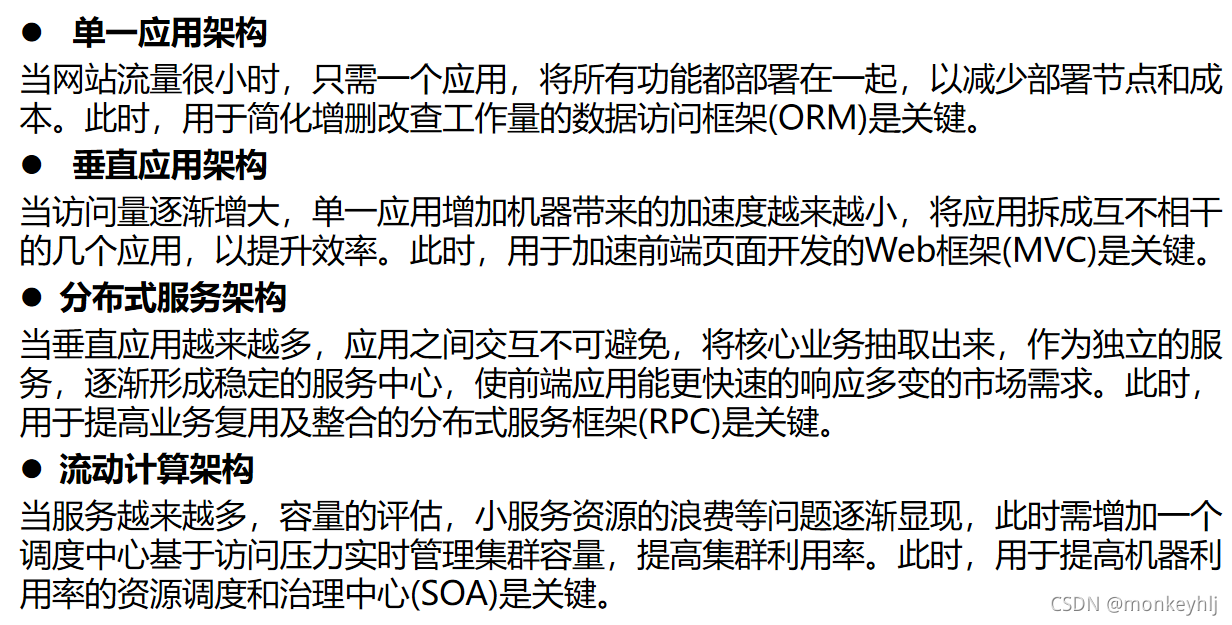
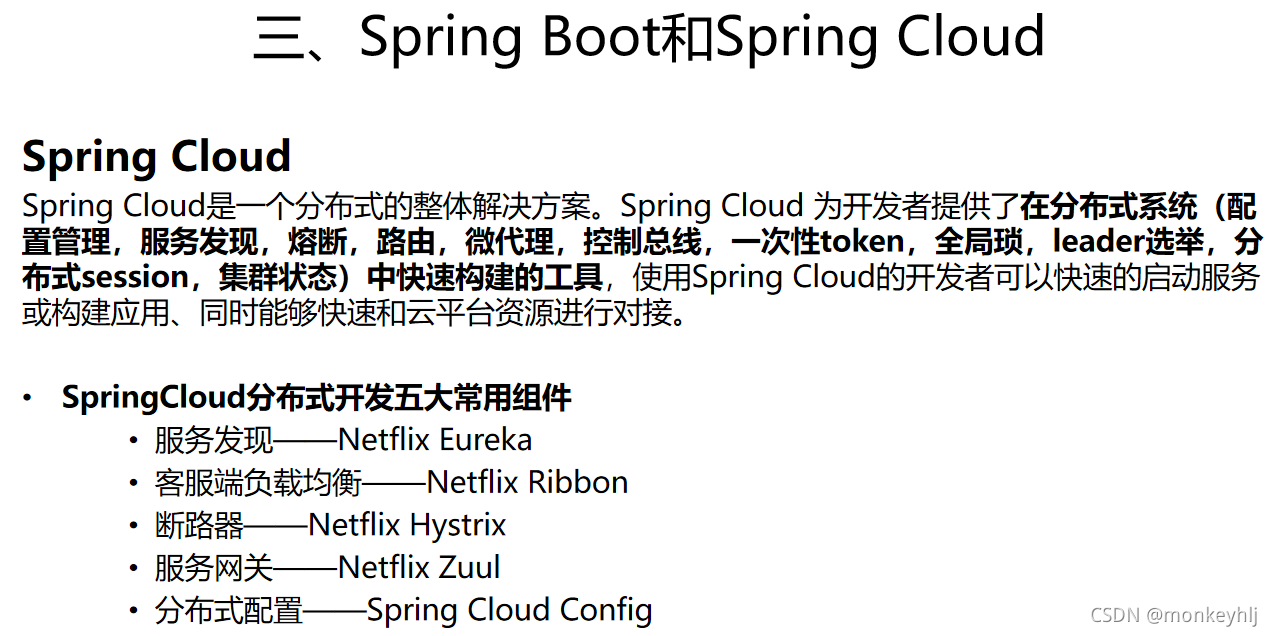
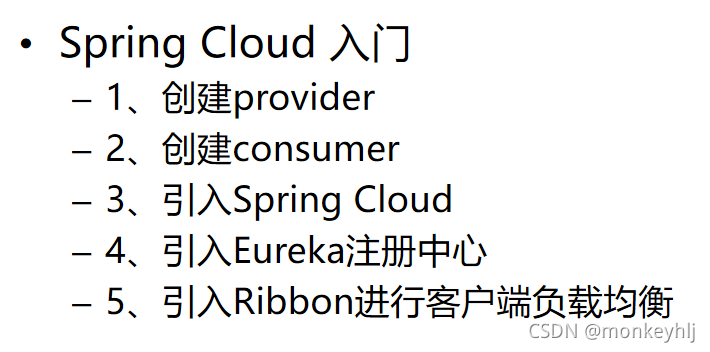
六、Spring Boot与分布式


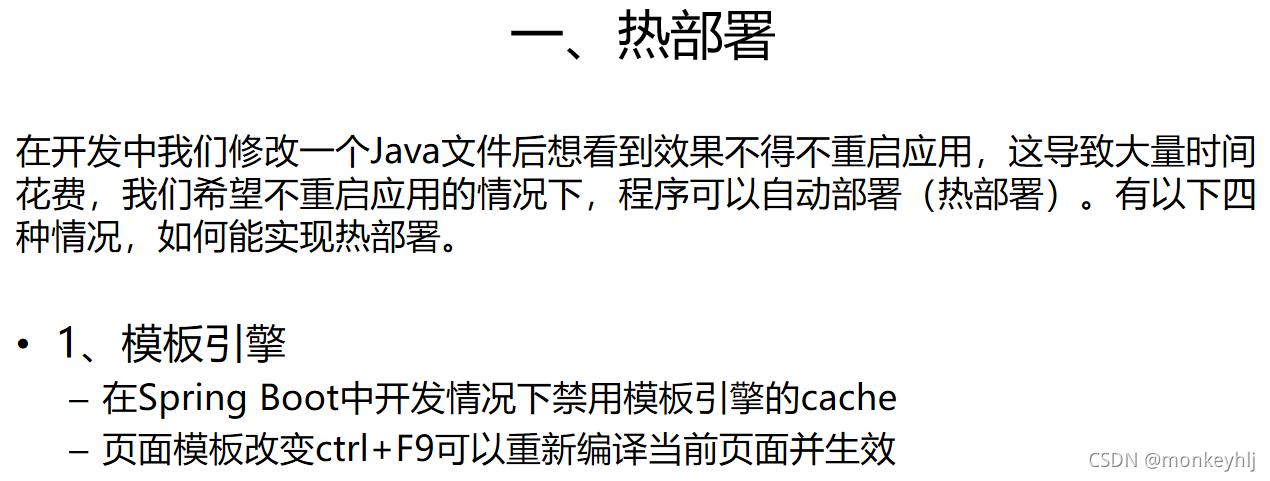
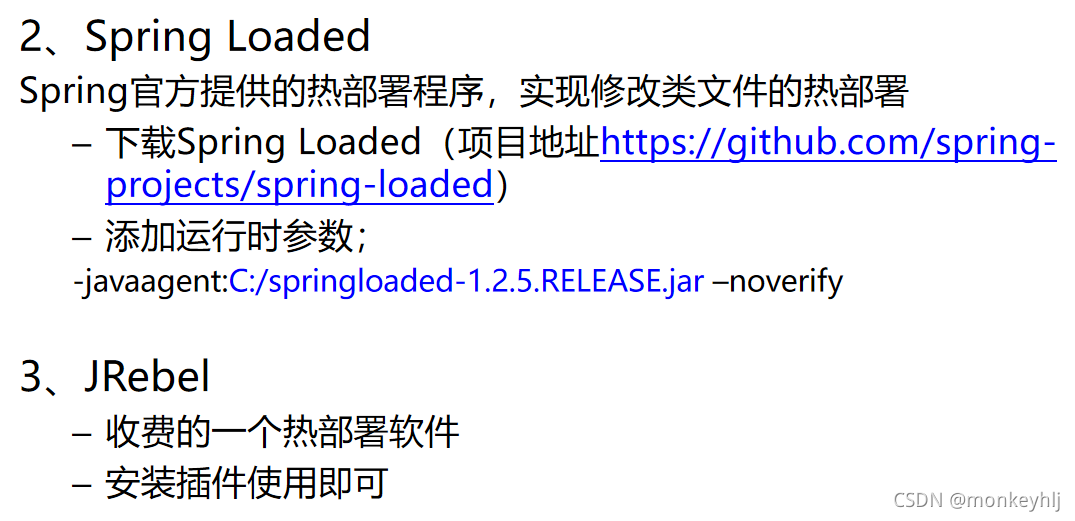
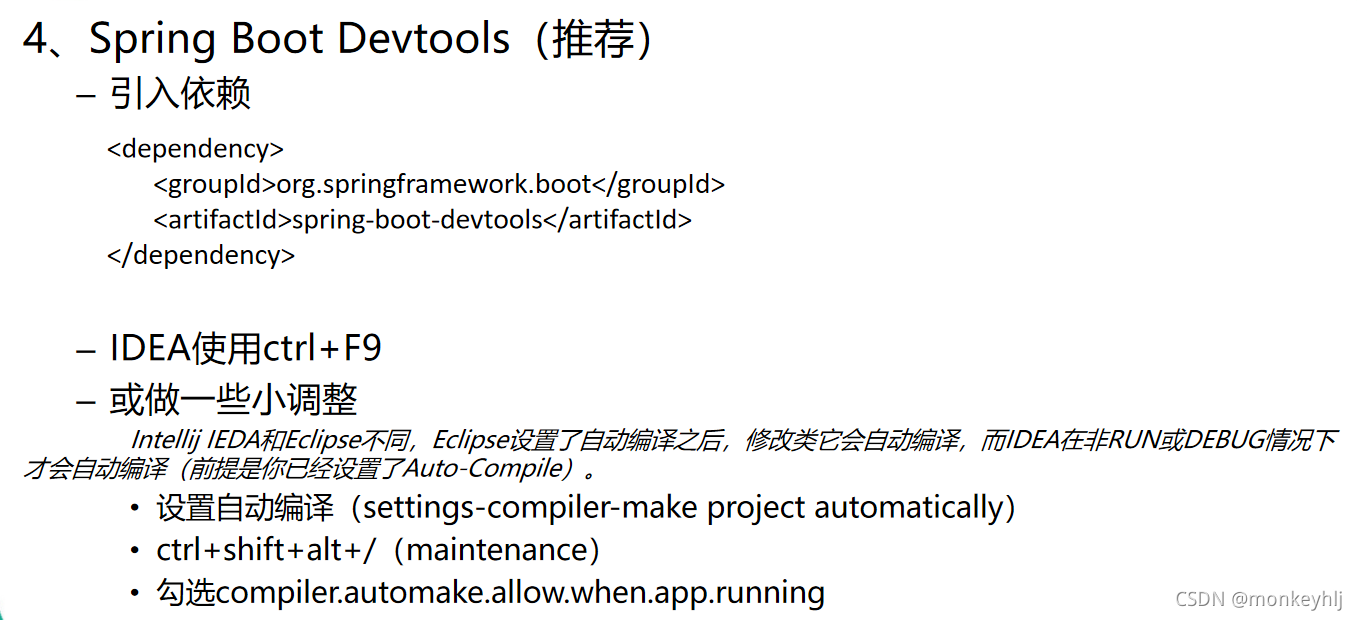
七、Spring Boot与开发热部署
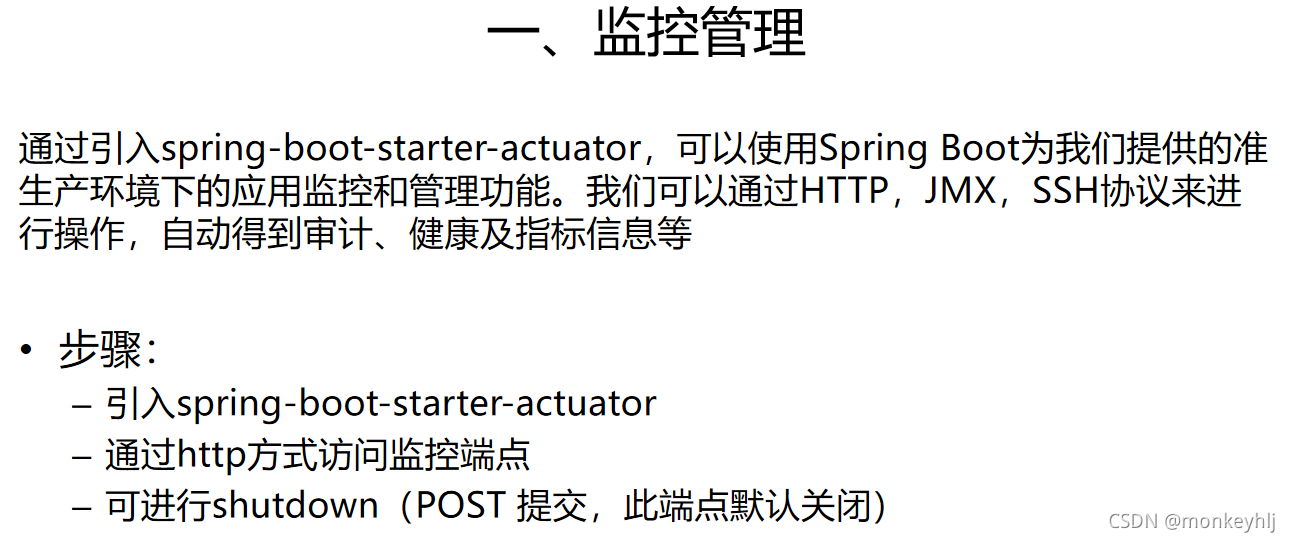
八、Spring Boot与监控管理


【学习视频参考】https://www.bilibili.com/video/BV1Ct411g78e
【代码参考】https://github.com/monkeyhlj/spring-study/tree/master/spring-boot-study-atguigu(2)


 1081
1081

 被折叠的 条评论
为什么被折叠?
被折叠的 条评论
为什么被折叠?
 到【灌水乐园】发言


