


源码安装tengine-2.1.0单节点、实现tomcat负载均衡
一、环境准备
服务器:
192.168.1.101 tomcat7、tengine
192.168.1.102 tomcat7
1、下载tengine-2.1.0.tar.gz---->http://tengine.taobao.org/download_cn.html
2、解压到192.168.1.101的/opt目录下
#[root@node1 opt]# tar -zxvf tengine-2.1.0.tar.gz
3、进入刚才的解压目录下:
#[root@node1 tengine-2.1.0]#
4、执行编译环境准备
./configure \
--error-log-path=/var/log/nginx/error.log \
--http-log-path=/var/log/nginx/access.log \
--pid-path=/var/run/nginx/nginx.pid \
--lock-path=/var/lock/nginx.lock \
--with-http_ssl_module \
--with-http_flv_module \
--with-http_stub_status_module \
--with-http_gzip_static_module \
--http-client-body-temp-path=/var/tmp/nginx/client/ \
--http-proxy-temp-path=/var/tmp/nginx/proxy/ \
--http-fastcgi-temp-path=/var/tmp/nginx/fcgi/ \
--http-uwsgi-temp-path=/var/tmp/nginx/uwsgi \
--http-scgi-temp-path=/var/tmp/nginx/scgi \
--with-pcre
./configure: error: the HTTP rewrite module requires the PCRE library.
You can either disable the module by using --without-http_rewrite_module
option, or install the PCRE library into the system, or build the PCRE library
statically from the source with nginx by using --with-pcre=<path> option.
解决:
需要安装依赖包:
#yum -y install gcc*
#yum -y install pcre*
#yum -y install pcre-devel
#yum -y install zlib*
#yum -y install openssl*
注意:--prefix=/opt/new_soft\是指定安装路径,默认安装在/usr/local/nginx目录
二、检查正常后开始:编译、安装
#make
#make install
1、创建文件夹:mkdir -p /var/tmp/nginx/client/
2、启动
[root@node1 nginx]# /usr/local/nginx/sbin/nginx -c /usr/local/nginx/conf/nginx.conf
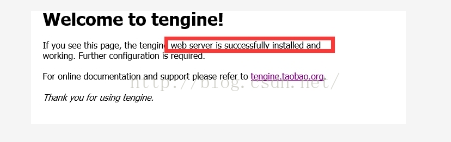
3、浏览器访问:http://192.168.1.101/
三、配置tomcat访问负载均衡
1、进入/usr/local/nginx/conf目录下,修改配置文件
#vi nginx.conf
#user nobody;
worker_processes 4; #进程数量:和cpu核数绑定
events {
worker_connections 2048; #连接worker数
}
http {
include mime.types;
default_type application/octet-stream;
sendfile on;
keepalive_timeout 65;
upstream nginx{
session_sticky cookie=uid fallback=on path=/ mode=insert option=indirect;
server 192.168.1.101:8080 weight=2;
server 192.168.1.102:8080 weight=1;
check interval=3000 rise=2 fall=5 timeout=1000 type=http;
check_http_send "HEAD /index.jsp HTTP/1.0\r\n\r\n";
check_http_expect_alive http_2xx http_3xx;
}
server {
listen 80;
server_name 10.37.49.185;#访问nginx的ip
location / {
session_sticky_hide_cookie upstream=nginx;
proxy_pass http://nginx;
proxy_set_header Host $host;
proxy_set_header X-Real-IP $remote_addr;
root html;
index index.html index.htm;
}
location ~ .*\.(gif|jpg|jpeg|png|bmp|swf|js|css)$ #实现静态资源访问
{
root /data/tomcat/webapps/; #静态资源路径
if (-f $request_filename) {
expires 1d;
break;
}
}
location /status {
check_status ;#多个tomcat的健康检查
}
error_page 500 502 503 504 /50x.html;
location = /50x.html {
root html;
}
}
}
2、启动tengine:[root@node1 nginx]# /usr/local/nginx/sbin/nginx -c /usr/local/nginx/conf/nginx.conf
3、启动2台机器的tomcat:[root@node1 bin]# sudo sh startup.sh
4、浏览器访问:http://192.168.1.101/
可以实现访问tomcat
浏览器访问:http://192.168.1.101/status
可以监控tomcat状态


 1367
1367


 被折叠的 条评论
为什么被折叠?
被折叠的 条评论
为什么被折叠?
 到【灌水乐园】发言


