


YUM查看可用安装包
- [root@microlmj ~]# yum list mysql*
- Available Packages
- MySQL-python.x86_64 1.2.3-0.3.c1.1.el6 base
- mysql.x86_64 5.1.73-3.el6_5 updates
- mysql-bench.x86_64 5.1.73-3.el6_5 updates
- mysql-connector-java.noarch 1:5.1.17-6.el6 base
- mysql-connector-odbc.x86_64 5.1.5r1144-7.el6 base
- mysql-devel.x86_64 5.1.73-3.el6_5 updates
- mysql-embedded.x86_64 5.1.73-3.el6_5 updates
- mysql-embedded-devel.x86_64 5.1.73-3.el6_5 updates
- mysql-libs.x86_64 5.1.73-3.el6_5 updates
- mysql-server.x86_64 5.1.73-3.el6_5 updates
- mysql-test.x86_64 5.1.73-3.el6_5 updates
安装mysql,mysql-server,mysql-devel.
- [root@microlmj~]# yum -y install mysql
- [root@microlmj~]# yum -y install mysql-server
- [root@microlmj~]# yum -y install mysql-devel
设置字符编码
- [root@microlmj~]# vi /etc/my.cnf
- [mysqld]
- datadir=/var/lib/mysql
- socket=/var/lib/mysql/mysql.sock
- user=mysql
- # Disabling symbolic-links is recommended to prevent assorted security risks
- symbolic-links=0
- [mysqld_safe]
- log-error=/var/log/mysqld.log
- pid-file=/var/run/mysqld/mysqld.pid
- #new add
- default-character-set=utf8
启动服务
- [root@microlmj init.d]# /etc/rc.d/init.d/mysqld start
- [ OK ]
- Starting mysqld: [ OK ]
- [root@microlmj init.d]# mysql -u root
- Welcome to the MySQL monitor. Commands end with ; or \g.
- Your MySQL connection id is 2
- Server version: 5.1.73 Source distribution
- Copyright (c) 2000, 2013, Oracle and/or its affiliates. All rights reserved.
- Oracle is a registered trademark of Oracle Corporation and/or its
- affiliates. Other names may be trademarks of their respective
- owners.
- Type 'help;' or '\h' for help. Type '\c' to clear the current input statement.
- mysql>
- mysql> select user ,host, password from mysql.user;
- +------+-----------------------+----------+
- | user | host | password |
- +------+-----------------------+----------+
- | root | localhost | |
- | root | ay14031710421034561bz | |
- | root | 127.0.0.1 | |
- | | localhost | |
- | | ay14031710421034561bz | |
- +------+-----------------------+----------+
- 5 rows in set (0.00 sec)
给root@localhost设置一个密码
- mysql> set password for root@localhost=password('yourpassword');
- Query OK, 0 rows affected (0.00 sec)
- mysql> select user ,host, password from mysql.user;
- +------+-----------------------+-------------------------------------------+
- | user | host | password |
- +------+-----------------------+-------------------------------------------+
- | root | localhost | *7E7C3D7567802A1EC617020149BB4B81E551B5EB |
- | root | ay14031710421034561bz | |
- | root | 127.0.0.1 | |
- | | localhost | |
- | | ay14031710421034561bz | |
- +------+-----------------------+-------------------------------------------+
- 5 rows in set (0.00 sec)
- mysql> exit
- Bye
- [root@microlmj init.d]# mysql -u root
- ERROR 1045 (28000): Access denied for user 'root'@'localhost' (using password: NO)
输入密码登录 0>.<0
- [root@microlmj init.d]# mysql -u root -p
- Enter password:
- Welcome to the MySQL monitor. Commands end with ; or \g.
- Your MySQL connection id is 7
- Server version: 5.1.73 Source distribution
- ...
- Type 'help;' or '\h' for help. Type '\c' to clear the current input statement.
- mysql>
但是俺想远程访问
新建个用户microlmj (*用root账户登陆先)
- mysql> insert into mysql.user(Host,User,Password) values("%","microlmj",password("microlmj"));
刷新系统权限-.-
- mysql> flush privileges;
- Query OK, 0 rows affected (0.00 sec)
- [root@microlmj init.d]# mysql -u microlmj -p
- Enter password:
- Welcome to the MySQL monitor. Commands end with ; or \g.
- ...
- Type 'help;' or '\h' for help. Type '\c' to clear the current input statement.
- mysql>
- mysql> use test;
- Database changed
- mysql> show tables;
- Empty set (0.00 sec)
- mysql> create table user (id int primary key, name varchar(10));
- Query OK, 0 rows affected (0.01 sec)
- mysql> desc user;
- +-------+-------------+------+-----+---------+-------+
- | Field | Type | Null | Key | Default | Extra |
- +-------+-------------+------+-----+---------+-------+
- | id | int(11) | NO | PRI | NULL | |
- | name | varchar(10) | YES | | NULL | |
- +-------+-------------+------+-----+---------+-------+
- 2 rows in set (0.00 sec)
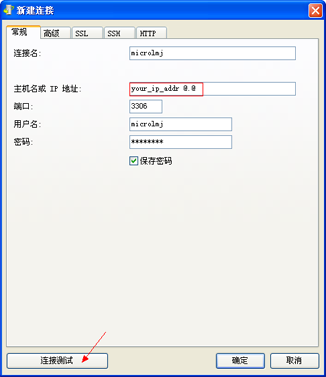
连接成功 -.-
Complete!
-.-


 393
393


 被折叠的 条评论
为什么被折叠?
被折叠的 条评论
为什么被折叠?
 到【灌水乐园】发言


