


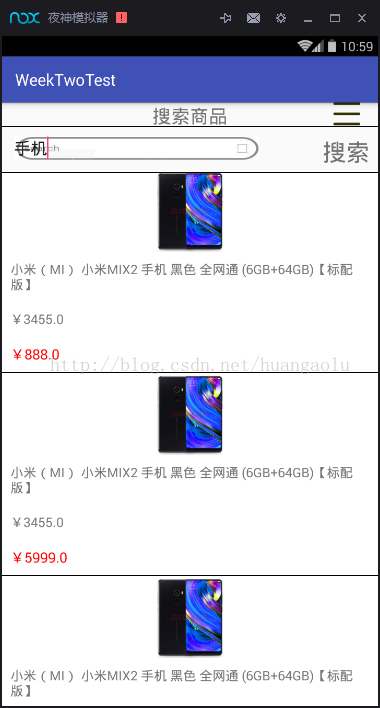
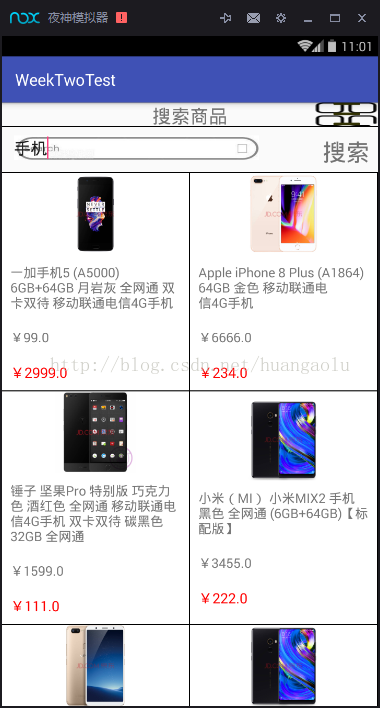
这是一个与OKhttp和RecyclerView相关的小demo,可以搜索(此接口只能输入手机或笔记本),切换布局,如果你不明白的话去看一下京东(大言不惭)。demo用MVP模式写成,OKhttp请求数据,RecyclerView展示数据,SpringView实现刷新和加载更多。闲言少叙,来看图:
界面有点low,大家将就一下哈!下面上代码。
首先是MainActivity。
public class MainActivity extends AppCompatActivity implements MainView, View.OnClickListener {

    //默认 page=1
    int page = 1;
    private ImageView ivChange;
    private EditText et;
    private TextView search;
    private RecyclerView recycler;
    private SpringView spring;
    private List<ShopBean.DataBean> list = new ArrayList<>();
    private MyPresneter presneter;
    private MyAdapter adapter;
    private boolean flag;

    @Override
    protected void onCreate(Bundle savedInstanceState) {
        super.onCreate(savedInstanceState);
        setContentView(R.layout.activity_main);
        initView();
        //实例化MyPresenter
        presneter = new MyPresneter(this);
        //为RecyclerView设置分割线
        recycler.addItemDecoration(new DividerItemDecoration(this, DividerItemDecoration.VERTICAL));


        /**
         * 设置头部样式
         */
        spring.setHeader(new DefaultHeader(this));
        /**
         * 设置底部样式
         */
        spring.setFooter(new DefaultFooter(this));
        /**
         * 上拉刷新、下拉加载
         */
        spring.setListener(new SpringView.OnFreshListener() {
            @Override
            public void onRefresh() {

                page++;//没拉
                String s1 = String.valueOf(page);
                presneter.getData(s1);
                frashAdapter();
                Toast.makeText(MainActivity.this, s1, Toast.LENGTH_SHORT).show();
                /**
                 * 重置控件位置,暴露给外部的方法,用于在刷新或者加载完成后调用
                 */
                spring.onFinishFreshAndLoad();
            }

            @Override
            public void onLoadmore() {
                presneter.getData("1");
                frashAdapter();
                spring.onFinishFreshAndLoad();
            }
        });
    }

    private void frashAdapter() {
        if (adapter == null) {
            recycler.setLayoutManager(new LinearLayoutManager(this));
            adapter = new MyAdapter(this, list, flag);
            adapter.notifyDataSetChanged();
        } else {
            adapter.notifyDataSetChanged();
        }
    }

    /**
     * 初始化
     */
    private void initView() {
        ivChange = (ImageView) findViewById(R.id.iv_change);
        et = (EditText) findViewById(R.id.et);
        search = (TextView) findViewById(R.id.tv_search);
        recycler = (RecyclerView) findViewById(R.id.recycler);
        spring = (SpringView) findViewById(R.id.spring);
        ivChange.setOnClickListener(this);
        search.setOnClickListener(this);
    }

    /**
     * 由于在MyPresenter中的getData()中调用了此方法,所以此时此方法携带数据
     * @param bean
     */
    @Override
    public void success(ShopBean bean) {
        //将数据加进集合里,在Adapter中通过构造器传过去
        list.addAll(bean.getData());
        //刷新适配器
        adapter.notifyDataSetChanged();
    }

    /**
     * 获取输入框数据的方法
     */
    @Override
    public String getKeywords() {
        return et.getText().toString().trim();
    }


    /**
     * 点击事件
     */
    @Override
    public void onClick(View view) {
        String str = String.valueOf(page);
        switch (view.getId()) {
            case R.id.tv_search:
                presneter.getData(str);
                break;
            case R.id.iv_change:
                change();
                break;
        }
    }

    /**
     * 点击变换布局样式
     */
    private void change() {
        if (flag) {
            //重新设置图标
            ivChange.setBackgroundResource(R.drawable.lv_icon);
            LinearLayoutManager manager = new LinearLayoutManager(this);
            recycler.setLayoutManager(manager);
            recycler.addItemDecoration(new DividerItemDecoration(this, DividerItemDecoration.VERTICAL));
            adapter = new MyAdapter(this, list, flag);
            recycler.setAdapter(adapter);
            flag = false;
        } else {
            ivChange.setBackgroundResource(R.drawable.grid_icon);
            recycler.setLayoutManager(new GridLayoutManager(this, 2));
            recycler.addItemDecoration(new DividerItemDecoration(this, DividerItemDecoration.HORIZONTAL));
            adapter = new MyAdapter(this, list, flag);
            recycler.setAdapter(adapter);
            flag = true;
        }
    }


    /**
     * 防止内存泄漏
     */
    @Override
    protected void onDestroy() {
        super.onDestroy();
        presneter.detach();
    }
}
public interface ModelCallback {
    /**
     *  model接口
     * @param keywords mobile=手机
     * @param page page=1
     * @param onNetListener
     */
    void getData(String keywords, String page, OnNetListener<ShopBean> onNetListener);
}
public class MyModel implements ModelCallback {
    Handler handler = new Handler(Looper.getMainLooper());

    /**
     * 实现接口重写的方法
     * @param keywords      mobile=手机/笔记本
     * @param page          page=1
     * @param onNetListener
     */
    @Override
    public void getData(String keywords, String page, final OnNetListener<ShopBean> onNetListener) {
        OkHttpUtils.getOkHttpUtils().doGet("http://120.27.23.105/product/searchProducts" + "?keywords=" + keywords + "&page=" + page, new Callback() {
            @Override
            public void onFailure(Call call, final IOException e) {
                handler.post(new Runnable() {
                    @Override
                    public void run() {
                        onNetListener.failure(e);
                    }
                });
            }

            @Override
            public void onResponse(Call call, final Response response) throws IOException {
                //网络请求后返回的数据
                String result = response.body().string();
                Gson gson = new Gson();
                //用Gson进行解析
                final ShopBean shopBean = gson.fromJson(result, ShopBean.class);
                handler.post(new Runnable() {
                    @Override
                    public void run() {
                        onNetListener.success(shopBean);
                    }
                });
            }
        });
    }
}
public interface MainView {
    /**
     * 获取数成功后
     */
    void success(ShopBean bean);

    /**
     * 获取输入框的数据
     */
    String getKeywords();


}
public class MyPresneter {
    MainView view;//V层
    MyModel model;//M层

    /**
     * 因为在MVP模式中V层与M层不直接交互,通过P层间接交互,所以需要通过构造器将V层数据与M层数据传到P层
     * @param view
     */
    public MyPresneter(MainView view) {
        this.view = view;
        model = new MyModel();
    }

    /**
     * 获取数据
     * @param num page
     */
    public void getData(String page){
        //获取输入框输入的数据
        String keywords = view.getKeywords();
        /**
         * keywords mobile=手机/笔记本
         * num page=1
         */
        model.getData(keywords, page, new OnNetListener<ShopBean>() {
            @Override
            public void success(ShopBean shopBean) {
                //至此view里面已经携带了从网络请求来并解析后的数据
                view.success(shopBean);
            }

            @Override
            public void failure(Exception e) {

            }
        });
    }

    /**
     * 防止内存泄露的方法,在Activity中重写onDestroy方法调用
     */
    public void detach(){
        this.view = null;
    }
}
public class MyAdapter extends RecyclerView.Adapter{
    Context context;//上下文
    List<ShopBean.DataBean> list;//包含数据的集合
    boolean flag;//根据flag判断显示那种布局

    /**
     * List集合里怎么有数据的呢?请看MainActivity中的show方法
     */
    public MyAdapter(Context context,List<ShopBean.DataBean> list,boolean flag) {
        this.context = context;
        this.list = list;
        this.flag = flag;
    }

    /**
     * Called when RecyclerView needs a new ViewHolder of the given type to represent
     * an item.
     */
    @Override
    public RecyclerView.ViewHolder onCreateViewHolder(ViewGroup parent, int viewType) {
        /**
         * 如果flag=true加载线性布局,否则加载网格布局
         */
        if (flag) {
            View inflate1 = LayoutInflater.from(context).inflate(R.layout.lv_item_layout, null);
            return new LvViewHolder(inflate1);
        }else{
            View inflate2 = LayoutInflater.from(context).inflate(R.layout.gv_item_layout, null);
            return new GvViewHolder(inflate2);
        }

    }

    /**
     * Called by RecyclerView to display the data at the specified position. This method should
     * update the contents of the  ViewHolder#itemView to reflect the item at the given
     * position.
     */
    @Override
    public void onBindViewHolder(RecyclerView.ViewHolder holder, int position) {
        /**
         *如果flag=true设置线性布局的数据,否则设置网格布局的数据
         */
        if(flag){
           if(holder instanceof LvViewHolder){
               //按照|格式拆分图片路径
               String[] str = list.get(position).getImages().split("\\|");
               ImageLoader.getInstance().displayImage(str[0],((LvViewHolder) holder).iv);
               ((LvViewHolder) holder).title.setText(list.get(position).getTitle());
               ((LvViewHolder) holder).newPrice.setText("¥"+list.get(position).getPrice()+"");
               ((LvViewHolder) holder).oldPrice.setText("¥"+list.get(position).getBargainPrice()+"");
           }
        }else{
          if(holder instanceof GvViewHolder){
              //按照|格式拆分图片路径
              String[] str = list.get(position).getImages().split("\\|");
              ImageLoader.getInstance().displayImage(str[0],((GvViewHolder) holder).gIv);
              ((GvViewHolder) holder).gTitle.setText(list.get(position).getTitle());
              ((GvViewHolder) holder).gNewPrice.setText("¥"+list.get(position).getPrice()+"");
              ((GvViewHolder) holder).gPrice.setText("¥"+list.get(position).getBargainPrice()+"");
          }
        }

    }

    /**
     * Returns the number of items in the adapter bound to the parent RecyclerView.
     * @return
     */
    @Override
    public int getItemCount() {
        return list==null?0:list.size();
    }

    /**
     * A ViewHolder describes an item view and metadata about its place within the RecyclerView.
     * 线性布局viewHolder
     */
     class LvViewHolder extends RecyclerView.ViewHolder{
         TextView title,newPrice,oldPrice;
         ImageView iv;

        public LvViewHolder(View itemView) {
            super(itemView);
            iv = itemView.findViewById(R.id.iv_lv);
            title = itemView.findViewById(R.id.tv_lv_title);
            newPrice=itemView.findViewById(R.id.tv_lv_new_price);
            oldPrice=itemView.findViewById(R.id.tv_lv_old_price);
        }
    }

    /**
     * A ViewHolder describes an item view and metadata about its place within the RecyclerView.
     * 网格布局viewHolder
     */
    class GvViewHolder extends RecyclerView.ViewHolder{
        TextView gTitle,gNewPrice,gPrice;
        ImageView gIv;

        public GvViewHolder(View itemView) {
            super(itemView);
            gIv = itemView.findViewById(R.id.image);
            gTitle = itemView.findViewById(R.id.title);
            gNewPrice=itemView.findViewById(R.id.new_price);
            gPrice=itemView.findViewById(R.id.price);
        }
    }

}
OKhttpUtils,封装了get和post请求
public class OkHttpUtils {
    /**
     * OKhttp提供的打印log的类
     */

    static HttpLoggingInterceptor loging;
    private static OkHttpUtils okHttpUtils = null;
    private static OkHttpClient client;

    /**
     * 为单例模式提供构造器
     */
    private OkHttpUtils() {
    }

    /**
     * 单例模式封装
     */
    public static OkHttpUtils getOkHttpUtils() {
        loging = new HttpLoggingInterceptor();
        loging.setLevel(HttpLoggingInterceptor.Level.BODY);
        if (okHttpUtils == null) {
            okHttpUtils = new OkHttpUtils();
            client = new OkHttpClient.Builder()
                    .connectTimeout(20, TimeUnit.SECONDS)
                    .addInterceptor(loging)
                    .addInterceptor(new MyInterceptor())
                    .build();
        }

        return okHttpUtils;

    }

    /**
     * GET请求
     */
    public void doGet(String url, Callback callback) {
        Request request = new Request.Builder().url(url).build();
        client.newCall(request).enqueue(callback);

    }

    /**
     * POST请求
     */
    public void doPost(Map<String, String> params, String url, Callback callback) {
        FormBody.Builder builder = new FormBody.Builder();
        for (Map.Entry<String, String> entry : params.entrySet()) {
            builder.add(entry.getKey(), entry.getValue());
        }
        FormBody build = builder.build();
        Request request = new Request.Builder().url(url).post(build).build();
        client.newCall(request).enqueue(callback);
    }
}
OnNetListener接口
public interface OnNetListener<T> {
    /**
     * 请求成功时调用
     */
    void success(T t);

    /**
     * 请求失败时调用
     */
    void failure(Exception e);
}public class MyInterceptor implements Interceptor {
private Request requestProcess;
private Response proceed;
@Override
public Response intercept(Chain chain) throws IOException {
//获取request
Request request = chain.request();
//如果是GET请求执行这个方法
if ("GET".equals(request.method())) {
//为原来的URL添加公共参数
String newUrl = request.url().toString() + "&source=android";
Request.Builder builder = request.newBuilder();
requestProcess = builder.get().url(newUrl).build();
proceed = chain.proceed(requestProcess);
} else {
FormBody.Builder builder = new FormBody.Builder();
RequestBody body = request.body();
if (body instanceof FormBody) {
FormBody formbody = (FormBody) body;
for (int i = 0; i < formbody.size(); i++) {
builder.add(formbody.encodedName(i), formbody.encodedValue(i));
}
builder.add("source", "android");
}
requestProcess = request.newBuilder().url(request.url().toString()).post(builder.build()).build();
proceed = chain.proceed(requestProcess);
}
return proceed;
}
}
代码说完了,下面是布局
MainActivity的布局
<?xml version="1.0" encoding="utf-8"?>
<LinearLayout xmlns:android="http://schemas.android.com/apk/res/android"
    xmlns:tools="http://schemas.android.com/tools"
    android:layout_width="match_parent"
    android:layout_height="match_parent"
    android:orientation="vertical"
    tools:context="com.bwie.huang.weektwotest.MainActivity">
    <LinearLayout
        android:layout_width="match_parent"
        android:layout_height="35dp"
        android:orientation="vertical">
        <RelativeLayout
            android:layout_width="match_parent"
            android:layout_height="29dp">
            <TextView
                android:layout_width="match_parent"
                android:layout_height="29dp"
                android:gravity="center"
                android:textSize="20sp"
                android:text="搜索商品"
                />
            <ImageView
                android:id="@+id/iv_change"
                android:layout_width="wrap_content"
                android:layout_height="30dp"
                android:layout_alignParentRight="true"
                android:src="@drawable/lv_icon"/>
        </RelativeLayout>

        <TextView
            android:layout_width="match_parent"
            android:layout_height="1dp"
            android:background="@android:color/black" />
    </LinearLayout>
    <RelativeLayout
        android:layout_width="match_parent"
        android:layout_height="50dp"
        android:gravity="center_vertical">
        <EditText
            android:id="@+id/et"
            android:layout_width="300dp"
            android:layout_height="30dp"
            android:layout_marginLeft="15dp"
            android:background="@drawable/search"
           />
        <TextView
            android:id="@+id/tv_search"
            android:layout_width="wrap_content"
            android:layout_height="wrap_content"
            android:layout_alignParentRight="true"
            android:textSize="25sp"
            android:layout_marginRight="10dp"
            android:text="搜索"/>
    </RelativeLayout>
    <TextView
        android:layout_width="match_parent"
        android:layout_height="1dp"
        android:background="@android:color/black" />
    <com.liaoinstan.springview.widget.SpringView
        android:id="@+id/spring"
        android:layout_width="match_parent"
        android:layout_height="match_parent">
        <android.support.v7.widget.RecyclerView
            android:id="@+id/recycler"
            android:layout_width="match_parent"
            android:layout_height="match_parent"/>
    </com.liaoinstan.springview.widget.SpringView>
</LinearLayout>
<?xml version="1.0" encoding="utf-8"?>
<LinearLayout xmlns:android="http://schemas.android.com/apk/res/android"
    android:layout_width="match_parent"
    android:layout_height="match_parent"
    android:background="@android:color/white"
    android:padding="10dp">
    <ImageView
        android:id="@+id/iv_lv"
        android:layout_width="0dp"
        android:layout_weight="1"
        android:layout_height="60dp"
        android:src="@mipmap/ic_launcher"/>
    <LinearLayout
        android:layout_width="0dp"
        android:layout_weight="3"
        android:orientation="vertical"
        android:padding="10dp"
        android:layout_height="100dp">
        <TextView
            android:id="@+id/tv_lv_title"
            android:layout_width="wrap_content"
            android:layout_height="wrap_content"
            android:text="标题"/>
        <RelativeLayout
            android:layout_width="match_parent"
            android:layout_height="wrap_content"

           >
            <TextView
                android:id="@+id/tv_lv_old_price"
                android:layout_width="wrap_content"
                android:layout_height="wrap_content"
                android:text="价格"/>
            <TextView
                android:id="@+id/tv_lv_new_price"
                android:layout_width="wrap_content"
                android:layout_height="wrap_content"
                android:layout_alignParentRight="true"
                android:textColor="#ff00"
                android:text="折扣价"/>
        </RelativeLayout>
    </LinearLayout>
</LinearLayout><?xml version="1.0" encoding="utf-8"?>
<LinearLayout xmlns:android="http://schemas.android.com/apk/res/android"
android:layout_width="match_parent"
android:orientation="vertical"
android:layout_gravity="center"
android:gravity="center"
android:background="#fff"
android:layout_height="match_parent">
<ImageView
android:id="@+id/image"
android:layout_width="100dp"
android:src="@mipmap/ic_launcher"
android:layout_height="100dp"
/>
<LinearLayout
android:layout_width="wrap_content"
android:layout_height="wrap_content"
android:orientation="vertical"
>
<TextView
android:id="@+id/title"
android:layout_width="wrap_content"
android:layout_height="wrap_content"
android:text="标题"
android:padding="10dp"
/>
<TextView
android:id="@+id/price"
android:padding="10dp"
android:layout_width="wrap_content"
android:layout_height="wrap_content"
android:text="价格"
/>
<TextView
android:id="@+id/new_price"
android:textColor="#ff0000"
android:padding="10dp"
android:layout_width="wrap_content"
android:layout_height="wrap_content"
android:textSize="15sp"
android:text="价格"
/>
</LinearLayout>
</LinearLayout>
<?xml version="1.0" encoding="utf-8"?>
<shape xmlns:android="http://schemas.android.com/apk/res/android">
    <solid android:color="@android:color/black" />
    <size
        android:width="1dp"
        android:height="1dp" />
</shape><resources>
<!-- Base application theme. -->
<style name="AppTheme" parent="Theme.AppCompat.Light.DarkActionBar">
<!-- Customize your theme here. -->
<item name="colorPrimary">@color/colorPrimary</item>
<item name="colorPrimaryDark">@color/colorPrimaryDark</item>
<item name="colorAccent">@color/colorAccent</item>
<!--设置RecyclerView默认分割线-->
<item name="android:listDivider">@drawable/diver</item>
</style>
</resources>
public class App extends Application {
    @Override
    public void onCreate() {
        super.onCreate();
        ImageLoaderConfiguration configuration = new ImageLoaderConfiguration.Builder(this).build();
        ImageLoader.getInstance().init(configuration);
    }
}
HttpLoggingInterceptor loging;OKhttp提供的打印log的类
compile 'com.squareup.okhttp3:logging-interceptor:3.9.0'//我叫依赖
最后来俩图片


如果我的博客对您有那么一丢丢的帮助的话,不妨抬起您发财的小手点个赞吧!


 91
91


 被折叠的 条评论
为什么被折叠?
被折叠的 条评论
为什么被折叠?
 到【灌水乐园】发言


