


Oracle Database 11g Release 2 (11.2) Installation On Oracle Linux 5
This article describes the installation of Oracle Database 11g Release 2 (11.2) (64-bit) on Oracle Linux 5 (64-bit). The article is based on a server installation with a minimum of 2G swap, secure Linux disabled. Oracle recommend a default server installation, but for these installations the following package groups installed:
- GNOME Desktop Environment
- Editors
- Graphical Internet
- Text-based Internet
- Development Libraries
- Development Tools
- Server Configuration Tools
- Administration Tools
- Base
- System Tools
- X Window System
An example of this type of Linux installations can be seen here. Alternative installations may require more packages to be loaded, in addition to the ones listed below.
- Download Software
- Unpack Files
- Hosts File
- Oracle-Validated Setup
- Manual Setup
- Additional Setup
- Installation
- Post Installation
Download Software
Download the following software.
Download the Oracle software from OTN or MOS depending on your support status.
- OTN: Oracle Database 11g Release 2 (11.2.0.1) Software (64-bit)
- MOS: Oracle Database 11g Release 2 (11.2.0.2 or 11.2.0.3) Software (64-bit)
Unpack Files
Unzip the files.
# 11.2.0.1
unzip linux.x64_11gR2_database_1of2.zip
unzip linux.x64_11gR2_database_2of2.zip

#11.2.0.2
unzip p10098816_112020_Linux-x86-64_1of7.zip
unzip p10098816_112020_Linux-x86-64_2of7.zip

#11.2.0.3
unzip p10404530_112030_Linux-x86-64_1of7.zip
unzip p10404530_112030_Linux-x86-64_2of7.zip
You should now have a single directory called "database" containing installation files.
Hosts File
The "/etc/hosts" file must contain a fully qualified name for the server.
<IP-address> <fully-qualified-machine-name> <machine-name>
For example.
127.0.0.1       localhost.localdomain  localhost
192.168.2.181   ol5-11gr2.localdomain  ol5-11gr2
Oracle-Validated Setup
If you plan to use the "oracle-validated" package to perform all your prerequisite setup, follow the instructions at http://public-yum.oracle.com to setup the yum repository for OL, then perform the following command.
# yum install oracle-validated
All necessary prerequisites will be performed automatically.
Manual Setup
If you have not used the "oracle-validated" package to perform all prerequisites, you will need to manually perform the following setup tasks.
Oracle recommend the following minimum parameter settings.
fs.suid_dumpable = 1
fs.aio-max-nr = 1048576
fs.file-max = 6815744
kernel.shmall = 2097152
kernel.shmmax = 536870912
kernel.shmmni = 4096
kernel.sem = 250 32000 100 128
net.ipv4.ip_local_port_range = 9000 65500
net.core.rmem_default = 262144
net.core.rmem_max = 4194304
net.core.wmem_default = 262144
net.core.wmem_max = 1048586
The current values can be tested using the following command.
/sbin/sysctl -a | grep <param-name>
Add or amend the following lines in the "/etc/sysctl.conf" file.
fs.suid_dumpable = 1
fs.aio-max-nr = 1048576
fs.file-max = 6815744
kernel.shmall = 2097152
kernel.shmmax = 536870912
kernel.shmmni = 4096
# semaphores: semmsl, semmns, semopm, semmni
kernel.sem = 250 32000 100 128
net.ipv4.ip_local_port_range = 9000 65500
net.core.rmem_default=4194304
net.core.rmem_max=4194304
net.core.wmem_default=262144
net.core.wmem_max=1048586
Run the following command to change the current kernel parameters.
/sbin/sysctl -p
Add the following lines to the "/etc/security/limits.conf" file.
oracle              soft    nproc   2047
oracle              hard    nproc   16384
oracle              soft    nofile  4096
oracle              hard    nofile  65536
oracle              soft    stack   10240
Installation
Log into the oracle user. If you are using X emulation then set the DISPLAY environmental variable.
DISPLAY=<machine-name>:0.0; export DISPLAY
Start the Oracle Universal Installer (OUI) by issuing the following command in the database directory.
./runInstaller
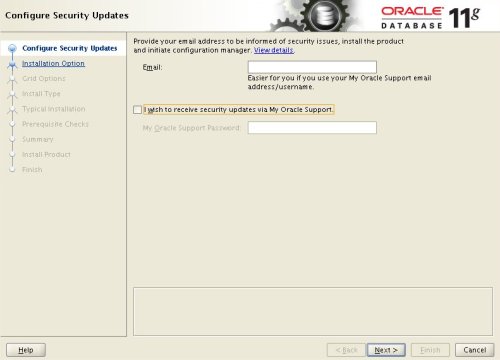
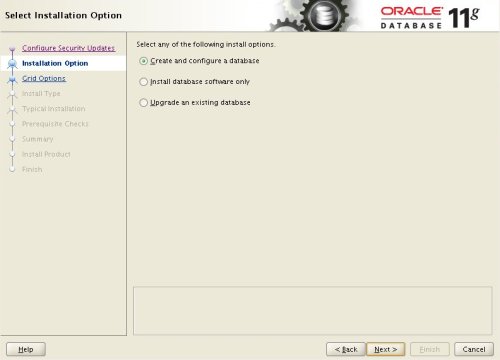
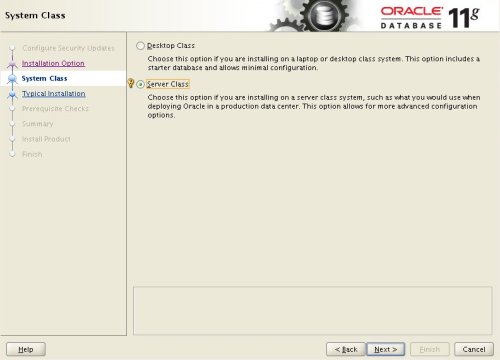
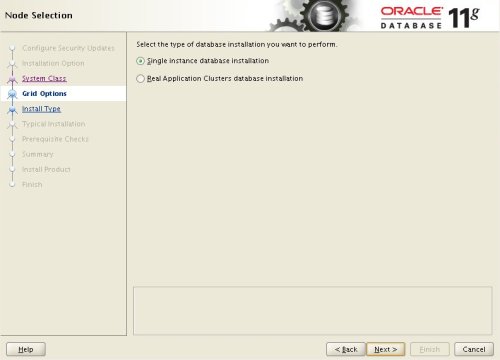
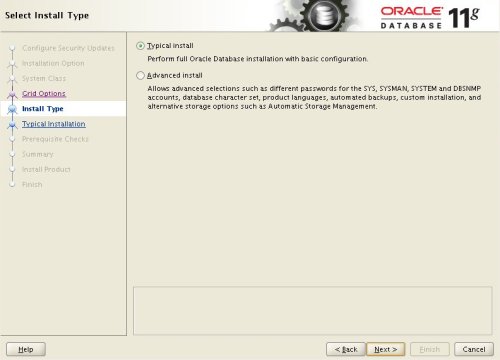
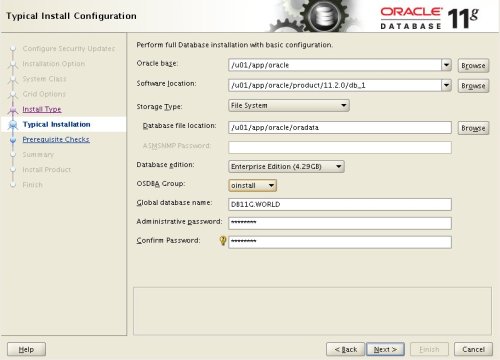
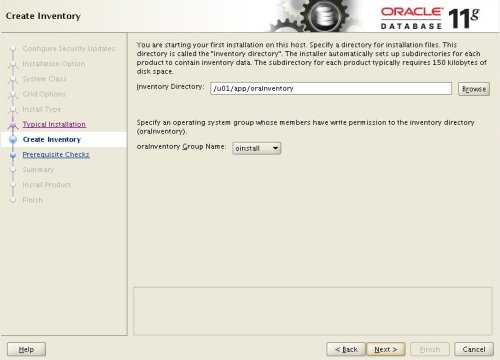
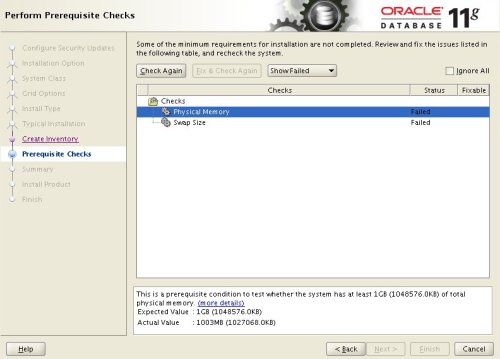
Proceed with the installation of your choice. You can see the type of installation I performed by clicking on the links below to see screen shots of each stage.
- Configure Security Updates
- Select Install Option
- System Class
- Node Selection
- Select Install Type
- Typical Install Configuration
- Create Inventory
- Perform Prerequisite Checks
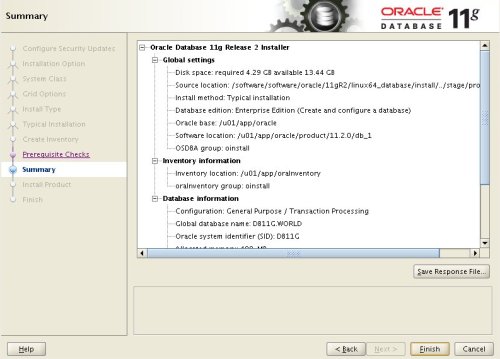
- Summary
- Install Product
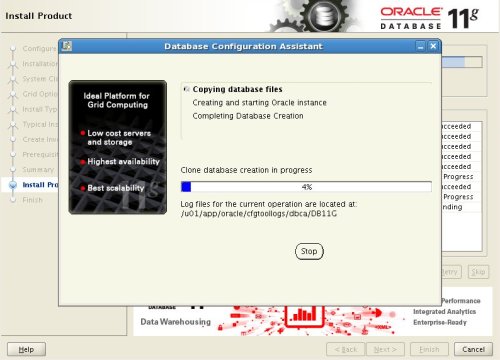
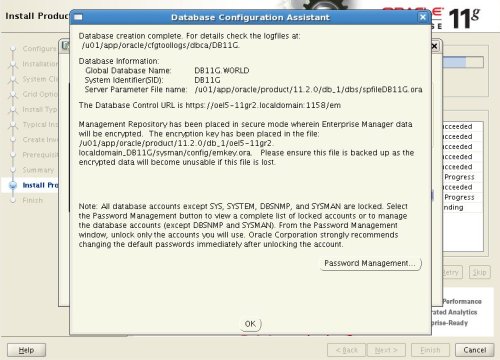
- Database Configuration Assistant
- Database Configuration Assistant 2
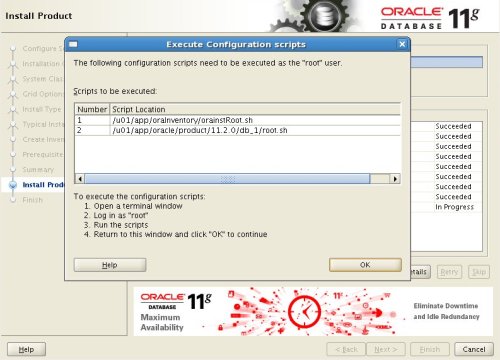
- Execute Configuration Scripts
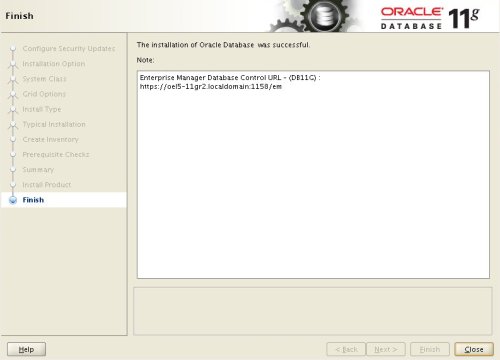
- Finish
Post Installation
Edit the "/etc/oratab" file setting the restart flag for each instance to 'Y'.
DB11G:/u01/app/oracle/product/11.2.0/db_1:Y
For more information see:
- Oracle Database Installation Guide 11g Release 2 (11.2) for Linux
- Automating Database Startup and Shutdown on Linux
原文地址:http://www.oracle-base.com/articles/11g/oracle-db-11gr2-installation-on-oracle-linux-5.php


 135
135

 被折叠的 条评论
为什么被折叠?
被折叠的 条评论
为什么被折叠?
 到【灌水乐园】发言


