


创建Git仓库
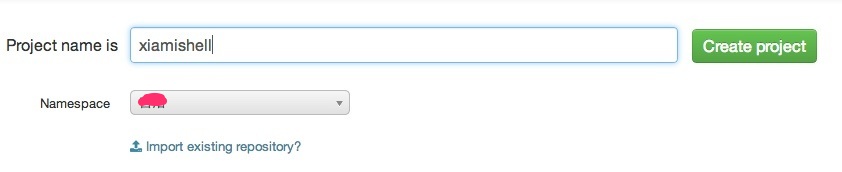
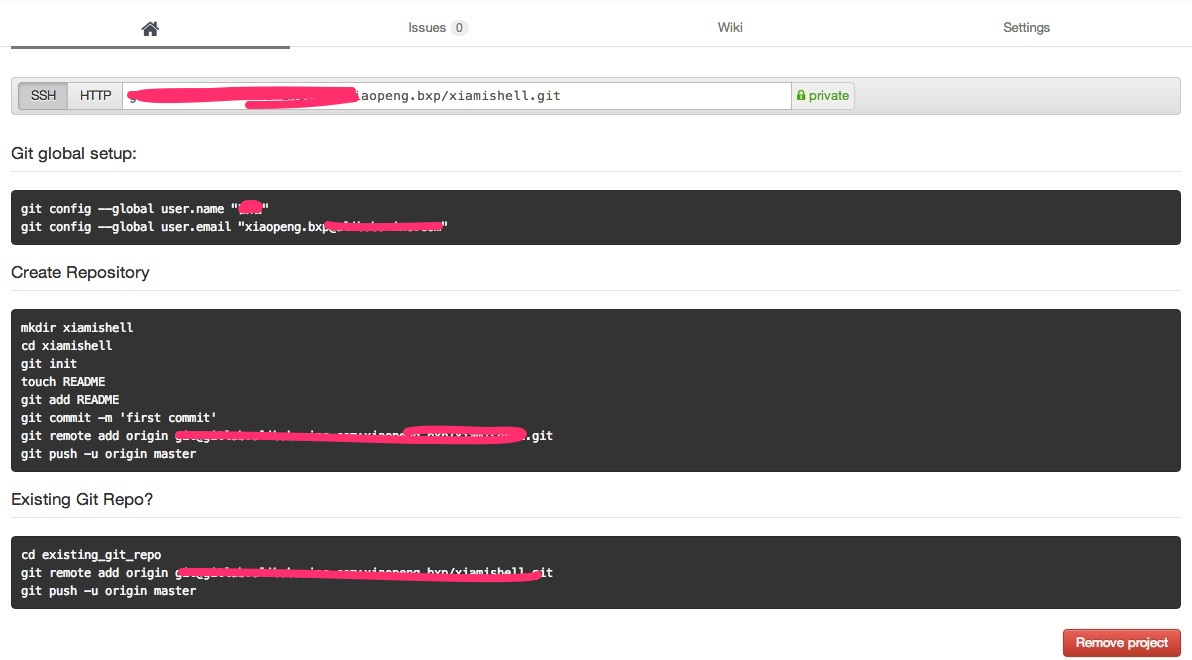
1 创建Gitlab仓库
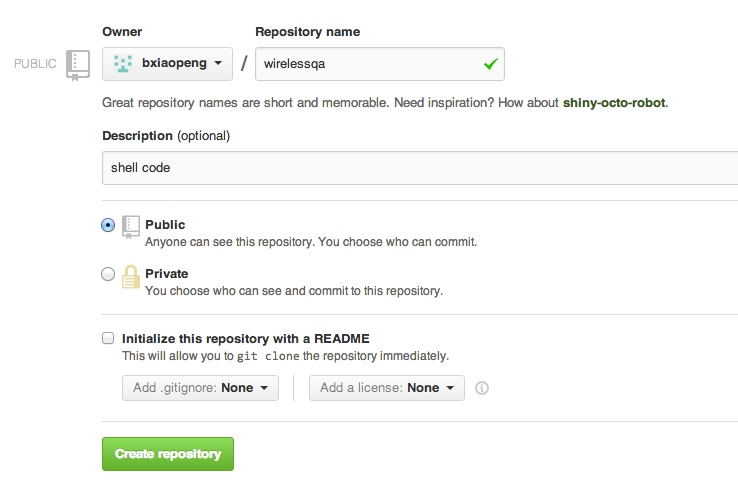
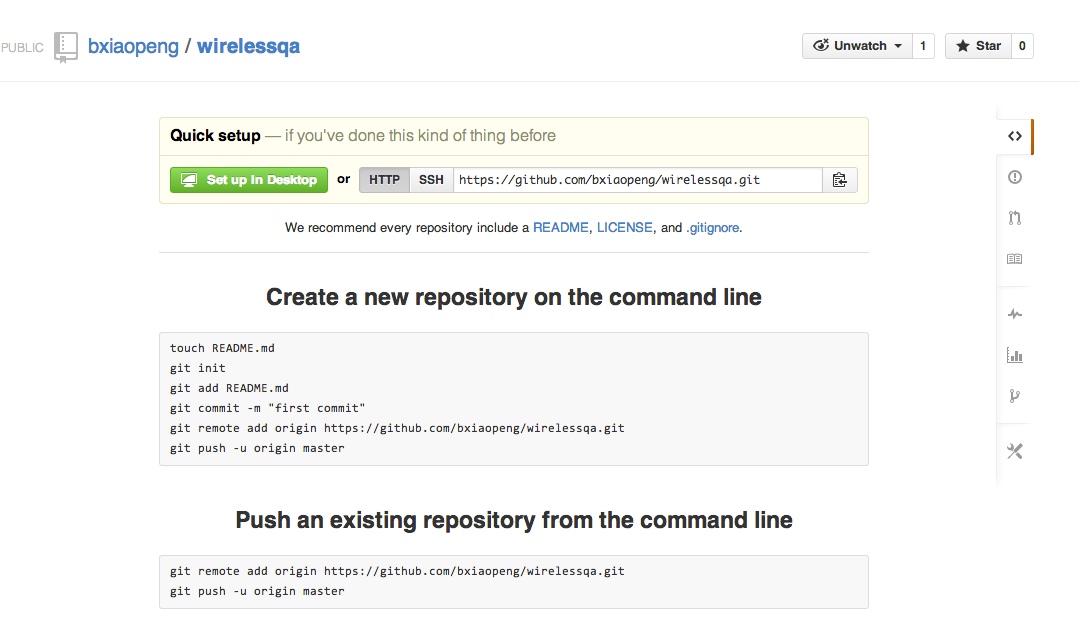
 2 Github上创建仓库
3 创建git仓库步骤说明
-
本地创建一个目录
-
进入目录执行“git init”进行初始化 后,git会对此目录下的文件进行版本控制
-
在远程服务器上创建一个项目(gitlab或github上),记住SSH地址
-
git remote add 别名
-
以后可以通过别名提交代码
4 从现有仓库中克隆代码
步骤1. 查看地址
步骤2. clone

Git branch 分支
查看当前有哪些branch
bixiaopeng@bixiaopengtekiMacBook-Pro xmrobotium$ git branch
* master
新建一个branch xm2.x
bixiaopeng@bixiaopengtekiMacBook-Pro xmrobotium$ git branch xm2.x
切换到一个branch
bixiaopeng@bixiaopengtekiMacBook-Pro xmrobotium$ git checkout xm2.x
新建并且切换到该branch,例: xm2.x
bixiaopeng@bixiaopengtekiMacBook-Pro xmrobotium$ git checkout -b xm2.x
再次查看
bixiaopeng@bixiaopengtekiMacBook-Pro xmrobotium$ git branch
* master
  xm2.x
添加一个文件到你的repo
bixiaopeng@bixiaopengtekiMacBook-Pro xmrobotium$ git add bixiaopeng.txt
添加所有的文件 git add .
bixiaopeng@bixiaopengtekiMacBook-Pro xmrobotium$ git add .
commit一个文件
bixiaopeng@bixiaopengtekiMacBook-Pro xmrobotium$ git commit -m "bixiaopeng test case"
commit到本地
bixiaopeng@bixiaopengtekiMacBook-Pro xmrobotium$ git commit -a -m "xm2.x test case"
[xm2.x f78f430] xm2.x test case
 39 files changed, 384 insertions(+)
 create mode 100644 AndroidManifest.xml
………….
查看几次commit的区别
bixiaopeng@bixiaopengtekiMacBook-Pro xmrobotium$ git diff
将branch push到远程
bixiaopeng@bixiaopengtekiMacBook-Pro xmrobotium$ git push origin xm2.x
Counting objects: 78, done.
Delta compression using up to 8 threads.
Compressing objects: 100% (51/51), done.
Writing objects: 100% (77/77), 565.97 KiB, done.
Total 77 (delta 3), reused 0 (delta 0)
remote: To git@mirror.gitlab.*****.com:/home/git/repositories/xiaopeng.bxp/xmrobotium.git
remote:  * [new branch]      xm2.x -> xm2.x
To git@gitlab.****.com:xiaopeng.bxp/xmrobotium.git
 * [new branch]      xm2.x -> xm2.x
查看远程分支
bixiaopeng@bixiaopengtekiMacBook-Pro xmrobotium$ git branch -r
  origin/master
  origin/xm2.x
查看本地和远程分支
bixiaopeng@bixiaopengtekiMacBook-Pro xmrobotium$ git branch -a
  master
* xm2.x
  remotes/origin/master
  remotes/origin/xm2.x
修改branch的名字
bixiaopeng@bixiaopengtekiMacBook-Pro xmrobotium$ git branch -m xm2.x test2.x
bixiaopeng@bixiaopengtekiMacBook-Pro xmrobotium$ git branch -r
  origin/master
  origin/xm2.x
查看本地和远程所有的分支
bixiaopeng@bixiaopengtekiMacBook-Pro xmrobotium$ git branch -a
  master
* test2.x
  remotes/origin/master
  remotes/origin/xm2.x
删除远程分支
bixiaopeng@bixiaopengtekiMacBook-Pro xmrobotium$ git push origin --delete xm2.x
remote: To git@mirror.gitlab.****.com:/home/git/repositories/xiaopeng.bxp/xmrobotium.git
remote:  - [deleted]         xm2.x
To git@gitlab.*****.com:xiaopeng.bxp/xmrobotium.git
 - [deleted]         xm2.x
bixiaopeng@bixiaopengtekiMacBook-Pro xmrobotium$ git branch -r
  origin/master
  origin/test2.x
十六. Git 合并分支
首先切换到想要合并到的分枝下,运行'git merge’命令 (例如本例中将test2.x分支合并到xm3.0分支的话,进入xm3.0分支运行git merge test2.x命令)如果合并顺利的话:
确保当前分支为xm3.0
bixiaopeng@bixiaopengtekiMacBook-Pro xmrobotium$ git status
 On branch xm3.0
nothing to commit, working directory clean
bixiaopeng@bixiaopengtekiMacBook-Pro xmrobotium$ git branch
  master
  test2.x
* xm3.0
bixiaopeng@bixiaopengtekiMacBook-Pro xmrobotium$ git merge test2.x
Already up-to-date.
合并冲突处理:
Automatic merge failed; fix conflicts and then commit the result.
修改冲突的文件后,git add 文件 然后,git commit
远程仓库的使用
查看当前项目有哪些远程仓库
$ git remote
bixiaopeng@bixiaopengtekiMacBook-Pro wirelessqa$ git remote
origin
查看远程仓库
$ git remote -v
bixiaopeng@bixiaopengtekiMacBook-Pro wirelessqa$ git remote -v
origin     git@gitlab.***.com:xiaopeng.bxp/wirelessqa.git (fetch)
origin     git@gitlab.***.com:xiaopeng.bxp/wirelessqa.git (push)
查看远程仓库信息
$ git remote -v <remote-name>
bixiaopeng@bixiaopengtekiMacBook-Pro wirelessqa$ git remote show origin
* remote origin
  Fetch URL: git@gitlab.****.com:xiaopeng.bxp/wirelessqa.git
  Push  URL: git@gitlab.***.com:xiaopeng.bxp/wirelessqa.git
  HEAD branch: master
  Remote branch:
    master tracked
  Local branch configured for 'git pull':
    master merges with remote master
  Local ref configured for 'git push':
    master pushes to master (local out of date)
添加远程仓库:
$ git remote add [remote-name] [url]
bixiaopeng@bixiaopengtekiMacBook-Pro robotium$ git remote add test git://github.com/paulboone/ticgit.git
bixiaopeng@bixiaopengtekiMacBook-Pro robotium$ git remote -v
origin     https://github.com/RobotiumTech/robotium (fetch)
origin     https://github.com/RobotiumTech/robotium (push)
test     git://github.com/paulboone/ticgit.git (fetch)
test     git://github.com/paulboone/ticgit.git (push)
删除远程仓库:
$ git remote rm [remote-name]
bixiaopeng@bixiaopengtekiMacBook-Pro robotium$ git remote rm test
bixiaopeng@bixiaopengtekiMacBook-Pro robotium$ git remote -v
origin     https://github.com/RobotiumTech/robotium (fetch)
origin     https://github.com/RobotiumTech/robotium (push)
修改远程仓库:
$ git remote set-url --push [remote-name] [newUrl]
重命名远程仓库
$ git remote rename <old-remote-name> <new-remote-name>
从远程仓库抓取数据 :
$git fetch [remote-name]
说明:
- 此命令会到远程仓库中拉取所有你本地仓库中还没有的数据。运行完成后,你就可以在本地访问该远程仓库中的所有分支
- fetch 命令只是将远端的数据拉到本地仓库,并不自动合并到当前工作分支,只有当你确实准备好了,才能手工合并
拉取远程仓库:
$ git pull [remote-name] [本地分支名]
说明: 一般我们获取代码更新都是用git pull, 目的是从原始克隆的远端仓库中抓取数据后,合并到工作目录中的当前分支
推送远程仓库:
$ git push [remote-name] [本地分支名]
说明: 只有在所克隆的服务器上有写权限,或者同一时刻没有其他人在推数据,这条命令才会如期完成任务。 如果在你推数据前,已经有其他人推送了若干更新,那你的推送操作就会被驳回。你必须先把他们的更新抓取到本地git pull,合并到自己的项目中,然后才可以再次推送。
$git push origin test:master         // 提交本地test分支作为远程的master分支
$git push origin test:test              // 提交本地test分支作为远程的test分支


 267
267

 被折叠的 条评论
为什么被折叠?
被折叠的 条评论
为什么被折叠?
 到【灌水乐园】发言


