


1、安装vs2019
2、 安装cmake https://cmake.org/download/
3、下载protobuff 3.8.0 https://github.com/google/protobuf/releases/
解压protobuf压缩包,在和protobuf同级目录下新建一个install文件夹,用作编译完成后方include ,lib等文件。
如:C:\Path\to\install
从VS开发人员命令行工具进入protobuf目录,创建build目录
C:\Path\to\protobuf\cmake>mkdir build & cd build
C:\Path\to\protobuf\cmake\build>
创建release版本的编译目录:
C:\Path\to\protobuf\cmake\build>mkdir release & cd release
C:\Path\to\protobuf\cmake\build\release>cmake -G "NMake Makefiles" -DCMAKE_BUILD_TYPE=Release -DCMAKE_INSTALL_PREFIX=../../../../install ../..
创建debug版本的编译目录:
C:\Path\to\protobuf\cmake\build>mkdir debug & cd debug
C:\Path\to\protobuf\cmake\build\debug>cmake -G "NMake Makefiles" -DCMAKE_BUILD_TYPE=Debug -DCMAKE_INSTALL_PREFIX=../../../../install ../..
创建生成visual stuido 工程的文件夹:
这一步需要注意的是,
- "Visual Studio 16 2019"
- 是因为安装了visual studio 2019而决定的,这是所谓的generator,不同编译器是不同的,具体类型可见: http://www.cmake.org/cmake/help/latest/manual/cmake-generators.7.html#visual-studio-generators
- C:\Path\to\protobuf\cmake\build>mkdir solution & cd solution
- C:\Path\to\protobuf\cmake\build\solution>cmake -G "Visual Studio 16 2019" -DCMAKE_INSTALL_PREFIX=../../../../install ../..
以上3种不是必须都做。
通过以上3个步骤,可以见到在不同目录都生成了相应的makefile文件,接下来是执行nmake进行编译:
- To compile protobuf:
- C:\Path\to\protobuf\cmake\build\release>nmake
- or
- C:\Path\to\protobuf\cmake\build\debug>nmake
以下安装头文件、库文件等安装到之前制定的文件(install):
- To install protobuf to the specified *install* folder:
- C:\Path\to\protobuf\cmake\build\release>nmake install
- or
- C:\Path\to\protobuf\cmake\build\debug>nmake install
到此,release 和 debug版本都编译成功,vs可以使用了。
-----------------------------------------------------------------------------------------------------------------------------------------------------------------
vs平台开发用sln生成库要注意两点:
第一:solution目录下有生成sln文件,可以用vs打开生成库,但要注意位数,比如如果vs + qt (32位库)
那么,protobuf也应该改成win32平台,讲所有项目都改成win32平台的,
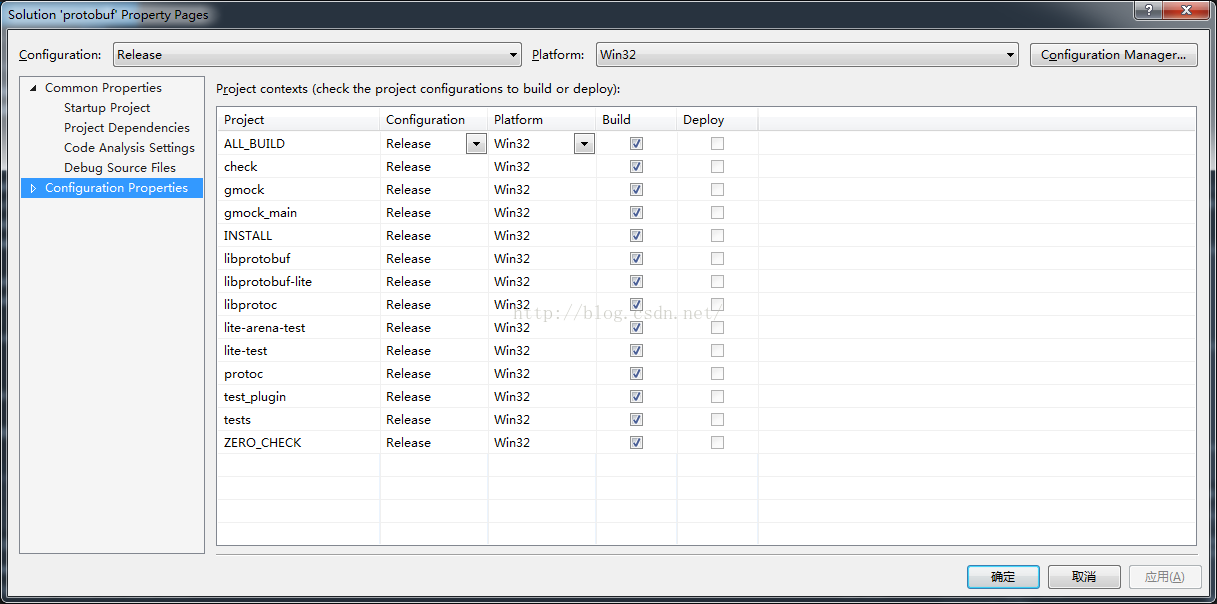
不然会出现: fatal error LNK1112: module machine type 'X86' conflicts with target machine type 'x64'
另外,32位编译器可以编译32和64位程序,这里选用win32
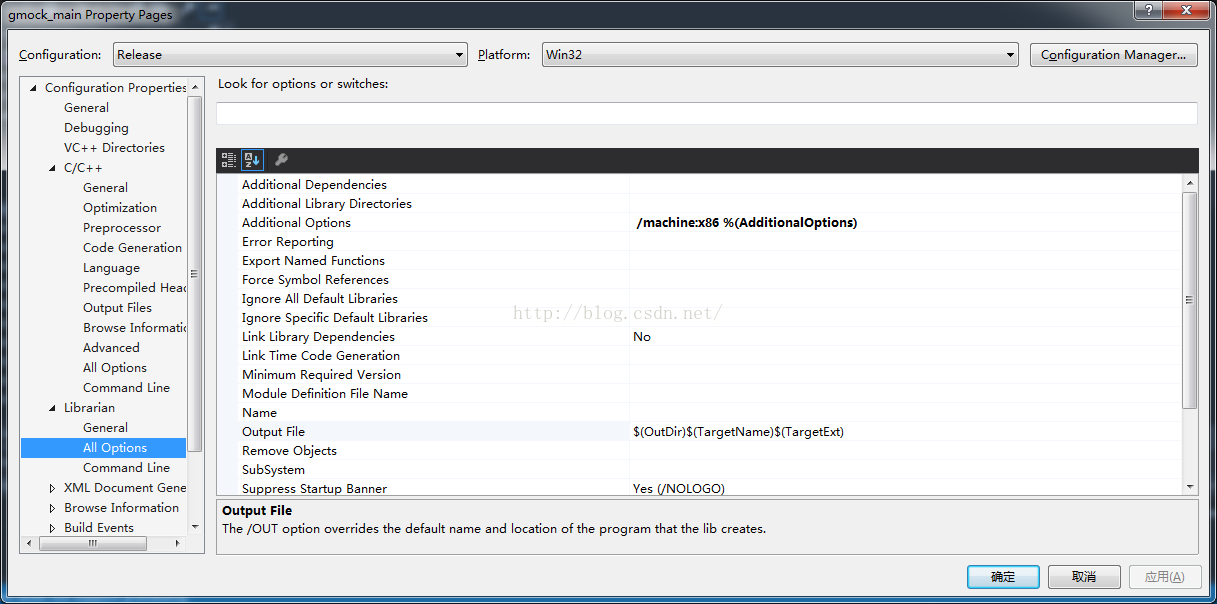
第二:编译的库要和你使用的版本一致,如release debug,在下图的位置确定;
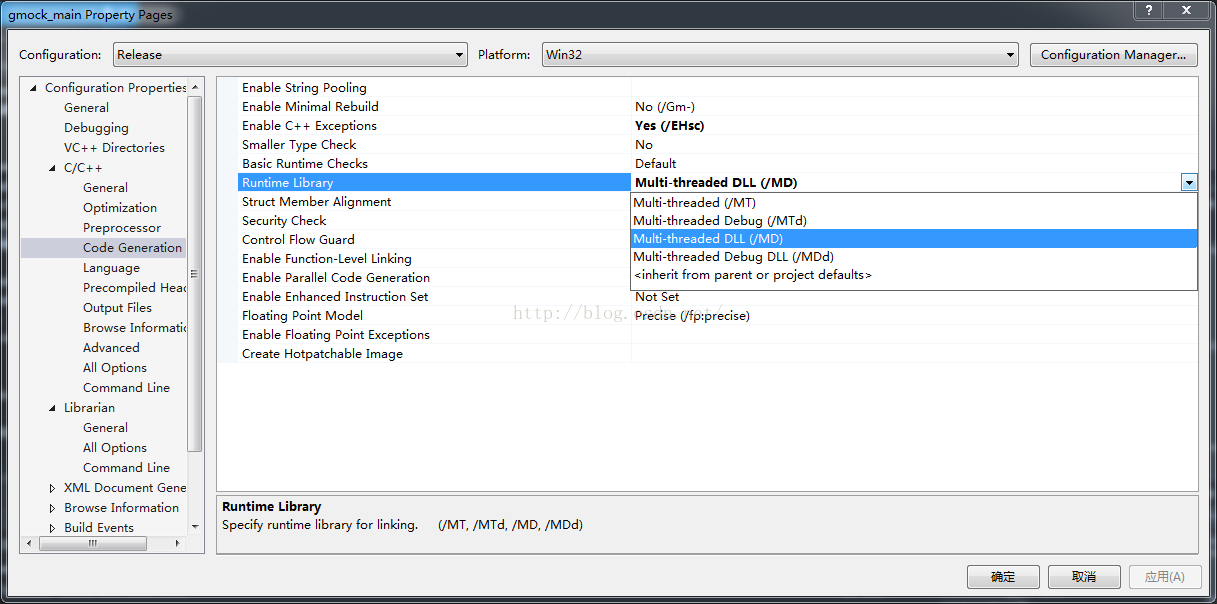
MD代表动态链接,MT代表静态链接,后面没有有d代表是release模式-》

release模式则用前两种。
同时,如果你在项目用到其他库,比如vs + qt (32位动态链接库),那么protobuf也应该用动态链接方式生成lib,不然提示:
值“MT_StaticRelease”不匹配值“MD_DynamicRelease”
等这类错误。
动态链接方式:MD
静态链接方式:MT
总之,qt 库链接方式要和protobuf的一致,如果还用到其他的,全部都要一致。


 1090
1090


 被折叠的 条评论
为什么被折叠?
被折叠的 条评论
为什么被折叠?
 到【灌水乐园】发言


