


前一段写的一篇“
建立Windows下面的syslog日志服务器”介绍了使用KiwiSyslog的一些情况,提到了在应用中集成Klog(KiwiSyslog的一个实用客户端工具)的方法。本文特地对Klog的DLL方式进行了测试,并对接口进行了封装和简化,贴出来和大家分享一下。
首先,找到Klog的3个文件:Klog.dll Klog.lib kloglib.h(我的电脑上在安装目录C:/Program Files/KLOG/KLOGDLL_CPP下面)。
使用时,将kloglib.h加入你的工程,然后把klog.lib加入工程的链接库,Klog.dll放在运行程序的旁边。
再把这个文件加入你的工程:
/*
Klogobj.h
Kiwi Logger v1.3
Sample C++ Logger class.
Links implicitly with KLOG.LIB.
Accesses KLOG.DLL at load-time.
*/
#include
"kloglib.h"
class
KLog
{
private
:
int
Kret
;
// Returned error code
char
Kerror
[100];
// Returned error string
HANDLE
MyHdl
;
public:
// Constructor. Initialise storage. Initialise the DLL.
// Set the syslog host, port, IP protocol, and RFC header process name.
KLog
(
char
*
Sysloghost
,
char
*
Service
,
int
Protocol
,
char
*
Processname
)
{
Kret
= 0;
memset
(
Kerror
, 0, sizeof(
Kerror
));
MyHdl
=
KLogInitialise
();
KLogSetHostAddress
(
MyHdl
,
Sysloghost
);
KLogSetPortByService
(
MyHdl
,
Service
);
KLogUseTCP
(
MyHdl
,
Protocol
);
KLogSetProcessName
(
MyHdl
,1,
Processname
);
SetPriority
(
"User"
,
"Notice"
);
}
// Deconstructor. Do nothing.
~
KLog
()
{
}
// Set the priority using facility names
void
SetPriority
(
char
*
FacilityName
,
char
*
LevelName
)
{
KLogSetMessageFacilityName
(
MyHdl
,
FacilityName
);
KLogSetMessageLevelName
(
MyHdl
,
LevelName
);
}
// Set the message
void
SetMessage
(
char
*
Msg
)
{
KLogSetMessage
(
MyHdl
,
Msg
);
}
BOOL
SendMessage
(
char
*
Msg
)
{
SetMessage
(
Msg
);
return
SendMessage
();
}
//Stephen:
我扩展的
SendMessage
函数,用于直接发送指定等级的日志消息
BOOL
SendMessage
(
char
*
FacilityName
,
char
*
LevelName
,
char
*
Msg
)
{
SetPriority
(
FacilityName
,
LevelName
);
SetMessage
(
Msg
);
return
SendMessage
();
}
// Send the message. Return FALSE if an error occurred.
BOOL
SendMessage
()
{
if (
KLogSendMessage
(
MyHdl
,&
Kret
) ==
FALSE
)
{
KLogReturnError
(
MyHdl
,
Kerror
, sizeof(
Kerror
));
return
FALSE
;
}
else
Kerror
[0] =
'/0'
;
return
TRUE
;
}
// Return the last error code and message
void
ReturnError
(
int
*
Rret
,
char
*
Rerror
,
int
Rlen
)
{
*
Rret
=
Kret
;
strncpy
(
Rerror
,
Kerror
,
Rlen
);
}
};
注:下面是可用的告警源(
Facility name
)和告警等级
(
Level name
)
:
|
Kernel
User
Mail
Daemon
Auth
Syslog
Lpr
News
UUCP
Cron
System0
System1
System2
System3
System4
System5
Local0
Local1
Local2
Local3
Local4
Local5
Local6
Local7
|
Emergency
Alert
Critical
Error
Warning
Notice
Information
Debug
|
最后,在你的应用程序中,如下调用:
#include
"klogobj.h"
… …
//
创建一个日志类实例,并设置一些基本信息
//Syslog
服务器:本机
,
端口:
514
,使用
UDP
协议,应用标记:
Test
KLog
MyKLog
(
"127.0.0.1"
,
"syslog"
,0,
"Test"
);
int
main
(
int
argc
,
char
*
argv
[])
{
//
默认发送等级
User.Notice
MyKLog
.
SendMessage
(
"
应用开始运行!
"
);
MyKLog
.
SendMessage
(
"User"
,
"Error"
,
"
带等级的日志信息!
"
);
… …
}
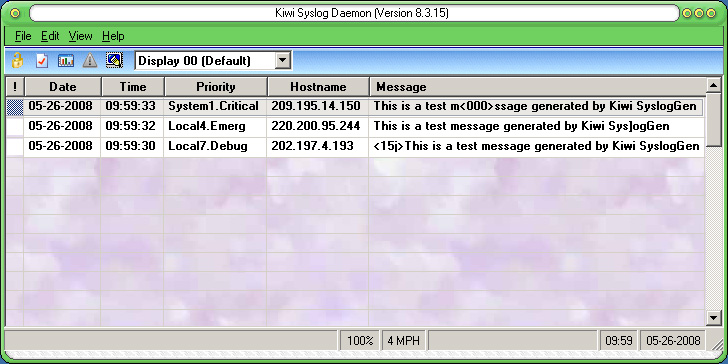
现在你可以打开
Kiwi Syslog Daemon
看看结果日志输出的结果了:


 6823
6823

 被折叠的 条评论
为什么被折叠?
被折叠的 条评论
为什么被折叠?
 到【灌水乐园】发言


