


www.diy567.com是我弄的文娱网站,累了,去上面休息一下下
一、环境配置:
MyEclipse7.0
Felx Builder3.0
JDK1.6
Flex sdk3.2
Tomcat6.0
二、创建JAVA Web工程
在MyEclipse中创建Web Project:TestProject
将相关JAR包拷贝到WEB-INF/lib下,并引入到项目的Build Path中
三、创建FLEX工程
在Flex Builder中创建Flex Project:TestProject
四、配置web.xml
配置JAVA Web工程中WebRoot/WEB-INF/web.xml
<!--添加模式文件--> <web-app version="2.4" xmlns="http://java.sun.com/xml/ns/j2ee" xmlns:xsi="http://www.w3.org/2001/XMLSchema-instance" xsi:schemaLocation="http://java.sun.com/xml/ns/j2ee http://java.sun.com/xml/ns/j2ee/web-app_2_4.xsd"> <!--指定欢迎页--> <welcome-file-list> <welcome-file>index.jsp</welcome-file> </welcome-file-list> <!--指定初始化文件--> <context-param> <param-name>contextConfigLocation</param-name> <param-value> classpath:ApplicationContext.xml, classpath:Application-Flex.xml </param-value> </context-param> <!--添加监听器--> <listener> <listener-class> org.springframework.web.context.ContextLoaderListener </listener-class> </listener> <listener> <listener-class> org.springframework.security.ui.session.HttpSessionEventPublisher </listener-class> </listener> <!--添加servlet配置--> <servlet> <servlet-name>flex</servlet-name> <servlet-class>org.springframework.web.servlet.DispatcherServlet </servlet-class> <load-on-startup>1</load-on-startup> </servlet> <servlet-mapping> <servlet-name>flex</servlet-name> <url-pattern>/messagebroker/*</url-pattern> </servlet-mapping> <!--添加session配置--> <session-config> <session-timeout>30</session-timeout> </session-config> <!--添加模式文件--> <web-app version="2.4" xmlns="http://java.sun.com/xml/ns/j2ee" xmlns:xsi="http://www.w3.org/2001/XMLSchema-instance" xsi:schemaLocation="http://java.sun.com/xml/ns/j2ee http://java.sun.com/xml/ns/j2ee/web-app_2_4.xsd"> <!--指定欢迎页--> <welcome-file-list> <welcome-file>index.jsp</welcome-file> </welcome-file-list> <!--指定初始化文件--> <context-param> <param-name>contextConfigLocation</param-name> <param-value> classpath:ApplicationContext.xml, classpath:Application-Flex.xml </param-value> </context-param> <!--添加监听器--> <listener> <listener-class> org.springframework.web.context.ContextLoaderListener </listener-class> </listener> <listener> <listener-class> org.springframework.security.ui.session.HttpSessionEventPublisher </listener-class> </listener> <!--添加servlet配置--> <servlet> <servlet-name>flex</servlet-name> <servlet-class>org.springframework.web.servlet.DispatcherServlet </servlet-class> <load-on-startup>1</load-on-startup> </servlet> <servlet-mapping> <servlet-name>flex</servlet-name> <url-pattern>/messagebroker/*</url-pattern> </servlet-mapping> <!--添加session配置--> <session-config> <session-timeout>30</session-timeout> </session-config>
五、创建ApplicationContext.xml、Application-Flex.xml
<!-- [if gte mso 9]><xml> <w:WordDocument> <w:View>Normal</w:View> <w:Zoom>0</w:Zoom> <w:PunctuationKerning/> <w:DrawingGridVerticalSpacing>7.8 磅</w:DrawingGridVerticalSpacing> <w:DisplayHorizontalDrawingGridEvery>0</w:DisplayHorizontalDrawingGridEvery> <w:DisplayVerticalDrawingGridEvery>2</w:DisplayVerticalDrawingGridEvery> <w:ValidateAgainstSchemas/> <w:SaveIfXMLInvalid>false</w:SaveIfXMLInvalid> <w:IgnoreMixedContent>false</w:IgnoreMixedContent> <w:AlwaysShowPlaceholderText>false</w:AlwaysShowPlaceholderText> <w:Compatibility> <w:SpaceForUL/> <w:BalanceSingleByteDoubleByteWidth/> <w:DoNotLeaveBackslashAlone/> <w:ULTrailSpace/> <w:DoNotExpandShiftReturn/> <w:AdjustLineHeightInTable/> <w:BreakWrappedTables/> <w:SnapToGridInCell/> <w:WrapTextWithPunct/> <w:UseAsianBreakRules/> <w:DontGrowAutofit/> <w:UseFELayout/> </w:Compatibility> <w:BrowserLevel>MicrosoftInternetExplorer4</w:BrowserLevel> </w:WordDocument> </xml><![endif]--><!-- [if gte mso 9]><xml> <w:LatentStyles DefLockedState="false" LatentStyleCount="156"> </w:LatentStyles> </xml><![endif]--><!-- /* Font Definitions */ @font-face {font-family:宋体; panose-1:2 1 6 0 3 1 1 1 1 1; mso-font-alt:SimSun; mso-font-charset:134; mso-generic-font-family:auto; mso-font-pitch:variable; mso-font-signature:3 135135232 16 0 262145 0;} @font-face {font-family:"Book Antiqua"; panose-1:2 4 6 2 5 3 5 3 3 4; mso-font-charset:0; mso-generic-font-family:roman; mso-font-pitch:variable; mso-font-signature:647 0 0 0 159 0;} @font-face {font-family:"\@宋体"; panose-1:2 1 6 0 3 1 1 1 1 1; mso-font-charset:134; mso-generic-font-family:auto; mso-font-pitch:variable; mso-font-signature:3 135135232 16 0 262145 0;} /* Style Definitions */ p.MsoNormal, li.MsoNormal, div.MsoNormal {mso-style-parent:""; margin:0cm; margin-bottom:.0001pt; mso-pagination:widow-orphan; mso-layout-grid-align:none; punctuation-wrap:simple; text-autospace:none; font-size:10.0pt; font-family:"Book Antiqua"; mso-fareast-font-family:宋体; mso-bidi-font-family:"Times New Roman";} /* Page Definitions */ @page {mso-page-border-surround-header:no; mso-page-border-surround-footer:no;} @page Section1 {size:612.0pt 792.0pt; margin:72.0pt 90.0pt 72.0pt 90.0pt; mso-header-margin:36.0pt; mso-footer-margin:36.0pt; mso-paper-source:0;} div.Section1 {page:Section1;} --><!-- [if gte mso 10]> <mce:style><!-- /* Style Definitions */ table.MsoNormalTable {mso-style-name:普通表格; mso-tstyle-rowband-size:0; mso-tstyle-colband-size:0; mso-style-noshow:yes; mso-style-parent:""; mso-padding-alt:0cm 5.4pt 0cm 5.4pt; mso-para-margin:0cm; mso-para-margin-bottom:.0001pt; mso-pagination:widow-orphan; font-size:10.0pt; font-family:"Times New Roman"; mso-fareast-font-family:"Times New Roman"; mso-ansi-language:#0400; mso-fareast-language:#0400; mso-bidi-language:#0400;} --><!-- [endif]-->在 web.xml 里配置了初始化配置文件 (ApplicationContext.xml 、 Application-Flex.xml) ,因此需要在 src 目录下创建相应的 xml 文件 ( 文件名需要与 web.xml 中设置的配置文件名相同,否则加载时将会报错 ) 。
六、配置ApplicationContext.xml
<beans xmlns="http://www.springframework.org/schema/beans" xmlns:xsi="http://www.w3.org/2001/XMLSchema-instance" xmlns:flex="http://www.springframework.org/schema/flex" xmlns:aop="http://www.springframework.org/schema/aop" xsi:schemaLocation="http://www.springframework.org/schema/beans http://www.springframework.org/schema/beans/spring-beans-2.0.xsd http://www.springframework.org/schema/aop http://www.springframework.org/schema/aop/spring-aop-2.0.xsd http://www.springframework.org/schema/flex http://www.springframework.org/schema/flex/spring-flex-1.0.xsd"> <aop:aspectj-autoproxy /> <bean id="timingAspect" class="org.perf4j.log4j.aop.TimingAspect"/> </beans>
七、Spring MVC配置
使用Spring MVC框架,将使用到两个配置文件ApplicationContext.xml、 [servlet-name]-servlet.xml
WEB-INF/[servlet-name]-servlet.xml, 它被用于配置Web层、视图解析器、控制器、校验器以及其他所有MVC框架中必需的
Bean。[servlet-name]指的是在web.xml部署描述符中定义的Spring dispatcher servlet的名称。
根据在web.xml中定义的名称,我们的配置文件应该为flex-servlet.xml。在
WEB-INF下创建flex-servlet.xml。
配置flex-servlet.xml
<?xml version="1.0" encoding="UTF-8"?> <beans xmlns="http://www.springframework.org/schema/beans" xmlns:flex="http://www.springframework.org/schema/flex" xmlns:xsi="http://www.w3.org/2001/XMLSchema-instance" xsi:schemaLocation=" http://www.springframework.org/schema/beans http://www.springframework.org/schema/beans/spring-beans-2.5.xsd http://www.springframework.org/schema/flex http://www.springframework.org/schema/flex/spring-flex-1.0.xsd"> </beans>
八、Spring+BlazeDS配置
BlazeDS是一种服务端使用java进行web通信的技术,其可以使开发人员方便地连接到后端分布式数据,推送数据到Flex或AIR应用,为RIA(rich Internet application)提供更好的体验。
Spring集成BlazeDS就是把spring的bean暴露成BlazeDS服务。在Spring BlazeDS Integration之前,BlazeDS要访问spring的bean,需要自己写代码。通过Spring BlazeDS Integration,当Flash来访问服务端时,spring会把请求转发给Flex message broker。同时,我们把spring中的一些bean暴露成Flex remoting service,那么Flash就能调用到spring中暴露成Flex remoting service的bean。
主要的BlazeDS组件是MessageBroker. Flex端传入的http信息将会通过Spring的DispatcherServlet来触发Spring-managed MessageBroker. 也就是说spring用DispatcherServlet来管理BlazeDS的MessageBroker。
配置Application-Flex.xml
<beans xmlns="http://www.springframework.org/schema/beans" xmlns:xsi="http://www.w3.org/2001/XMLSchema-instance" xmlns:flex="http://www.springframework.org/schema/flex" xmlns:aop="http://www.springframework.org/schema/aop" xsi:schemaLocation="http://www.springframework.org/schema/beans http://www.springframework.org/schema/beans/spring-beans-2.0.xsd http://www.springframework.org/schema/aop http://www.springframework.org/schema/aop/spring-aop-2.0.xsd http://www.springframework.org/schema/flex http://www.springframework.org/schema/flex/spring-flex-1.0.xsd"> <!--使用Spring message Broker代替BlazeDS--> <flex:message-broker>
九、BlazeDS配置
1)下载BlazeDS
下载地址:http://opensource.adobe.com/wiki/display/blazeds/Release+Builds
2)解压blazeds.zip,解压其中的blazeds.war,将其中flex目录下的四个xml文件(messaging- config.xml、proxy-config.xml、remoting-config.xml、services-config.xml)拷贝到
- JAVA工程WebRoot/WEB-INF/flex下(flex目录需要手动创建)
- FLEX工程src/config下(config目录需要手动创建)
3)修改FLEX 工程src/config/services-config.xml
<?xml version="1.0" encoding="UTF-8"?> <services-config> <services> <service-include file-path="remoting-config.xml" /> <service-include file-path="proxy-config.xml" /> <service-include file-path="messaging-config.xml" /> </services> <security> <login-command class="flex.messaging.security.TomcatLoginCommand" server="Tomcat"/> </security> <channels> <channel-definition id="my-amf" class="mx.messaging.channels.AMFChannel"> <endpoint url="/TestWeb/messagebroker/amf" class="flex.messaging.endpoints.AMFEndpoint"/> </channel-definition> <channel-definition id="my-secure-amf" class="mx.messaging.channels.SecureAMFChannel"> <endpoint url="/TestWeb/messagebroker/amfsecure" class="flex.messaging.endpoints.SecureAMFEndpoint"/> <properties> <add-no-cache-headers>false</add-no-cache-headers> </properties> </channel-definition> <channel-definition id="my-polling-amf" class="flex.mx.messaging.channels.AMFChannel"> <endpoint url=" /TestWeb/messagebroker/amfpolling" class="flex.messaging.endpoints.AMFEndpoint"/> <properties> <polling-enabled>true</polling-enabled> <polling-interval-seconds>4</polling-interval-seconds> </properties> </channel-definition> </channels> <logging> <target class="flex.messaging.log.ConsoleTarget" level="Error"> <properties> <prefix>[BlazeDS] </prefix> <includeDate>false</includeDate> <includeTime>false</includeTime> <includeLevel>false</includeLevel> <includeCategory>false</includeCategory> </properties> <filters> <pattern>Endpoint.*</pattern> <pattern>Service.*</pattern> <pattern>Configuration</pattern> </filters> </target> </logging> <system> <redeploy><enabled>false</enabled></redeploy> </system> </services-config>
十、框架应用
1)创建UserService.java
搭好框架后,需要在JAVA工程中创建JAVA类,并通过配置文件发布给FLEX应用,以此验证JAVA与FLEX的通信是否成功
在JAVA工程src下创建package:com.admin.service,创建UserService.java
package com.admin.service;
public class UserService {
public String getMessage(){
System.out.println("Excute UserService :"+"hello world!");
return "Hello World";
}
}
2)发布UserService
所有的JAVA类,如果想要发布给FLEX应用,就需要在Application-Flex中添加<flex:remoting-destination>节点,在Application-Flex.xml中添加如下配置:
<bean id="UserService" class="com.hand.admin.service.UserService">
<flex:remoting-destination />
</bean>
3)FLEX引用UserService
对于所有JAVA工程发布的远程服务,如果需要调用,则必须在FLEX工程的配置文件remoting-config.xml中进行配置,在 remoting-config.xml中添加如下配置(这里的source必须和JAVA工程中发布远程服务时提供的bean id一致,否则调用将会失败):
<destination id="UserService">
<properties>
<source>UserService</source>
</properties>
</destination>
4)创建FLEX应用程序
在FLEX工程src下创建modules/common目录,创建Index.mxml,在其中调用UserService
<?xml version="1.0" encoding="utf-8"?> <mx:Application xmlns:mx="http://www.adobe.com/2006/mxml" layout="vertical" horizontalAlign="center" creationComplete="initApp()" fontSize="15"> <mx:Script> <!--[CDATA[ import mx.rpc.events.ResultEvent; import mx.controls.Alert; private function initApp():void{ UserService.getMessage(); UserService.getMessage.addEventListener(ResultEvent.RESULT, getMessageHandler); } private function getMessageHandler(evt:ResultEvent):void{ UserService.getMessage.removeEventListener(ResultEvent.RESULT,getMessageHandler); initText.text = evt.result as String; } ]]--> </mx:Script> <mx:RemoteObject id="UserService" destination="UserService"/> <mx:Label text="Welcome" id="initText" fontWeight="bold"/> </mx:Application>
5)修改FLEX主应用
在这里需要特别提一下,由于FLEX工程创建时会默认提供一个主应用程序TestProject.mxml,当我们希望主应用程序由我们自己决定时(在本例中主应用程序为moduls/common/Index.mxml),需要修改FLEX工程目录下的.actionScriptProperties文件。修改如下配置
<applications>
<application path="TestFlex.mxml"/>
<application path="modules/common/Index.mxml"/>
</applications>
6)修改JAVA主页
修改JAVA工程中的index.jsp
<!-- 设置显示的FLEX首页,URL需要与FLEX工程下的指定首页地址匹配 -->
<%response.sendRedirect(path+"/modules/common/Index.html");%>
十一、编译运行
1)编译FLEX工程
选择Project—>Clean—>TestProject
2)拷贝编译目录bin-debug/modules到JAVA工程的WebRoot下
3)在MyEclipse中启动Tomcat服务器
4)运行程序
服务器正常启动后,在浏览器中输入如下地址(其中9090为服务器端口号):
http://localhost:9090/TestProject/modules/common/Index.html
运行结果如下:
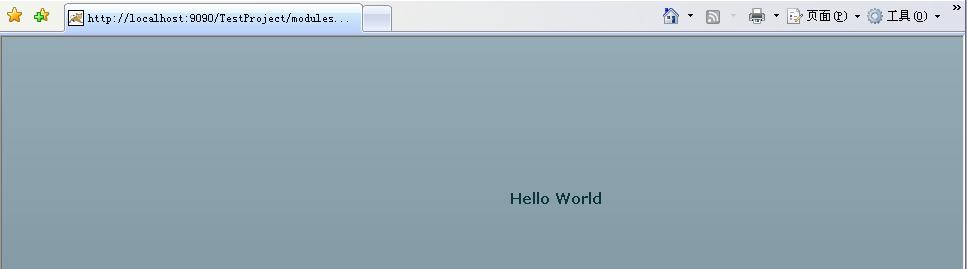
本例到此就实践结束,似乎有点长,下一次将在此基础上添加数据库配置。。。。。。


 153
153


 被折叠的 条评论
为什么被折叠?
被折叠的 条评论
为什么被折叠?
 到【灌水乐园】发言


