


这个Project的编译和bochrc的配置没什么特殊之处,所以编译后然后启动bochs会显示如下界面:
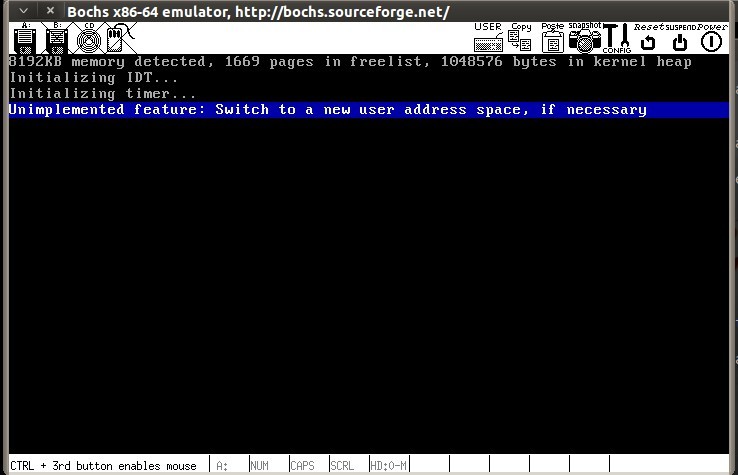
ok, 可以看到 Unimplemented feature.:Switch to a new user address space, if necessary. 这个就是我们的任务了.
这句话比较简洁: 新建新的用户地址空间. 但是我们再来看附带的文档, Project Synopsis .就会发现任务不止这一个 .仔细阅读这段 然后把具体任务整理如下:
1. 在src/geekos/user.c中, 需要实现Spawn()和Switch_To_User_Context()这两个函数,Spawn()这个函数主要用来开启一个新的用户进程,Switch_To_User_Context()用来在被调度之前用来开启一个新的线程去切换用户地址空间.
2.在src/geekos/elf.c中需要实现Parse_ELF_Executable()这个函数, 这个函数就像Project1的处理的一样,包括要读取的可执行ELF文件的 offset, length 和user address 和 data segments. 基于这些信息,填充于Exe_Format这个结构体中, 这个结构体会被 Spawn()函数调用.当然这些取决于怎么去加载这个可执行文件. 这个可以直接使用之前Project1的代码.
3.在src/geekos/userseg.c中,实现的函数比较多,有 Destroy_User_Context() ,Load_User_Program(), Copy_From_User(), Copy_To_User(), Switch_To_Address_Space()
Destroy_User_Context(): 释放用户进程的内存资源
Load_User_Program(): 载入部分可执行程序到内存中
Copy_From_User() 和 Copy_To_User(): 在用户地址空间和内核地址空间之间互相拷贝数据
Switch_To_Address_Space(): 当载入处理器的LDT寄存器时激活用户地址空间
4.在src/geekos/kthread.c中需要实现Setup_User_Thread()和Start_User_Thread()两个函数,Setup_User_Thread 是建立进程的内核初始化堆栈,也即 当进程第一个次进入用户态时,来初始化处理器的寄存器中的内容, Start_User_Thread()主要是使用User_Conect这个对象来启动一个新的进程.
从上面分析下来, 基本目标已经明确 . 下面就需要一步一步填充这些代码了.
先从开启一个新的用户进程来开刀, 看下 Spawn的原型:
int Spawn(const char *program, const char *command, struct Kernel_Thread **pThread);program: 可执行文件的路径command: 这个参数包括程序的名字 和 参数
pThread: Kernel_Thread 指针
返回值: 新的进程的id Otherwise return erro Code
可以根据Spwan函数中的Hints 来完成整个函数:
88 /* 89 * Hints: 90 * - Call Read_Fully() to load the entire executable into a memory buffer 91 * - Call Parse_ELF_Executable() to verify that the executable is 92 * valid, and to populate an Exe_Format data structure describing 93 * how the executable should be loaded 94 * - Call Load_User_Program() to create a User_Context with the loaded 95 * program 96 * - Call Start_User_Thread() with the new User_Context 97 * 98 * If all goes well, store the pointer to the new thread in 99 * pThread and return 0. Otherwise, return an error code. 100 */Read_Fully() 载入整个可执行文件到内存中,原型在 vfs.h中 char* exeFileData; //reference to variable where pointer to allocated buffer ulong_t exeFileLen; //reference to variable where length of file should be stored int ret = Read_Fully(program, &exeFileData, &exeFileLen); if (ret != 0) { Print("Load Program %s failed!\n", program); return -1; }Parse_ELF_Executable() 检验ELF可执行文件是否有效 ,原型在 elf.h 中 这个函数还需要我们自己来实现的. 不过之前的Project1以前实现过 直接拿来用就可以了
struct Exe_Format exeFmt; int ret = Parse_ELF_Executable(exeFileData, exeFileLen, &exeFmt) ; if (ret != 0) { Print("Parse ELF_Executable File failed!\n); return -1; }Load_User_Program() 创建一个User_Context来加载程序,原型在 userseg.h中 . 这个函数需要我们来实现的
struct User_Context* userContext; int ret = Load_User_Program(exeFileData, exeFileLen, &exeFmt, command, &userContext); if (ret !=0) { Print("Load User Program failed!\n); return -1; }Start_User_Thread() 使用创建出来的 User_Context,并使进程进入准备队列中 原型在kthread.h中, 这个函数也是下面我们实现的
继续看Switch_To_User_Context()
void Switch_To_User_Context(struct Kernel_Thread* kthread, struct Interrupt_State* state); kthread: the thread that is about to executestate: saved processor registers describing the state when the thread wsa interrupted
Switch_To_Address_Space()这个函数的原型是在userseg.h中,用来切换地址空间的.
这里要了解下,userContext为用户态进程上下文, 对于内核进程来说,这个指针为空, 而用户进程都拥有自己的User_Context. 所以, 要判断一个进程是内核进程还是用户态进程,只需要通过userContext字段是否为空来判断.Switch_To_User_Context的实现如下:
141 void Switch_To_User_Context(struct Kernel_Thread* kthread, struct Interrupt_State* state) 142 { 143 /* 144 * Hint: Before executing in user mode, you will need to call 145 * the Set_Kernel_Stack_Pointer() and Switch_To_Address_Space() 146 * functions. 147 */ 148 struct User_Context* curUserContext; 149 struct User_Context* userContext = kthread->userContext; 150 if(!userContext) return; //Kernel process 151 if (userContext != curUserContext) { 152 ulong_t stack; 153 Switch_To_Address_Space(userContext); 154 esp0 = kthread->stackPage + PAGE_SIZE; 155 Set_Kernel_Stack_Pointer(esp0); //start new 156 curUserContext = userContext; 157 } 158 } 下面对 src/geekos/userseg.c 下几个函数进行实现://Destroy a User_Context object, including all memory and other resources allocated within it.
Load_User_Program()的实现可以阅读下:
Besides loading the executable's text and data segments into memory,you will also need to create two other data structures in theprocess's memory space.
You will need to create a stack for the new process.The stack will reside at the top of the user address space.You can use theDEFAULT_USER_STACK_SIZE macro insrc/geekos/userseg.c as the stack size.
You will also need to create an argument block datastructure. This data structure creates theargc andargv arguments that are passed to themain()function of the user process.Two functions are defined to help you build theargument block (prototypes in<geekos/argblock.h>).Get_Argument_Block_Size() takes thecommand stringpassed to the Spawn() function and determines how manycommand line arguments there will be, and how manybytes are required to store the argument block.TheFormat_Argument_Block()function takes the number of arguments and argument block size fromGet_Argument_Block_Size()and builds the argument block data structure in the memory location you haveallocated for it.
Note that you will need to take the size of the stack and argument blockinto account when you decide how much memory to allocate for theprocess.
然后可以根据Hint 来写:
/* * Hints: * - Determine where in memory each executable segment will be placed * - Determine size of argument block and where it memory it will * be placed * - Copy each executable segment into memory * - Format argument block in memory * - In the created User_Context object, set code entry point * address, argument block address, and initial kernel stack pointer * address */用户进程块的大小 = Round_Up_To_Page(maxva) + DEFAULT_USER_STACK_SIZE; //Round_Up_To_Page为参数块总大小
然后得到size,通过Create_User_Context(size)来创建一个用户进程的上下文,再Copy each executable segment into memory. 这里需要把exeFormat->segment[i]的内容拷贝到userContext下.最后是些初始化data,入口地址,堆栈指针操作.
Copy_From_User和Copy_To_User 用户地址空间和内核地址空间之间互相拷贝数据这两个函数的实现主要根据当前进程的User_Context,g_currentThread->userContext两者都要用到Validate_User_Memory这个函数,这个函数起了防御性作用,判错功能,下面再进行memcpy,下面是实现:
bool Copy_From_User(void* destInKernel, ulong_t srcInUser, ulong_t bufSize) 198 { 199 /* 200 * Hints: 201 * - the User_Context of the current process can be found 202 * from g_currentThread->userContext 203 * - the user address is an index relative to the chunk 204 * of memory you allocated for it 205 * - make sure the user buffer lies entirely in memory belonging 206 * to the process 207 */ 208 //TODO("Copy memory from user buffer to kernel buffer"); 209 //Validate_User_Memory(NULL,0,0); /* delete this; keeps gcc happy */ 210 struct User_Context* UserContext = g_currentThread->userContext; 211 if (!Validate_User_Memory(UserContext, srcInUser, bufSize)) return false; 212 memcpy(destInKernel, UserContext->memory + srcInUser, bufSize); 213 214 return true; 215 }229 bool Copy_To_User(ulong_t destInUser, void* srcInKernel, ulong_t bufSize) 230 { 231 /* 232 * Hints: same as for Copy_From_User() 233 */ 234 //TODO("Copy memory from kernel buffer to user buffer"); 235 struct User_Context* UserContext = g_currentThread->userContext; 236 if (!Validate_User_Memory(UserContext, destInUser, bufSize)) return false; 237 memcpy(UserContext->memory + destInUser, srcInKernel, bufSize); 238
switch_To_Address_Space这个函数要使用LDT 也即 userContext->ldtSelector 来切换到局部描述符表
通过下面这段ASM:
__asm__ __volatile__ ( "lldt %0" : :"a"(ldtSelector) );
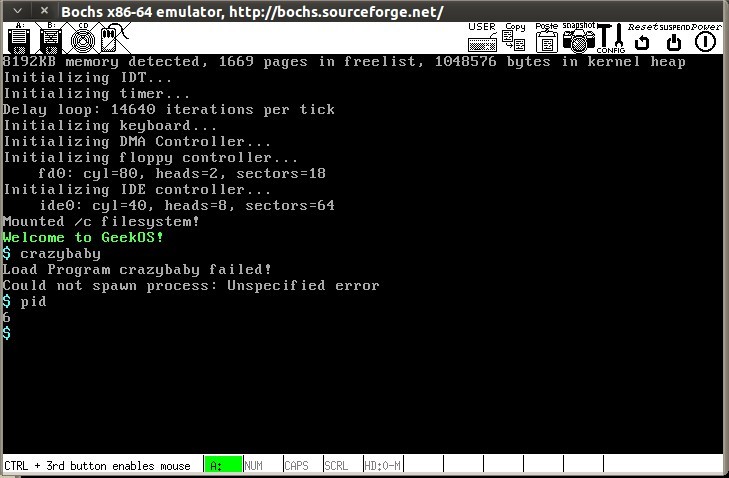
这个Project要填的内容还真多.还有kthread和syscall的实现. 这里就不细说了,有需要的可以留言询问.
最后实现图如下:


 5955
5955


 被折叠的 条评论
为什么被折叠?
被折叠的 条评论
为什么被折叠?
 到【灌水乐园】发言


