


Bluetooth简介
蓝牙,是一种支持设备短距离通信(一般10m内)的无线电技术。能在包括移动电话、PDA、无线耳机、笔记本电脑、相关外设等众多设备之间进行无线信息交换。利用“蓝牙”技术,能够有效地简化移动通信终端设备之间的通信,也能够成功地简化设备与因特网Internet之间的通信,从而数据传输变得更加迅速高效,为无线通信拓宽道路。蓝牙采用分散式网络结构以及快跳频和短包技术,支持点对点及点对多点通信,工作在全球通用的2.4GHz ISM(即工业、科学、医学)频段。其数据速率为1Mbps。采用时分双工传输方案实现全双工传输。
Bluetooth的基本类
Android平台提供了一个android.bluetooth的包,里面有蓝牙API去实现蓝牙设备之间的通信,只有8个类。常用的四个类:
BluetoothAdapter类:代表了一个本地的蓝牙适配器。它是所有蓝牙交互的入口点。利用它你可以发现其他蓝牙设备,查询绑定了的设备,使用已知的MAC地址实例化一个蓝牙设
备和建立一个BluetoothServerSocket(作为服务器端)来监听来自其他设备的连接。
BluetoothDevice类:代表了一个远端的蓝牙设备,使用它请求远端蓝牙设备连接或者获取远端蓝牙设备的名称、地址、种类和绑定状态(其信息是封装在BluetoothSocket中)。
BluetoothSocket类:代表了一个蓝牙套接字的接口(类似于TCP中的套接字),它是应用程序通过输入、输出流与其他蓝牙设备通信的连接点。
BlueboothServerSocket类:代表打开服务连接来监听可能到来的连接请求(属于server端),为了连接两个蓝牙设备必须有一个设备作为服务器打开一个服务套接字。当远端设
备发起连接连接请求的时候,并且已经连接到了的时候,BlueboothServerSocket类将会返回一个BluetoothSocket。
BluetoothAdapter蓝牙适配器
cancelDiscovery()取消发现,当我们正在搜索设备的时候调用这个方法将不再继续搜索
disable()关闭蓝牙
enable()打开蓝牙,这个方法打开蓝牙不会弹出提示,更多的时候我们需要问下用户是否打开,以下两行代码同样是打开蓝牙,但会提示用户:
Intentenabler = new Intent(BluetoothAdapter.ACTION_REQUEST_ENABLE);
startActivity(enabler);
getAddress()获取本地蓝牙地址
getDefaultAdapter()获取默认BluetoothAdapter,实际上,也只有这一种方法获取BluetoothAdapter
getName()获取本地蓝牙名称
getRemoteDevice(String address)根据蓝牙地址获取远程蓝牙设备
getState()获取本地蓝牙适配器当前状态
isDiscovering()判断当前是否正在查找设备,是则返回true
isEnabled()判断蓝牙是否打开,已打开返回true,否则返回false
listenUsingRfcommWithServiceRecord(String name,UUID uuid)根据名称,UUID创建并返回BluetoothServerSocket,这是创建BluetoothSocket服务器端的第一步
startDiscovery()开始搜索,这是搜索的第一步
BluetoothDevice:远程蓝牙设备
createRfcommSocketToServiceRecord(UUIDuuid)根据UUID创建并返回一个BluetoothSocket,这个方法也是我们获取BluetoothDevice的目的——创建BluetoothSocket
这个类其他的方法,如getAddress()、getName()等,同BluetoothAdapter。
BluetoothServerSocket
如果去除了Bluetooth相信大家一定再熟悉不过了,既然是Socket,方法就应该都差不多,这个类一种只有三个方法:
accept()
accept(int timeout)
close()关闭。
两者的区别在于后面的方法指定了过时时间,需要注意的是,执行这两个方法的时候,直到接收到了客户端的请求(或是过期之后),都会阻塞线程,应该放在新线程里运行。
还有一点需要注意的是,这两个方法都返回一个BluetoothSocket,最后的连接也是服务器端与客户端的两个BluetoothSocket的连接
BluetoothSocket是客户端
共5个方法
close()关闭
connect()连接
getInptuStream()获取输入流
getOutputStream()获取输出流
getRemoteDevice()获取远程设备,这里指的是获取bluetoothSocket指定连接的那个远程蓝牙设备
蓝牙数据传输——服务器端
1、获得BluetoothAdapter。
2、通过BluetoothAdapter.listenUsingRfcommWithServiceRecord(name,UUID uuid)方法创建BluetoothServerSocket对象。
3、通过luetoothServerSocket.accept()方法返回一个BluetoothSocket对象。由于该方法处于阻塞状态,需要开启线程来处理。
4、通过BluetoothSocket.getInputStream()和BluetoothSocket.getOutputStream()方法获得读写数据的InputStream和OutputStream对象。
5、通过InputStream.read()方法来读数据。通过OutputStream.write()方法来写数据。
蓝牙数据传输——客户端
1、获得BluetoothAdapter。
2、通过BluetoothAdapter.getRemoteDevice(String address)获得指定地址的BluetoothDevice对象。
3、通过BluetoothDevice.createRfcommSocketToServiceRecord (UUID uuid)方法创建BluetoothSocket对象。
4、通过BluetoothSocket.connect()方法来连接蓝牙设备。
5、通过BluetoothSocket.getInputStream()和BluetoothSocket.getOutputStream()方法获得读写数据的InputStream和OutputStream对象。
6、通过InputStream.read()方法来读数据。通过OutputStream.write()方法来写数据。
UUID
UUID:全局唯一标识符,格式为:8-4-4-4-12
两个蓝牙设备进行连接需要使用同一个UUID
串口服务的UUID:00001101-0000-1000-8000-00805F9B34FB
信息同步服务:00001104-0000-1000-8000-00805F9B34FB
文件传输服务:00001106-0000-1000-8000-00805F9B34FB
权限设置
操作蓝牙权限:
<uses-permissionandroid:name="android.permission.BLUETOOTH_ADMIN" />
<uses-permissionandroid:name="android.permission.BLUETOOTH" />
Bluetooth的应用实现
蓝牙设备之间的通信主要包括了四个步骤:
设置蓝牙设备
寻找局域网内可能或者匹配的设备
连接设备
设备之间的数据传输
具体编程实现
1. 启动蓝牙功能 2. 查找设备
3. 查询匹配好的设备 4. 扫描设备
5. 使能被发现 6. 连接设备
7. 服务端的连接 8. 客户端的连接
9. 管理连接 10. 权限设置
1. 启动蓝牙功能
首先通过调用静态方法getDefaultAdapter()获取蓝牙适配器BluetoothAdapter,如果返回为空,则无法继续执行了。例如:
BluetoothAdapter mBluetoothAdapter = BluetoothAdapter
                .getDefaultAdapter();
        if (mBluetoothAdapter == null) {
            // Device does not support Bluetooth
        }
其次,调用isEnabled()来查询当前蓝牙设备的状态,如果返回为false,则表示蓝牙设备没有开启,接下来你需要封装一个ACTION_REQUEST_ENABLE请求到intent里面,调
用startActivityForResult()方法使能蓝牙设备,例如:
  if (!mBluetoothAdapter.isEnabled()) {
            Intent enableBtIntent = new Intent(
                    BluetoothAdapter.ACTION_REQUEST_ENABLE);
            startActivityForResult(enableBtIntent, REQUEST_ENABLE_BT);
        }
2. 查找设备
使用BluetoothAdapter类里的方法,你可以查找远端设备(大概十米以内)或者查询在你手机上已经匹配(或者说绑
定)的其他设备了。当然需要确定对方蓝牙设备已经开启或者已经开启了“被发现使能”功能(对方设备是可以被发现
的是你能够发起连接的前提条件)。如果该设备是可以被发现的,会反馈回来一些对方的设备信息,比如名字、MAC
地址等,利用这些信息,你的设备就可以选择去向对方初始化一个连接。
如果你是第一次与该设备连接,那么一个配对的请求就会自动的显示给用户。当设备配对好之后,他的一些基本信息
(主要是名字和MAC)被保存下来并可以使用蓝牙的API来读取。使用已知的MAC地址就可以对远端的蓝牙设备发起
连接请求。
匹配好的设备和连接上的设备的不同点:匹配好只是说明对方设备发现了你的存在,并拥有一个共同的识别码,并且
可以连接。连接上:表示当前设备共享一个RFCOMM信道并且两者之间可以交换数据。也就是是说蓝牙设备在建立
RFCOMM信道之前,必须是已经配对好了的。
3. 查询匹配好的设备
在建立连接之前你必须先查询配对好了的蓝牙设备集以便选取一个设备进行通信,例如你可以你可以查询所有配对的
蓝牙设备,并使用一个数组适配器将其打印显示出来:
        Set<BluetoothDevice> pairedDevices = mBluetoothAdapter
                .getBondedDevices();
        // If there are paired devices
        if (pairedDevices.size() > 0) {
            // Loop through paired devices
            for (BluetoothDevice device : pairedDevices) {
                // Add the name and address to an array adapter to show in a
                // ListView
                mArrayAdapter
                        .add(device.getName() + "\n" + device.getAddress());
            }
        }
建立一个蓝牙连接只需要MAC地址就已经足够。
4. 扫描设备
扫描设备,只需要调用startDiscovery()方法,这个扫描的过程大概持续是12秒,应用程序为了ACTION_FOUND动作
需要注册一个BroadcastReceiver来接受设备扫描到的信息。对于每一个设备,系统都会广播ACTION_FOUND动作。
  // Create a BroadcastReceiver for ACTION_FOUND
        private final BroadcastReceiver mReceiver = new BroadcastReceiver() {
            public void onReceive(Context context, Intent intent) {
                String action = intent.getAction();
                // When discovery finds a device
                if (BluetoothDevice.ACTION_FOUND.equals(action)) {
                    // Get the BluetoothDevice object from the Intent
                    BluetoothDevice device = intent
                            .getParcelableExtra(BluetoothDevice.EXTRA_DEVICE);
                    // Add the name and address to an array adapter to show in a
                    // ListView
                    mArrayAdapter.add(device.getName() + "\n"
                            + device.getAddress());
                }
            }
        };
        // Register the BroadcastReceiver
        IntentFilter filter = new IntentFilter(BluetoothDevice.ACTION_FOUND);
        registerReceiver(mReceiver, filter); // Don't forget to unregister
                                             // during onDestroy。
5.使能被发现:Enabling discoverability
如果你想使你的设备能够被其他设备发现,将ACTION_REQUEST_DISCOVERABLE动作封装在intent中并调用
startActivityForResult(Intent, int)方法就可以了。它将在不使你应用程序退出的情况下使你的设备能够被发现。缺省情
况下的使能时间是120秒,当然你可以可以通过添加EXTRA_DISCOVERABLE_DURATION字段来改变使能时间(最
大不超过300秒)例如:
 Intent discoverableIntent = new Intent(
                BluetoothAdapter.ACTION_REQUEST_DISCOVERABLE);
        discoverableIntent.putExtra(
                BluetoothAdapter.EXTRA_DISCOVERABLE_DURATION, 300);
        startActivity(discoverableIntent);
运行该段代码之后,系统会弹出一个对话框来提示你启动设备使能被发现(此过程中如果你的蓝牙功能没有开启,系
统会帮你开启),并且如果你准备对该远端设备发现一个连接,你不需要开启设备被发现功能,因为该功能只是在你
的应用程序作为服务器端的时候才需要。
6.连接设备
在应用程序中,想建立两个蓝牙设备之间的连接,必须实现客户端和服务器端的代码(因为任何一个设备都必须可以
作为服务端或者客户端)。一个开启服务来监听,一个发起连接请求(使用服务器端设备的MAC地址)。当他们都拥
有一个蓝牙套接字在同一RFECOMM信道上的时候,可以认为他们之间已经连接上了。服务端和客户端通过不同的方
式或其他们的蓝牙套接字。当一个连接监听到的时候,服务端获取到蓝牙套接字。当客户可打开一个FRCOMM信道给
服务器端的时候,客户端获取到蓝牙套接字。
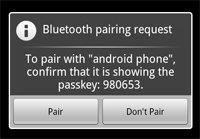
注意:在此过程中,如果两个蓝牙设备还没有配对好的,android系统会通过一个通知或者对话框的形式来通知用户。
RFCOMM连接请求会在用户选择之前阻塞。如下图:
7.服务端的连接
当你想要连接两台设备时,一个必须作为服务端(通过持有一个打开的BluetoothServerSocket),目的是监听外来连
接请求,当监听到以后提供一个连接上的BluetoothSocket给客户端,当客户端从BluetoothServerSocket得到
BluetoothSocket以后就可以销毁BluetoothServerSocket,除非你还想监听更多的连接请求。
建立服务套接字和监听连接的基本步骤:
首先通过调用listenUsingRfcommWithServiceRecord(String, UUID)方法来获取BluetoothServerSocket对象,参数
String代表了该服务的名称,UUID代表了和客户端连接的一个标识(128位格式的字符串ID,相当于PIN码),UUID
必须双方匹配才可以建立连接。
其次调用accept()方法来监听可能到来的连接请求,当监听到以后,返回一个连接上的蓝牙套接字
BluetoothSocket。
最后,在监听到一个连接以后,需要调用close()方法来关闭监听程序。(一般蓝牙设备之间是点对点的传输)
注意:accept()方法不应该放在主Acitvity里面,因为它是一种阻塞调用(在没有监听到连接请求之前程序就一直停
在那里)。解决方法是新建一个线程来管理。例如:
private class AcceptThread extends Thread {
    private final BluetoothServerSocket mmServerSocket;

    public AcceptThread() {
        // Use a temporary object that is later assigned to mmServerSocket,
        // because mmServerSocket is final
        BluetoothServerSocket tmp = null;
        try {
            // MY_UUID is the app's UUID string, also used by the client code
            tmp = mBluetoothAdapter.listenUsingRfcommWithServiceRecord(NAME, MY_UUID);
        } catch (IOException e) { }
        mmServerSocket = tmp;
    }

    public void run() {
        BluetoothSocket socket = null;
        // Keep listening until exception occurs or a socket is returned
        while (true) {
            try {
                socket = mmServerSocket.accept();
            } catch (IOException e) {
                break;
            }
            // If a connection was accepted
            if (socket != null) {
                // Do work to manage the connection (in a separate thread)
                manageConnectedSocket(socket);
                mmServerSocket.close();
                break;
            }
        }
    }

    /** Will cancel the listening socket, and cause the thread to finish */
    public void cancel() {
        try {
            mmServerSocket.close();
        } catch (IOException e) { }
    }
}
8.客户端的连接
为了初始化一个与远端设备的连接,需要先获取代表该设备的一个BluetoothDevice对象。通过BluetoothDevice对象
来获取BluetoothSocket并初始化连接,具体步骤:
使用BluetoothDevice对象里的方法createRfcommSocketToServiceRecord(UUID)来获取BluetoothSocket。UUID就是
匹配码。然后,调用connect()方法来。如果远端设备接收了该连接,他们将在通信过程中共享RFFCOMM信道,
并且connect返回。
注意:conncet()方法也是阻塞调用,一般建立一个独立的线程中来调用该方法。在设备discover过程中不应该发起
连接connect(),这样会明显减慢速度以至于连接失败。且数据传输完成只有调用close()方法来关闭连接,这样
可以节省系统内部资源。
private class ConnectThread extends Thread {
    private final BluetoothSocket mmSocket;
    private final BluetoothDevice mmDevice;

    public ConnectThread(BluetoothDevice device) {
        // Use a temporary object that is later assigned to mmSocket,
        // because mmSocket is final
        BluetoothSocket tmp = null;
        mmDevice = device;

        // Get a BluetoothSocket to connect with the given BluetoothDevice
        try {
            // MY_UUID is the app's UUID string, also used by the server code
            tmp = device.createRfcommSocketToServiceRecord(MY_UUID);
        } catch (IOException e) { }
        mmSocket = tmp;
    }

    public void run() {
        // Cancel discovery because it will slow down the connection
        mBluetoothAdapter.cancelDiscovery();

        try {
            // Connect the device through the socket. This will block
            // until it succeeds or throws an exception
            mmSocket.connect();
        } catch (IOException connectException) {
            // Unable to connect; close the socket and get out
            try {
                mmSocket.close();
            } catch (IOException closeException) { }
            return;
        }

        // Do work to manage the connection (in a separate thread)
        manageConnectedSocket(mmSocket);
    }

    /** Will cancel an in-progress connection, and close the socket */
    public void cancel() {
        try {
            mmSocket.close();
        } catch (IOException e) { }
    }
}
9.管理连接(主要涉及数据的传输)
当设备连接上以后,每个设备都拥有各自的BluetoothSocket。就可以实现设备之间数据的共享了。
首先通过调用getInputStream()和getOutputStream()方法来获取输入输出流。
然后通过调用read(byte[]) 和write(byte[]).方法来读取或者写数据。
实现细节:以为读取和写操作都是阻塞调用,需要建立一个专用线程来管理。 。
private class ConnectedThread extends Thread {
    private final BluetoothSocket mmSocket;
    private final InputStream mmInStream;
    private final OutputStream mmOutStream;

    public ConnectedThread(BluetoothSocket socket) {
        mmSocket = socket;
        InputStream tmpIn = null;
        OutputStream tmpOut = null;

        // Get the input and output streams, using temp objects because
        // member streams are final
        try {
            tmpIn = socket.getInputStream();
            tmpOut = socket.getOutputStream();
        } catch (IOException e) { }

        mmInStream = tmpIn;
        mmOutStream = tmpOut;
    }

    public void run() {
        byte[] buffer = new byte[1024];  // buffer store for the stream
        int bytes; // bytes returned from read()

        // Keep listening to the InputStream until an exception occurs
        while (true) {
            try {
                // Read from the InputStream
                bytes = mmInStream.read(buffer);
                // Send the obtained bytes to the UI activity
                mHandler.obtainMessage(MESSAGE_READ, bytes, -1, buffer)
                        .sendToTarget();
            } catch (IOException e) {
                break;
            }
        }
    }

    /* Call this from the main activity to send data to the remote device */
    public void write(byte[] bytes) {
        try {
            mmOutStream.write(bytes);
        } catch (IOException e) { }
    }

    /* Call this from the main activity to shutdown the connection */
    public void cancel() {
        try {
            mmSocket.close();
        } catch (IOException e) { }
    }
}
10. 权限设置
操作蓝牙权限:
<uses-permissionandroid:name="android.permission.BLUETOOTH_ADMIN" />
<uses-permissionandroid:name="android.permission.BLUETOOTH" />
例子程序:
main.xml
<?xml version="1.0" encoding="utf-8"?>
<LinearLayout xmlns:android="http://schemas.android.com/apk/res/android"
    android:layout_width="fill_parent"
    android:layout_height="fill_parent"
    android:orientation="vertical" >

    <LinearLayout
        android:id="@+id/LinearLayout01"
        android:layout_width="wrap_content"
        android:layout_height="wrap_content" >

        <TextView
            android:id="@+id/TextView01"
            android:layout_width="100dip"
            android:layout_height="wrap_content"
            android:text="手机蓝牙开关" >
        </TextView>

        <ToggleButton
            android:id="@+id/tbtnSwitch"
            android:layout_width="wrap_content"
            android:layout_height="wrap_content"
            android:text="蓝牙开关" >
        </ToggleButton>

        <Button
            android:id="@+id/btnDis"
            android:layout_width="160dip"
            android:layout_height="wrap_content"
            android:text="本机蓝牙可见" >
        </Button>
    </LinearLayout>

    <LinearLayout
        android:id="@+id/LinearLayout02"
        android:layout_width="wrap_content"
        android:layout_height="wrap_content" >

        <Button
            android:id="@+id/btnSearch"
            android:layout_width="160dip"
            android:layout_height="wrap_content"
            android:text="搜索设备" >
        </Button>

        <Button
            android:id="@+id/btnExit"
            android:layout_width="160dip"
            android:layout_height="wrap_content"
            android:text="退出程序" >
        </Button>
    </LinearLayout>

    <ListView
        android:id="@+id/lvDevices"
        android:layout_width="fill_parent"
        android:layout_height="fill_parent" >
    </ListView>

</LinearLayout>
MainActivity.java
package com.testBlueTooth;

import java.io.IOException;
import java.util.ArrayList;
import java.util.List;
import java.util.UUID;

import android.app.Activity;
import android.bluetooth.BluetoothAdapter;
import android.bluetooth.BluetoothDevice;
import android.bluetooth.BluetoothSocket;
import android.content.BroadcastReceiver;
import android.content.Context;
import android.content.Intent;
import android.content.IntentFilter;
import android.os.Bundle;
import android.util.Log;
import android.view.View;
import android.widget.AdapterView;
import android.widget.ArrayAdapter;
import android.widget.Button;
import android.widget.ListView;
import android.widget.Toast;
import android.widget.ToggleButton;

public class testBlueTooth extends Activity {
    static final String SPP_UUID = "00001101-0000-1000-8000-00805F9B34FB";

    Button btnSearch, btnDis, btnExit;

    ToggleButton tbtnSwitch;

    ListView lvBTDevices;

    ArrayAdapter<String> adtDevices;

    List<String> lstDevices = new ArrayList<String>();

    BluetoothAdapter btAdapt;

    public static BluetoothSocket btSocket;

    @Override
    public void onCreate(Bundle savedInstanceState) {
        super.onCreate(savedInstanceState);
        setContentView(R.layout.main);
        // Button 设置
        btnSearch = (Button) this.findViewById(R.id.btnSearch);
        btnSearch.setOnClickListener(new ClickEvent());
        btnExit = (Button) this.findViewById(R.id.btnExit);
        btnExit.setOnClickListener(new ClickEvent());
        btnDis = (Button) this.findViewById(R.id.btnDis);
        btnDis.setOnClickListener(new ClickEvent());

        // ToogleButton设置
        tbtnSwitch = (ToggleButton) this.findViewById(R.id.tbtnSwitch);
        tbtnSwitch.setOnClickListener(new ClickEvent());

        // ListView及其数据源 适配器
        lvBTDevices = (ListView) this.findViewById(R.id.lvDevices);
        adtDevices = new ArrayAdapter<String>(testBlueTooth.this,
                android.R.layout.simple_list_item_1, lstDevices);
        lvBTDevices.setAdapter(adtDevices);
        lvBTDevices.setOnItemClickListener(new ItemClickEvent());

        btAdapt = BluetoothAdapter.getDefaultAdapter();// 初始化本机蓝牙功能

        if (btAdapt.getState() == BluetoothAdapter.STATE_ON)// 读取蓝牙状态并显示
            tbtnSwitch.setChecked(false);
        else if (btAdapt.getState() == BluetoothAdapter.STATE_OFF)
            tbtnSwitch.setChecked(true);

        // 注册Receiver来获取蓝牙设备相关的结果
        IntentFilter intent = new IntentFilter();
        intent.addAction(BluetoothDevice.ACTION_FOUND);// 用BroadcastReceiver来取得搜索结果
        intent.addAction(BluetoothDevice.ACTION_BOND_STATE_CHANGED);
        intent.addAction(BluetoothAdapter.ACTION_SCAN_MODE_CHANGED);
        intent.addAction(BluetoothAdapter.ACTION_STATE_CHANGED);
        registerReceiver(searchDevices, intent);
    }

    private BroadcastReceiver searchDevices = new BroadcastReceiver() {

        public void onReceive(Context context, Intent intent) {
            String action = intent.getAction();
            Bundle b = intent.getExtras();
            Object[] lstName = b.keySet().toArray();

            // 显示所有收到的消息及其细节
            for (int i = 0; i < lstName.length; i++) {
                String keyName = lstName[i].toString();
                Log.e(keyName, String.valueOf(b.get(keyName)));
            }
            // 搜索设备时,取得设备的MAC地址
            if (BluetoothDevice.ACTION_FOUND.equals(action)) {
                BluetoothDevice device = intent
                        .getParcelableExtra(BluetoothDevice.EXTRA_DEVICE);
                String str = device.getName() + "|" + device.getAddress();
                if (lstDevices.indexOf(str) == -1)// 防止重复添加
                    lstDevices.add(str); // 获取设备名称和mac地址
                adtDevices.notifyDataSetChanged();
            }
        }
    };

    @Override
    protected void onDestroy() {
        this.unregisterReceiver(searchDevices);
        super.onDestroy();
        android.os.Process.killProcess(android.os.Process.myPid());
    }

    class ItemClickEvent implements AdapterView.OnItemClickListener {

        @Override
        public void onItemClick(AdapterView<?> arg0, View arg1, int arg2,
                long arg3) {
            btAdapt.cancelDiscovery();
            String str = lstDevices.get(arg2);
            String[] values = str.split("\\|");
            String address = values[1];
            Log.e("address", values[1]);
            UUID uuid = UUID.fromString(SPP_UUID);
            BluetoothDevice btDev = btAdapt.getRemoteDevice(address);
            try {
                btSocket = btDev.createRfcommSocketToServiceRecord(uuid);
                btSocket.connect();

            } catch (IOException e) {
                // TODO Auto-generated catch block

            }

        }

    }

    class ClickEvent implements View.OnClickListener {
        @Override
        public void onClick(View v) {
            if (v == btnSearch)// 搜索蓝牙设备,在BroadcastReceiver显示结果
            {
                if (btAdapt.getState() == BluetoothAdapter.STATE_OFF) {// 如果蓝牙还没开启
                    Toast.makeText(testBlueTooth.this, "请先打开蓝牙", 1000).show();
                    return;
                }
                setTitle("本机蓝牙地址:" + btAdapt.getAddress());
                lstDevices.clear();
                btAdapt.startDiscovery();
            } else if (v == tbtnSwitch) {// 本机蓝牙启动/关闭
                if (tbtnSwitch.isChecked() == false)
                    btAdapt.enable();
                else if (tbtnSwitch.isChecked() == true)
                    btAdapt.disable();
            } else if (v == btnDis)// 本机可以被搜索
            {
                Intent discoverableIntent = new Intent(
                        BluetoothAdapter.ACTION_REQUEST_DISCOVERABLE);
                discoverableIntent.putExtra(
                        BluetoothAdapter.EXTRA_DISCOVERABLE_DURATION, 300);
                startActivity(discoverableIntent);
            } else if (v == btnExit) {
                try {
                    if (btSocket != null)
                        btSocket.close();
                } catch (IOException e) {
                    e.printStackTrace();
                }
                testBlueTooth.this.finish();
            }
        }

    }
}
清单文件:
<?xml version="1.0" encoding="utf-8"?>
<manifest xmlns:android="http://schemas.android.com/apk/res/android"
    package="com.testBlueTooth"
    android:versionCode="1"
    android:versionName="1.0" >

    <uses-sdk
        android:minSdkVersion="17"
        android:targetSdkVersion="17" />

    <application
        android:icon="@drawable/icon"
        android:label="@string/app_name" >
        <activity
            android:name=".testBlueTooth"
            android:label="@string/app_name" >
            <intent-filter>
                <action android:name="android.intent.action.MAIN" />

                <category android:name="android.intent.category.LAUNCHER" />
            </intent-filter>
        </activity>
        <activity android:name="WaveDiagram" >
        </activity>
    </application>

    <uses-permission android:name="android.permission.BLUETOOTH" />
    <uses-permission android:name="android.permission.BLUETOOTH_ADMIN" />

</manifest>


 766
766


 被折叠的 条评论
为什么被折叠?
被折叠的 条评论
为什么被折叠?
 到【灌水乐园】发言


