


GS物流项目第7天课程
【学习目标】
1、WebService入门
a, 什么是WebService
b, 调用网络上的WebService服务
c, SOAP和WSDL概念
d, 基于JDK1.7发布一个简单的WebService服务
e, 使用JDK的wsimport命令生成本地代码调用WebService服务
2、apache CXF入门
a, CXF简介
b, CXF入门案例(服务端开发)
c, CXF入门案例(客户端开发)
1)使用WSDL2Java命令生成本地代码调用
2)在配置文件中注册代理对象调用
3、基于CXF发布CRM服务
a, 创建CRM数据库和CRM客户表
b, 发布服务
第1章 WebService入门
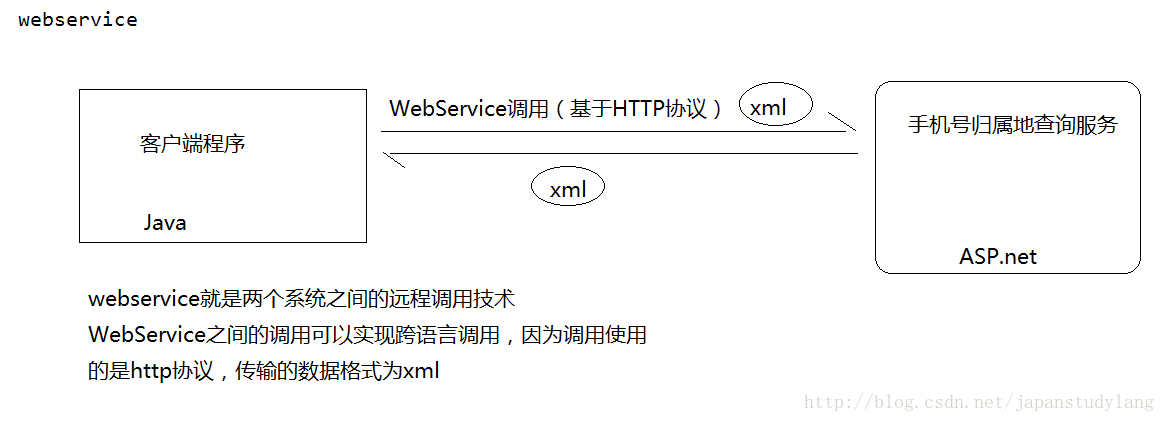
1.1. 什么是WebService
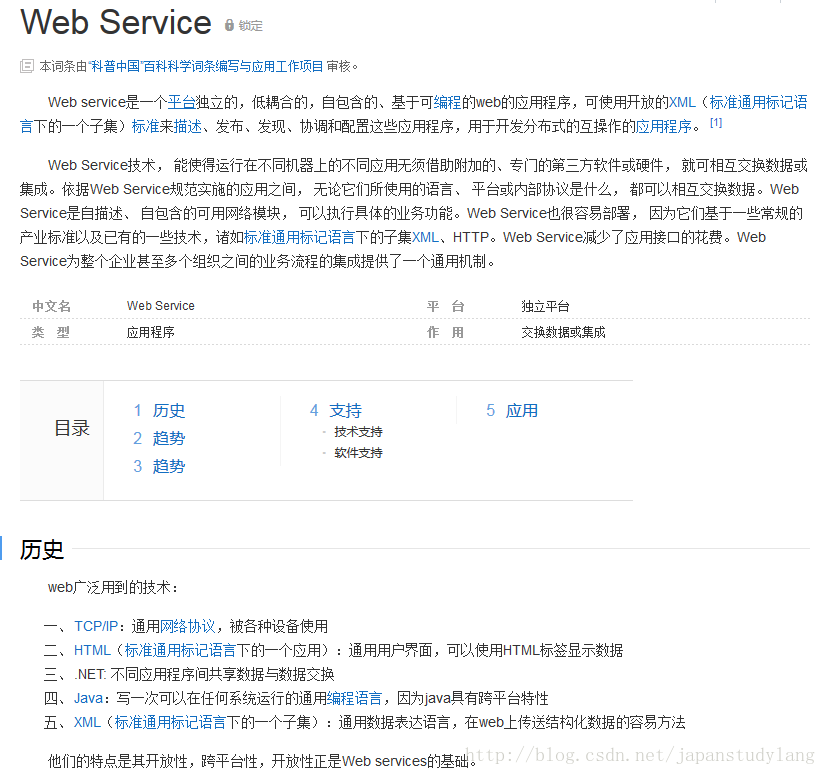
l WebService的特点
• WebService通过HTTP POST方式接受客户的请求
• WebService与客户端之间一般使用SOAP协议传输XML数据
• 它本身就是为了跨平台或跨语言而设计的
1.2. 调用网络上的WebService服务
wsimport –s . http://ws.webxml.com.cn/WebServices/MobileCodeWS.asmx?wsdl
1.3. SOAP和WSDL概念
1.3.1 SOAP(SimpleObject Access Protocol):简单对象访问协议
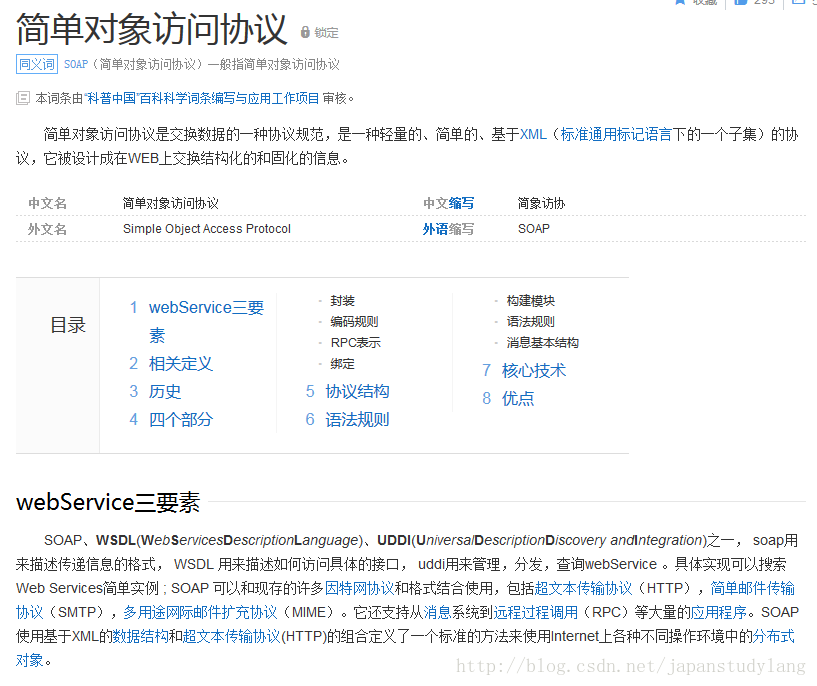
n SOAP作为一个基于XML语言的协议用于在网上传输数据。
n SOAP = 在HTTP的基础上+XML数据。
n SOAP是基于HTTP的。
u SOAP的组成如下:
l Envelope – 必须的部分。以XML的根元素出现。
l Headers – 可选的。
l Body – 必须的。在body部分,包含要执行的服务器的方法。和发送到服务器的数据。
示例:
POST /WebServices/IpAddressSearchWebService.asmxHTTP/1.1
Host: ws.webxml.com.cn
Content-Type: text/xml; charset=utf-8
Content-Length: length
SOAPAction:"http://WebXml.com.cn/getCountryCityByIp"
<?xml version="1.0"encoding="utf-8"?>
<soap:Envelopexmlns:xsi="http://www.w3.org/2001/XMLSchema-instance"xmlns:xsd="http://www.w3.org/2001/XMLSchema"xmlns:soap="http://schemas.xmlsoap.org/soap/envelope/">
<soap:Body>
<getCountryCityByIpxmlns="http://WebXml.com.cn/">
<theIpAddress>string</theIpAddress>
</getCountryCityByIp>
</soap:Body>
</soap:Envelope>
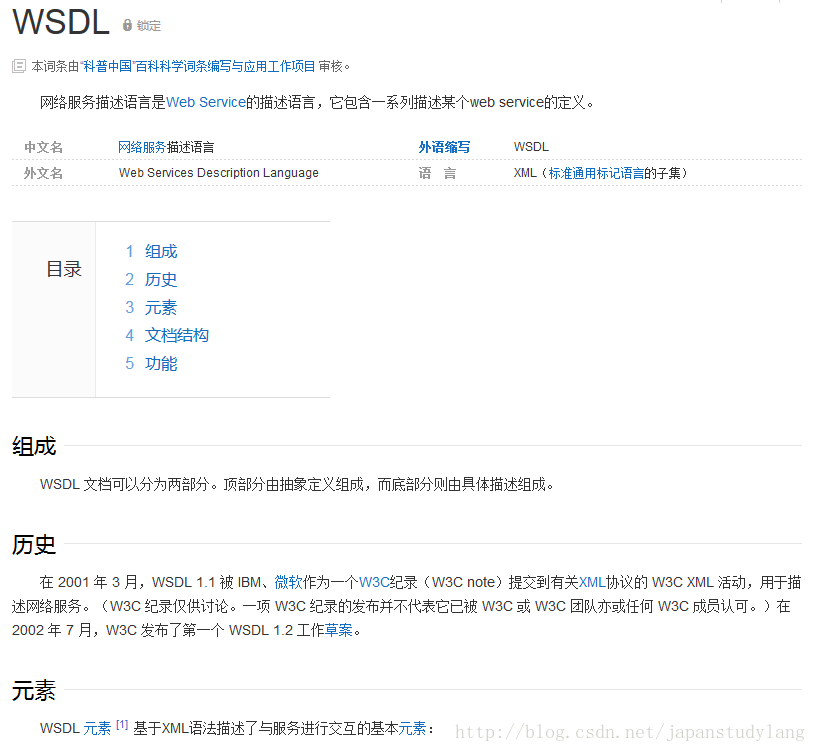
1.3.2 WSDL Web服务描述语言
WSDL(WebService Description Language):web 服务描述语言
就是一个xml文档,用于描述当前服务的一些信息(服务名称、服务的发布地址、服务提供的方法、方法的参数类型、方法的返回值类型等)
public staticvoid main(String[] args) {
MobileCodeWS ss=new MobileCodeWS();
MobileCodeWSSoap soap=ss.getMobileCodeWSSoap();
ArrayOfString aos=soap.getDatabaseInfo();
List list=aos.getString();
System.out.println(list);
}
第2章 基于jdk1.7发布一个WebService服务
2.
2.1. 服务端发布
第一步:创建一个Java项目
第二步:创建一个类,加入Webservice注解
第三步:提供一个方法add
第四步:在main方法中调用jdk提供的发布服务的方法
第五步:访问服务的wsdl文档(服务的发布地址+?wsdl)http://192.168.115.87:8080/hello?wsdl
package com.igeek.webservice;
import javax.jws.WebService;
@WebService
public classMyWebService01 {
publicint add(inta,intb) {
System.out.println("==MyWebService01==add==");
returna +b;
}
}
测试类:
package com.igeek.test;
import javax.xml.ws.Endpoint;
import com.igeek.webservice.MyWebService01;
public classServerTest02 {
publicstaticvoidmain(String[] args) {
String address = "http://192.168.1.196:8090/test02";
Object implementor = newMyWebService01();
//使用Endpoint类提供的publish方法发布WebService,发布时要保证使用的端口号没有被其他应用程序占用
Endpoint.publish(address,implementor);
}
}
2.2. 客户端调用
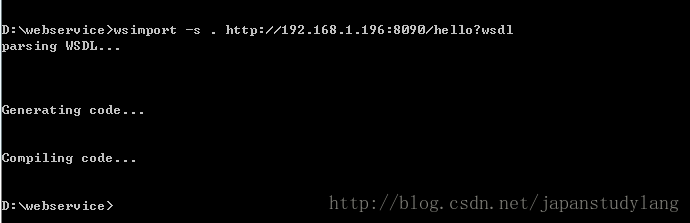
2.2.1jdk中wsimport命令使用
作用:解析wsdl文件,生成客户端本地代码
打开java JDK目录我们会看到wsimport工具,这是由sun为我们免费提供的的,功能强大,会给我们工作带来极大的方便。
wsimport是JDK自带的工具,主要功能是根据服务端生成的WSDL文件创建客户端支持代码。生成java客户端代码常使用的命令参数说明:
| 参数 | 说明 |
| -p | 定义客户端生成类的包名称 |
| -s | 指定客户端执行类的源文件存放目录 |
| -d | 指定客户端执行类的class文件的存放目录 |
| -keep | 表示生成客户端执行类的源代码 |
| -b | 指定jaxws/jaxb绑定文件或额外的schemas |
| -extension | 使用扩展来支持SOAP1.2 |
示例:
% wsimport -p client -s source -d bin http://192.168.1.196:8090/hello?wsdl
将生成的客户端代码直接拷贝到项目中。
2.2.2客户端调用
1、使用wsimport命令解析wsdl文件生成本地代码
2、通过本地代码创建一个代理对象
3、通过代理对象实现远程调用
package com.igeek.test;
import com.igeek.webservice.MyWebService01;
importcom.igeek.webservice.MyWebService01Service;
public classClientTest02 {
publicstaticvoidmain(String[] args) {
MyWebService01Service ss =newMyWebService01Service();
//创建客户端代理对象,用于远程调用
MyWebService01 proxy = ss.getMyWebService01Port();
intret=proxy.add(2,3);
System.out.println(ret);
}
}
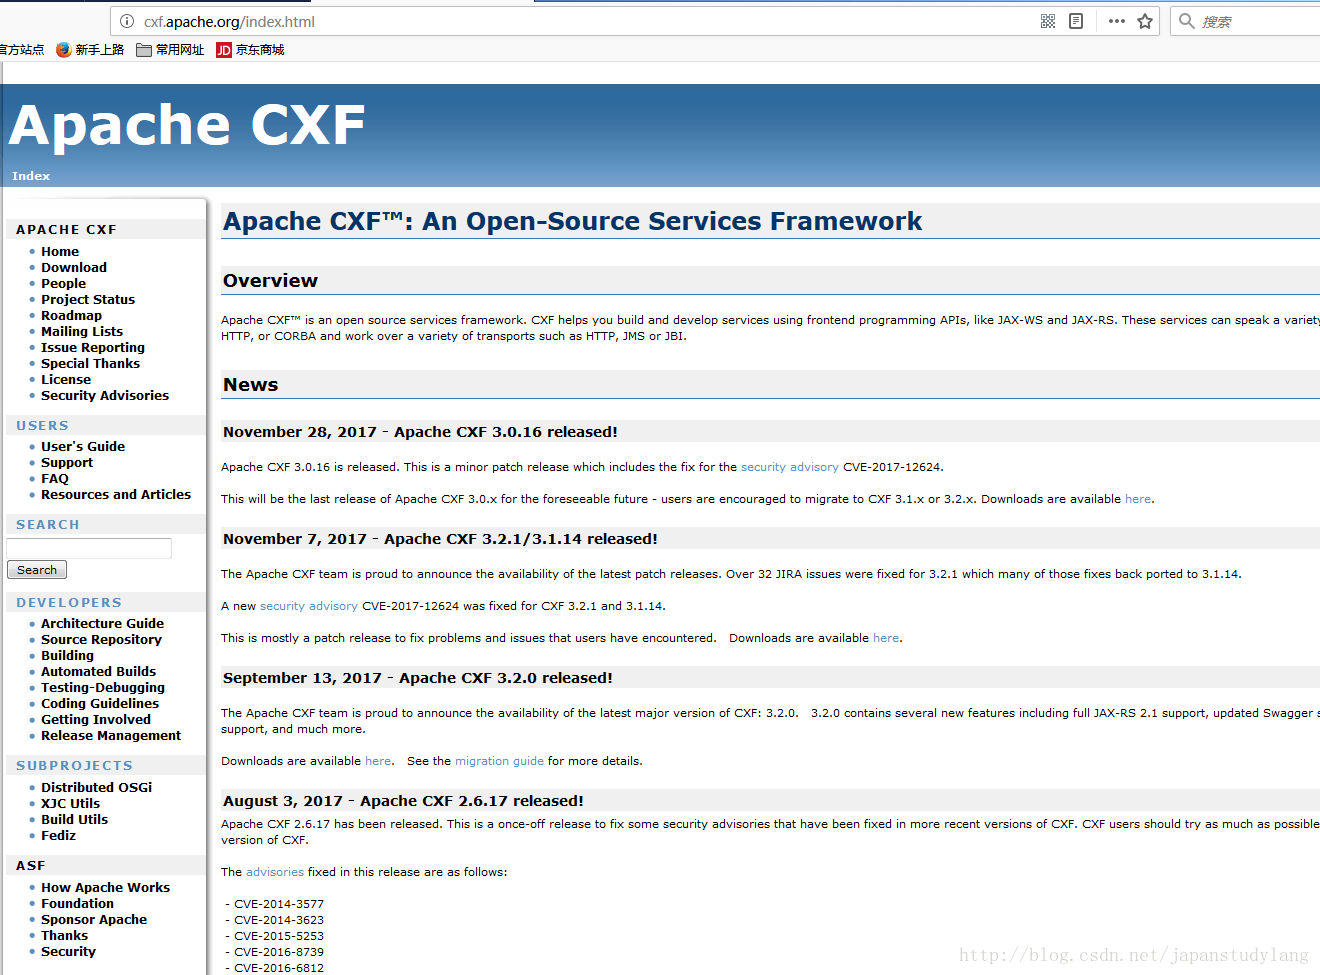
第3章 apache CXF入门
3.1. 介绍及入门案例(服务端开发)
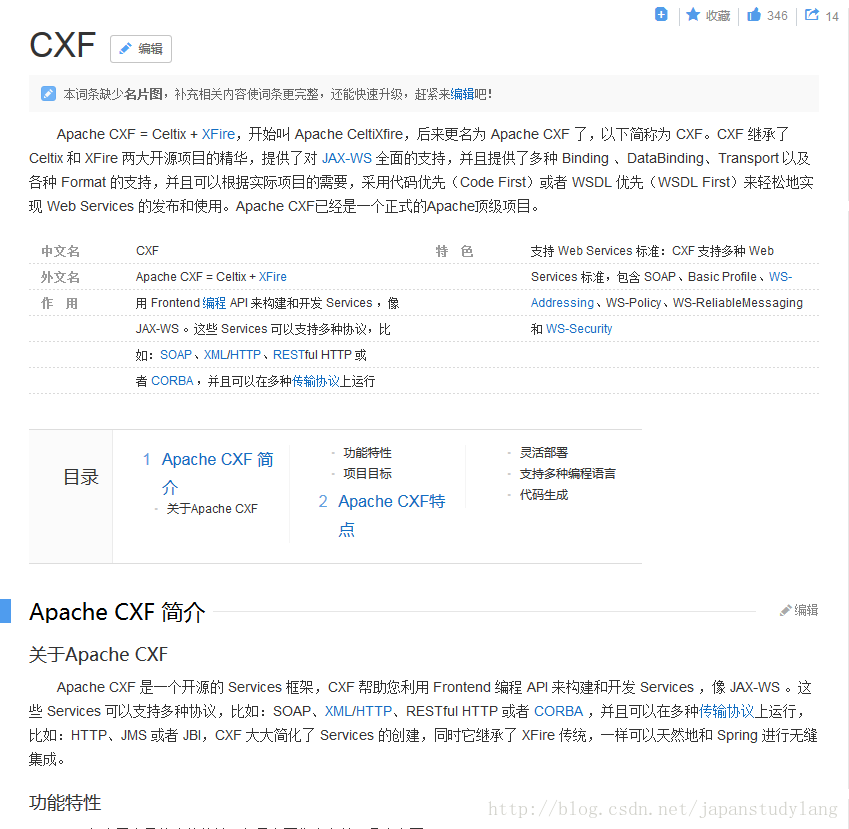
官网:cxf.apache.org
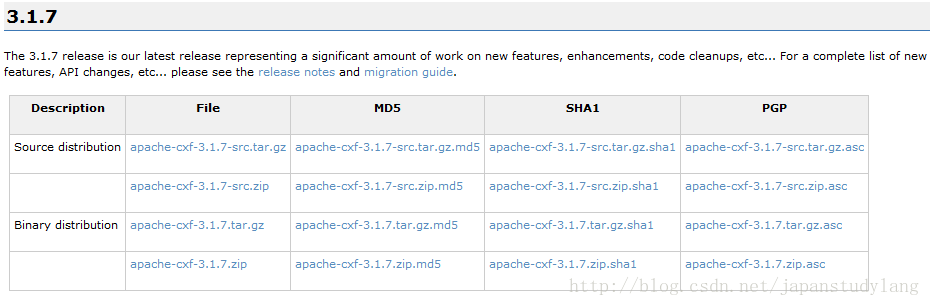

下载CXF的开发包:

解压上面的zip文件:
l Apache CXF = Celtix + Xfire
l 支持多种协议:
• SOAP1.1,1.2
• XML/HTTP
• CORBA(Common Object RequestBroker Architecture公共对象请求代理体系结构,早期语言使用的WS。C,c++,C#)
• 并可以与Spring进行快速无缝的整合
• 灵活的部署:可以运行在Tomcat,Jboss,Jetty(内置),IBMWS,BeaWL上面。
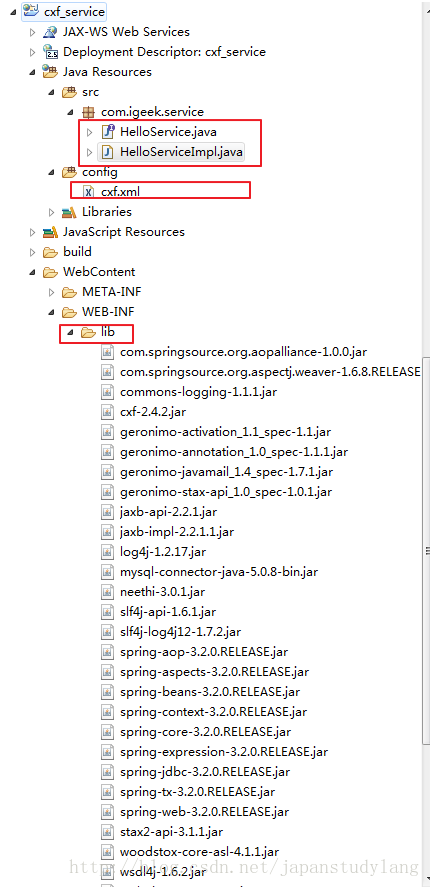
第一步:创建动态web项目
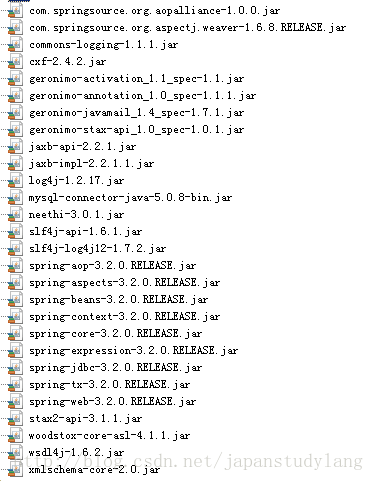
第二步:导入CXF相关jar包
第三步:在web.xml中配置CXF框架提供的一个Servlet
<?xml version="1.0"encoding="UTF-8"?>
<web-app xmlns:xsi="http://www.w3.org/2001/XMLSchema-instance"xmlns="http://java.sun.com/xml/ns/javaee"xsi:schemaLocation="http://java.sun.com/xml/ns/javaeehttp://java.sun.com/xml/ns/javaee/web-app_2_5.xsd"id="WebApp_ID"version="2.5">
<display-name>cxf_service</display-name>
<!-- 配置CXF框架提供的Servlet -->
<servlet>
<servlet-name>cxf</servlet-name>
<servlet-class>org.apache.cxf.transport.servlet.CXFServlet</servlet-class>
<!-- 通过初始化参数指定CXF框架的配置文件位置 -->
<init-param>
<param-name>config-location</param-name>
<param-value>classpath:cxf.xml</param-value>
</init-param>
</servlet>
<servlet-mapping>
<servlet-name>cxf</servlet-name>
<url-pattern>/service/*</url-pattern>
</servlet-mapping>
<welcome-file-list>
<welcome-file>index.html</welcome-file>
<welcome-file>index.htm</welcome-file>
<welcome-file>index.jsp</welcome-file>
<welcome-file>default.html</welcome-file>
<welcome-file>default.htm</welcome-file>
<welcome-file>default.jsp</welcome-file>
</welcome-file-list>
</web-app>
第四步:在类路径下提供cxf.xml
<?xml version="1.0"encoding="UTF-8"?>
<beans xmlns="http://www.springframework.org/schema/beans"
xmlns:xsi="http://www.w3.org/2001/XMLSchema-instance"
xmlns:jaxws="http://cxf.apache.org/jaxws"
xmlns:soap="http://cxf.apache.org/bindings/soap"
xsi:schemaLocation="http://www.springframework.org/schema/beans
http://www.springframework.org/schema/beans/spring-beans.xsd
http://cxf.apache.org/bindings/soap
http://cxf.apache.org/schemas/configuration/soap.xsd
http://cxf.apache.org/jaxws
http://cxf.apache.org/schemas/jaxws.xsd">
<!-- 引入CXF Bean定义如下,早期的版本中使用 -->
<importresource="classpath:META-INF/cxf/cxf.xml"/>
<importresource="classpath:META-INF/cxf/cxf-extension-soap.xml"/>
<importresource="classpath:META-INF/cxf/cxf-servlet.xml"/>
</beans>
第五步:开发一个接口和实现类
package com.igeek.service;
import javax.jws.WebService;
@WebService
public interfaceHelloService {
publicString sayHello(Stringname);
}
package com.igeek.service;
public classHelloServiceImpl implementsHelloService{
publicString sayHello(Stringname) {
System.out.println("基于CXF开发的服务端sayHello方法被调用了。。。。");
return"hello " +name;
}
}
第六步:在cxf.xml中注册服务

<beanid="helloService"class="com.igeek.service.HelloServiceImpl"/>
<!-- 注册服务 -->
<jaxws:serverid="myService"address="/cxfService">
<jaxws:serviceBean>
<refbean="helloService"/>
</jaxws:serviceBean>
</jaxws:server>
启动tomcat
访问:http://localhost:8090/cxf_service/service/cxfService?wsdl
3.2. 入门案例(客户端开发)
l 方式一:使用jdk提供的wsimport命令生成本地代码完成调用(前面使用过)
l 方式二:使用CXF提供的方式(重点)
第一步:创建Java项目并导入CXF相关jar包
第二步:使用wsimport或者CXF提供wsdl2java生成本地代码,只需要生成接口文件
wsdl2java用法:
wsdl2java-p com -d src -all aa.wsdl
-p 指定其wsdl的命名空间,也就是要生成代码的包名:
-d 指定要产生代码所在目录
-client生成客户端测试web service的代码
-server生成服务器启动web service的代码
-impl 生成webservice的实现代码
-ant 生成build.xml文件
-all 生成所有开始端点代码:types,service proxy,,service interface,server mainline, client mainline, implementation object, and an Ant build.xmlfile.
wsdl2java -d . http://127.0.0.1:8090/cxfserver/service/cxfService?wsdl
第三步:将接口文件复制到项目中
第四步:提供spring配置文件,注册客户端代理对象
Cxf.xml
<?xml version="1.0"encoding="UTF-8"?>
<beans xmlns="http://www.springframework.org/schema/beans"
xmlns:xsi="http://www.w3.org/2001/XMLSchema-instance"
xmlns:jaxws="http://cxf.apache.org/jaxws"
xmlns:soap="http://cxf.apache.org/bindings/soap"
xsi:schemaLocation="http://www.springframework.org/schema/beans
http://www.springframework.org/schema/beans/spring-beans.xsd
http://cxf.apache.org/bindings/soap
http://cxf.apache.org/schemas/configuration/soap.xsd
http://cxf.apache.org/jaxws
http://cxf.apache.org/schemas/jaxws.xsd">
<!-- 引入CXF Bean定义如下,早期的版本中使用 -->
<importresource="classpath:META-INF/cxf/cxf.xml"/>
<importresource="classpath:META-INF/cxf/cxf-extension-soap.xml"/>
<importresource="classpath:META-INF/cxf/cxf-servlet.xml"/>
<!-- 注册CXF客户端代理对象,通过spring框架创建这个代理对象,使用代理对象实现远程调用 -->
<jaxws:clientid="myClient"
address="http://192.168.1.196:8090/cxfserver/service/cxfService"
serviceClass="com.igeek.service.HelloService">
</jaxws:client>
</beans>
第五步:读取spring配置文件,创建spring工厂,从工厂中获取代理对象,实现远程调用
修改HelloService文件
package com.igeek.service;
import javax.jws.WebMethod;
import javax.jws.WebParam;
import javax.jws.WebResult;
import javax.jws.WebService;
import javax.xml.bind.annotation.XmlSeeAlso;
import javax.xml.ws.RequestWrapper;
import javax.xml.ws.ResponseWrapper;
/**
* This class was generated by Apache CXF 2.4.2
* 2018-01-17T09:37:21.868+08:00
* Generated source version: 2.4.2
*
*/
@WebService(targetNamespace = "http://service.igeek.com/", name = "HelloService")
@XmlSeeAlso({})
public interfaceHelloService {
@WebResult(name= "return", targetNamespace = "")
@RequestWrapper(localName= "sayHello", targetNamespace = "http://service.igeek.com/", className ="com.igeek.service.SayHello")
@WebMethod
@ResponseWrapper(localName= "sayHelloResponse",targetNamespace = "http://service.igeek.com/",className ="com.igeek.service.SayHelloResponse")
publicjava.lang.String sayHello(
@WebParam(name= "arg0", targetNamespace = "")
java.lang.String arg0
);
}
package com.igeek.test;
importorg.springframework.context.ApplicationContext;
import org.springframework.context.support.ClassPathXmlApplicationContext;
import com.igeek.service.HelloService;
public classClientTest {
publicstaticvoidmain(String[] args) {
ApplicationContext ctx =newClassPathXmlApplicationContext("cxf.xml");
HelloService proxy = (HelloService)ctx.getBean("myClient");
String ret = proxy.sayHello("test");
System.out.println(ret);
}
}
第4章 基于CXF开发crm服务
4.1. 数据库环境搭建
创建crm的数据库,并创建客户表
执行sql脚本:
DROP TABLE IF EXISTS `t_customer`;
CREATE TABLE `t_customer` (
`id`int(11) NOT NULL auto_increment,
`name`varchar(255) default NULL,
`station`varchar(255) default NULL,
`telephone` varchar(255) default NULL,
`address`varchar(255) default NULL,
`decidedzone_id` varchar(255) default NULL,
PRIMARYKEY (`id`)
) ENGINE=InnoDB DEFAULT CHARSET=utf8;
添加表数据:
INSERT INTO `t_customer` VALUES ('1', '小文', '百度','13811111111', '南京市鼓楼区湖南路20号', null);
INSERT INTO `t_customer` VALUES ('2', '小静', '极客营','13822222222', '无锡市新吴区新安街道250号', null);
INSERT INTO `t_customer` VALUES ('3', '小新', '搜狗','13533333333', '无锡市新区震泽路18号', null);
INSERT INTO `t_customer` VALUES ('4', '老袁', '联想','18633333333', '南京市玄武区高楼门5号', null);
INSERT INTO `t_customer` VALUES ('5', '小何', '测试空间','18511111111', '无锡市南长区学前西路20号', null);
INSERT INTO `t_customer` VALUES ('6', '小华', '联想','13722222222', '无锡市南长区学前西路10号', null);
INSERT INTO `t_customer` VALUES ('7', '小董', '百度','13733333333', '南京市鼓楼区山西路20号', null);
INSERT INTO `t_customer` VALUES ('8', '老董', 'NIIT','13788888888', '南京市鼓楼区三步两桥18号', null);
4.2. web项目环境搭建及测试
第一步:创建动态web项目
第二步:导入CXF相关jar包
第三步:配置web.xml
<?xml version="1.0"encoding="UTF-8"?>
<web-app xmlns:xsi="http://www.w3.org/2001/XMLSchema-instance"xmlns="http://java.sun.com/xml/ns/javaee"xsi:schemaLocation="http://java.sun.com/xml/ns/javaeehttp://java.sun.com/xml/ns/javaee/web-app_2_5.xsd"id="WebApp_ID"version="2.5">
<display-name>crm</display-name>
<context-param>
<param-name>contextConfigLocation</param-name>
<param-value>classpath:cxf.xml</param-value>
</context-param>
<listener>
<listener-class>org.springframework.web.context.ContextLoaderListener</listener-class>
</listener>
<!-- 配置CXF框架提供的Servlet -->
<servlet>
<servlet-name>cxf</servlet-name>
<servlet-class>org.apache.cxf.transport.servlet.CXFServlet</servlet-class>
</servlet>
<servlet-mapping>
<servlet-name>cxf</servlet-name>
<url-pattern>/service/*</url-pattern>
</servlet-mapping>
<welcome-file-list>
<welcome-file>index.html</welcome-file>
<welcome-file>index.htm</welcome-file>
<welcome-file>index.jsp</welcome-file>
<welcome-file>default.html</welcome-file>
<welcome-file>default.htm</welcome-file>
<welcome-file>default.jsp</welcome-file>
</welcome-file-list>
</web-app>
第四步:在类路径下提供cxf.xml
第五步:针对t_customer表创建一个Customer客户实体类
package com.igeek.crm.domain;
/**
* 物流公司的客户实体
* @authorigeek
*
*/
public classCustomer {
private intid ;
private String name;
private String station;
private String telephone;
private String address;
private String decidedzone_id;
public Customer() {
}
publicCustomer(intid,String name, Stringstation,String telephone, Stringaddress, String decidedzone_id){
super();
this.id =id;
this.name =name;
this.station=station;
this.telephone =telephone;
this.address =address;
this.decidedzone_id =decidedzone_id;
}
publicint getId() {
returnid;
}
publicvoid setId(intid) {
this.id =id;
}
publicString getName() {
returnname;
}
publicvoid setName(Stringname) {
this.name =name;
}
publicString getStation() {
returnstation;
}
publicvoid setStation(Stringstation) {
this.station =station;
}
publicString getTelephone() {
returntelephone;
}
publicvoid setTelephone(Stringtelephone) {
this.telephone =telephone;
}
publicString getAddress() {
returnaddress;
}
publicvoid setAddress(Stringaddress) {
this.address =address;
}
publicString getDecidedzone_id() {
returndecidedzone_id;
}
publicvoid setDecidedzone_id(Stringdecidedzone_id) {
this.decidedzone_id =decidedzone_id;
}
}
第六步:开发一个接口和实现类
package com.igeek.crm.service;
import java.util.List;
import javax.jws.WebService;
import com.igeek.crm.domain.Customer;
@WebService
public interfaceICustomerService {
publicList<Customer> findAll();
}
package com.igeek.crm.service;
import java.sql.ResultSet;
import java.sql.SQLException;
import java.util.List;
importorg.springframework.jdbc.core.JdbcTemplate;
import org.springframework.jdbc.core.RowMapper;
import org.springframework.transaction.annotation.Transactional;
import com.igeek.crm.domain.Customer;
@Transactional
public classCustomerServiceImpl implementsICustomerService {
privateJdbcTemplatejdbcTemplate;
publicvoid setJdbcTemplate(JdbcTemplatejdbcTemplate) {
this.jdbcTemplate =jdbcTemplate;
}
publicList<Customer> findAll() {
String sql = "select *from t_customer";
List<Customer> list = jdbcTemplate.query(sql, newRowMapper<Customer>(){
public Customer mapRow(ResultSetrs, intarg1) throwsSQLException {
intid = rs.getInt("id");//根据字段名称从结果集中获取对应的值
String name =rs.getString("name");
String station =rs.getString("station");
String telephone =rs.getString("telephone");
String address =rs.getString("address");
String decidedzone_id =rs.getString("decidedzone_id");
returnnewCustomer(id,name,station,telephone,address,decidedzone_id);
}
});
returnlist;
}
}
第七步:配置cxf.xml
<?xml version="1.0"encoding="UTF-8"?>
<beans xmlns="http://www.springframework.org/schema/beans"
xmlns:xsi="http://www.w3.org/2001/XMLSchema-instance"
xmlns:jaxws="http://cxf.apache.org/jaxws"
xmlns:soap="http://cxf.apache.org/bindings/soap"
xmlns:context="http://www.springframework.org/schema/context"
xmlns:aop="http://www.springframework.org/schema/aop"
xmlns:tx="http://www.springframework.org/schema/tx"
xsi:schemaLocation="http://www.springframework.org/schema/beans
http://www.springframework.org/schema/beans/spring-beans.xsd
http://cxf.apache.org/bindings/soap
http://cxf.apache.org/schemas/configuration/soap.xsd
http://cxf.apache.org/jaxws
http://cxf.apache.org/schemas/jaxws.xsd
http://www.springframework.org/schema/context
http://www.springframework.org/schema/context/spring-context.xsd
http://www.springframework.org/schema/aop
http://www.springframework.org/schema/aop/spring-aop.xsd
http://www.springframework.org/schema/tx
http://www.springframework.org/schema/tx/spring-tx.xsd
">
<!-- 引入CXF Bean定义如下,早期的版本中使用 -->
<importresource="classpath:META-INF/cxf/cxf.xml"/>
<importresource="classpath:META-INF/cxf/cxf-extension-soap.xml"/>
<importresource="classpath:META-INF/cxf/cxf-servlet.xml"/>
<!-- 配置数据源 -->
<beanid="dataSource"class="org.springframework.jdbc.datasource.DriverManagerDataSource">
<propertyname="driverClassName"value="com.mysql.jdbc.Driver"/>
<propertyname="url"value="jdbc:mysql:///crm"/>
<propertyname="username"value="root"/>
<propertyname="password"value="root"/>
</bean>
<!-- 事务管理器 -->
<beanid="txManager"class="org.springframework.jdbc.datasource.DataSourceTransactionManager">
<propertyname="dataSource"ref="dataSource"/>
</bean>
<!-- 支持事务注解 -->
<tx:annotation-driventransaction-manager="txManager"/>
<beanid="jdbcTemplate"class="org.springframework.jdbc.core.JdbcTemplate">
<propertyname="dataSource"ref="dataSource"/>
</bean>
<beanid="customerService"class="com.igeek.crm.service.CustomerServiceImpl">
<propertyname="jdbcTemplate"ref="jdbcTemplate"/>
</bean>
<!-- 注册服务 -->
<jaxws:serverid="myService"address="/customer">
<jaxws:serviceBean>
<refbean="customerService"/>
</jaxws:serviceBean>
</jaxws:server>
</beans>
最后,将项目部署到tomcat并运行
客户端测试:
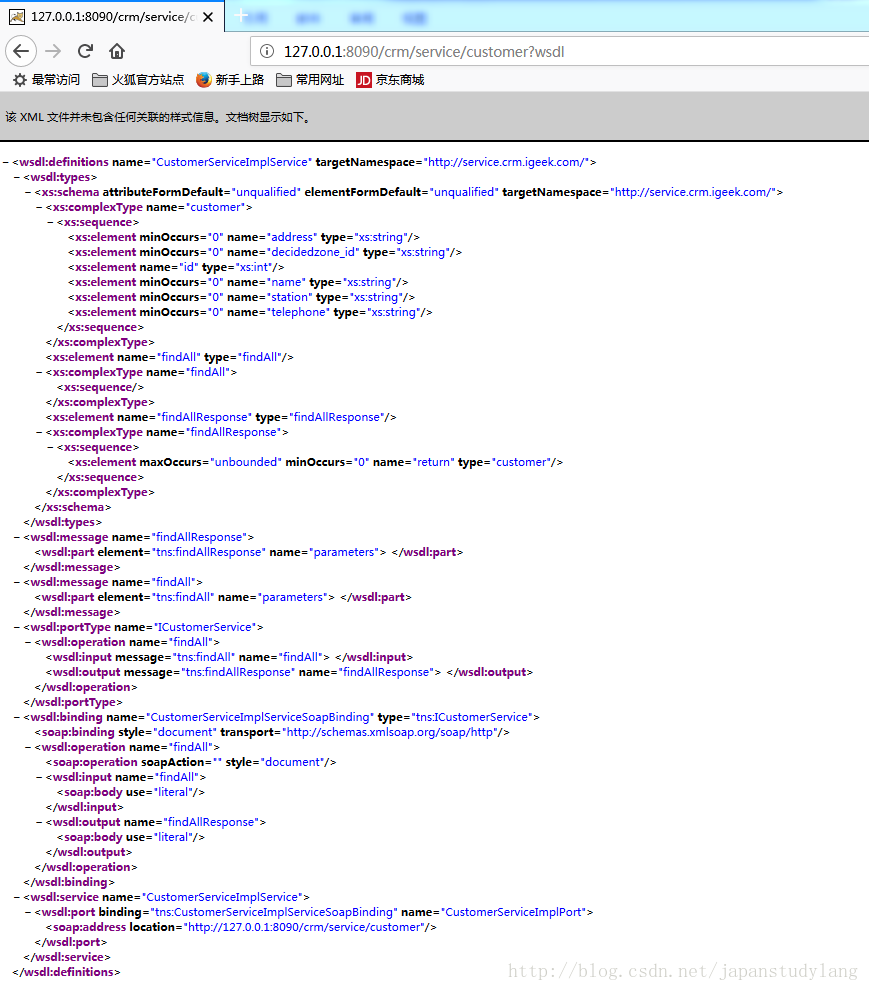
先在浏览器中输入http://127.0.0.1:8090/crm/service,点击链接
运行wsimport 生成客户端代码
http://127.0.0.1:8090/crm/service/customer?wsdl
package com.igeek.test;
import java.util.List;
import com.igeek.crm.service.Customer;
importcom.igeek.crm.service.CustomerServiceImplService;
importcom.igeek.crm.service.ICustomerService;
public classCrmTest01 {
publicstatic voidmain(String[] args) {
CustomerServiceImplService ss = newCustomerServiceImplService();
ICustomerService proxy = ss.getCustomerServiceImplPort();
List<Customer> list = proxy.findAll();
for(Customer customer : list) {
System.out.println(customer);
}
}
}


 573
573


 被折叠的 条评论
为什么被折叠?
被折叠的 条评论
为什么被折叠?
 到【灌水乐园】发言


