


如何在SharePoint 安装 配置PowerPivot SharePoint那
Install PowerPivot for SharePoint
I. Install PowerPivot for Sharepoint
这些不用我翻译吧。
In this step, you run SQL Server Setup to install PowerPivot for SharePoint. In a subsequent step, you will configure the server as a post-installation task.1. Insert the installation media or open a folder that contains the setup files for SQL Server.
2. Click Installation on the navigation pane to the left.
3. Click New SQL Server stand-alone installation or add features to an existing installation.
4. On the Setup Support Rules page, review any warnings and click OK.
5. On the Product Key page, specify the evaluation edition or enter a product key for a licensed copy of the enterprise edition.
Click Next.
6. Accept the Microsoft Software License Terms of agreement, and then click Next.
7. Update the setup files if you are prompted to do so.
8. On the Setup Support Rules page, setup identifies any problems that might prevent it from installing. Review the list to determine whether Setup detected potential problems on the system.
上图
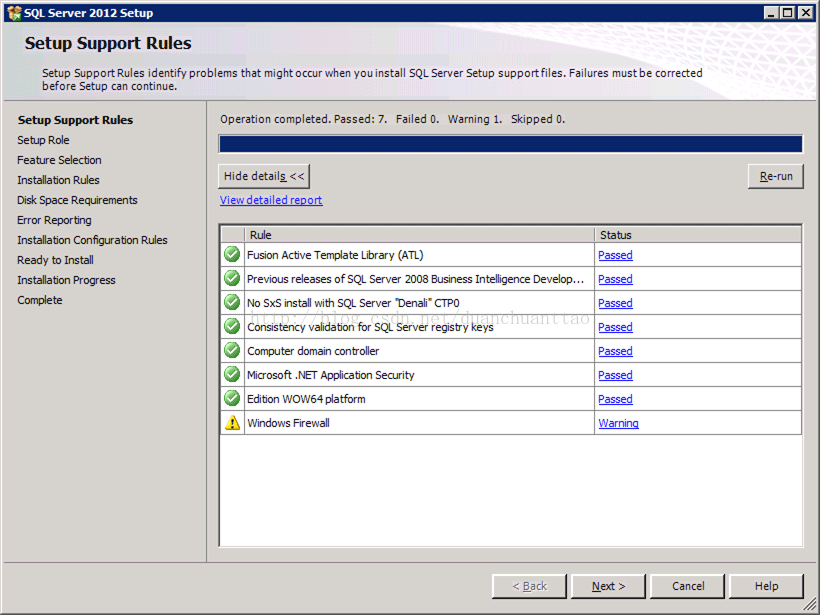
Note
Because Windows Firewall is enabled, you will be warned to open ports to enable remote access. This warning is generally not applicable to PowerPivot installations. Connections to PowerPivot services and data files are made using the SharePoint ports that are already open for SharePoint service-to-service communication.
Click Next. Wait while SQL Server Setup program files are installed on the server.
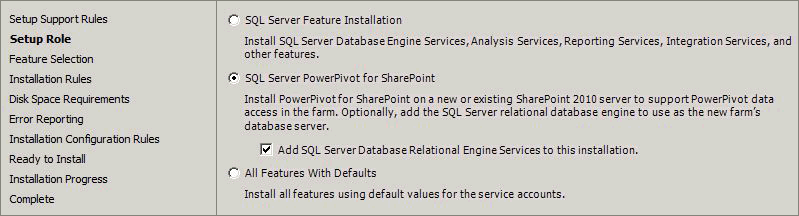
9. In Setup Role, select SQL Server PowerPivot for SharePoint.
10. Optionally, you can add an instance of the Database Engine to your installation. You might do this if you are setting up a new farm and need a database server to run the farm’s configuration and content databases. If you add the Database Engine, it will be installed as a PowerPivot named instance. Whenever you need to specify a connection to this instance (for example, in the farm configuration wizard if you are using that wizard to configure the farm), enter the database name in this format: <servername>\PowerPivot.
11. Click Next.
12. On the Feature Selection page, a read-only list of the features that will be installed is displayed for informational purposes. You cannot add or remove items that are preselected for this role. Click Next.
13. On the Installation Rules page, click Next.
14. On the Instance Configuration page, a read-only instance name of 'PowerPivot' is displayed for informational purposes. This instance name is required and cannot be modified. However, you can enter a unique Instance ID to specify a descriptive directory name and registry keys. Click Next.
15. On the Disk Space Requirements page, verify you have sufficient disk capacity to install the feature and then click Next.
16. On the Server Configuration page, type desired account information.
For SQL Server Analysis Services, you must specify a domain user account. Do not specify a built-in account. Domain accounts are required for managing the Analysis Services service account as a managed account in SharePoint Central administration
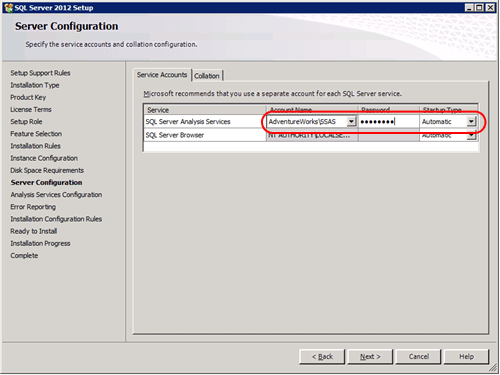
If you added the SQL Server Database Engine and SQL Server Agent, you can configure the services to run under domain user accounts or under the default virtual account.
Never use your own domain user account to provision any service. Doing so grants the server the same permissions that you have to the resources in your network. If the server is compromised by a malicious user, that user will be logged in under your domain credentials, with the ability to download or use the same data and applications that you do.
17. Click Next.
18. If you are installing the Database Engine, the Database Engine Configuration page appears. In Database Engine Configuration, click Add Current User to grant your user account administrator permissions on the Database Engine instance. Click Next.
19. On the Analysis Services Configuration page, click Add Current User to grant your user account administrative permissions. You will need administrative permission to configure the server after Setup is finished.
20. On the same page, add the Windows user account of any person who also requires administrative permissions. For example, any user who wants to connect to the Analysis Services service instance in SQL Server Management Studio to troubleshoot database connection problems or get version information must have system administrator permissions on the server. Add the user account of any person who might need to troubleshoot or administer the server now.
21. Click Next.
22. Click Next on each of the remaining pages until you get to the Ready to Install page.
23. Click Install.
II. Configure the server
III. Install Analysis Services OLD DB providers for Excel Services Application Servers
IV. Verify the installation.
Reference: http://technet.microsoft.com/en-us/library/ee210708.aspx#InstallSQL
Initial Configuration (PowerPivot for SharePoint)
Step 1: Deploy the PowerPivot Solution Package
Step 2: Start Services on the Server
Step 3: Create a PowerPivot Service Application
Step 4: Enable Excel Services
Step 5: Enable Secure Store Service and Configure Data Refresh
Step 6: Enable Usage Data Collection
Step 7: Increase Maximum Upload Size for SharePoint Web Applications and Excel Services
Step 8: Activate PowerPivot Feature Integration for Site Collections
Step 9: Install the SQL Server 2008 R2 Version of the OLE DB provider
Step 10: Verify Installation


 3368
3368

 被折叠的 条评论
为什么被折叠?
被折叠的 条评论
为什么被折叠?
 到【灌水乐园】发言


