


因为最近项目中需要使用百度地图,特此记录一下使用过程,大致跟百度地图API中的demo一样,只是将多个方法进行了一下封装。
主要是用到了地图定位、地图坐标点选择、智能搜索定位。直接上代码:
样式:
    <style>
        body,html,div,header{
            margin:0;
            padding:0;}
        #icon_header {
            width: 100%;
            height: 45px;
            line-height: 45px;
            position: relative;
            z-index: 5;
            zoom: 1;
            vertical-align: middle;
            background: #fff;
            margin: auto;
            text-align: left;
            border-bottom: 1px solid #ddd;
        }
        #icon_header > a {
            position: absolute;
            z-index: 5;
            zoom: 1;
            top: 0;
            width: 45px;
            height: 45px;
            vertical-align: middle;
            text-align: center;
            color: #666;
            font-size: 1rem;
            text-decoration: none;
        }
        #confirm_location{right: 0;}
        #icon_header div{text-align: center;}
        #r-result {
            width: 90%;
            background: white;
            position: absolute;
            top: 10%;
            left: 5%;
            height: 40px;
            line-height: 40px;
            border-radius: 4px;
            box-shadow: 2px 2px 5px rgba(0, 0, 0, 0.3);
        }
        #r-result input {
            border: none;
            background: none;
            outline: none;
            padding-left: 2%;
            width: 96%; }
</style>- 1
- 2
- 3
- 4
- 5
- 6
- 7
- 8
- 9
- 10
- 11
- 12
- 13
- 14
- 15
- 16
- 17
- 18
- 19
- 20
- 21
- 22
- 23
- 24
- 25
- 26
- 27
- 28
- 29
- 30
- 31
- 32
- 33
- 34
- 35
- 36
- 37
- 38
- 39
- 40
- 41
- 42
- 43
- 44
- 45
- 46
- 47
- 48
- 49
- 50
HTML:
<header id="icon_header">
    <div>
        选择地址
    </div>
    <a href="javascript:;" id="confirm_location">确定</a>
</header>


<div id="map_show"></div>
<div id="r-result">
    <input type="text" id="suggestId" placeholder="请输入地点"/>
</div>
<div id="searchResultPanel" style="display:none;"></div>- 1
- 2
- 3
- 4
- 5
- 6
- 7
- 8
- 9
- 10
- 11
- 12
- 13
JS:
<!--引入百度地图API-->
<script type="text/javascript" src="http://api.map.baidu.com/api?v=2.0&ak=iBM9rbzTH2dMZW7MbYMYmFgb"></script>
<script>
    function AddMap(){
        //设置地图容器高度
        var screenH=window.innerHeight;
        var headerH=this.elById("icon_header").offsetHeight;
        this.elById("map_show").style.height=screenH-headerH+"px";
    }

    /**
     * @param el 地图初始化容器
     * @param p  初始化坐标点
     */
    AddMap.prototype.init=function(el,p){
        var point={
            lng:116.404113,
            lat:39.914965
        };
        if(p && p.lng && p.lat){
            point.lng=p.lng;
            point.lat=p.lat;
        }
        this.m = new BMap.Map(el);      //实例化地图
        this.p = new BMap.Point(point.lng,point.lat);

        this.m.enableContinuousZoom();    //启用地图惯性拖拽
        this.m.enableScrollWheelZoom();   //启用滚轮放大缩小
        this.m.centerAndZoom(this.p, 12);  //设置地图显示中间点、地图显示级别

        this.addMaker(this.p);
        this.search();               //搜索
        this.getLocation();
    };

    //获取坐标点位置
    AddMap.prototype.getLocation=function(){
        var _this=this;
        var confirm=this.elById("confirm_location");
        confirm.addEventListener("click",function(){
            var makerPoint=_this.makerPoint();
            console.log(makerPoint)
        });
    };

    AddMap.prototype.elById=function(id) {
        return document.getElementById(id);
    };

    //添加坐标显示
    AddMap.prototype.addMaker=function(location){
        var mk = new BMap.Marker(location);
        mk.enableDragging();        //marker可拖拽
        mk.enableMassClear();
        this.m.addOverlay(mk); //在地图中添加marker

        this.makerPoint=function(){
            return mk.getPosition(); //返回当前坐标
        };

    };

    //搜索
    AddMap.prototype.search=function(){
        var _this=this;
        var ac = new BMap.Autocomplete(    //建立一个自动完成的对象
                {
                    "input" : "suggestId",
                    "location" : _this.m
                }
        );
        ac.addEventListener("onconfirm", function(e) {    //鼠标点击下拉列表后的事件
            var _value = e.item.value;
            myValue = _value.province +  _value.city +  _value.district +  _value.street +  _value.business;
            _this.elById("searchResultPanel").innerHTML ="onconfirm<br />index = " + e.item.index + "<br />myValue = " + myValue;
            _this.setPlace(_this.m);
        });
    };

    //定位到具体位置
    AddMap.prototype.setPlace=function(m){
        var _this=this;
        m.clearOverlays();    //清除地图上所有覆盖物
        function myFun(){
            var pp = local.getResults().getPoi(0).point;    //获取第一个智能搜索的结果
            m.centerAndZoom(pp, 15);  //设置地图显示中间点、地图显示级别
            _this.addMaker(pp);
        }
        var local = new BMap.LocalSearch(m, { //智能搜索
            onSearchComplete: myFun
        });
        local.search(myValue);
    };

    var mapInclude=new AddMap();

    //初始化地图
    //需传入容器DOM(id),可传坐标点定位
    mapInclude.init("map_show",{lng:104.072247,lat:30.663436});

</script>- 1
- 2
- 3
- 4
- 5
- 6
- 7
- 8
- 9
- 10
- 11
- 12
- 13
- 14
- 15
- 16
- 17
- 18
- 19
- 20
- 21
- 22
- 23
- 24
- 25
- 26
- 27
- 28
- 29
- 30
- 31
- 32
- 33
- 34
- 35
- 36
- 37
- 38
- 39
- 40
- 41
- 42
- 43
- 44
- 45
- 46
- 47
- 48
- 49
- 50
- 51
- 52
- 53
- 54
- 55
- 56
- 57
- 58
- 59
- 60
- 61
- 62
- 63
- 64
- 65
- 66
- 67
- 68
- 69
- 70
- 71
- 72
- 73
- 74
- 75
- 76
- 77
- 78
- 79
- 80
- 81
- 82
- 83
- 84
- 85
- 86
- 87
- 88
- 89
- 90
- 91
- 92
- 93
- 94
- 95
- 96
- 97
- 98
- 99
- 100
- 101
我这里是针对移动端大小进行的布局,只需要稍微修改一下布局就可以在PC端使用。
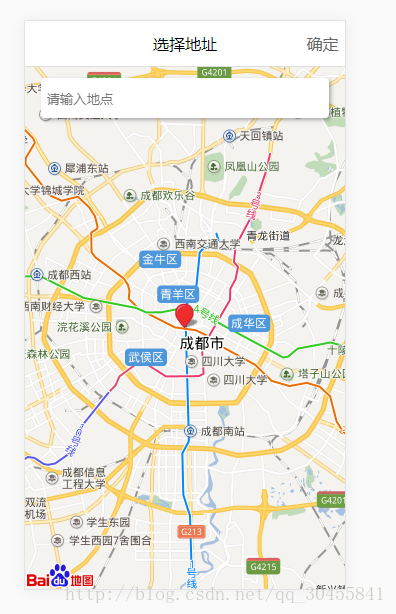
页面初始化:
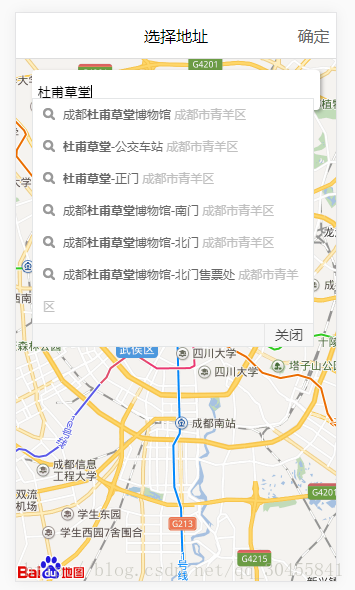
搜索:
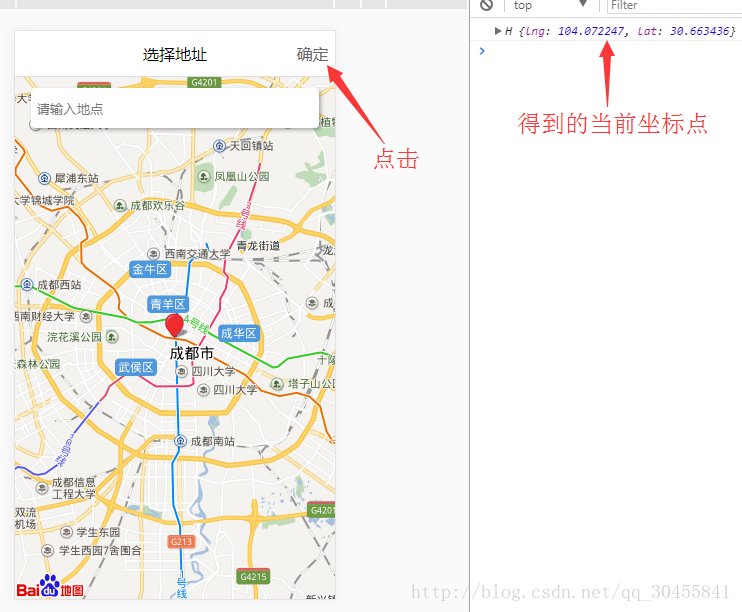
点击右上角确定选取的坐标点:
以上代码复制粘贴下来即可运行
点关注,不迷路
文章每周持续更新,可以微信搜索「 十分钟学编程 」第一时间阅读和催更,如果这个文章写得还不错,觉得有点东西的话 ~求点赞👍 求关注❤️ 求分享❤️
各位的支持和认可,就是我创作的最大动力,我们下篇文章见!


 1217
1217


 被折叠的 条评论
为什么被折叠?
被折叠的 条评论
为什么被折叠?
 到【灌水乐园】发言


