


网上有很多很有名的开源框架,这里就来拉拉PullToRefresh这个框架,也就是我们平时用的下拉刷新啦,当然你问我这个有什么用啊?别人已经写好了,这里主要是学习以及练习,练习的次数多了,一切就顺其自然的会了.
废话少说,先上图,再上代码:
1.要想实现下拉刷新功能必须要有个下拉刷新的布局,是吧?
- <?xml version="1.0" encoding="utf-8"?>
- <LinearLayout xmlns:android="http://schemas.android.com/apk/res/android"
- android:layout_width="match_parent"
- android:layout_height="match_parent"
- android:orientation="vertical" >
- <RelativeLayout
- android:layout_width="match_parent"
- android:layout_height="wrap_content"
- android:paddingBottom="10dip"
- android:paddingTop="10dip" >
- <LinearLayout
- android:id="@+id/layout"
- android:layout_width="wrap_content"
- android:layout_height="wrap_content"
- android:layout_centerInParent="true"
- android:gravity="center"
- android:orientation="vertical" >
- <TextView
- android:id="@+id/tip"
- android:layout_width="wrap_content"
- android:layout_height="wrap_content"
- android:text="@string/state" />
- <TextView
- android:id="@+id/lastupdate_time"
- android:layout_width="wrap_content"
- android:layout_height="wrap_content" />
- </LinearLayout>
- <ProgressBar
- android:id="@+id/progress"
- style="?android:attr/progressBarStyleSmall"
- android:layout_width="wrap_content"
- android:layout_height="wrap_content"
- android:layout_toLeftOf="@id/layout"
- android:layout_marginRight="20dip"
- android:visibility="gone" />
- <ImageView
- android:id="@+id/arrow"
- android:layout_width="wrap_content"
- android:layout_height="wrap_content"
- android:layout_alignTop="@+id/layout"
- android:layout_marginRight="19dp"
- android:layout_toLeftOf="@+id/layout"
- android:src="@drawable/arrow_down" />
- </RelativeLayout>
- </LinearLayout>
2.你要把它加入到布局里面吧!
- headView=layoutInflater.from(context).inflate(R.layout.header_layout, null);
- this.addHeaderView(headView);
- headerHeight = headView.getMeasuredHeight();
- setHeaderViewHeight(-headerHeight);
- /**
- * 设置头部布局的高度
- *
- * @param i
- */
- private void setHeaderViewHeight(int headerHeight) {
- headView.setPadding(headView.getPaddingLeft(), headerHeight,
- headView.getPaddingRight(), headView.getPaddingBottom());
- //重绘
- headView.invalidate();
- }
4.跑起来之后,白瞎了,没实现想要的功能,也就是说没有把头部布局隐藏掉,哎,跟踪代码之后发现高度为0,郭神说过在measure之前,getMeasureWidth()和getMeasureHeight()都为零,好吧,那就先measure吧!
- private void measureView(View view) {
- ViewGroup.LayoutParams lp = view.getLayoutParams();
- if (lp == null) {
- lp = new ViewGroup.LayoutParams(
- ViewGroup.LayoutParams.MATCH_PARENT,
- ViewGroup.LayoutParams.WRAP_CONTENT);
- }
- int width = ViewGroup.getChildMeasureSpec(0, 0, lp.width);
- int height;
- int tempHeight=lp.height;
- if (tempHeight > 0) {
- height = MeasureSpec.makeMeasureSpec(tempHeight,
- MeasureSpec.EXACTLY);
- } else {
- height = MeasureSpec.makeMeasureSpec(0, MeasureSpec.UNSPECIFIED);
- }
- view.measure(width, height);
- }
5.隐藏成功了,下面就要实现具体的功能了,下拉刷新,松开刷新,正在刷新这三个状态,是通过手势改变状态,所以这里要实现onTouch,当然还有OnScrollListener
需要用到firstVisibleItem判断Listview向上滑动还是向下滑动,如果firstVisibleItem==0说明到达ListView的头部了,当然你还需要一个布尔值判断是否按下滑动
- @Override
- public void onScroll(AbsListView view, int firstVisibleItem,
- int visibleItemCount, int totalItemCount) {
- this.firstVisibleItem=firstVisibleItem;
- }
- @Override
- public boolean onTouchEvent(MotionEvent ev) {
- switch (ev.getAction()) {
- case MotionEvent.ACTION_DOWN:
- if (firstVisibleItem == 0) {
- isRemark = true;
- startY = (int) ev.getY();
- }
- break;
- case MotionEvent.ACTION_MOVE:
- onMove(ev);
- break;
- case MotionEvent.ACTION_UP:
- if (state==RELEASE) {
- state=REFRASH;
- reflashViewByState();
- //更新数据
- isRefreshListener.onRefresh();
- }else if (state==PULL) {
- state=NONE;
- isRemark=false;
- refreshDrawableState();
- }
- break;
- }
- return super.onTouchEvent(ev);
- }
代码不全,先解释一下,后面附上全部代码
按下时,如果firstVisibleItem为0,说明到达listview的顶部,并且可以按下,把isRemark赋值为true,滑动时改变头部布局的状态
- /**
- * 移动过程的状态变换
- *
- * @param ev
- */
- private void onMove(MotionEvent ev) {
- if (!isRemark) {
- return;
- }
- int tempY = (int) ev.getY();
- int space = tempY - startY;
- int topPadding = space - headerHeight;
- switch (state) {
- case NONE:
- if (space>0) {
- state=PULL;
- reflashViewByState();
- }
- break;
- case PULL:
- setHeaderViewHeight(topPadding);
- if (space>headerHeight+30&&scrollState==SCROLL_STATE_IDLE) {
- state=RELEASE;
- reflashViewByState();
- }
- break;
- case RELEASE:
- setHeaderViewHeight(topPadding);
- if (space<headerHeight+30) {
- state=PULL;
- reflashViewByState();
- }else if (space<=0) {
- state=NONE;
- reflashViewByState();
- }
- break;
- }
- }
根据滑动之后和动画前y值的变化判断滑动状态,当space大于零时,当前状态变为下拉刷新,如果space大于某个值时,当前状态变为松开可以刷新,当space大于零小于某个值时,当前状态为下拉刷新状态,当space小于零时,当前状态变为正常状态.当然状态改变时,界面也要随着改变
- /**
- *根据状态刷新当前页面
- */
- private void reflashViewByState() {
- TextView tip = (TextView) headView.findViewById(R.id.tip);
- ImageView arrow = (ImageView) headView.findViewById(R.id.arrow);
- ProgressBar progress = (ProgressBar) headView.findViewById(R.id.progress);
- RotateAnimation anim = new RotateAnimation(0, 180,
- RotateAnimation.RELATIVE_TO_SELF, 0.5f,
- RotateAnimation.RELATIVE_TO_SELF, 0.5f);
- anim.setDuration(500);
- anim.setFillAfter(true);
- RotateAnimation anim1 = new RotateAnimation(180, 0,
- RotateAnimation.RELATIVE_TO_SELF, 0.5f,
- RotateAnimation.RELATIVE_TO_SELF, 0.5f);
- anim1.setDuration(500);
- anim1.setFillAfter(true);
- switch (state) {
- case NONE:
- setHeaderViewHeight(-headerHeight);
- arrow.clearAnimation();
- break;
- case PULL:
- arrow.setVisibility(View.VISIBLE);
- progress.setVisibility(View.GONE);
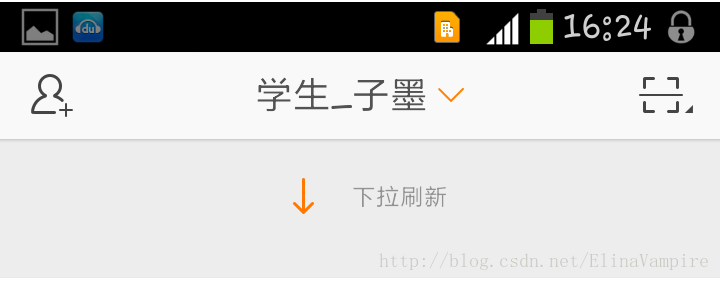
- tip.setText("下拉刷新");
- arrow.clearAnimation();
- arrow.setAnimation(anim1);
- break;
- case RELEASE:
- arrow.setVisibility(View.VISIBLE);
- progress.setVisibility(View.GONE);
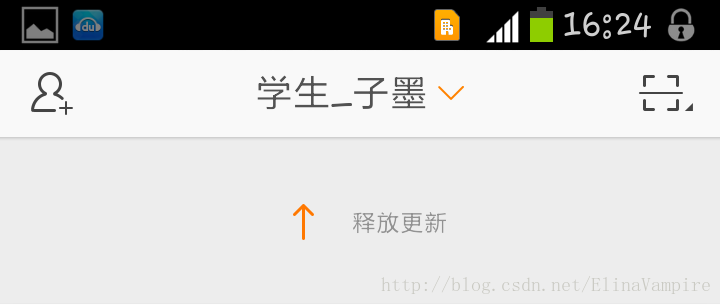
- tip.setText("松开刷新");
- arrow.clearAnimation();
- arrow.setAnimation(anim);
- break;
- case REFRASH:
- setHeaderViewHeight(50);
- arrow.setVisibility(View.GONE);
- progress.setVisibility(View.VISIBLE);
- tip.setText("正在刷新");
- arrow.clearAnimation();
- break;
- }
- }
界面上主要改变的就是提示,箭头和progress,正常状态下,界面不可见,下拉刷新状态下,箭头可见并且朝下,提示信息为下拉刷新并且progress不可见,松开刷新状态,箭头朝上,progress不可见,提示信息为下拉刷新,正在加载状态箭头不可见,progress可见,提示信息改为正在刷新
当然,在变成正在加载状态时,还要加载更过数据
- public interface IsRefreshListener{
- public void onRefresh();
- }
- public void setIsRefreshListener(IsRefreshListener isRefreshListener){
- this.isRefreshListener=isRefreshListener;
- }
加载完数据后,还要通知listview刷新结束
- /**
- * 获取完数据;
- */
- public void reflashComplete() {
- state = NONE;
- isRemark = false;
- reflashViewByState();
- TextView lastupdatetime = (TextView) headView
- .findViewById(R.id.lastupdate_time);
- SimpleDateFormat format = new SimpleDateFormat("yyyy年MM月dd日 hh:mm:ss");
- Date date = new Date(System.currentTimeMillis());
- String time = format.format(date);
- lastupdatetime.setText(time);
- }
自定义下拉刷新控件就这样完成了,不懂得留言吧,我尽量给你解答,自定义这东西,写多了也就知道怎么写了
下面附上自定义下拉刷新控件的全部代码:
- package com.sdufe.thea.guo.view;
- import java.text.SimpleDateFormat;
- import java.util.Date;
- import android.content.Context;
- import android.util.AttributeSet;
- import android.view.LayoutInflater;
- import android.view.MotionEvent;
- import android.view.View;
- import android.view.ViewGroup;
- import android.view.animation.RotateAnimation;
- import android.widget.AbsListView;
- import android.widget.ImageView;
- import android.widget.ProgressBar;
- import android.widget.TextView;
- import android.widget.AbsListView.OnScrollListener;
- import android.widget.ListView;
- import com.sdufe.thea.guo.R;
- public class PullToRefreshListView extends ListView implements OnScrollListener {
- View headView;
- int headerHeight;
- int firstVisibleItem;
- int scrollState;
- boolean isRemark;
- int startY;
- int state;
- final int NONE = 0;
- final int PULL = 1;
- final int RELEASE = 2;
- final int REFRASH = 3;
- IsRefreshListener isRefreshListener;
- public PullToRefreshListView(Context context, AttributeSet attrs,
- int defStyle) {
- super(context, attrs, defStyle);
- initView(context);
- }
- public PullToRefreshListView(Context context, AttributeSet attrs) {
- super(context, attrs);
- initView(context);
- }
- public PullToRefreshListView(Context context) {
- super(context);
- initView(context);
- }
- private void initView(Context context) {
- headView = LayoutInflater.from(context).inflate(R.layout.header_layout,
- null);
- measureView(headView);
- headerHeight = headView.getMeasuredHeight();
- setHeaderViewHeight(-headerHeight);
- addView(headView);
- setOnScrollListener(this);
- }
- /**
- * 计算宽高
- *
- * @param view
- */
- private void measureView(View view) {
- ViewGroup.LayoutParams lp = view.getLayoutParams();
- if (lp == null) {
- lp = new ViewGroup.LayoutParams(
- ViewGroup.LayoutParams.MATCH_PARENT,
- ViewGroup.LayoutParams.WRAP_CONTENT);
- }
- int width = ViewGroup.getChildMeasureSpec(0, 0, lp.width);
- int height;
- int tempHeight = lp.height;
- if (tempHeight > 0) {
- height = MeasureSpec.makeMeasureSpec(tempHeight,
- MeasureSpec.EXACTLY);
- } else {
- height = MeasureSpec.makeMeasureSpec(0, MeasureSpec.UNSPECIFIED);
- }
- view.measure(width, height);
- }
- /**
- * 设置头部布局的高度
- *
- * @param i
- */
- private void setHeaderViewHeight(int headerHeight) {
- headView.setPadding(headView.getPaddingLeft(), headerHeight,
- headView.getPaddingRight(), headView.getPaddingBottom());
- // 重绘
- headView.invalidate();
- }
- @Override
- public void onScrollStateChanged(AbsListView view, int scrollState) {
- this.scrollState = scrollState;
- }
- @Override
- public void onScroll(AbsListView view, int firstVisibleItem,
- int visibleItemCount, int totalItemCount) {
- this.firstVisibleItem = firstVisibleItem;
- }
- @Override
- public boolean onTouchEvent(MotionEvent ev) {
- switch (ev.getAction()) {
- case MotionEvent.ACTION_DOWN:
- if (firstVisibleItem == 0) {
- isRemark = true;
- startY = (int) ev.getY();
- }
- break;
- case MotionEvent.ACTION_MOVE:
- onMove(ev);
- break;
- case MotionEvent.ACTION_UP:
- if (state==RELEASE) {
- state=REFRASH;
- reflashViewByState();
- //更新数据
- isRefreshListener.onRefresh();
- }else if (state==PULL) {
- state=NONE;
- isRemark=false;
- refreshDrawableState();
- }
- break;
- }
- return super.onTouchEvent(ev);
- }
- /**
- * 移动过程的状态变换
- *
- * @param ev
- */
- private void onMove(MotionEvent ev) {
- if (!isRemark) {
- return;
- }
- int tempY = (int) ev.getY();
- int space = tempY - startY;
- int topPadding = space - headerHeight;
- switch (state) {
- case NONE:
- if (space>0) {
- state=PULL;
- reflashViewByState();
- }
- break;
- case PULL:
- setHeaderViewHeight(topPadding);
- if (space>headerHeight+30&&scrollState==SCROLL_STATE_IDLE) {
- state=RELEASE;
- reflashViewByState();
- }
- break;
- case RELEASE:
- setHeaderViewHeight(topPadding);
- if (space<headerHeight+30) {
- state=PULL;
- reflashViewByState();
- }else if (space<=0) {
- state=NONE;
- reflashViewByState();
- }
- break;
- }
- }
- /**
- * 获取完数据;
- */
- public void reflashComplete() {
- state = NONE;
- isRemark = false;
- reflashViewByState();
- TextView lastupdatetime = (TextView) headView
- .findViewById(R.id.lastupdate_time);
- SimpleDateFormat format = new SimpleDateFormat("yyyy年MM月dd日 hh:mm:ss");
- Date date = new Date(System.currentTimeMillis());
- String time = format.format(date);
- lastupdatetime.setText(time);
- }
- /**
- *根据状态刷新当前页面
- */
- private void reflashViewByState() {
- TextView tip = (TextView) headView.findViewById(R.id.tip);
- ImageView arrow = (ImageView) headView.findViewById(R.id.arrow);
- ProgressBar progress = (ProgressBar) headView.findViewById(R.id.progress);
- RotateAnimation anim = new RotateAnimation(0, 180,
- RotateAnimation.RELATIVE_TO_SELF, 0.5f,
- RotateAnimation.RELATIVE_TO_SELF, 0.5f);
- anim.setDuration(500);
- anim.setFillAfter(true);
- RotateAnimation anim1 = new RotateAnimation(180, 0,
- RotateAnimation.RELATIVE_TO_SELF, 0.5f,
- RotateAnimation.RELATIVE_TO_SELF, 0.5f);
- anim1.setDuration(500);
- anim1.setFillAfter(true);
- switch (state) {
- case NONE:
- setHeaderViewHeight(-headerHeight);
- arrow.clearAnimation();
- break;
- case PULL:
- arrow.setVisibility(View.VISIBLE);
- progress.setVisibility(View.GONE);
- tip.setText("下拉刷新");
- arrow.clearAnimation();
- arrow.setAnimation(anim1);
- break;
- case RELEASE:
- arrow.setVisibility(View.VISIBLE);
- progress.setVisibility(View.GONE);
- tip.setText("松开刷新");
- arrow.clearAnimation();
- arrow.setAnimation(anim);
- break;
- case REFRASH:
- setHeaderViewHeight(50);
- arrow.setVisibility(View.GONE);
- progress.setVisibility(View.VISIBLE);
- tip.setText("正在刷新");
- arrow.clearAnimation();
- break;
- }
- }
- public interface IsRefreshListener{
- public void onRefresh();
- }
- public void setIsRefreshListener(IsRefreshListener isRefreshListener){
- this.isRefreshListener=isRefreshListener;
- }
- }
- <com.sdufe.thea.guo.view.PullToRefreshListView
- android:id="@+id/pull_to_refresh"
- android:layout_width="match_parent"
- android:layout_height="wrap_content"/>
- package com.sdufe.thea.guo;
- import java.util.ArrayList;
- import java.util.List;
- import com.sdufe.thea.guo.view.PullToRefreshListView;
- import com.sdufe.thea.guo.view.PullToRefreshListView.IsRefreshListener;
- import android.os.Bundle;
- import android.app.Activity;
- import android.view.Menu;
- import android.widget.ArrayAdapter;
- public class MainActivity extends Activity implements IsRefreshListener{
- PullToRefreshListView listView;
- ArrayAdapter<String> adapter;
- List<String> list;
- @Override
- protected void onCreate(Bundle savedInstanceState) {
- super.onCreate(savedInstanceState);
- setContentView(R.layout.activity_main);
- listView = (PullToRefreshListView) findViewById(R.id.pull_to_refresh);
- initData();
- adapter = new ArrayAdapter<String>(this,
- android.R.layout.simple_list_item_1, list);
- listView.setAdapter(adapter);
- }
- private void initData() {
- list = new ArrayList<String>();
- list.add("123456789");
- list.add("123456789");
- list.add("123456789");
- }
- @Override
- public void onRefresh() {
- list.add("爸爸");
- list.add("妈妈");
- list.add("我");
- adapter.notifyDataSetChanged();
- listView.reflashComplete();
- }
- }
今天就到此结束啦,不懂的,留言


 3万+
3万+


 被折叠的 条评论
为什么被折叠?
被折叠的 条评论
为什么被折叠?
 到【灌水乐园】发言


