安卓之下拉刷新

SwipeRefreshLayout讲解
SwipeRefreshLayout 是谷歌公司推出的用于下拉刷新的控件,SwipeRefreshLayout已经被放到了sdk中,在Version 19.1之后SwipeRefreshLayout 被放到support v4中。
歌公司提供了下拉刷新的功能,RecyclerView的出现基本就是为了替代ListView,GridView的。
首先创建一个安卓项目,在activity_main.xml中编写如下代码:

<LinearLayout xmlns:android="http://schemas.android.com/apk/res/android"
    xmlns:app="http://schemas.android.com/apk/res-auto"
    xmlns:tools="http://schemas.android.com/tools"
    android:layout_width="match_parent"
    android:layout_height="match_parent"
    android:orientation="vertical"
    tools:context=".MainActivity">
        <androidx.swiperefreshlayout.widget.SwipeRefreshLayout
            android:id="@+id/swipe_refresh"
            android:layout_width="match_parent"
            android:layout_height="match_parent"
      >
       <view class="androidx.appcompat.app.AlertController$RecycleListView"
           android:layout_width="match_parent"
           android:layout_height="match_parent"
               />
        </androidx.swiperefreshlayout.widget.SwipeRefreshLayout>

</LinearLayout>

虽然RecyclerView已经支持下拉刷新功能了,但是我们还要在代码中处理具体的刷新逻辑才行。在MainActivity中编写如下代码:

public class MainActivity extends AppCompatActivity {
   private SwipeRefreshLayout swipeRefreshLayout;
    @Override
    protected void onCreate(Bundle savedInstanceState) {
        super.onCreate(savedInstanceState);
        setContentView(R.layout.activity_main);
        swipeRefreshLayout=(SwipeRefreshLayout)findViewById(R.id.swipe_refresh);
        swipeRefreshLayout.setColorSchemeResources(R.color.colorPrimary);
        swipeRefreshLayout.setOnRefreshListener(new SwipeRefreshLayout.OnRefreshListener() {
            @Override
            public void onRefresh() {
                refresh();
            }
        });
    }

    private void refresh() {
        new Thread(new Runnable() {
            @Override
            public void run() {
                try {
                    Thread.sleep(2000);
                } catch (InterruptedException e) {
                    e.printStackTrace();
                }
                runOnUiThread(new Runnable() {
                    @Override
                    public void run() {
                        swipeRefreshLayout.setRefreshing(false);
                    }
                });
            }
        }).start();
    }
}

首先通过findViewById()方法拿到SwipeRefreshLayout的实例,然后调用setColorSchemeResources()方法来设置下拉刷新进度条的颜色,这里我们就使用了一个蓝色作为进度条的颜色,接着调用setOnRefreshListener()方法来设置一个下拉刷新的监听器,当触发了下拉刷新操作的时候就会回调这个监听器的onRefresh()方法。
refresh()方法中开启一个线程,然后讲线程沉睡两秒钟,之所以这么做,是因为本地刷新操作速度非常快,如果不将线程沉睡的话,刷新就立刻结束了,从而看不到刷新的过程。沉睡结束之后,这里使用了runOnUiThread()方法将线程切换回主线程,然后调用SwipeRefreshLayout的setRefreshing()方法并传入false,用于表示刷新时间结束,并隐藏刷新进度条。

//设置进度View样式的大小,只有两个值DEFAULT和LARGE,表示默认和较大
swipeRefreshLayout.setSize(DEFAULT);
//设置触发下拉刷新的距离
swipeRefreshLayout.setDistanceToTriggerSync(300);
//设置动画样式下拉的起始点和结束点,scale 是指设置是否需要放大或者缩小动画。
swipeRefreshLayout.setProgressViewOffset(boolean scale, int start, int end)
//设置动画样式下拉的结束点,scale 是指设置是否需要放大或者缩小动画
swipeRefreshLayout.setProgressViewEndTarget(boolean scale, int end);
//如果自定义了swipeRefreshLayout,可以通过这个回调方法决定是否可以滑动。
setOnChildScrollUpCallback(@Nullable OnChildScrollUpCallback callback)
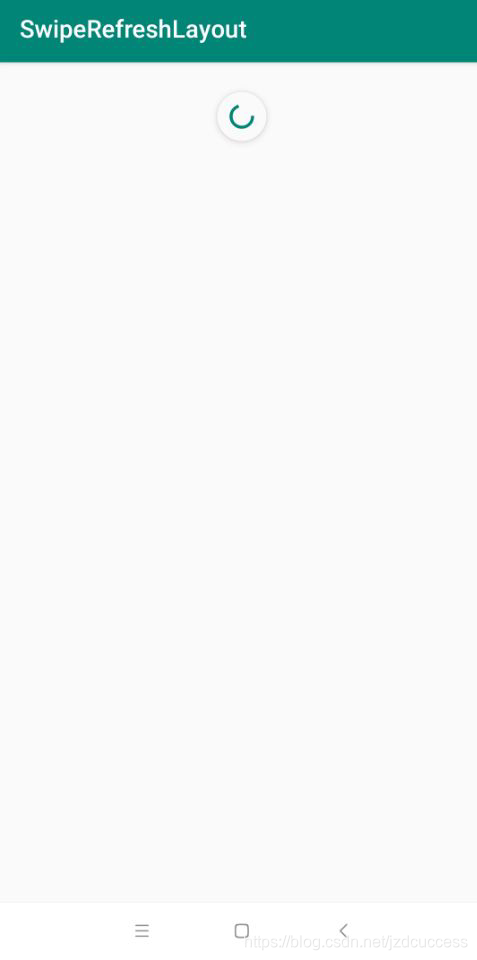
效果图如下所示:
在这里插入图片描述
生如蝼蚁当立鸿鹄之志,命薄如纸应有不屈之才。

  • 3
    点赞
  • 23
    收藏
    觉得还不错? 一键收藏
  • 2
    评论
实现上拉刷新、下拉加载的 ListView,可以使用第三方库,如 Google 推荐的 SwipeRefreshLayout,或者自己实现。 下面是自己实现的一种方法: 1. 在布局文件中加入 ListView 和 ProgressBar: ``` <RelativeLayout android:layout_width="match_parent" android:layout_height="match_parent"> <ListView android:id="@+id/listView" android:layout_width="match_parent" android:layout_height="match_parent" /> <ProgressBar android:id="@+id/progressBar" android:layout_width="wrap_content" android:layout_height="wrap_content" android:layout_centerInParent="true" android:visibility="gone" /> </RelativeLayout> ``` 2. 在 Activity 或 Fragment 中初始化 ListView 和适配器: ``` listView = findViewById(R.id.listView); listView.setAdapter(adapter); ``` 3. 给 ListView 设置滚动监听器,当滚动到底部时,执行加载更多的操作: ``` listView.setOnScrollListener(new AbsListView.OnScrollListener() { @Override public void onScrollStateChanged(AbsListView view, int scrollState) { if (scrollState == AbsListView.OnScrollListener.SCROLL_STATE_IDLE) { if (view.getLastVisiblePosition() == view.getCount() - 1) { // 滚动到底部,执行加载更多操作 loadMoreData(); } } } @Override public void onScroll(AbsListView view, int firstVisibleItem, int visibleItemCount, int totalItemCount) { } }); ``` 4. 在加载更多的操作中,显示 ProgressBar,加载数据后更新适配器,隐藏 ProgressBar: ``` private void loadMoreData() { progressBar.setVisibility(View.VISIBLE); // 加载数据 // 更新适配器 progressBar.setVisibility(View.GONE); } ``` 5. 实现下拉刷新,可以使用 SwipeRefreshLayout,在布局文件中加入 SwipeRefreshLayout 和 ListView: ``` <android.support.v4.widget.SwipeRefreshLayout android:id="@+id/swipeRefreshLayout" android:layout_width="match_parent" android:layout_height="match_parent"> <ListView android:id="@+id/listView" android:layout_width="match_parent" android:layout_height="match_parent" /> </android.support.v4.widget.SwipeRefreshLayout> ``` 6. 在 Activity 或 Fragment 中初始化 SwipeRefreshLayout 和 ListView,并给 SwipeRefreshLayout 设置刷新监听器: ``` swipeRefreshLayout = findViewById(R.id.swipeRefreshLayout); swipeRefreshLayout.setOnRefreshListener(new SwipeRefreshLayout.OnRefreshListener() { @Override public void onRefresh() { // 下拉刷新,重新加载数据 refreshData(); } }); ``` 7. 在刷新数据的操作中,显示 ProgressBar,加载数据后更新适配器,隐藏 ProgressBar 和 SwipeRefreshLayout: ``` private void refreshData() { progressBar.setVisibility(View.VISIBLE); // 加载数据 // 更新适配器 progressBar.setVisibility(View.GONE); swipeRefreshLayout.setRefreshing(false); } ```

“相关推荐”对你有帮助么?

  • 非常没帮助
  • 没帮助
  • 一般
  • 有帮助
  • 非常有帮助
提交
评论 2
添加红包

请填写红包祝福语或标题

红包个数最小为10个

红包金额最低5元

当前余额3.43前往充值 >
需支付:10.00
成就一亿技术人!
领取后你会自动成为博主和红包主的粉丝 规则
hope_wisdom
发出的红包
实付
使用余额支付
点击重新获取
扫码支付
钱包余额 0

抵扣说明:

1.余额是钱包充值的虚拟货币,按照1:1的比例进行支付金额的抵扣。
2.余额无法直接购买下载,可以购买VIP、付费专栏及课程。

余额充值