


这一章我们主要来介绍网络数据的传递与处理,相信很多读者都希望做出来的应用能跟网络上的数据进行互动,如微博,论坛之类的,这里我们就要学习网络传输与返回数据的处理,首先网络传递参数有POST跟GET两种协议,做过网页或是学习过的同学应该知道.网页每个表单中都有一个<form action="XXX" method="post">参数,这里method就是提交表单参数使用的协议,当然,协议不止这两种,还有文件上传协议,这我们以后会讲,今天我们首来就来熟悉Android中对于POST跟GET协议的应用,首先我们提供了一个HttpConnectionUtil.java的辅助类,这里面对POST跟GET进行了封装
import java.io.BufferedReader;
import java.io.IOException;
import java.io.InputStreamReader;
import java.io.UnsupportedEncodingException;
import java.net.URLEncoder;
import java.util.ArrayList;
import java.util.List;
import java.util.Map;

import org.apache.http.HttpResponse;
import org.apache.http.HttpStatus;
import org.apache.http.NameValuePair;
import org.apache.http.client.ClientProtocolException;
import org.apache.http.client.HttpClient;
import org.apache.http.client.entity.UrlEncodedFormEntity;
import org.apache.http.client.methods.HttpGet;
import org.apache.http.client.methods.HttpPost;
import org.apache.http.client.methods.HttpUriRequest;
import org.apache.http.impl.client.DefaultHttpClient;
import org.apache.http.message.BasicNameValuePair;

import android.os.Handler;
import android.util.Log;

public class HttpConnectionUtil
{
	public static enum HttpMethod
	{
		GET, POST
	}

	/**
	 * 异步连接
	 *
	 * @param url
	 *            网址
	 * @param method
	 *            Http方法,POST跟GET
	 * @param callback
	 *            回调方法,返回给页面或其他的数据
	 */
	public void asyncConnect(final String url, final HttpMethod method,
			final HttpConnectionCallback callback)
	{
		asyncConnect(url, null, method, callback);
	}

	/**
	 * 同步方法
	 *
	 * @param url
	 *            网址
	 * @param method
	 *            Http方法,POST跟GET
	 * @param callback
	 *            回调方法,返回给页面或其他的数据
	 */
	public void syncConnect(final String url, final HttpMethod method,
			final HttpConnectionCallback callback)
	{
		syncConnect(url, null, method, callback);
	}

	/**
	 * 异步带参数方法
	 *
	 * @param url
	 *            网址
	 * @param params
	 *            POST或GET要传递的参数
	 * @param method
	 *            方法,POST或GET
	 * @param callback
	 *            回调方法
	 */
	public void asyncConnect(final String url,
			final Map<String, String> params, final HttpMethod method,
			final HttpConnectionCallback callback)
	{
		Handler handler = new Handler();
		Runnable runnable = new Runnable()
		{
			public void run()
			{
				syncConnect(url, params, method, callback);
			}
		};
		handler.post(runnable);
	}

	/**
	 * 同步带参数方法
	 *
	 * @param url
	 *            网址
	 * @param params
	 *            POST或GET要传递的参数
	 * @param method
	 *            方法,POST或GET
	 * @param callback
	 *            回调方法
	 */
	public void syncConnect(final String url, final Map<String, String> params,
			final HttpMethod method, final HttpConnectionCallback callback)
	{
		String json = null;
		BufferedReader reader = null;

		try
		{
			HttpClient client = new DefaultHttpClient();
			HttpUriRequest request = getRequest(url, params, method);
			HttpResponse response = client.execute(request);
			if (response.getStatusLine().getStatusCode() == HttpStatus.SC_OK)
			{
				reader = new BufferedReader(new InputStreamReader(response
						.getEntity().getContent()));
				StringBuilder sb = new StringBuilder();
				for (String s = reader.readLine(); s != null; s = reader
						.readLine())
				{
					sb.append(s);
				}

				json = sb.toString();
			}
		} catch (ClientProtocolException e)
		{
			Log.e("HttpConnectionUtil", e.getMessage(), e);
		} catch (IOException e)
		{
			Log.e("HttpConnectionUtil", e.getMessage(), e);
		} finally
		{
			try
			{
				if (reader != null)
				{
					reader.close();
				}
			} catch (IOException e)
			{
				// ignore me
			}
		}
		callback.execute(json);
	}

	/**
	 * POST跟GET传递参数不同,POST是隐式传递,GET是显式传递
	 *
	 * @param url
	 *            网址
	 * @param params
	 *            参数
	 * @param method
	 *            方法
	 * @return
	 */
	private HttpUriRequest getRequest(String url, Map<String, String> params,
			HttpMethod method)
	{
		if (method.equals(HttpMethod.POST))
		{
			List<NameValuePair> listParams = new ArrayList<NameValuePair>();
			if (params != null)
			{
				for (String name : params.keySet())
				{
					listParams.add(new BasicNameValuePair(name, params
							.get(name)));
				}
			}
			try
			{
				UrlEncodedFormEntity entity = new UrlEncodedFormEntity(
						listParams);
				HttpPost request = new HttpPost(url);
				request.setEntity(entity);
				return request;
			} catch (UnsupportedEncodingException e)
			{
				// Should not come here, ignore me.
				throw new java.lang.RuntimeException(e.getMessage(), e);
			}
		} else
		{
			if (url.indexOf("?") < 0)
			{
				url += "?";
			}
			if (params != null)
			{
				for (String name : params.keySet())
				{
					try
					{
						url += "&" + name + "="
								+ URLEncoder.encode(params.get(name), "UTF-8");

					} catch (UnsupportedEncodingException e)
					{
						e.printStackTrace();
					}
				}
			}
			HttpGet request = new HttpGet(url);
			return request;
		}
	}

	/**
	 * 回调接口
	 * @author Administrator
	 *
	 */
	public interface HttpConnectionCallback
	{
		/**
		 * Call back method will be execute after the http request return.
		 *
		 * @param response
		 *            the response of http request. The value will be null if
		 *            any error occur.
		 */
		void execute(String response);
	}

}
这个类也是我从网上看到的,使用起来相当方便,希望读者能学会怎样使用,其实像java学习,可以将一些有用的类或是方法定义个自己包,将它们放进去,下次要用的话只要在主程序中调用就行了,这也是面向对象重要的方法.
这里面的方法,我就没有一行一行定义说明了,里面用的都是HttpClient的中方法
接下来,我们用这个类来进行Android的应用
main.xml(模板文件)
<?xml version="1.0" encoding="utf-8"?>
<LinearLayout xmlns:android="http://schemas.android.com/apk/res/android"
	android:orientation="vertical" android:layout_width="match_parent"
	android:layout_height="match_parent">
	<EditText android:layout_width="match_parent"
		android:layout_height="wrap_content" android:id="@+id/http_edit"
		android:text="http://">
		<requestFocus></requestFocus>
	</EditText>
	<RelativeLayout android:layout_width="match_parent"
		android:layout_height="wrap_content" android:id="@+id/relativeLayout1">
		<Button android:text="取消" android:layout_width="wrap_content"
			android:id="@+id/http_cancal" android:layout_height="wrap_content"
			android:layout_alignParentTop="true" android:layout_alignParentRight="true"></Button>
		<Button android:text="确定" android:layout_width="wrap_content"
			android:id="@+id/http_ok" android:layout_height="wrap_content"
			android:layout_alignParentTop="true" android:layout_toLeftOf="@+id/http_cancal"
			android:layout_marginRight="14dp"></Button>
	</RelativeLayout>
	<ScrollView android:layout_width="match_parent"
		android:layout_height="match_parent">
		<TextView android:id="@+id/http_text" android:text="TextView"
			android:textAppearance="?android:attr/textAppearanceSmall"
			android:layout_height="match_parent" android:layout_width="match_parent"></TextView>
	</ScrollView>

</LinearLayout>
然后就是主Actitiv的java代码了
import android.app.Activity;
import android.os.Bundle;
import android.text.Html;
import android.view.View;
import android.view.View.OnClickListener;
import android.widget.Button;
import android.widget.EditText;
import android.widget.TextView;

import com.kang.http.HttpConnectionUtil;
import com.kang.http.HttpConnectionUtil.HttpConnectionCallback;
import com.kang.http.HttpConnectionUtil.HttpMethod;

public class HttpClientDemo extends Activity
{
	private Button ok_btn;
	private Button cancal_btn;
	private EditText edit_text;
	private TextView text;

	@Override
	protected void onCreate(Bundle savedInstanceState)
	{
		// TODO Auto-generated method stub
		super.onCreate(savedInstanceState);
		setContentView(R.layout.http_client);

		//确定按钮
		ok_btn = (Button) findViewById(R.id.http_ok);
		ok_btn.setOnClickListener(new ClickEvent());

		//取消按钮
		cancal_btn = (Button) findViewById(R.id.http_cancal);
		cancal_btn.setOnClickListener(new ClickEvent());

		//文本编辑框
		edit_text = (EditText) findViewById(R.id.http_edit);

		//文本框
		text = (TextView) findViewById(R.id.http_text);
	}


	//自定义按钮点击方法
	public class ClickEvent implements OnClickListener
	{

		@Override
		public void onClick(View v)
		{
			switch (v.getId())
			{
			case R.id.http_ok:
				//网址
				String url = edit_text.getText().toString().trim();

				if (!url.equals("http://") && !url.equals(""))
				{
					//自定义类,封装了GET/POST方法,而且同样也封装了同步跟异步的方法
					HttpConnectionUtil conn = new HttpConnectionUtil();
					conn.asyncConnect(url, HttpMethod.GET,
							new HttpConnectionCallback()
							{

								@Override
								public void execute(String response)
								{
									text.setText(Html.fromHtml(response));
								}
							});
				}

				break;

			case R.id.http_cancal:
				edit_text.setText("http://");

				break;

			}

		}

	}
}
看里面 ClickEvent类中onClick方法中我们就使用了自定义的HttpConnectionUtil类,别急着运行了,接下来还有一步,也是最重要的,就是权限的增加,你要访问网络,肯定需要访问网络的权限,在AndroidManifest.xml中加入<uses-permission android:name="android.permission.INTERNET"></uses-permission>这一句,至于加哪里,那你可别问我了,百度或是google一下吧,呵呵,卖卖关子,现在就可以运行了,看图是不是跟我的一样
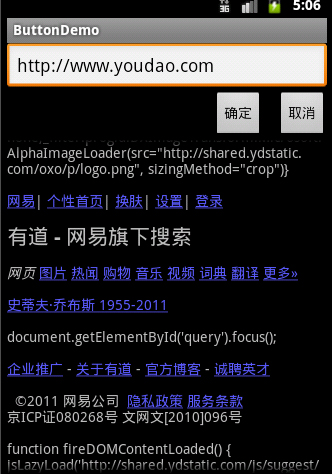
你一定会奇怪,怎么会有其他一些代码呢?呵呵,这里我们取出的是它的源代码.OK,这一章讲完了,下一章我们就要来实现Mysql数据库+PHP+Android的显示了,相信这会是很多读者感兴趣的一章,谢谢


 被折叠的 条评论
为什么被折叠?
被折叠的 条评论
为什么被折叠?
 到【灌水乐园】发言


