


一、pytest框架测试用例前后置处理
前置处理: 环境准备(启动服务)、数据初始化、资源获取(加载配置文件)
后置处理: 环境清理(垃圾数据)、资源释放、状态还原(回滚数据库事务)
1. setup/teardown、setup_class/teardown_class(用的少)
- 举例(使用方法和 unittest 类似)
import pytest

class TestLogin:

    @classmethod
    def setup_class(cls):
        """在所有测试用例执行前只执行一次"""
        print('类的初始化工作,如创建对象,创建数据库链接')

    def setup(self):
        """前置处理"""
        print('在每个测试方法运行前都要执行该代码块')

    def test_case01(self):
        print('第2个')

    def test_case02(self):
        print('第3个')

    def test_case03(self):
        print('第1个')

    def teardown(self):
        """前置处理"""
        print('在每个测试方法运行后都要执行该代码块')

    @classmethod
    def teardown_class(cls):
        """在所有测试用例执行后只执行一次"""
        print('关闭数据库的链接')
2. pytest核心:通过装饰器 @pytest.fixture 方式来实现用例前后置(重点!!)
1)格式和结构
- 前置处理(默认)
在方法前加上 @pytest.fixture(scope=“”, params=“”, autouse=False, ids=“”, name=“”)
- 后置处理,关键字 yield
yield 之前的代码是前置,之后的是后置(teardown)
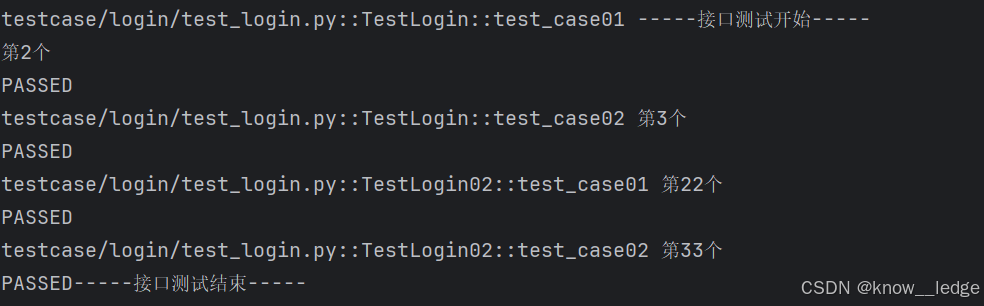
@pytest.fixture(scope='function',autouse=True)
def fixture_test():
    """前后置处理"""
    print("-----接口测试开始-----")
    yield
    print("-----接口测试结束-----")
2)@pytest.fixture 5种参数详解
- scope(重点)
| scope | 表示被 @pytest.fixture 标记的方法作用域,它的值主要有4个,function(默认),class、module、package/session |
|---|---|
| function(默认) | (作用域是每一个方法)每个测试用例执行之前都会先去执行前置操作,类似setup/teardown |
| class | (作用域是每一个类)每个类执行之前会执行前置操作,类似setup_class/teardown_class |
| module | (作用域是模块,也就是类)一个文件有多个类的时候,每次都只会执行一次前置和后置操作 |
| package/session | 多个测试用例文件只执行一次前后置操作 |
举例:
function
@pytest.fixture(scope='function',autouse=True)
def fixture_test():
    """前后置处理"""
    print("这是处理前后置的方法")
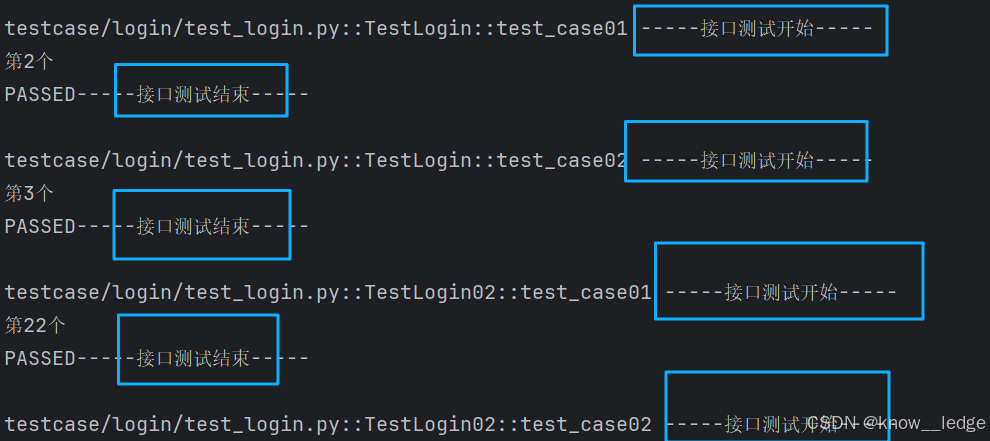
class
@pytest.fixture(scope='class',autouse=True)
def fixture_test():
"""前后置处理"""
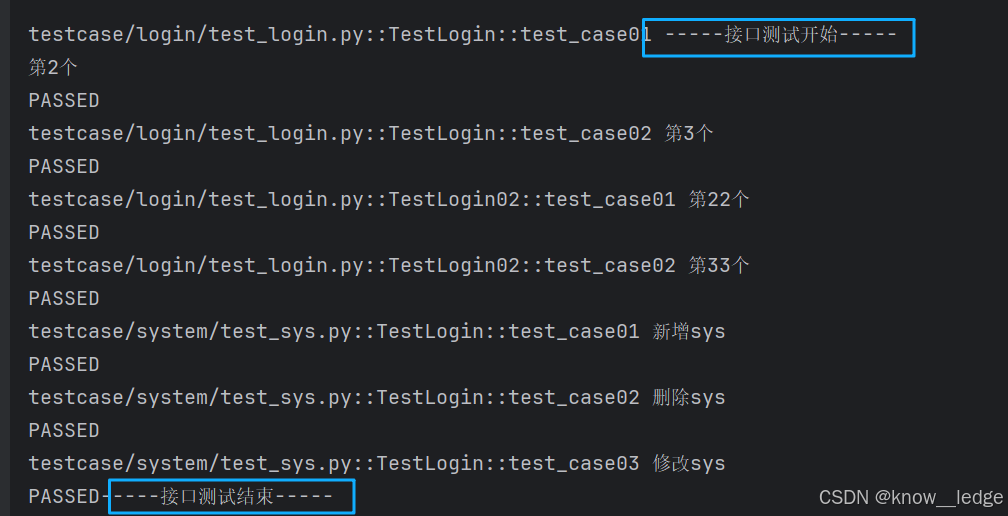
print("-----接口测试开始-----")
yield
print("-----接口测试结束-----")
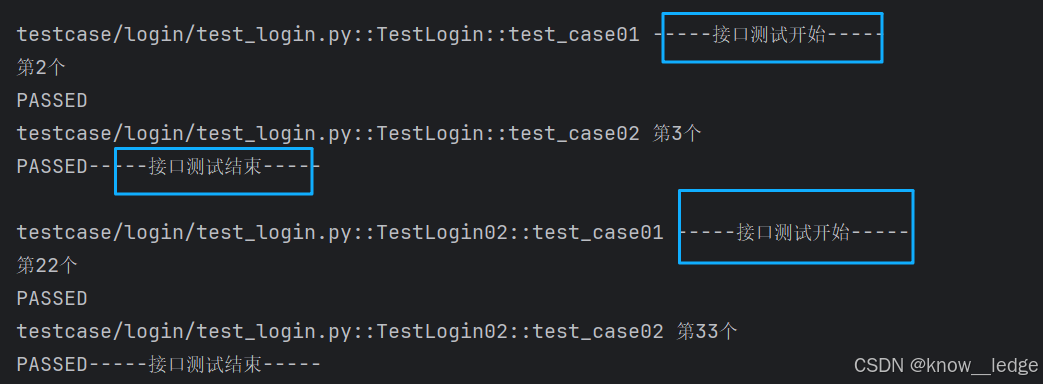
module
@pytest.fixture(scope='module',autouse=True)
def fixture_test():
    """前后置处理"""
    print("-----接口测试开始-----")
    yield
    print("-----接口测试结束-----")
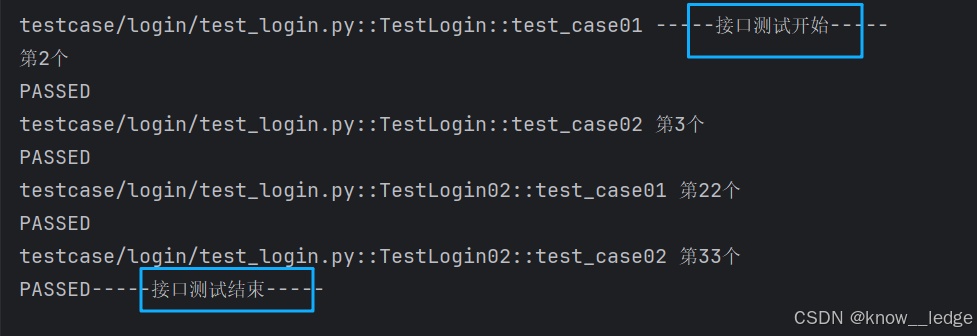
package/session
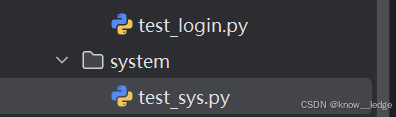
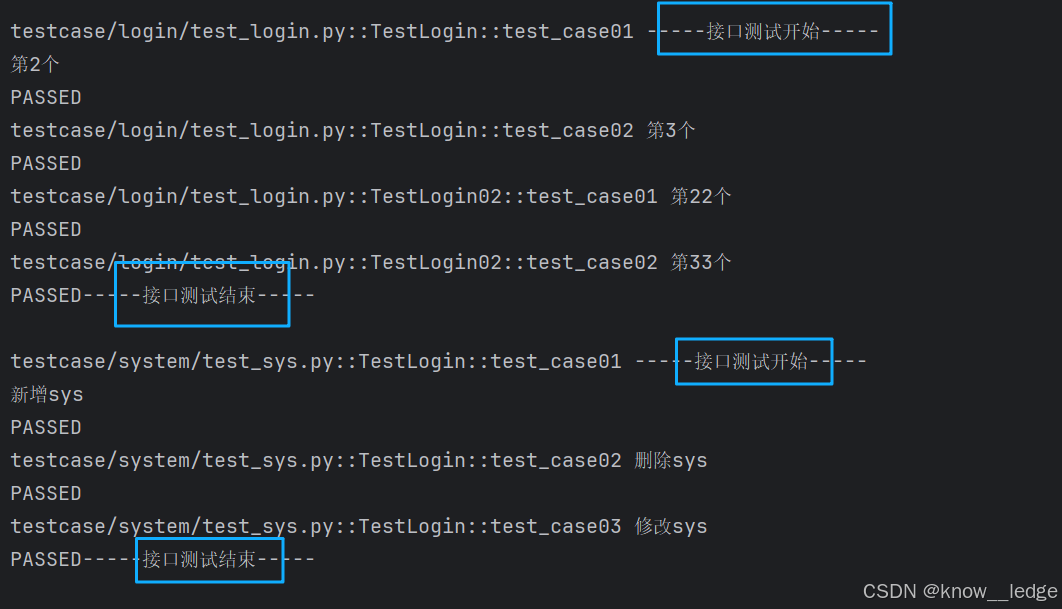
步骤一:创建多个测试用例文件
步骤二:在根目录下创建 conftest.py ,@pytest.fixture(scope=‘session’)
import pytest

@pytest.fixture(scope='session',autouse=True)
def fixture_test():
    """前后置处理"""
    print("-----接口测试开始-----")
    yield
    print("-----接口测试结束-----")
步骤三:运行测试用例
import pytest

if __name__ == '__main__':
    pytest.main(['-vs', './testcase'])
运行结果:多个测试用例文件只执行一次前后置操作
- params
| params | 参数化(支持的格式有:list、tuple、字典) |
|---|
格式:
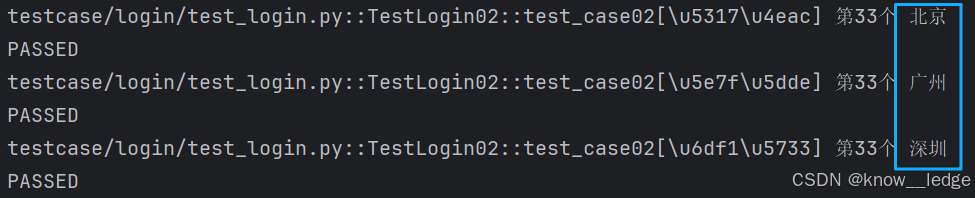
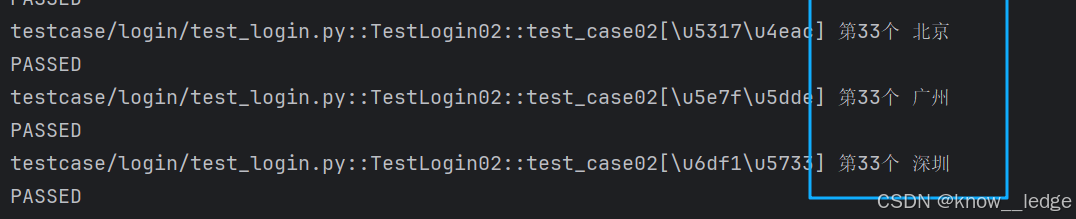
@pytest.fixture(scope='function', autouse=True, params=['北京', '广州', '深圳'])
def fixture_test(request):
    """前后置处理"""
    return request.param

class TestLogin02:
    def test_case01(self):
        print('第22个')

    def test_case02(self,fixture_test):
        print('第33个',fixture_test)
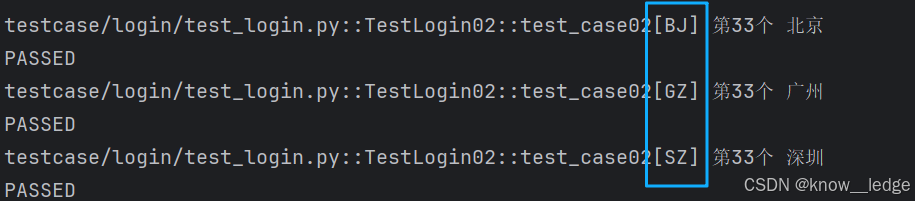
- ids(用的不多)
| ids | 当使用params参数化时,给每一个值设置一个变量(相当于取别名),意义不大 |
|---|
@pytest.fixture(scope='function',autouse=True,params=['北京','广州','深圳'],ids=['BJ','GZ','SZ'])
def fixture_test(request):
    """前后置处理"""
    return request.param

class TestLogin02:
    def test_case01(self):
        print('第22个')

    def test_case02(self,fixture_test):
        print('第33个',fixture_test)
- autouse
| autouse | autouse=True 时自动使用@pytest.fixture ,默认False |
|---|
@pytest.fixture(scope='module',autouse=True)
def fixture_test():
    """前后置处理"""
    print("-----接口测试开始-----")
    yield
    print("-----接口测试结束-----")
- name(用的不多)
| name | 给被fixture标记的方法修改别名 |
|---|
@pytest.fixture(scope='function',autouse=True,params=['北京','广州','深圳'],name="test3")
def fixture_test(request):
    """前后置处理"""
    return request.param

class TestLogin02:
    def test_case01(self):
        print('第22个')

    def test_case02(self,test3):
        print('第33个',test3)
3. conftest.py + @pytest.fixtrue(全局处理)
conftest.py 文件名是固定写法,不可更改,conftest.py + @pytest.fixtrue 结合使用来实现全局前后置应用
操作步骤
步骤一:创建多个测试用例文件
步骤二:在根目录下创建 conftest.py ,@pytest.fixture
import pytest

@pytest.fixture(scope='module',autouse=True)
def fixture_test():
    """前后置处理"""
    print("-----接口测试开始-----")
    yield
    print("-----接口测试结束-----")
步骤三:运行测试用例
import pytest

if __name__ == '__main__':
    pytest.main(['-vs', './testcase'])
运行结果:多个测试用例文件均执行 conftest.py 中 @pytest.fixtrue 的前后置操作
使用场景(conftest可以根据需要写无数个)
1.登录操作(多个测试用例文件只需登录一次拿到 token 值)
@pytest.fixture(scope="function")
def login():
    """模拟用户登录,返回 token"""
    global LOGIN_TOKEN
    print("正在执行登录操作...")

    # 模拟登录请求
    credentials = {"username": "testuser", "password": "123456"}
    # 假设登录成功,返回 token
    LOGIN_TOKEN = "bearer_xyz_123_token"

    yield LOGIN_TOKEN  # 提供给测试函数使用

    # 后置:登出或清理 token
    print("登出,清除登录状态...")
    LOGIN_TOKEN = None
2.文件清除操作(每次运行结束后整体清除缓存)
@pytest.fixture(scope="function")
def temp_file():
    """创建一个临时测试文件,测试结束后自动删除"""
    file_path = "tests/temp/test_data.json"
    data = {"name": "张三", "age": 25}

    print(f"创建临时文件: {file_path}")
    with open(file_path, 'w', encoding='utf-8') as f:
        json.dump(data, f, ensure_ascii=False)

    yield file_path  # 将文件路径传给测试

    # 后置:删除文件
    if os.path.exists(file_path):
        os.remove(file_path)
        print(f"已删除临时文件: {file_path}")
    else:
        print(f"文件 {file_path} 不存在,跳过删除")
二、pytest框架参数化
1.@pytest.mark.parametrize(args_name,args_value)
args_name:参数名称 , args_value:值
| 值的可用类型 | 举例 |
|---|---|
| list:列表(最常用) | [ ‘小李’ , ‘小张’ , ‘小华’ ] |
| tuple:元祖类型 | ( ‘李四’ , ‘张三’ , ‘王五’ ) |
| 字典列表:[{},{},{}] | [{‘name’: ‘小张’}, {‘name’: ‘小明’}] |
| 字典元祖:({},{},{}) | ({‘name’: ‘小张’}, {‘name’: ‘小明’}) |
2.参数里面有多少个值这个用例就会执行多少次
- 举例
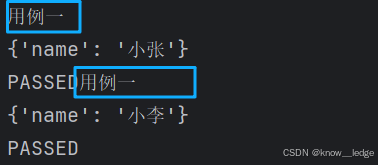
class TestLogin:
    @pytest.mark.parametrize('params',({'name':'小张'},{'name':'小李'}))
    def test_case01(self,params):
        print('用例一')
        print(params)
三、pytest使用yaml文件做数据驱动
数据驱动是指:将测试逻辑与测试数据分离,通过读取外部文件中的数据来驱动测试用例执行。
使用场景:测试用例参数化(如登录、接口测试);配置管理;多环境数据支持(开发、测试、生产);UI 自动化中的页面对象数据分离
步骤一:准备工作
1. 安装依赖(PyYAML+Allure)
1)安装PyYAML
pip install PyYAML
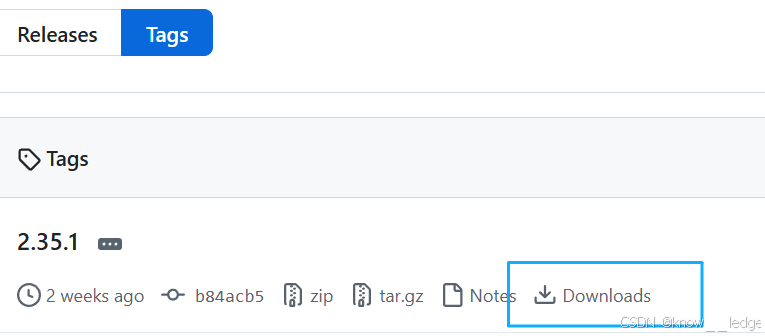
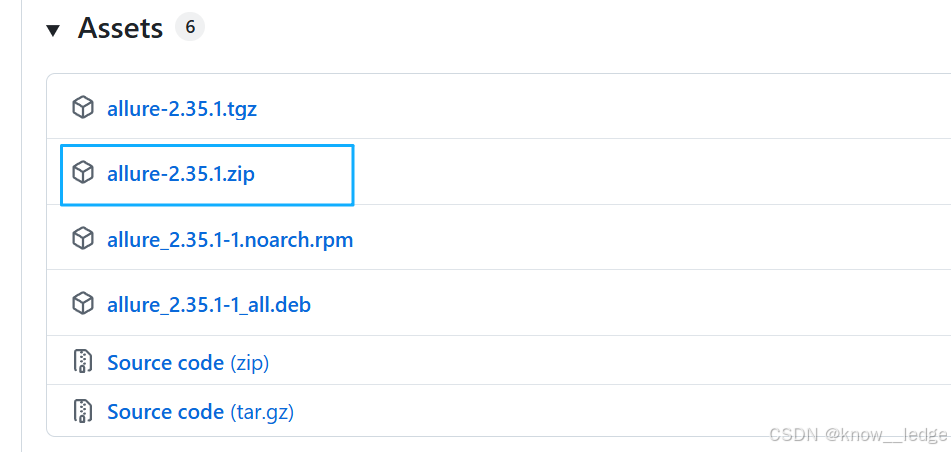
- 解压 allure.zip
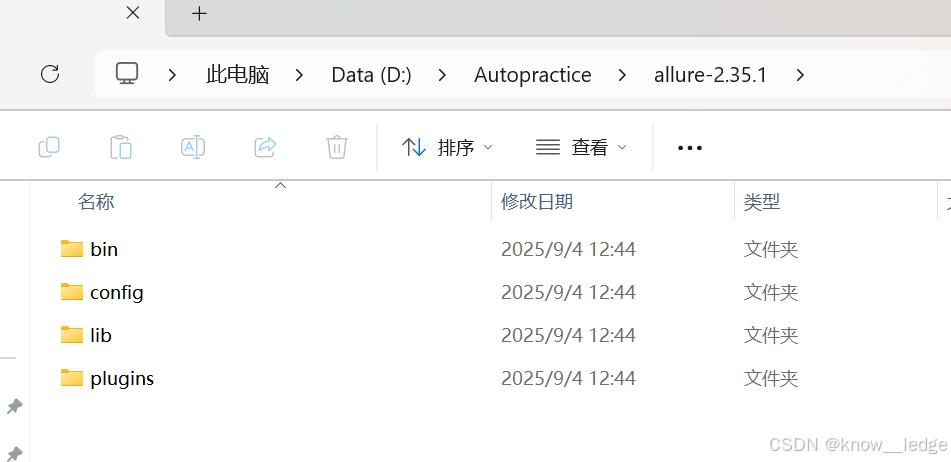
- 将 bin 目录的地址添加到环境变量中
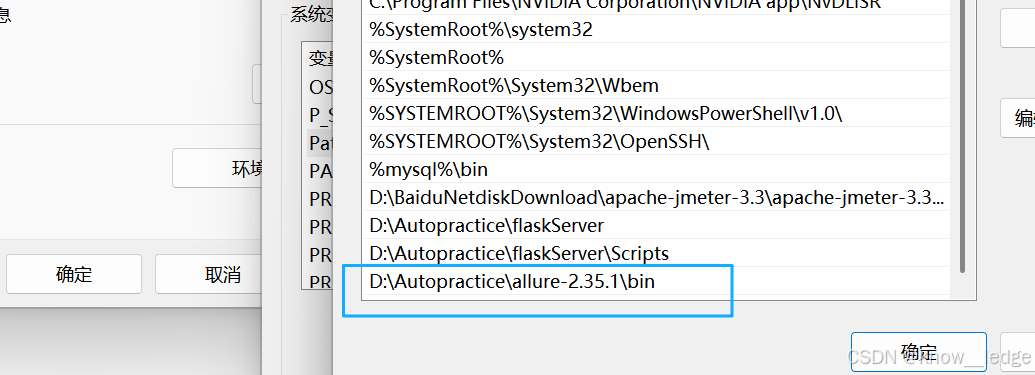
- cmd检查是否安装成功

2. Allure的使用
pytest.ini 配置文件及 run.py 整体运行文件的编写
- 1)pytest.ini 配置文件及解释
addopts = --alluredir=./report/temp -vs --clean-alluredir -p no:warnings
         """生成文件存储路径       存储精细度    每次执行覆盖前一次  只显示报错"""
- 2)run.py 整体运行文件的编写
import pytest
import os

if __name__ == '__main__':
    pytest.main(['-vs', './testcase'])
    os.system(f'allure serve ./report/temp')
             """使用allure方式解析文件"""
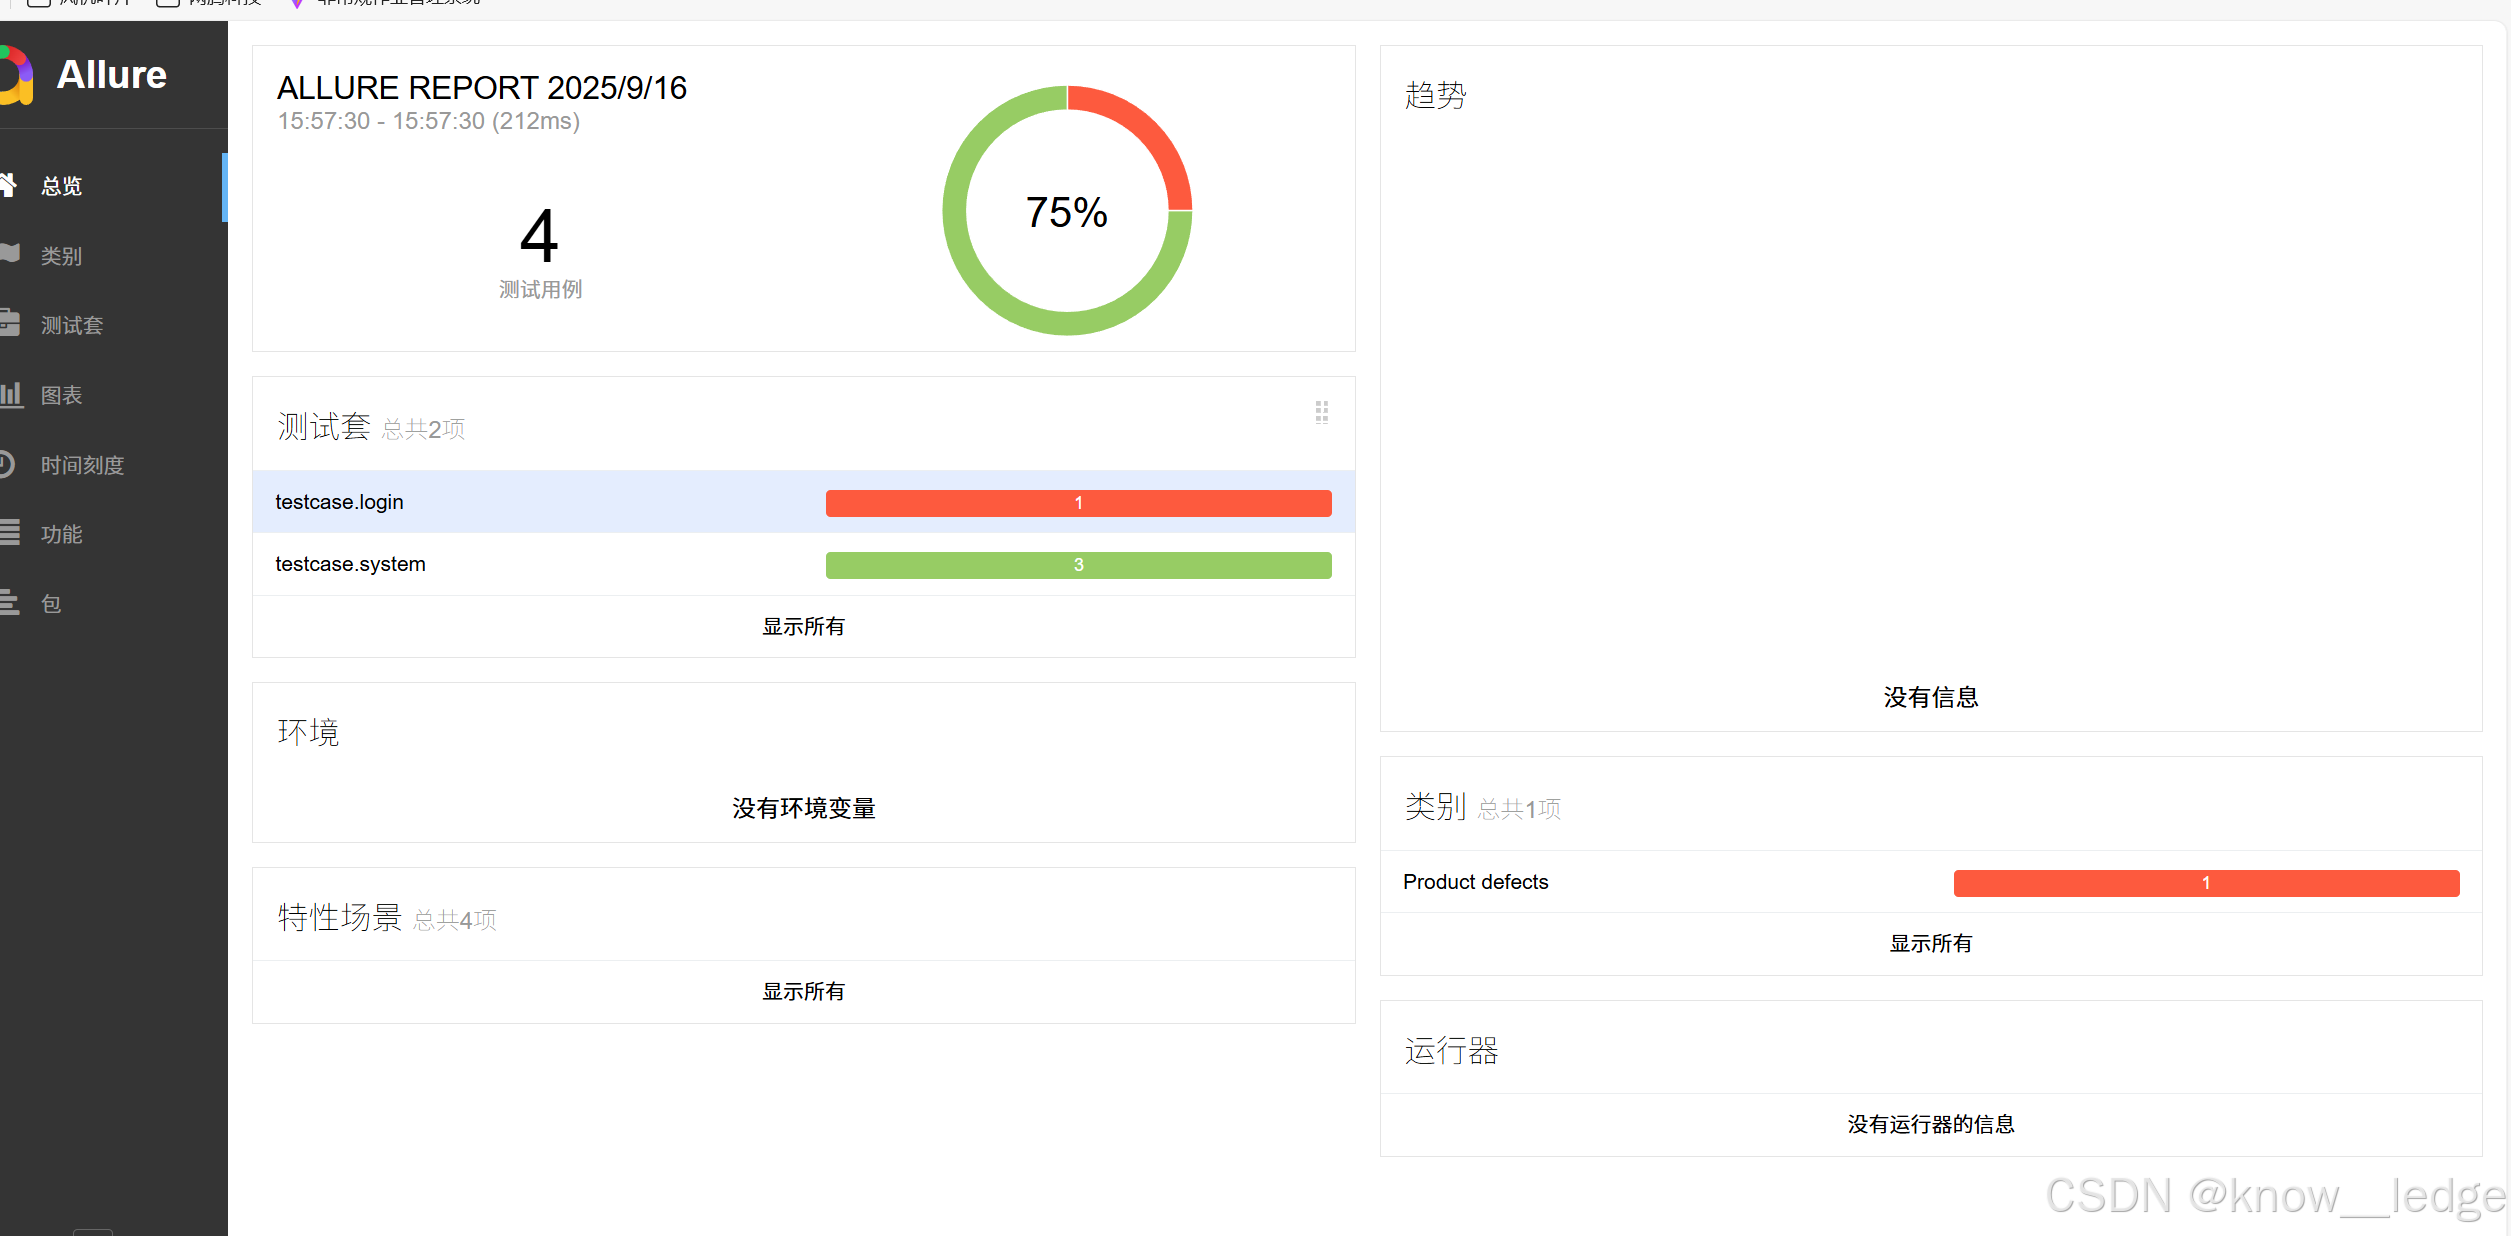
- 3)运行 run.py 生成报告

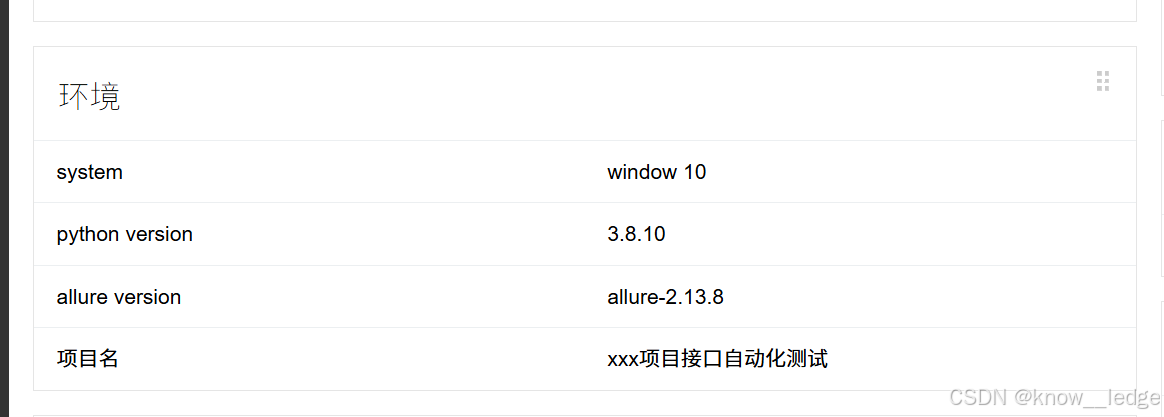
补充知识:allure测试报告内容定制化
(总览界面里的环境可通过代码进行配置)

1)根目录创建 environment.xml 文档

2)固定语法,可按需求修改内容
<environment>
    <parameter>
        <key>system</key>
        <value>window 10</value>
    </parameter>
    <parameter>
        <key>python version</key>
        <value>3.8.10</value>
    </parameter>
    <parameter>
        <key>allure version</key>
        <value>allure-2.13.8</value>
    </parameter>
    <parameter>
        <key>项目名</key>
        <value>xxx项目接口自动化测试</value>
    </parameter>
</environment>
3)运行主函数 run.py 里书写
每次运行,将 ./environment.xml 复制到 ./report/temp文件夹下
import shutil
if __name__ == '__main__':
    shutil.copy('./environment.xml','./report/temp')
4)查看生成效果
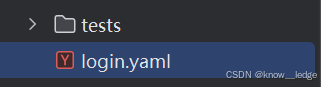
3. 创建 YAML 数据文件
- baseInfo:
    api_name: 用户登录
    url: /api/basic/auth/loginWithoutCheckCode
    method: POST
    header:
      Content-Type: application/json
  test_case:
    - case_name: 用户名和密码正确登录验证
      json:
        username: "cssc"
        password: "11312313"
      validation:
        - eq: [msg, 登录成功]
      extract:
        token: $.token
步骤二:执行
1. 编写测试用例(使用 @pytest.mark.parametrize)
import pytest
from common.run_yaml import ReadYamlData
from conf.setting import FILE_PATH
from common.sendrequests import SendRequest

class TestLogin:
    readyaml = ReadYamlData()

    @pytest.mark.parametrize('params',readyaml.read(FILE_PATH['login']))
    def test_case01(self,params):
        # print(params)
        new_url = 'http://192.168.4.200'+params['baseInfo']['url']
        headers =  params['baseInfo']['header']
        method = params['baseInfo']['method']
        data = params['test_case'][0]['json']
        sendrequest = SendRequest()
        res=sendrequest.run_main(url=new_url,header=headers,method=method,data=data)
        print(res)
        assert res['code'] == 200
- 代码解析:
1)引入封装好的 ReadYamlData(读取 YAML 数据)
from common.run_yaml import ReadYamlData
class TestLogin:
    readyaml = ReadYamlData()   # 实例化类
2)数据参数化,将读取的yaml数据变为参数
from conf.setting import FILE_PATH
    @pytest.mark.parametrize('params',readyaml.read(FILE_PATH['login']))
FILE_PATH[‘login’] 为配置文件 setting.py 的使用
# 文件路径
FILE_PATH = {
    'login': os.path.join(DIR_path, r'testcase\login\login.yaml')
}
3)测试用例中使用该参数化的数据
    @pytest.mark.parametrize('params',readyaml.read(FILE_PATH['login']))
    def test_case01(self,params):
        new_url = 'http://192.xxx.x.200' + params['baseInfo']['url']
        headers =  params['baseInfo']['header']
        method = params['baseInfo']['method']
        data = params['test_case'][0]['json']
4)引入封装好的接口请求,执行接口调用
- 封装好的接口请求
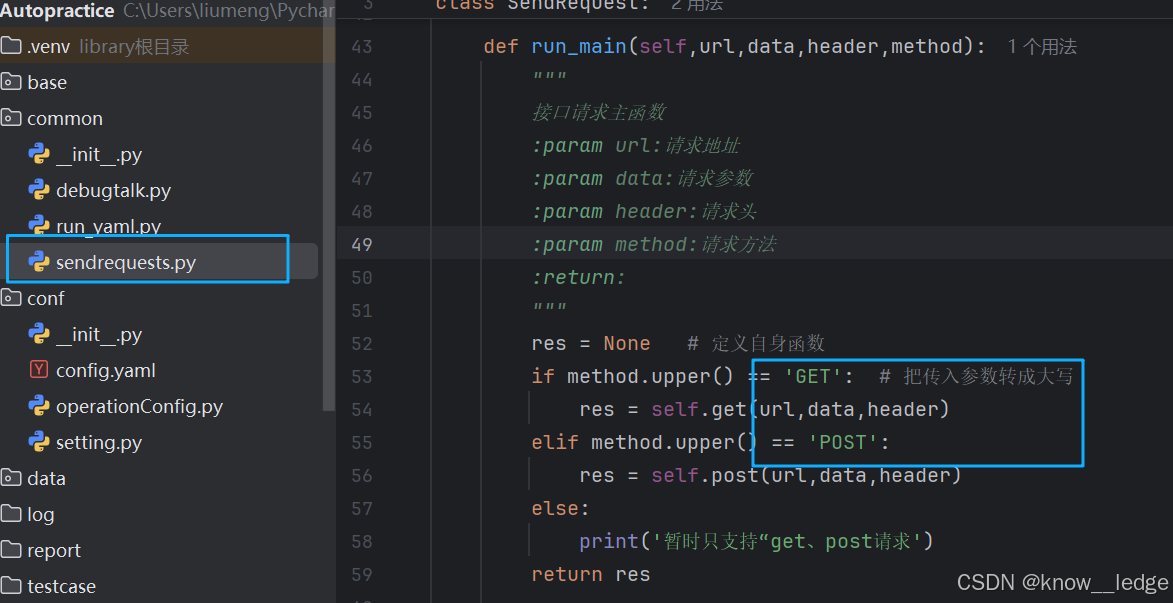
- assert 断言判断接口返回是否与预期一致
from common.sendrequests import SendRequest
        sendrequest = SendRequest()
        res = sendrequest.run_main(url=new_url,header=headers,method=method,data=data)
        print(res)
        assert res['code'] == 200
- 执行结果
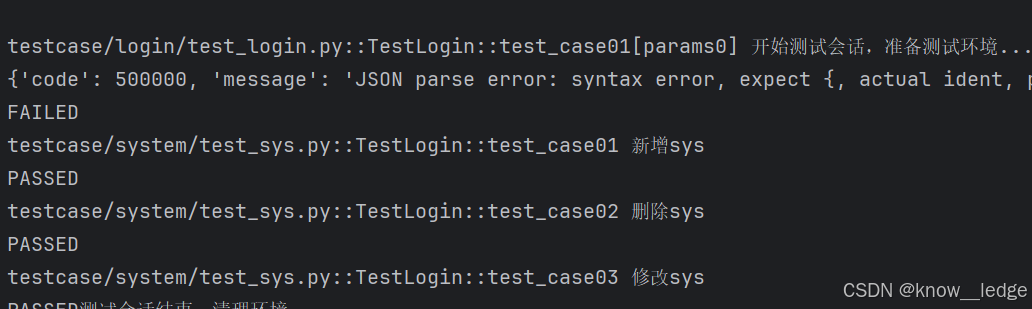
2. 运行Allure生成测试报告
运行根目录下的 run.py 文件
import pytest
import os

if __name__ == '__main__':
    pytest.main(['-vs', './testcase'])
    os.system(f'allure serve ./report/temp')
四、log日志模块的封装
目标:实现一个可复用的日志功能
-
实现:
1)日志能输出到 文件(用于后期排查问题)
2)日志能输出到 控制台(方便实时查看)
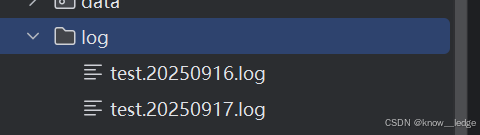
3)日志文件按 天 命名,自动创建目录
4)日志内容包含:级别、时间、文件名、行号、函数名、消息
5)支持不同输出级别控制 -
文件目录(示例)
Autopractice/
├── conf/
│ └── setting.py ---- 配置文件
├── common/
│ └── recordlog.py ---- 日志封装模块
├── testcases/
│ └── test_login.py ---- 测试用例
└── log/ ---- 自动生成的日志目录(无需手动创建)
第一步:配置文件 setting.py
# log日志的输出级别
LOG_LEVEL = logging.DEBUG        # 写入文件的日志级别(DEBUG 最详细)
STREAM_LOG_LEVEL = logging.WARNING  # 输出到控制台的日志级别(只显示警告及以上)

# 文件路径配置
FILE_PATH = {
    'log' : os.path.join(DIR_path, 'log')
}
- 说明:
logging.DEBUG:表示记录所有级别的日志(DEBUG、INFO、WARNING、ERROR、CRITICAL)
logging.WARNING:表示记录 warning 级别以上的日志(WARNING、ERROR、CRITICAL)
第二步:封装日志模块 recordlog.py
import logging
import os
import time
from conf.setting import FILE_PATH,LOG_LEVEL,STREAM_LOG_LEVEL
from logging.handlers import RotatingFileHandler

log_path = FILE_PATH['log']
if not os.path.exists(log_path):
    os.makedirs(log_path)
logfile_name = os.path.join(log_path, f'test.{time.strftime("%Y%m%d")}.log')

class RecordLog:
    """封装日志"""
    def output_logging(self):
        """获取logger对象"""
        logger = logging.getLogger("apilog")
        # 防止打印重复的log日志
        if not logger.handlers:
            logger.setLevel(LOG_LEVEL)
            log_format = logging.Formatter('%(levelname)s - %(asctime)s - %(filename)s:%(lineno)d - [%(module)s:%(funcName)s] - %(message)s')
            # 日志输出到指定文件
            fh = RotatingFileHandler(filename=logfile_name,mode='a', maxBytes=5242880,
                                backupCount=7,
                                encoding='utf-8') # maxBytes:控制单个日志文件的大小,单位是字节,backupCount:用于控制日志文件的数量
            fh.setLevel(LOG_LEVEL)
            fh.setFormatter(log_format)

            # 再将相应的handler添加到logger
            logger.addHandler(fh)

            # 将日志输出到控制台
            sh = logging.StreamHandler()
            sh.setLevel(STREAM_LOG_LEVEL)
            sh.setFormatter(log_format)
            logger.addHandler(sh)

        return logger


apilog = RecordLog()
logs = apilog.output_logging()
- 解释说明:
① 在 setting.py 文件中获取日志存储路径
② 查看是否有该路径存在,没有则按 setting.py 中规定创建 log 的多级目录
③ 定义日志文件名(按日期命名)
from conf.setting import FILE_PATH,LOG_LEVEL,STREAM_LOG_LEVEL

log_path = FILE_PATH['log']   # 在 setting.py 文件中获取日志存储路径
if not os.path.exists(log_path):
    os.makedirs(log_path)
logfile_name = os.path.join(log_path, f'test.{time.strftime("%Y%m%d")}.log')
                                           """time.strftime("%Y%m%d"):生成当前日期"""
- 封装类:RecordLog(日志功能)
① 单例模式,创建名为’apilog’ 的 logger对象
② 设置日志输出级别 和 格式,并防止重复打印
③ 配置两个处理器,一个将日志输出到文件,一个将日志输出到终端
class RecordLog:
    """封装日志功能"""
    def output_logging(self):
        """返回一个配置好的 logger 对象"""
        # 获取一个名为 'apilog' 的 logger
        logger = logging.getLogger("apilog")
        # 防止重复添加 handler(避免日志重复打印)
        if not logger.handlers:
            # 设置 logger 的日志级别
            logger.setLevel(LOG_LEVEL)
            # 定义日志格式
            log_format = logging.Formatter(
                '%(levelname)s - %(asctime)s - %(filename)s:%(lineno)d - '
                '[%(module)s:%(funcName)s] - %(message)s'
            )
            # 1. 配置文件处理器:写入日志文件
            fh = RotatingFileHandler(
                filename=logfile_name,     # 日志文件路径
                mode='a',                  # 追加模式
                maxBytes=5 * 1024 * 1024,  # 单个文件最大 5MB
                backupCount=7,             # 最多保留 7 个备份文件
                encoding='utf-8'           # 编码格式
            )
            fh.setLevel(LOG_LEVEL)
            fh.setFormatter(log_format)
            logger.addHandler(fh)  # 添加到 logger

            # 2. 配置控制台处理器:输出到终端
            sh = logging.StreamHandler()
            sh.setLevel(STREAM_LOG_LEVEL)
            sh.setFormatter(log_format)
            logger.addHandler(sh)  # 添加到 logger

        return logger
| 代码 | 作用 |
|---|---|
| logging.getLogger(“apilog”) | 获取一个唯一的 logger 实例,名字叫 apilog |
| if not logger.handlers | 判断是否已添加处理器,防止重复添加导致日志重复 |
| logger.setLevel(LOG_LEVEL) | 设置 logger 本身的日志级别 |
| RotatingFileHandler | 将日志输出到文件,支持按大小分割日志文件,避免单个文件过大 |
| StreamHandler | 将日志输出到控制台(PyCharm 的运行窗口) |
| setFormatter() | 设置日志的显示格式 |
| addHandler() | 把 handler 加入 logger,实现多目的地输出 |
- 创建全局 logger 实例
logs 就是一个可以直接使用的日志对象
# 创建一个 RecordLog 对象
apilog = RecordLog()

# 获取配置好的 logger
logs = apilog.output_logging()
第三步:在测试用例中使用日志
import pytest
from common.run_yaml import ReadYamlData
from conf.setting import FILE_PATH
from common.sendrequests import SendRequest
from common.recordlog import apilog,logs

class TestLogin:
    readyaml = ReadYamlData()
    @pytest.mark.parametrize('params',readyaml.read(FILE_PATH['login']))
    def test_case01(self,params):
        # print(params)
        new_url = 'http://192.168.4.200'+params['baseInfo']['url']
        logs.info("获取到接口的地址:" + new_url)
- 日志级别使用建议:
| 方法 | 用途 |
|---|---|
| logs.debug(“…”) | 调试信息,如变量值、内部流程 |
| logs.info(“…”) | 正常流程,如“开始执行测试” |
| logs.warning(“…”) | 警告,如“响应时间超过2秒” |
| logs.error(“…”) | 错误,如“请求失败”、“断言失败” |
第四步:运行后查看日志
1.查看文件输出日志
INFO - 2025-09-17 10:29:18,989 - conftest.py:14 - [conftest:setup_test_env] - 开始测试会话,准备测试环境...
INFO - 2025-09-17 10:29:18,991 - test_login.py:15 - [test_login:test_case01] - 获取到接口的地址:http://192.168.4.200/api/basic/auth/loginWithoutCheckCode
INFO - 2025-09-17 10:29:40,240 - conftest.py:18 - [conftest:setup_test_env] - 测试会话结束,清理环境...
- 日志内容解析
日志内容按我们设定的 log 内容输出,分别为:级别 - 时间 - 文件名:行数 - [ 模块:方法名] - logs.info到的内容
 log_format = logging.Formatter(
                '%(levelname)s - %(asctime)s - %(filename)s:%(lineno)d - '
                '[%(module)s:%(funcName)s] - %(message)s'
            )
2.查看终端输出日志

- 日志内容解析
日志内容按我们设定的 log 内容输出,分别为:级别 - 时间 - 文件名:行数 - [ 模块:方法名] - logs.info到的内容
 log_format = logging.Formatter(
                '%(levelname)s - %(asctime)s - %(filename)s:%(lineno)d - '
                '[%(module)s:%(funcName)s] - %(message)s'
            )


 620
620

 被折叠的 条评论
为什么被折叠?
被折叠的 条评论
为什么被折叠?
 到【灌水乐园】发言


