


首先还是布局文件main.xml的Code:
- <?xml version="1.0" encoding="utf-8"?>
- <LinearLayout xmlns:android="http://schemas.android.com/apk/res/android"
- android:orientation="vertical"
- android:layout_width="fill_parent"
- android:layout_height="fill_parent"
- >
- <LinearLayout
- android:orientation="horizontal"
- android:layout_width="fill_parent"
- android:layout_height="wrap_content"
- >
- <EditText
- android:id="@+id/editText"
- android:layout_width="fill_parent"
- android:layout_height="wrap_content"
- android:layout_weight="1.0"
- android:lines="1"
- />
- <Button
- android:id="@+id/button"
- android:layout_width="wrap_content"
- android:layout_height="wrap_content"
- android:text="go"
- />
- </LinearLayout>
- <WebView
- android:id="@+id/webView"
- android:layout_width="fill_parent"
- android:layout_height="wrap_content"
- android:layout_weight="1.0"
- />
- </LinearLayout>
利用两个LineraLayout的嵌套显示,上面显示一个编辑框和按钮,下面的是webView用来显示网页,大家要注意两个LineraLayout的android:orientation的属性,最外面的这个是垂直显示,里面的是水平显示,最终得到效果如图:
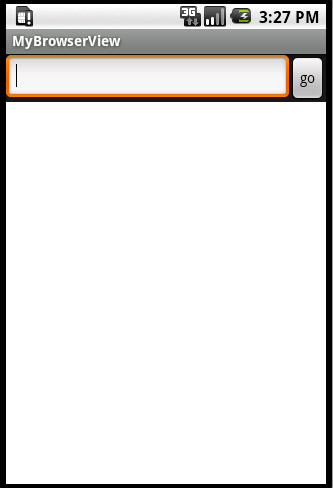
效果图下面的白色区域就是webView,等Java的Code完成后就能看出效果啦,期待吧!呵呵!
- import android.app.Activity;
- import android.widget.*;
- import android.os.Bundle;
- import android.webkit.*;
- import android.view.KeyEvent;
- import android.view.View;
- import android.view.View.*;
- public class MyBrowserView extends Activity {
- private EditText editText;
- private Button button;
- private WebView webView;
- /** Called when the activity is first created. */
- @Override
- public void onCreate(Bundle savedInstanceState) {
- super.onCreate(savedInstanceState);
- setContentView(R.layout.main);
- editText = (EditText) findViewById(R.id.editText);
- button = (Button) findViewById(R.id.button);
- webView = (WebView) findViewById(R.id.webView);
- button.setOnClickListener(new OnClickListener() {
- //同样为按钮绑定点击事件
- public void onClick(View v) {
- openBrowser();
- }
- });
- editText.setOnKeyListener(new OnKeyListener() {
- //同样为编辑框绑定键盘事件
- @Override
- public boolean onKey(View v, int keyCode, KeyEvent event) {
- // TODO Auto-generated method stub
- if(keyCode==KeyEvent.KEYCODE_ENTER) {
- openBrowser();
- return true;
- }
- return false;
- }
- });
- }
- //利用webView的loadUrl方法
- public void openBrowser() {
- webView.loadUrl("http://"+editText.getText().toString());
- }
- }
除了openBrowser()方法,其他的和用Intent打开网页是差不多的。
只要利用webView的loadUrl()方法就能加载网页。好的什么也不说啦!看效果图:

哈哈,不错吧,这样就方便打开别的网页啦!哦!差点忘了,要在AndroidManifest.xml中加入
<uses-permission android:name="android.permission.INTERNET">
否则就不能访问Internet哟!
到这里看了上一篇的同学可能就问,为什么上个例子不要加上这条语句呢?
因为通过Intent就能请求其他应用程序查看网页,而其他应用程序需要在自己的AndroidManifest.xml中请求获得访问Internet的权限。
不知道解释的清楚不?呵呵!
好了今天的就到这里了哟!祝大家一起进步!加油!


 2195
2195

 被折叠的 条评论
为什么被折叠?
被折叠的 条评论
为什么被折叠?
 到【灌水乐园】发言


