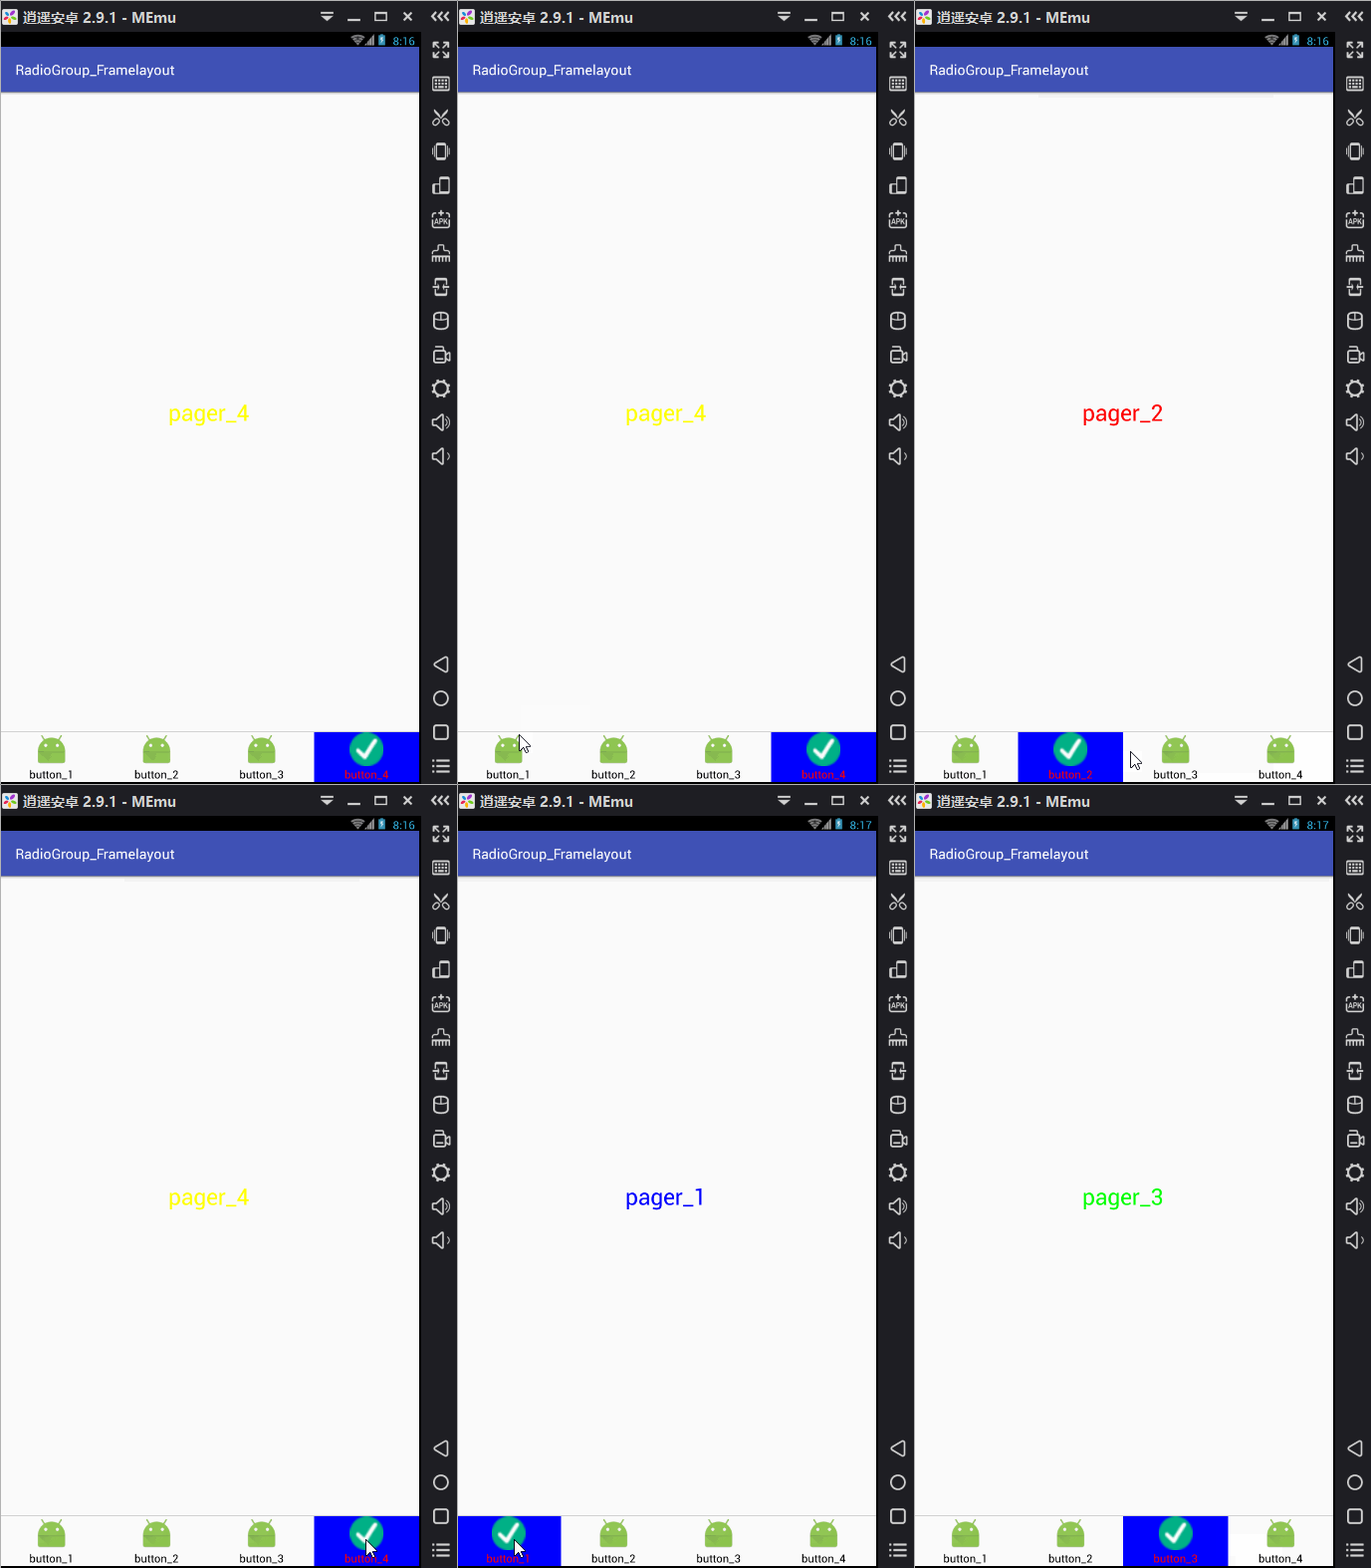
FrameLayout与Fragment禁止左右滑动

 
<? xml version= "1.0" encoding= "utf-8" ?>
< LinearLayout
xmlns: android = "http://schemas.android.com/apk/res/android" xmlns: app = "http://schemas.android.com/apk/res-auto"
xmlns: tools = "http://schemas.android.com/tools"  
android :layout_width= "match_parent"  
android :layout_height= "match_parent"
android :orientation= "vertical"
tools :context= "com.example.adoptionofreplies.view.ShouYeActivity">
<!--使用FrameLayout当做盛放Fragment对象的容器-->
< FrameLayout  
android :id= "@+id/framelayout"
android :layout_width= "match_parent"
android :layout_height= "0dp"
android :layout_weight= "0.9"  
/>
<!--中间为一条分割线-->  
< View
android :background= "#DEDEDE"  
android :layout_width= "match_parent"  
android :layout_height= "1dp"/>
< RadioGroup
android :layout_width= "match_parent"
android :layout_height= "0dp"  
android :layout_weight= "0.1"  
android :id= "@+id/group"  
android :orientation= "horizontal" >
< RadioButton
android :layout_width= "0dp"
android :layout_weight= "1"  
android :layout_height= "match_parent"  
android :checked= "true"  
android :button= "@null"  
android :gravity= "center"  
android :background= "@drawable/selector"  
android :id= "@+id/but01" />
< RadioButton
android :layout_width= "0dp"
android :layout_weight= "1"
android :layout_height= "match_parent"
android :button= "@null"  
android :gravity= "center"  
android :background= "@drawable/selector1"
android :id= "@+id/but02" />
< RadioButton  
android :layout_width= "0dp"
android :layout_weight= "1"  
android :layout_height= "match_parent"  
android :button= "@null"  
android :gravity= "center"  
android :background= "@drawable/selector2"
android :id= "@+id/but03" />
< RadioButton  
android :layout_width= "0dp"  
android :layout_weight= "1"  
android :layout_height= "match_parent"
android :button= "@null"  
android :gravity= "center"  
android :background= "@drawable/selector3"  
android :id= "@+id/but04" />
< RadioButton  
android :layout_width= "0dp"
android :layout_weight= "1"
android :layout_height= "match_parent"  
android :button= "@null"  
android :gravity= "center"  
android :background= "@drawable/selector4"  
android :id= "@+id/but05" />
</ RadioGroup>
</ LinearLayout>

//主界面
public class ShouYeActivity extends AppCompatActivity implements View.OnClickListener{
   
    private RadioGroup group;
    private List<Fragment> list;
    private FrameLayout frameLayout;
    private Button but01;
    private Button but02;
    private Button but03;
    private Button but04;
    private Button but05;
    private Fragment01 fragment_1;
    private Fragment02 fragment_2;
    private Fragment03 fragment_3;
    private Fragment04 fragment_4;
    private Fragment05 fragment_5;

    @Override
    protected void onCreate(Bundle savedInstanceState) {
        super.onCreate(savedInstanceState);
        //        去掉TitleBar(需要放到setContentView上面)
        requestWindowFeature(Window.FEATURE_NO_TITLE);
        setContentView(R.layout.activity_shou_ye);
        frameLayout = findViewById(R.id.framelayout);
        group = findViewById(R.id.group);

        but01 = findViewById(R.id.but01);
        but02 = findViewById(R.id.but02);
        but03 = findViewById(R.id.but03);
        but04 = findViewById(R.id.but04);
        but05 = findViewById(R.id.but05);

        //创建Fragment对象及集合

        fragment_1 = new Fragment01();

        fragment_2 = new Fragment02();

        fragment_3 = new Fragment03();

        fragment_4 = new Fragment04();

        fragment_5 = new Fragment05();

        list = new ArrayList<>();
        list.add(fragment_1);
        list.add(fragment_2);
        list.add(fragment_3);
        list.add(fragment_4);
        list.add(fragment_5);


        //时设置的按钮,设置第一个按钮为默认值

        group.check(R.id.but01);

        //设置RadioGroup开始//设置按钮点击监听

        but01.setOnClickListener(this);

        but02.setOnClickListener(this);

        but03.setOnClickListener(this);

        but04.setOnClickListener(this);

        but05.setOnClickListener(this);

        //初始时向容器中添加第一个Fragment对象

        addFragment(fragment_1);


    }
    @Override

    public void finish() {

        ViewGroup viewGroup = (ViewGroup) getWindow().getDecorView();

        viewGroup.removeAllViews();

        super.finish();

    }

    //点击事件处理


    public void onClick(View v) {

        //我们根据参数的id区别不同按钮

        //不同按钮对应着不同的Fragment对象页面

        switch (v.getId()) {

            case R.id.but01:

                addFragment(fragment_1);

                break;

            case R.id.but02:

                addFragment(fragment_2);

                break;

            case R.id.but03:

                addFragment(fragment_3);

                break;

            case R.id.but04:

                addFragment(fragment_4);

                break;
            case R.id.but05:

                addFragment(fragment_5);

                break;
            default:

                break;

        }
    }
    //向Activity中添加Fragment的方法

    public void addFragment(Fragment fragment) {


        //获得Fragment管理器

        FragmentManager fragmentManager = getSupportFragmentManager();

        //使用管理器开启事务

        FragmentTransaction fragmentTransaction = fragmentManager.beginTransaction();

        //使用事务替换Fragment容器中Fragment对象

        fragmentTransaction.replace(R.id.framelayout,fragment);

        //提交事务,否则事务不生效

        fragmentTransaction.commit();

    }

    }
  • 0
    点赞
  • 1
    收藏
    觉得还不错? 一键收藏
  • 0
    评论
1.创建一个NavigationDrawer Fragment NavigationDrawer Fragment即为侧滑菜单的实现,可以通过以下步骤创建: 1.1 新建一个Blank Fragment 在Android Studio中,右键点击app文件夹,选择New -> Fragment -> Fragment(Blank),并命名为NavigationDrawerFragment。 1.2 修改布局文件 在NavigationDrawerFragment的布局文件中,添加一个DrawerLayout作为根布局,然后在DrawerLayout中添加一个NavigationView,如下所示: <android.support.v4.widget.DrawerLayout xmlns:android="http://schemas.android.com/apk/res/android" xmlns:app="http://schemas.android.com/apk/res-auto" android:id="@+id/drawer_layout" android:layout_width="match_parent" android:layout_height="match_parent"> <FrameLayout android:id="@+id/container" android:layout_width="match_parent" android:layout_height="match_parent"/> <android.support.design.widget.NavigationView android:id="@+id/navigation_view" android:layout_width="wrap_content" android:layout_height="match_parent" android:layout_gravity="start" app:headerLayout="@layout/navigation_header" app:menu="@menu/navigation_menu"/> </android.support.v4.widget.DrawerLayout> 其中,NavigationView中的headerLayout属性可以指定一个布局文件作为NavigationView的头部,例如: <android.support.design.widget.NavigationView ... app:headerLayout="@layout/navigation_header" ... /> 1.3 创建菜单文件 在res文件夹中创建一个menu文件夹,并在其中创建一个navigation_menu.xml文件,用于定义菜单项。例如: <menu xmlns:android="http://schemas.android.com/apk/res/android"> <group android:checkableBehavior="single"> <item android:id="@+id/nav_item_1" android:checked="true" android:icon="@drawable/ic_menu_item_1" android:title="@string/menu_item_1"/> <item android:id="@+id/nav_item_2" android:icon="@drawable/ic_menu_item_2" android:title="@string/menu_item_2"/> <item android:id="@+id/nav_item_3" android:icon="@drawable/ic_menu_item_3" android:title="@string/menu_item_3"/> </group> </menu> 1.4 实现DrawerLayout的开关 在NavigationDrawerFragment的onCreateView方法中,可以通过以下代码实现DrawerLayout的开关: DrawerLayout drawerLayout = (DrawerLayout) view.findViewById(R.id.drawer_layout); ActionBarDrawerToggle toggle = new ActionBarDrawerToggle( getActivity(), drawerLayout, toolbar, R.string.navigation_drawer_open, R.string.navigation_drawer_close); drawerLayout.addDrawerListener(toggle); toggle.syncState(); 其中,ActionBarDrawerToggle是一个内置的开关控件,可以在DrawerLayout的开关状态下自动切换ActionBar的图标和标题,同时也支持手势滑动开关。 2.创建一个Content Fragment Content Fragment即为导航栏的内容部分,可以通过以下步骤创建: 2.1 新建一个Blank Fragment 在Android Studio中,右键点击app文件夹,选择New -> Fragment -> Fragment(Blank),并命名为ContentFragment。 2.2 修改布局文件 在ContentFragment的布局文件中,添加一个LinearLayout作为根布局,然后在LinearLayout中添加需要显示的内容,例如: <LinearLayout xmlns:android="http://schemas.android.com/apk/res/android" android:layout_width="match_parent" android:layout_height="match_parent" android:orientation="vertical"> <TextView android:layout_width="match_parent" android:layout_height="wrap_content" android:text="@string/content"/> </LinearLayout> 其中,TextView可以替换为其他需要显示的控件,例如ListView、RecyclerView等。 3.实现导航栏的切换 通过以上步骤,已经创建了一个带有侧滑菜单和内容部分的Activity,下面可以通过NavigationView的点击事件实现导航栏的切换。 在NavigationDrawerFragment中,可以通过以下代码实现NavigationView的点击事件: NavigationView navigationView = (NavigationView) view.findViewById(R.id.navigation_view); navigationView.setNavigationItemSelectedListener(new NavigationView.OnNavigationItemSelectedListener() { @Override public boolean onNavigationItemSelected(@NonNull MenuItem item) { Fragment fragment = null; switch (item.getItemId()) { case R.id.nav_item_1: fragment = ContentFragment.newInstance(1); break; case R.id.nav_item_2: fragment = ContentFragment.newInstance(2); break; case R.id.nav_item_3: fragment = ContentFragment.newInstance(3); break; } if (fragment != null) { FragmentManager fragmentManager = getFragmentManager(); fragmentManager.beginTransaction() .replace(R.id.container, fragment) .commit(); DrawerLayout drawerLayout = (DrawerLayout) getActivity().findViewById(R.id.drawer_layout); drawerLayout.closeDrawer(GravityCompat.START); } return true; } }); 其中,onNavigationItemSelected方法中根据点击的菜单项创建对应的ContentFragment,并将其替换到布局文件中的container中。最后,需要关闭DrawerLayout的侧滑菜单。 至此,一个基本的导航栏就实现了,可以通过添加菜单项和内容部分来扩展导航栏的功能。
评论
添加红包

请填写红包祝福语或标题

红包个数最小为10个

红包金额最低5元

当前余额3.43前往充值 >
需支付:10.00
成就一亿技术人!
领取后你会自动成为博主和红包主的粉丝 规则
hope_wisdom
发出的红包
实付
使用余额支付
点击重新获取
扫码支付
钱包余额 0

抵扣说明:

1.余额是钱包充值的虚拟货币,按照1:1的比例进行支付金额的抵扣。
2.余额无法直接购买下载,可以购买VIP、付费专栏及课程。

余额充值