Servlet+JSP+JavaBean开发模式(MVC)介绍
Servlet+JSP+JavaBean(MVC)模式适合开发复杂的web应用,在这种模式下,servlet负责处理用户请求,jsp负责数据显示,javabean负责封装数据。Servlet+JSP+JavaBean模式程序各个模块之间层次清晰,web开发推荐采用此种模式。
这里以一个最常用的用户登录注册程序来讲解Servlet+JSP+JavaBean开发模式,通过这个用户登录注册程序综合案例,把之前的学过的XML、Xpath、Servlet、jsp的知识点都串联起来。
创建MVC架构的Web项目
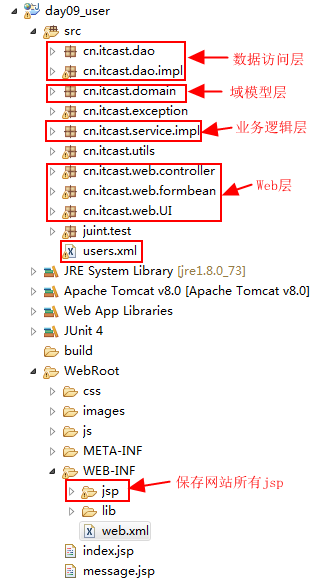
在Eclipse中新创建一个day09_user项目,导入项目所需要的开发包(jar包),创建项目所需要的包,在Java开发中,架构的层次是以包的形式体现出来的。
项目所需要的开发包(jar包):
| 序号 | 开发包名称 | 描述 |
|---|
| 1 | dom4j-1.6.1.jar | dom4j用于操作XML文件 |
| 2 | jaxen-1.1-beta-6.jar | 用于解析XPath表达式 |
| 3 | commons-beanutils-1.9.2.jar | 工具类,用于处理bean对象 |
| 4 | commons-logging-1.2.jar | commons-beanutils-1.9.2.jar的依赖jar包 |
| 5 | commons-collections-3.2.2.jar | commons-beanutils-1.9.2.jar的依赖jar包 |
| 6 | stl-1.2.jar | jstl标签库和EL表达式依赖包 |
项目所需要的包:
| 序号 | 包名 | 描述 | 所属层次 |
|---|
| 1 | cn.itcast.domain | 存放系统的JavaBean类(只包含简单的属性以及属性对应的get和set方法,不包含具体的业务处理方法),提供给【数据访问层】、【业务逻辑层】、【Web层】来使用 | domain(域模型)层 |
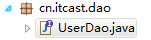
| 2 | cn.itcast.dao | 存放访问数据库的操作接口类 | 数据访问层 |
| 3 | cn.itcast.dao.impl | 存放访问数据库的操作接口的实现类 | 数据访问层 |
| 4 | cn.itcast.service | 存放处理系统业务接口类 | 业务逻辑层 |
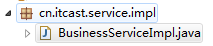
| 5 | cn.itcast.service.impl | 存放处理系统业务接口的实现类 | 业务逻辑层 |
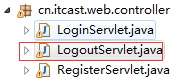
| 6 | cn.itcast.web.controller | 存放作为系统控制器的Servlet(处理请求的servlet) | Web层(表现层) |
| 7 | cn.itcast.web.listener | 存放系统用到的监听器(Listener) | Web层(表现层) |
| 8 | cn.itcast.web.filter | 存放系统用到的过滤器(Filter) | Web层(表现层) |
| 9 | cn.itcast.web.UI | 给用户提供用户界面。由于在严格的MVC模式下,jsp被保护起来,禁止外界直接访问,用户要注册,需要拿一个表单页面,需要用一个servlet转到jsp上面去,有一部分servlet专门给用户提供用户界面,也即是说在实际开发里面有一部分servlet是用来处理请求,有一部分servlet专门用来接收请求之后转到jsp,给用户提供用户界面 | Web层(表现层) |
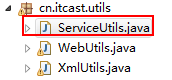
| 10 | cn.itcast.utils | 存放系统的通用工具类,提供给【数据访问层】、【业务逻辑层】、【Web层】来使用 | |
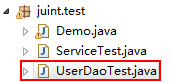
| 11 | juint.test | 存放系统的测试类 | |
一个良好的JavaWeb项目架构应该具有以上的11个包,这样显得层次分明,各个层之间的职责也很清晰明了,搭建JavaWeb项目架构时,就按照上面的1~11的序号顺序创建包:domain→dao→dao.impl→service→service.impl→web.controller→web.UI→web.filter→web.listener→util→junit.test,包的层次创建好了,项目的架构也就定下来了,当然,在实际的项目开发中,也不一定是完完全全按照上面说的来创建包的层次结构,而是根据项目的实际情况,可能还需要创建其他的包,这个得根据项目的需要来定了。
创建代表数据库的xml文件:
在类目录(src目录)下创建一个代表数据库的users.xml文件。
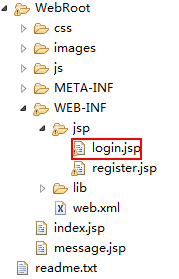
在WEB-INF目录下创建一个jsp目录,jsp目录存放系统的一些受保护(不允许用户直接通过URL地址访问)的jsp页面,用户要想访问这些受保护的jsp页面,那么只能通过cn.itcast.web.UI这个包里面的Servlet。
创建好的项目架构如下图所示:
分层架构的代码编写
分层架构的代码也是按照【域模型层(domain)】→【数据访问层(dao、dao.impl)】→【业务逻辑层(service、service.impl)】→【表现层(web.controller、web.UI、web.filter、web.listener)】→【工具类(util)】→【测试类(junit.test)】的顺序进行编写的。
开发domain层
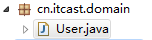
在cn.itcast.domain包下创建一个User类。
User类具体代码如下:
public class User {
    private String id;
    private String username;
    private String password;
    private String email;
    private Date birthday;
    private String nickname;

    public String getId() {
        return id;
    }
    public void setId(String id) {
        this.id = id;
    }
    public String getUsername() {
        return username;
    }
    public void setUsername(String username) {
        this.username = username;
    }
    public String getPassword() {
        return password;
    }
    public void setPassword(String password) {
        this.password = password;
    }
    public String getEmail() {
        return email;
    }
    public void setEmail(String email) {
        this.email = email;
    }
    public Date getBirthday() {
        return birthday;
    }
    public void setBirthday(Date birthday) {
        this.birthday = birthday;
    }
    public String getNickname() {
        return nickname;
    }
    public void setNickname(String nickname) {
        this.nickname = nickname;
    }

}
- 1
- 2
- 3
- 4
- 5
- 6
- 7
- 8
- 9
- 10
- 11
- 12
- 13
- 14
- 15
- 16
- 17
- 18
- 19
- 20
- 21
- 22
- 23
- 24
- 25
- 26
- 27
- 28
- 29
- 30
- 31
- 32
- 33
- 34
- 35
- 36
- 37
- 38
- 39
- 40
- 41
- 42
- 43
- 44
- 45
- 46
- 1
- 2
- 3
- 4
- 5
- 6
- 7
- 8
- 9
- 10
- 11
- 12
- 13
- 14
- 15
- 16
- 17
- 18
- 19
- 20
- 21
- 22
- 23
- 24
- 25
- 26
- 27
- 28
- 29
- 30
- 31
- 32
- 33
- 34
- 35
- 36
- 37
- 38
- 39
- 40
- 41
- 42
- 43
- 44
- 45
- 46
开发数据访问层(dao、dao.impl)
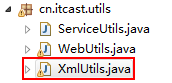
在开发数据访问层时,由于要编写得到Document对象和更新文档这些工具性质的操作,所以应该把他们放在一个工具类XmlUtils中。在cn.itcast.utils包下创建一个XmlUtils类。
XmlUtils类具体代码如下:
public class XmlUtils {

    private static String filepath;

    static {
        filepath = XmlUtils.class.getClassLoader().getResource("users.xml").getPath();
    }

    public static Document getDocument() throws DocumentException {
        SAXReader reader = new SAXReader();
        Document document = reader.read(new File(filepath));
        return document;
    }

    public static void write2Xml(Document document) throws Exception, FileNotFoundException {
        OutputFormat format = OutputFormat.createPrettyPrint();
        format.setEncoding("UTF-8");
        XMLWriter writer = new XMLWriter( new FileOutputStream(filepath), format );
        writer.write( document );
        writer.close();
    }
}
- 1
- 2
- 3
- 4
- 5
- 6
- 7
- 8
- 9
- 10
- 11
- 12
- 13
- 14
- 15
- 16
- 17
- 18
- 19
- 20
- 21
- 22
- 1
- 2
- 3
- 4
- 5
- 6
- 7
- 8
- 9
- 10
- 11
- 12
- 13
- 14
- 15
- 16
- 17
- 18
- 19
- 20
- 21
- 22
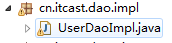
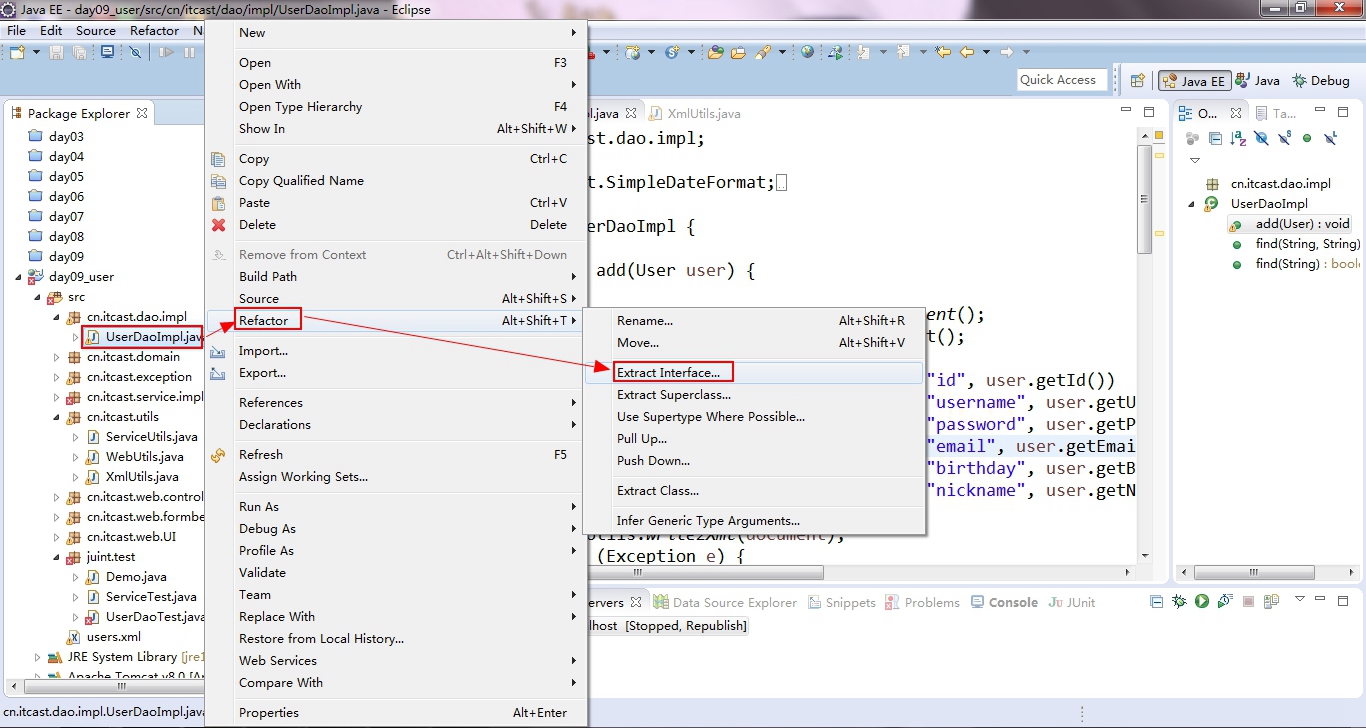
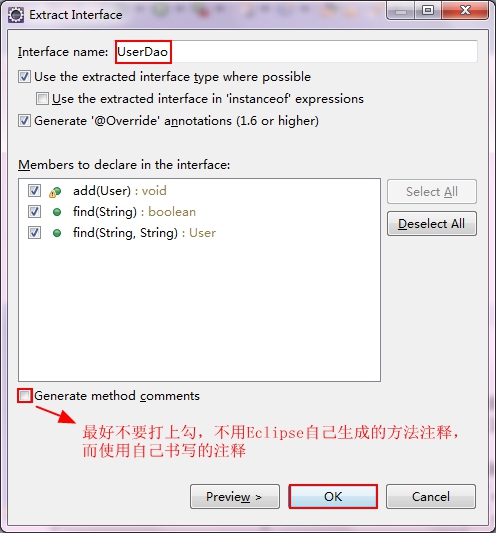
在cn.itcast.dao.impl包下创建一个UserDaoImpl类。
UserDaoImpl类是UserDao接口的具体实现类,对于接口的实现类命名方式,我习惯以”接口名+impl”形式来命名:UserDao(接口)→UserDaoImpl(实现类)。
先编写UserDaoImpl类的代码如下:
public class UserDaoImpl {
public void add(User user) {
try {
Document document = XmlUtils.getDocument();
Element root = document.getRootElement();
root.addElement("user").addAttribute("id", user.getId())
.addAttribute("username", user.getUsername())
.addAttribute("password", user.getPassword())
.addAttribute("email", user.getEmail())
.addAttribute("birthday", user.getBirthday()==null?"":user.getBirthday().toLocaleString())
.addAttribute("nickname", user.getNickname());
XmlUtils.write2Xml(document);
} catch (Exception e) {
throw new RuntimeException(e);
}
}
public User find(String username, String password) {
try {
Document document = XmlUtils.getDocument();
Element e = (Element) document.selectSingleNode("//user[@username='"+username+"' and @password='"+password+"']");
if(e == null) {
return null;
}
User user = new User();
String date = e.attributeValue("birthday");
if(date == null || date.equals("")) {
user.setBirthday(null);
} else {
SimpleDateFormat df = new SimpleDateFormat("yyyy-MM-dd");
user.setBirthday(df.parse(date));
}
user.setEmail(e.attributeValue("email"));
user.setId(e.attributeValue("id"));
user.setNickname(e.attributeValue("nickname"));
user.setPassword(e.attributeValue("password"));
user.setUsername(e.attributeValue("username"));
return user;
} catch (Exception e) {
throw new RuntimeException(e);
}
}
public boolean find(String username) {
try {
Document document = XmlUtils.getDocument();
Element e = (Element) document.selectSingleNode("//user[@username='"+username+"']");
if(e == null) {
return false;
}
return true;
} catch (Exception e) {
throw new RuntimeException(e);
}
}
}
- 1
- 2
- 3
- 4
- 5
- 6
- 7
- 8
- 9
- 10
- 11
- 12
- 13
- 14
- 15
- 16
- 17
- 18
- 19
- 20
- 21
- 22
- 23
- 24
- 25
- 26
- 27
- 28
- 29
- 30
- 31
- 32
- 33
- 34
- 35
- 36
- 37
- 38
- 39
- 40
- 41
- 42
- 43
- 44
- 45
- 46
- 47
- 48
- 49
- 50
- 51
- 52
- 53
- 54
- 55
- 56
- 57
- 58
- 59
- 60
- 61
- 62
- 63
- 64
- 65
- 66
- 67
编写完UserDaoImpl(实现类),我们可以通过如下方式:
此时UserDaoImpl类的具体代码最终变为:
public class UserDaoImpl implements UserDao {
@Override
public void add(User user) {
try {
Document document = XmlUtils.getDocument();
Element root = document.getRootElement();
root.addElement("user").addAttribute("id", user.getId())
.addAttribute("username", user.getUsername())
.addAttribute("password", user.getPassword())
.addAttribute("email", user.getEmail())
.addAttribute("birthday", user.getBirthday()==null?"":user.getBirthday().toLocaleString())
.addAttribute("nickname", user.getNickname());
XmlUtils.write2Xml(document);
} catch (Exception e) {
throw new RuntimeException(e);
}
}
@Override
public User find(String username, String password) {
try {
Document document = XmlUtils.getDocument();
Element e = (Element) document.selectSingleNode("//user[@username='"+username+"' and @password='"+password+"']");
if(e == null) {
return null;
}
User user = new User();
String date = e.attributeValue("birthday");
if(date == null || date.equals("")) {
user.setBirthday(null);
} else {
SimpleDateFormat df = new SimpleDateFormat("yyyy-MM-dd");
user.setBirthday(df.parse(date));
}
user.setEmail(e.attributeValue("email"));
user.setId(e.attributeValue("id"));
user.setNickname(e.attributeValue("nickname"));
user.setPassword(e.attributeValue("password"));
user.setUsername(e.attributeValue("username"));
return user;
} catch (Exception e) {
throw new RuntimeException(e);
}
}
@Override
public boolean find(String username) {
try {
Document document = XmlUtils.getDocument();
Element e = (Element) document.selectSingleNode("//user[@username='"+username+"']");
if(e == null) {
return false;
}
return true;
} catch (Exception e) {
throw new RuntimeException(e);
}
}
}
- 1
- 2
- 3
- 4
- 5
- 6
- 7
- 8
- 9
- 10
- 11
- 12
- 13
- 14
- 15
- 16
- 17
- 18
- 19
- 20
- 21
- 22
- 23
- 24
- 25
- 26
- 27
- 28
- 29
- 30
- 31
- 32
- 33
- 34
- 35
- 36
- 37
- 38
- 39
- 40
- 41
- 42
- 43
- 44
- 45
- 46
- 47
- 48
- 49
- 50
- 51
- 52
- 53
- 54
- 55
- 56
- 57
- 58
- 59
- 60
- 61
- 62
- 63
- 64
- 65
- 66
- 67
- 68
- 69
- 70
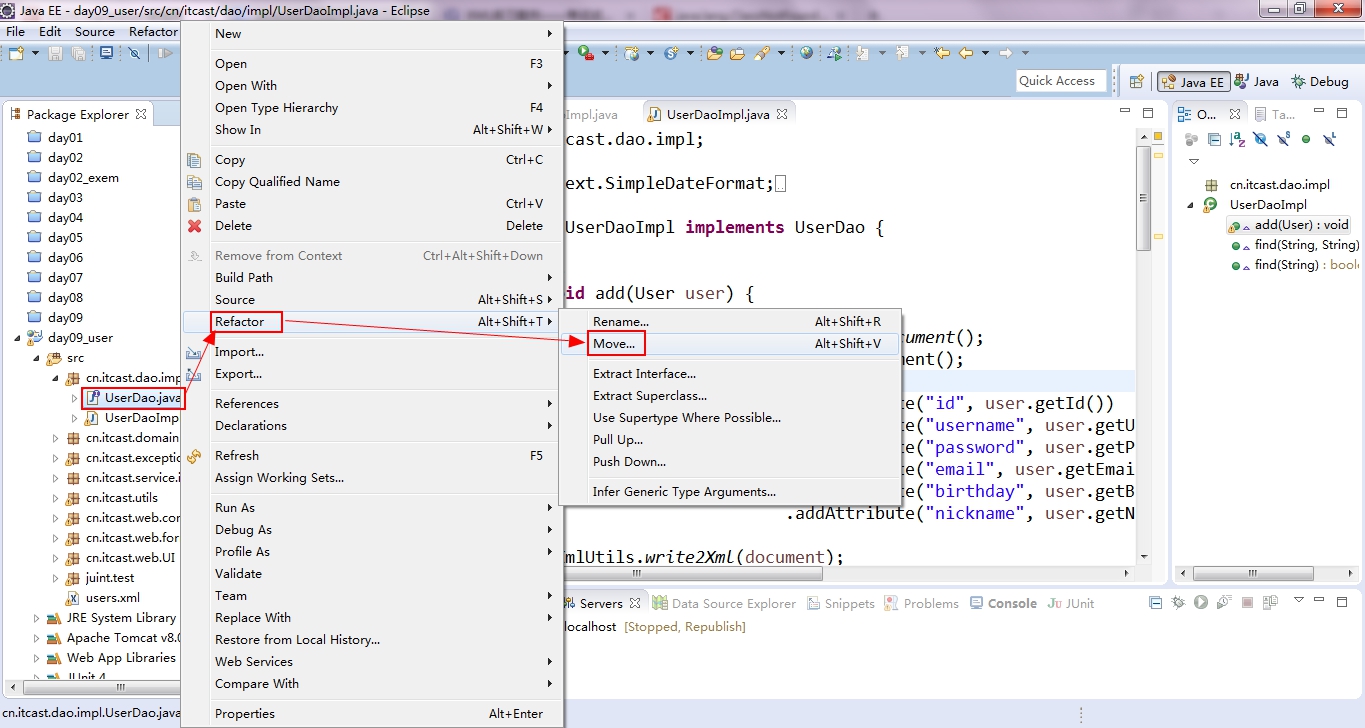
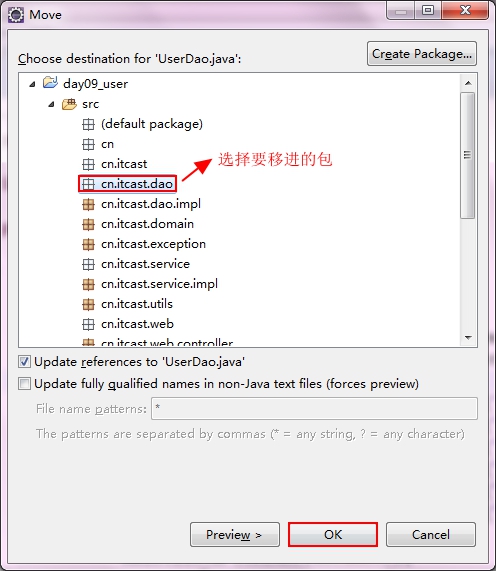
而且在it.cast.dao包下也创建了一个UserDao接口类。
UserDao接口的具体代码如下:
public interface UserDao {
void add(User user);
User find(String username, String password);
boolean find(String username);
}
对于接口中的方法定义,这个只能是根据具体的业务来分析需要定义哪些方法了,但是无论是多么复杂的业务,都离不开基本的CRUD(增删改查)操作,Dao层是直接和数据库交互的,所以Dao层的接口一般都会有增删改查这四种操作的相关方法。
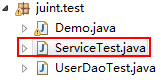
开发完数据访问层,一定要对程序已编写好的部分代码进行测试,做一步,测试一步,以免整个程序完成后由于页面太多或者是代码量太大给查找错误造成更大的负担!所以,在juint.test包下创建了一个UserDaoTest类。
UserDaoTest类的具体代码如下:
public class UserDaoTest {
@Test
public void testAdd() {
User user = new User();
user.setBirthday(new Date());
user.setEmail("bb@sina.com");
user.setId("2142354354");
user.setNickname("李子");
user.setUsername("bbbb");
user.setPassword("123");
UserDao dao = new UserDaoImpl();
dao.add(user);
}
@Test
public void testFind() {
UserDao dao = new UserDaoImpl();
dao.find("aaa", "123");
}
@Test
public void testFindByUsername() {
UserDao dao = new UserDaoImpl();
System.out.println(dao.find("adsad"));
}
}
- 1
- 2
- 3
- 4
- 5
- 6
- 7
- 8
- 9
- 10
- 11
- 12
- 13
- 14
- 15
- 16
- 17
- 18
- 19
- 20
- 21
- 22
- 23
- 24
- 25
- 26
- 27
- 1
- 2
- 3
- 4
- 5
- 6
- 7
- 8
- 9
- 10
- 11
- 12
- 13
- 14
- 15
- 16
- 17
- 18
- 19
- 20
- 21
- 22
- 23
- 24
- 25
- 26
- 27
经测试,没发现任何错误,即开发完数据访问层。
开发service层(service层对web层提供所有的业务服务)
在我的笔记——客户端防表单重复提交和服务器端session防表单重复提交中有记录md5算法技术在实际开发中的应用,其应用之一就是用来保存用户的密码。所以我们在注册用户时,将用户的密码保存到数据库中时,应该将其md5一把,然后再保存到数据库中,这样保存的密码会更加安全。所以把要编写的代码存放到一个工具类ServiceUtils中。
在cn.itcast.utils包中创建一个ServiceUtils工具类。
ServiceUtils工具类的具体代码如下:
public class ServiceUtils {
public static String md5(String message) {
try {
MessageDigest md = MessageDigest.getInstance("md5");
byte[] md5 = md.digest(message.getBytes());
BASE64Encoder encoder = new BASE64Encoder();
return encoder.encode(md5);
} catch (NoSuchAlgorithmException e) {
throw new RuntimeException(e);
}
}
}
在cn.itcast.service.impl包中创建BusinessServiceImpl类。
UserServiceImpl类为UserService接口的具体实现类,具体代码如下:
public class BusinessServiceImpl {
private UserDao dao = new UserDaoImpl();
public void register(User user) throws UserExistException {
boolean b = dao.find(user.getUsername());
if(b) {
throw new UserExistException();
} else {
user.setPassword(ServiceUtils.md5(user.getPassword()));
dao.add(user);
}
}
public User login(String username, String password) {
password = ServiceUtils.md5(password);
return dao.find(username, password);
}
}
- 1
- 2
- 3
- 4
- 5
- 6
- 7
- 8
- 9
- 10
- 11
- 12
- 13
- 14
- 15
- 16
- 17
- 18
- 19
- 20
- 21
- 22
- 23
- 24
- 25
- 26
- 27
- 28
- 29
- 30
- 31
- 32
- 33
- 34
- 1
- 2
- 3
- 4
- 5
- 6
- 7
- 8
- 9
- 10
- 11
- 12
- 13
- 14
- 15
- 16
- 17
- 18
- 19
- 20
- 21
- 22
- 23
- 24
- 25
- 26
- 27
- 28
- 29
- 30
- 31
- 32
- 33
- 34
从以上代码可以看到业务逻辑层和数据访问层是紧密联系在一起的,所以业务逻辑层和数据访问层要解耦,要解耦,有两张方法:
在这里不作详细讨论,会将项目搞得越来越复杂,而我们重点是要深刻认识Servlet+JSP+JavaBean这种开发模式,如果在此作深入讨论,会本末倒置!!!
发现要注册的用户已存在,要给web层抛一个编译时异常,提醒web层处理这个异常,给用户一个友好提示。所以要在cn.itcast.exception包中创建一个UserExistException类。

UserExistException类的具体代码如下:
public class UserExistException extends Exception {
public UserExistException() {
}
public UserExistException(String message) {
super(message);
}
public UserExistException(Throwable cause) {
super(cause);
}
public UserExistException(String message, Throwable cause) {
super(message, cause);
}
public UserExistException(String message, Throwable cause, boolean enableSuppression, boolean writableStackTrace) {
super(message, cause, enableSuppression, writableStackTrace);
}
}
- 1
- 2
- 3
- 4
- 5
- 6
- 7
- 8
- 9
- 10
- 11
- 12
- 13
- 14
- 15
- 16
- 17
- 18
- 19
- 20
- 21
- 22
- 23
- 24
- 25
- 26
- 27
- 1
- 2
- 3
- 4
- 5
- 6
- 7
- 8
- 9
- 10
- 11
- 12
- 13
- 14
- 15
- 16
- 17
- 18
- 19
- 20
- 21
- 22
- 23
- 24
- 25
- 26
- 27
注意:在业务逻辑层中我并没有设计UserService接口类,如果有必要的话,你也可以自行设计。
同理,开发完业务逻辑层,一定要对程序已编写好的部分代码进行测试,做一步,测试一步,以免整个程序完成后由于页面太多或者是代码量太大给查找错误造成更大的负担!所以,在juint.test包下创建了一个ServiceTest类。
ServiceTest类的具体代码如下:
public class ServiceTest {

    @Test
    public void testRegister() {
        User user = new User();
        user.setBirthday(new Date());
        user.setEmail("bb@sina.com");
        user.setId("2142354354");
        user.setNickname("李子");
        user.setUsername("lizi");
        user.setPassword("123");

        BusinessServiceImpl service = new BusinessServiceImpl();
        try {
            service.register(user);
            System.out.println("注册成功!!!");
        } catch (UserExistException e) {
            System.out.println("用户已存在");
        }
    }

    @Test
    public void testLogin() {
        BusinessServiceImpl service = new BusinessServiceImpl();
        User user = service.login("lizi", "123");
        System.out.println(user);
    }
}
- 1
- 2
- 3
- 4
- 5
- 6
- 7
- 8
- 9
- 10
- 11
- 12
- 13
- 14
- 15
- 16
- 17
- 18
- 19
- 20
- 21
- 22
- 23
- 24
- 25
- 26
- 27
- 28
- 1
- 2
- 3
- 4
- 5
- 6
- 7
- 8
- 9
- 10
- 11
- 12
- 13
- 14
- 15
- 16
- 17
- 18
- 19
- 20
- 21
- 22
- 23
- 24
- 25
- 26
- 27
- 28
经测试,没发现任何错误,即开发完业务逻辑层。
开发Web层
开发注册功能
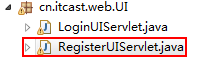
在cn.itcast.web.UI包下编写一个RegisterUIServlet为用户提供注册界面。
RegisterUIServlet收到用户请求后,就跳到register.jsp。RegisterUIServlet的代码如下:
public class RegisterUIServlet extends HttpServlet {
protected void doGet(HttpServletRequest request, HttpServletResponse response)
throws ServletException, IOException {
request.getRequestDispatcher("/WEB-INF/jsp/register.jsp").forward(request, response);
}
protected void doPost(HttpServletRequest request, HttpServletResponse response)
throws ServletException, IOException {
doGet(request, response);
}
}
在/WEB-INF/jsp/目录下编写用户注册的jsp页面register.jsp。
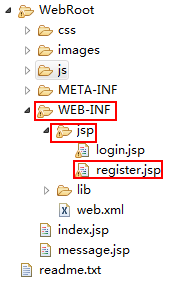
凡是位于WEB-INF目录下的jsp页面是无法直接通过URL地址直接访问的。

在开发中如果项目中有一些敏感web资源不想被外界直接访问,那么可以考虑将这些敏感的web资源放到WEB-INF目录下,这样就可以禁止外界直接通过URL来访问了。
register.jsp页面的代码如下:
<%@ page language="java" contentType="text/html; charset=UTF-8"
pageEncoding="UTF-8"%>
<!DOCTYPE html PUBLIC "-//W3C//DTD HTML 4.01 Transitional//EN" "http://www.w3.org/TR/html4/loose.dtd">
<html>
<head>
<meta http-equiv="Content-Type" content="text/html; charset=UTF-8">
<link href="${pageContext.request.contextPath }/css/auto.css" rel="stylesheet" type="text/css" />
<title>注册界面</title>
</head>
<body>
<div class="header wrapfix">
<a href="###" target="_blank"><img src="${pageContext.request.contextPath }/images/toplogo.gif"
class="logo" alt="首页" /></a>
<div class="help">
<a href="###" target="_blank" title="">首页</a> | <a href="###"
target="_blank" title="帮助中心">帮助中心</a> <span class="tel">客服热线:
13......</span>
</div>
</div>
<div class="clearfix"></div>
<div class="wrap">
<div class="login_main_white">
<div class="login_main_announce">
<ol>
<b>注册须知:</b>
<li>1:在本站注册的会员,必须遵守《互联网电子公告服务管理规定》,不得在本站发表诽谤他人,侵犯他人隐私,侵犯他人知识产权,传播病毒,政治言论,商业机密等信息。</li>
<li>2:在所有在本站发表的文章,本站都具有最终编辑权,并且保留用于印刷或向第三方发表的权利,如果你的资料不齐全,我们将有权不作任何通知使用你在本站发布的作品。</li>
</ol>
</div>
<div class="clearfix"></div>
</div>
<dl>
<form name="form2" action="${pageContext.request.contextPath }/RegisterServlet" method="post">
<dd>登陆帐号:
<input type="hidden" name="fmdo" value="user"><input
type="hidden" name="dopost" value="regok"><input
name="username" type="text" class="log_input2"
onchange="TestUserOk()" />
</dd>
<dd>
登陆密码: <input name="password" type="password" class="log_input2" />
</dd>
<dd>
重复密码: <input name="password2" type="password" class="log_input2" />
</dd>
<dd>
电子邮箱: <input name="email" type="text" class="log_input2" />
</dd>
<dd>
    生日:   <input name="birthday" type="text" class="sang_Calender" />
</dd>
<script type="text/javascript" src="${pageContext.request.contextPath }/js/datetime.js"></script>
<dd>
您的昵称: <input name="nickname" type="text" class="log_input2" />
</dd>
<dd id="com" style="display: none;">
公司名称: <input name="comname" type="text" class="log_input2" />(公司用户填写)
</dd>
<dd>
验证码: <input name="vdcode" type="text" class="log_input2" />
<img src="" name='1' id="1" alt="换一张" />
</dd>
<dd>
<br />
<input type="submit" name="Submit2" value="确定注册" class="Btn" />
<input type="reset" name="Submit22" value="重 置"
class="Btn"> <br />
<br />
</dd>
</form>
</dl>
</div>
<div class="clearfix"></div>
<div class="footet_box">
<div class="footet_dh">
<a href="/abouts/index.html">网站简介</a> - <a href="/abouts/team.html">管理团队</a>
- <a href="/abouts/services.html">产品与服务</a> - <a
href="/abouts/jobs.html">招贤纳士</a> - <a href="/abouts/marketing.html">网络营销</a>
- <a href="/abouts/contact.html">联系我们</a>
</div>
<div class="footet_bj">
</div>
</div>
</body>
</html>
- 1
- 2
- 3
- 4
- 5
- 6
- 7
- 8
- 9
- 10
- 11
- 12
- 13
- 14
- 15
- 16
- 17
- 18
- 19
- 20
- 21
- 22
- 23
- 24
- 25
- 26
- 27
- 28
- 29
- 30
- 31
- 32
- 33
- 34
- 35
- 36
- 37
- 38
- 39
- 40
- 41
- 42
- 43
- 44
- 45
- 46
- 47
- 48
- 49
- 50
- 51
- 52
- 53
- 54
- 55
- 56
- 57
- 58
- 59
- 60
- 61
- 62
- 63
- 64
- 65
- 66
- 67
- 68
- 69
- 70
- 71
- 72
- 73
- 74
- 75
- 76
- 77
- 78
- 79
- 80
- 81
- 82
- 83
- 84
- 85
- 86
- 87
- 88
- 89
- 90
- 91
- 92
- 93
- 94
- 95
- 96
- 97
- 98
- 99
- 100
- 101
- 102
- 103
以上注册页面是我在网上扒的html登录注册模板——

中的其中一个页面,并做出稍微的修改。
由于生日输入框中要输入日期,所以我也从网上扒下一个日期控件——

用法如下代码所示:
<dd>
生日: <input name="birthday" type="text" class="sang_Calender" />
</dd>
<script type="text/javascript" src="${pageContext.request.contextPath }/js/datetime.js"></script>
register.jsp中的<form action="${pageContext.request.contextPath}/servlet/RegisterServlet" method="post">指明表单提交后,交给RegisterServlet进行处理。
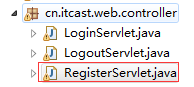
在cn.itcast.web.controller包下编写用于处理用户注册的RegisterServlet。
RegisterServlet担任着以下几个职责:
- 接收客户端提交到服务端的表单数据。
- 校验表单数据的合法性,如果校验失败跳回到register.jsp,并回显错误信息。
- 如果校验通过,调用service层向数据库中注册用户。
为了方便RegisterServlet接收表单数据和校验表单数据,在此我设计一个用于校验注册表单数据的RegisterForm类,它代表提交的表单,RegisterForm封装提交表单的数据。再写一个WebUtils工具类,封装客户端提交的表单数据到RegisterForm中。
在cn.itcast.web.formbean包下创建一个用于校验注册表单数据RegisterForm。
RegisterForm代码如下:
public class RegisterForm {
private String username;
private String password;
private String password2;
private String email;
private String birthday;
private String nickname;
private Map errors = new HashMap();
public Map getErrors() {
return errors;
}
public void setErrors(Map errors) {
this.errors = errors;
}
public String getUsername() {
return username;
}
public void setUsername(String username) {
this.username = username;
}
public String getPassword() {
return password;
}
public void setPassword(String password) {
this.password = password;
}
public String getPassword2() {
return password2;
}
public void setPassword2(String password2) {
this.password2 = password2;
}
public String getEmail() {
return email;
}
public void setEmail(String email) {
this.email = email;
}
public String getBirthday() {
return birthday;
}
public void setBirthday(String birthday) {
this.birthday = birthday;
}
public String getNickname() {
return nickname;
}
public void setNickname(String nickname) {
this.nickname = nickname;
}
public boolean validate() {
boolean isOk = true;
if(this.username == null || this.username.trim().equals("")) {
isOk = false;
errors.put("username", "用户名不能为空!!!");
} else {
if(!this.username.matches("[A-Za-z]{3,8}")) {
isOk = false;
errors.put("username", "用户名必须是3~8位字母!!!");
}
}
if(this.password == null || this.password.trim().equals("")) {
isOk = false;
errors.put("password", "密码不能为空!!!");
} else {
if(!this.password.matches("\\d{3,8}")) {
isOk = false;
errors.put("password", "密码必须是3~8位数字!!!");
}
}
if(this.password2 == null || this.password2.trim().equals("")) {
isOk = false;
errors.put("password2", "确认密码不能为空!!!");
} else {
if(!this.password.equals(this.password2)) {
isOk = false;
errors.put("password2", "两次密码要一致!!!");
}
}
if(this.email == null || this.email.trim().equals("")) {
isOk = false;
errors.put("email", "邮箱不能为空!!!");
} else {
if(!this.email.matches("\\w+@\\w+(\\.\\w+)+")) {
isOk = false;
errors.put("email", "邮箱格式不对!!!");
}
}
if(this.birthday!=null && !this.birthday.trim().equals("")) {
try {
DateLocaleConverter dlc = new DateLocaleConverter();
dlc.convert(this.birthday, "yyyy-MM-dd HH:mm:ss");
} catch (Exception e) {
isOk = false;
errors.put("birthday", "日期格式不正确!!!");
}
}
if(this.nickname == null || this.nickname.trim().equals("")) {
isOk = false;
errors.put("nickname", "昵称不能为空!!!");
} else {
if(!this.nickname.matches("^([\u4e00-\u9fa5]+)$")) {
isOk = false;
errors.put("nickname", "昵称必须是汉字!!!");
}
}
return isOk;
}
}
- 1
- 2
- 3
- 4
- 5
- 6
- 7
- 8
- 9
- 10
- 11
- 12
- 13
- 14
- 15
- 16
- 17
- 18
- 19
- 20
- 21
- 22
- 23
- 24
- 25
- 26
- 27
- 28
- 29
- 30
- 31
- 32
- 33
- 34
- 35
- 36
- 37
- 38
- 39
- 40
- 41
- 42
- 43
- 44
- 45
- 46
- 47
- 48
- 49
- 50
- 51
- 52
- 53
- 54
- 55
- 56
- 57
- 58
- 59
- 60
- 61
- 62
- 63
- 64
- 65
- 66
- 67
- 68
- 69
- 70
- 71
- 72
- 73
- 74
- 75
- 76
- 77
- 78
- 79
- 80
- 81
- 82
- 83
- 84
- 85
- 86
- 87
- 88
- 89
- 90
- 91
- 92
- 93
- 94
- 95
- 96
- 97
- 98
- 99
- 100
- 101
- 102
- 103
- 104
- 105
- 106
- 107
- 108
- 109
- 110
- 111
- 112
- 113
- 114
- 115
- 116
- 117
- 118
- 119
- 120
- 121
- 122
- 123
- 124
- 125
- 126
- 127
- 128
- 129
- 130
- 131
- 132
- 133
- 134
- 135
- 136
- 137
- 138
- 139
我们单独将校验日期是否合法拿出来讲解。
看下面一段代码:
public class Demo {

    public static void main(String[] args) throws ParseException {
        String d = "19a0-12-31";

        SimpleDateFormat df = new SimpleDateFormat("yyyy-MM-dd");
        Date date = df.parse(d);
        System.out.println(date);
}
会报异常:
Exception in thread "main" java.text.ParseException: Unparseable date: "19a0-12-31"
虽然根据以上的代码我们可以校验出19a0-12-31是非法日期,但是我们能使用这样的代码来校验日期是否合法吗?——显然不可能。试看如下一段代码:
public class Demo {

    public static void main(String[] args) throws ParseException {
        String d = "1980-12-35";

        SimpleDateFormat df = new SimpleDateFormat("yyyy-MM-dd");
        Date date = df.parse(d);
        System.out.println(date);
}
正常输出Sun Jan 04 00:00:00 CST 1981,没有报任何异常,但是日期1980-12-35显然是非法的,使用以上代码并没有校验出来,所以我们不能使用这样的代码来校验日期是否合法。那么到底应该怎么做呢?
要校验日期是否合法,需要用到BeanUtils的日期转换器DateLocaleConverter。
-
若使用以下代码来校验日期19a0-12-31
public class Demo {
public static void main(String[] args) throws ParseException {
String d = "19a0-12-31";
DateLocaleConverter dlc = new DateLocaleConverter();
dlc.convert(d, "yyyy-MM-dd");
}
}
会报异常:
Exception in thread "main" org.apache.commons.beanutils.ConversionException: Error parsing date '19a0-12-31' at position=2
-
若使用以下代码来校验日期1980-12-35
public class Demo {
public static void main(String[] args) throws ParseException {
String d = "1980-12-35";
DateLocaleConverter dlc = new DateLocaleConverter();
dlc.convert(d, "yyyy-MM-dd");
}
}
会报异常:
Exception in thread "main" org.apache.commons.beanutils.ConversionException: Error parsing date '1980-12-35' at position=10
在cn.itcast.utils包下创建一个WebUtils工具类,该工具类的功能就是封装客户端提交的表单数据到RegisterForm中。
WebUtils工具类的具体代码如下:
public class WebUtils {
public static <T> T request2Bean(HttpServletRequest request, Class<T> beanClass) {
try {
T bean = beanClass.newInstance();
Enumeration<String> e = request.getParameterNames();
while(e.hasMoreElements()) {
String name = e.nextElement();
String value = request.getParameter(name);
BeanUtils.setProperty(bean, name, value);
}
return bean;
} catch (Exception e) {
throw new RuntimeException(e);
}
}
public static void copyBean(Object src, Object dest) {
ConvertUtils.register(new Converter() {
@Override
public <T> T convert(Class<T> type, Object value) {
if(value == null) {
return null;
}
String str = (String) value;
if(str.trim().equals("")) {
return null;
}
SimpleDateFormat df = new SimpleDateFormat("yyyy-MM-dd");
try {
return (T) df.parse(str);
} catch (ParseException e) {
throw new RuntimeException(e);
}
}
}, Date.class);
try {
BeanUtils.copyProperties(dest, src);
} catch (Exception e) {
throw new RuntimeException(e);
}
}
public static String generateID() {
return UUID.randomUUID().toString();
}
}
- 1
- 2
- 3
- 4
- 5
- 6
- 7
- 8
- 9
- 10
- 11
- 12
- 13
- 14
- 15
- 16
- 17
- 18
- 19
- 20
- 21
- 22
- 23
- 24
- 25
- 26
- 27
- 28
- 29
- 30
- 31
- 32
- 33
- 34
- 35
- 36
- 37
- 38
- 39
- 40
- 41
- 42
- 43
- 44
- 45
- 46
- 47
- 48
- 49
- 50
- 51
- 52
- 53
- 54
- 55
- 56
- 57
- 58
- 59
- 60
- 61
- 62
- 63
- 64
- 65
- 66
- 67
- 68
- 69
- 70
- 71
- 72
- 73
- 74
- 75
- 76
- 77
- 78
- 79
- 80
- 81
- 82
- 83
- 84
- 85
最后看一下负责处理用户注册的RegisterServlet完整代码:
public class RegisterServlet extends HttpServlet {
protected void doGet(HttpServletRequest request, HttpServletResponse response)
throws ServletException, IOException {
request.setCharacterEncoding("UTF-8");
RegisterForm form = WebUtils.request2Bean(request, RegisterForm.class);
boolean b = form.validate();
if(!b) {
request.setAttribute("form", form);
request.getRequestDispatcher("/WEB-INF/jsp/register.jsp").forward(request, response);
return;
}
User user = new User();
WebUtils.copyBean(form, user);
user.setId(WebUtils.generateID());
BusinessServiceImpl service = new BusinessServiceImpl();
try {
service.register(user);
request.setAttribute("message", "恭喜您,注册成功!!!3秒后为您自动跳到登录页面!!<meta http-equiv='refresh' content='3;url="+request.getContextPath()+"/LoginUIServlet'");
request.getRequestDispatcher("/message.jsp").forward(request, response);
return;
} catch (UserExistException e) {
form.getErrors().put("username", "注册的用户名已存在!!!");
request.setAttribute("form", form);
request.getRequestDispatcher("/WEB-INF/jsp/register.jsp").forward(request, response);
return;
} catch (Exception e) {
e.printStackTrace();
request.setAttribute("message", "服务器出现未知错误!!!");
request.getRequestDispatcher("/message.jsp").forward(request, response);
return;
}
}
protected void doPost(HttpServletRequest request, HttpServletResponse response)
throws ServletException, IOException {
doGet(request, response);
}
}
- 1
- 2
- 3
- 4
- 5
- 6
- 7
- 8
- 9
- 10
- 11
- 12
- 13
- 14
- 15
- 16
- 17
- 18
- 19
- 20
- 21
- 22
- 23
- 24
- 25
- 26
- 27
- 28
- 29
- 30
- 31
- 32
- 33
- 34
- 35
- 36
- 37
- 38
- 39
- 40
- 41
- 42
- 43
- 44
- 45
- 46
- 47
- 48
- 49
- 50
- 51
- 52
- 53
- 54
- 55
- 56
- 1
- 2
- 3
- 4
- 5
- 6
- 7
- 8
- 9
- 10
- 11
- 12
- 13
- 14
- 15
- 16
- 17
- 18
- 19
- 20
- 21
- 22
- 23
- 24
- 25
- 26
- 27
- 28
- 29
- 30
- 31
- 32
- 33
- 34
- 35
- 36
- 37
- 38
- 39
- 40
- 41
- 42
- 43
- 44
- 45
- 46
- 47
- 48
- 49
- 50
- 51
- 52
- 53
- 54
- 55
- 56
用户注册时如果填写的表单数据校验不通过,那么服务器端就将一个存储了错误提示消息和表单数据的formbean对象存储到request对象中,然后发送回register.jsp页面,因此我们需要在register.jsp页面中取出request对象中formbean对象,然后将用户填写的表单数据重新回显到对应的表单项上面,将出错时的提示消息也显示到form表单上面,让用户知道是哪些数据填写不合法!
修改register.jsp页面,代码如下:
<%@ page language="java" contentType="text/html; charset=UTF-8"
pageEncoding="UTF-8"%>
<!DOCTYPE html PUBLIC "-//W3C//DTD HTML 4.01 Transitional//EN" "http://www.w3.org/TR/html4/loose.dtd">
<html>
<head>
<meta http-equiv="Content-Type" content="text/html; charset=UTF-8">
<link href="${pageContext.request.contextPath }/css/auto.css" rel="stylesheet" type="text/css" />
<title>注册界面</title>
</head>
<body>
<div class="header wrapfix">
<a href="###" target="_blank"><img src="${pageContext.request.contextPath }/images/toplogo.gif"
class="logo" alt="首页" /></a>
<div class="help">
<a href="###" target="_blank" title="">首页</a> | <a href="###"
target="_blank" title="帮助中心">帮助中心</a> <span class="tel">客服热线:
13......</span>
</div>
</div>
<div class="clearfix"></div>
<div class="wrap">
<div class="login_main_white">
<div class="login_main_announce">
<ol>
<b>注册须知:</b>
<li>1:在本站注册的会员,必须遵守《互联网电子公告服务管理规定》,不得在本站发表诽谤他人,侵犯他人隐私,侵犯他人知识产权,传播病毒,政治言论,商业机密等信息。</li>
<li>2:在所有在本站发表的文章,本站都具有最终编辑权,并且保留用于印刷或向第三方发表的权利,如果你的资料不齐全,我们将有权不作任何通知使用你在本站发布的作品。</li>
</ol>
</div>
<div class="clearfix"></div>
</div>
<dl>
<form name="form2" action="${pageContext.request.contextPath }/RegisterServlet" method="post">
<dd>登陆帐号:
<input type="hidden" name="fmdo" value="user"><input
type="hidden" name="dopost" value="regok"><input
name="username" value="${form.username }" type="text" class="log_input2"
onchange="TestUserOk()" />
<span id='testCanReg'>${form.errors.username }</span>
</dd>
<dd>
登陆密码: <input name="password" value="${form.password }" type="password" class="log_input2" />
<span id='testCanReg'>${form.errors.password }</span>
</dd>
<dd>
重复密码: <input name="password2" value="${form.password2 }" type="password" class="log_input2" />
<span id='testCanReg'>${form.errors.password2 }</span>
</dd>
<dd>
电子邮箱: <input name="email" value="${form.email }" type="text" class="log_input2" />
<span id='testCanReg'>${form.errors.email }</span>
</dd>
<dd>
生日: <input name="birthday" value="${form.birthday }" type="text" class="sang_Calender" />
<span id='testCanReg'>${form.errors.birthday }</span>
</dd>
<script type="text/javascript" src="${pageContext.request.contextPath }/js/datetime.js"></script>
<dd>
您的昵称: <input name="nickname" value="${form.nickname }" type="text" class="log_input2" />
<span id='testCanReg'>${form.errors.nickname }</span>
</dd>
<dd id="com" style="display: none;">
公司名称: <input name="comname" type="text" class="log_input2" />(公司用户填写)
</dd>
<dd>
验证码: <input name="vdcode" type="text" class="log_input2" />
<img src="" name='1' id="1" alt="换一张" />
</dd>
<dd>
<br />
<input type="submit" name="Submit2" value="确定注册" class="Btn" />
<input type="reset" name="Submit22" value="重 置"
class="Btn"> <br />
<br />
</dd>
</form>
</dl>
</div>
<div class="clearfix"></div>
<div class="footet_box">
<div class="footet_dh">
<a href="/abouts/index.html">网站简介</a> - <a href="/abouts/team.html">管理团队</a>
- <a href="/abouts/services.html">产品与服务</a> - <a
href="/abouts/jobs.html">招贤纳士</a> - <a href="/abouts/marketing.html">网络营销</a>
- <a href="/abouts/contact.html">联系我们</a>
</div>
<div class="footet_bj">
</div>
</div>
</body>
</html>
- 1
- 2
- 3
- 4
- 5
- 6
- 7
- 8
- 9
- 10
- 11
- 12
- 13
- 14
- 15
- 16
- 17
- 18
- 19
- 20
- 21
- 22
- 23
- 24
- 25
- 26
- 27
- 28
- 29
- 30
- 31
- 32
- 33
- 34
- 35
- 36
- 37
- 38
- 39
- 40
- 41
- 42
- 43
- 44
- 45
- 46
- 47
- 48
- 49
- 50
- 51
- 52
- 53
- 54
- 55
- 56
- 57
- 58
- 59
- 60
- 61
- 62
- 63
- 64
- 65
- 66
- 67
- 68
- 69
- 70
- 71
- 72
- 73
- 74
- 75
- 76
- 77
- 78
- 79
- 80
- 81
- 82
- 83
- 84
- 85
- 86
- 87
- 88
- 89
- 90
- 91
- 92
- 93
- 94
- 95
- 96
- 97
- 98
- 99
- 100
- 101
- 102
- 103
- 104
- 105
- 106
- 107
- 108
- 109
到此,用户注册功能就算是开发完成了!
下面测试一下开发好的用户注册功能:
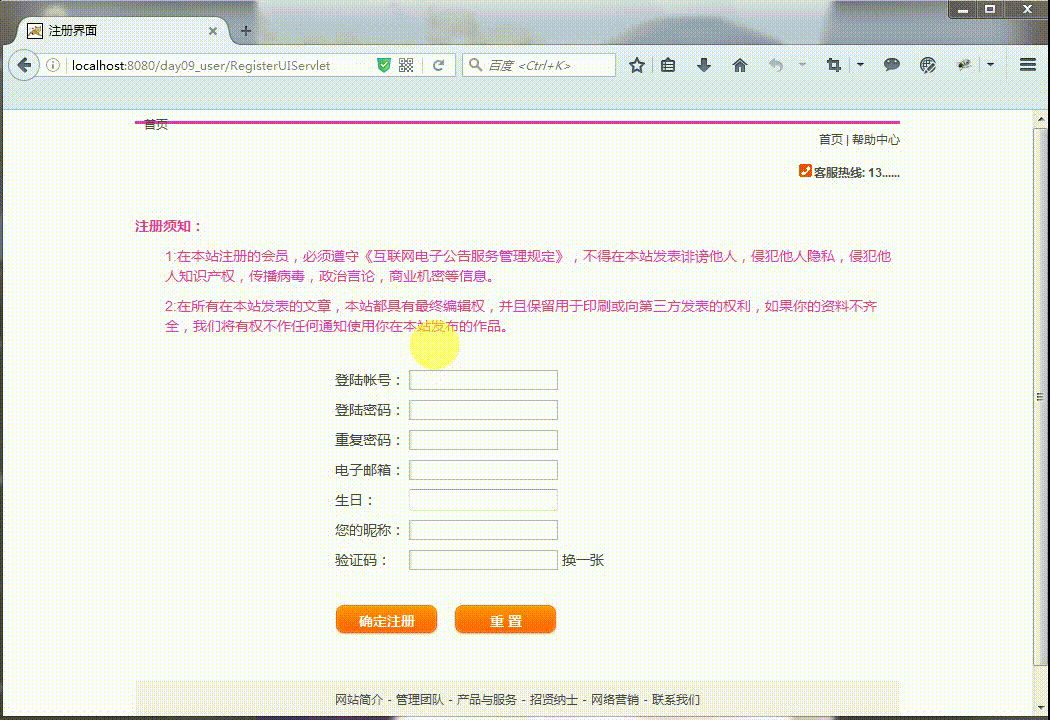
如果输入的表单项不符合校验规则,那么是无法进行注册的,你可以自行进行验证,在此不赘述。
开发登录功能
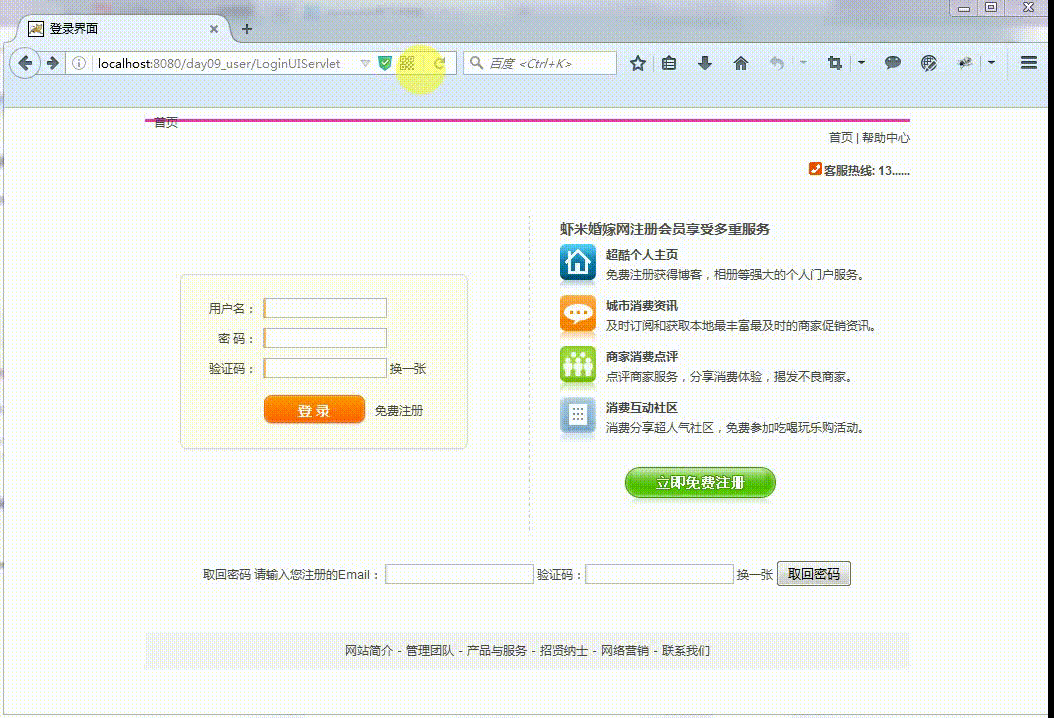
在cn.itcast.web.UI包下写一个LoginUIServlet为用户提供登录界面。
LoginUIServlet收到用户请求后,就跳到login.jsp。LoginUIServlet的代码如下:
public class LoginUIServlet extends HttpServlet {

    protected void doGet(HttpServletRequest request, HttpServletResponse response)
            throws ServletException, IOException {
        request.getRequestDispatcher("/WEB-INF/jsp/login.jsp").forward(request, response);
    }

    protected void doPost(HttpServletRequest request, HttpServletResponse response)
            throws ServletException, IOException {
        doGet(request, response);
    }

}
在/WEB-INF/jsp/目录下编写用户登录的jsp页面login.jsp。
login.jsp页面的代码如下:
<%@ page language="java" contentType="text/html; charset=UTF-8"
pageEncoding="UTF-8"%>
<!DOCTYPE html PUBLIC "-//W3C//DTD HTML 4.01 Transitional//EN" "http://www.w3.org/TR/html4/loose.dtd">
<html>
<head>
<meta http-equiv="Content-Type" content="text/html; charset=UTF-8">
<title>登录界面</title>
<link href="${pageContext.request.contextPath }/css/auto.css" rel="stylesheet" type="text/css" />
</head>
<body>
<div class="header wrapfix">
<a href="###" target="_blank"><img src="${pageContext.request.contextPath }/images/toplogo.gif"
class="logo" alt="首页" /></a>
<div class="help">
<a href="###" target="_blank" title="首页">首页</a> | <a href="###"
target="_blank" title="帮助中心">帮助中心</a> <span class="tel">客服热线:
13......</span>
</div>
</div>
<div class="clearfix"></div>
<div class="wrap">
<div class="Login">
<div class="Login_L"></div>
<div class="Login_R">
<div class="login_zc">
<form name='form1' method='POST' action='${pageContext.request.contextPath }/LoginServlet'>
<table width="100%" border="0" cellpadding="2" cellspacing="2">
<tr>
<td width="50" align="right">用户名:</td>
<td height="24" colspan="2"><input type="hidden"
name="fmdo" value="login"> <input type="hidden"
name="dopost" value="login"> <input type="hidden"
name="gourl" value="<?php if(!empty($gourl)) echo $gourl;?>">
<input name="username" type="text" class="log_input" /></td>
</tr>
<tr>
<td align="right">密 码:</td>
<td height="24" colspan="2"><input name="password"
type="password" class="log_input" /></td>
</tr>
<tr>
<td align="right">验证码:</td>
<td height="24" colspan="2"><input name="vdcode"
type="text" class="log_input" /> <img
src="../include/vdimgck.php" name='img1' id="img1" alt="换一张"
onClick="document.getElementById('img1').src='/include/vdimgck.php?rnd=' + Math.random()"
style="cursor: hand" /></td>
</tr>
<tr>
<td height="45"> </td>
<td width="106" height="45" valign="middle"><input
type="submit" name="Submit" value="登 录" class="Btn" /></td>
<td width="74" height="48" valign="middle"><a
href="index_do.php?fmdo=user&dopost=regnew" class="Blue">免费注册</a></td>
</tr>
</table>
</form>
</div>
</div>
</div>
<div class="server_box">
<h3>虾米婚嫁网注册会员享受多重服务</h3>
<div class="server_con">
<div class="PPbox1">
<img src="images/ico_01.gif" alt="图" align="absmiddle" class="Img" />
<p>
<b>超酷个人主页</b><br /> 免费注册获得博客,相册等强大的个人门户服务。
</p>
</div>
<div class="PPbox1">
<img src="images/ico_02.gif" alt="图" align="absmiddle" class="Img" />
<p>
<b>城市消费资讯</b><br /> 及时订阅和获取本地最丰富最及时的商家促销资讯。
</p>
</div>
<div class="PPbox1">
<img src="images/ico_03.gif" alt="图" align="absmiddle" class="Img" />
<p>
<b>商家消费点评</b><br /> 点评商家服务,分享消费体验,揭发不良商家。
</p>
</div>
<div class="PPbox1">
<img src="${pageContext.request.contextPath }/images/ico_04.gif" alt="图" align="absmiddle" class="Img" />
<p>
<b>消费互动社区</b><br /> 消费分享超人气社区,免费参加吃喝玩乐购活动。
</p>
</div>
<div class="clearfix"></div>
<div class="server_but">
<a href="index_do.php?fmdo=user&dopost=regnew" title="免费注册"><img
src="images/logbtn.gif" alt="免费注册" align="absmiddle" /></a>
</div>
</div>
</div>
<div class="clearfix"></div>
<div align="center" style="padding-bottom: 30px;">
<form name='form2' action="index_do.php">
取回密码 请输入您注册的Email: <input type="hidden" name="fmdo" value="login"><input
type="hidden" name="dopost" value="getpwd"><input
name="email" type="text" class="log_input2" /> 验证码:<input
name="vdcode" type="text" class="log_input2" /> <img
src="../include/vdimgck.php" name='img2' id="img2" alt="换一张"
onClick="document.getElementById('img2').src='/include/vdimgck.php?rnd=' + Math.random()"
style="cursor: hand" /> <input type="submit" name="Submit2"
value="取回密码" class="login_button" />
</form>
</div>
</div>
<div class="clearfix"></div>
<div class="footet_box">
<div class="footet_dh">
<a href="/abouts/index.html">网站简介</a> - <a href="/abouts/team.html">管理团队</a>
- <a href="/abouts/services.html">产品与服务</a> - <a
href="/abouts/jobs.html">招贤纳士</a> - <a href="/abouts/marketing.html">网络营销</a>
- <a href="/abouts/contact.html">联系我们</a>
</div>
<div class="footet_bj">
<?php echo $cfg_powerby?>
</div>
</div>
</body>
</html>
- 1
- 2
- 3
- 4
- 5
- 6
- 7
- 8
- 9
- 10
- 11
- 12
- 13
- 14
- 15
- 16
- 17
- 18
- 19
- 20
- 21
- 22
- 23
- 24
- 25
- 26
- 27
- 28
- 29
- 30
- 31
- 32
- 33
- 34
- 35
- 36
- 37
- 38
- 39
- 40
- 41
- 42
- 43
- 44
- 45
- 46
- 47
- 48
- 49
- 50
- 51
- 52
- 53
- 54
- 55
- 56
- 57
- 58
- 59
- 60
- 61
- 62
- 63
- 64
- 65
- 66
- 67
- 68
- 69
- 70
- 71
- 72
- 73
- 74
- 75
- 76
- 77
- 78
- 79
- 80
- 81
- 82
- 83
- 84
- 85
- 86
- 87
- 88
- 89
- 90
- 91
- 92
- 93
- 94
- 95
- 96
- 97
- 98
- 99
- 100
- 101
- 102
- 103
- 104
- 105
- 106
- 107
- 108
- 109
- 110
- 111
- 112
- 113
- 114
- 115
- 116
- 117
- 118
- 119
- 120
- 121
- 122
- 123
- 124
- 125
- 126
- 127
- 128
- 129
- 130
- 131
- 132
- 133
- 134
- 135
- 136
- 137
- 138
- 139
- 140
- 141
- 142
- 143
login.jsp中的<form action="${pageContext.request.contextPath }/LoginServlet">指明表单提交后,交给LoginServlet进行处理。
在cn.itcast.web.controller包下编写用于处理用户登录的LoginServlet。
LoginServlet的代码如下:
public class LoginServlet extends HttpServlet {
protected void doGet(HttpServletRequest request, HttpServletResponse response)
throws ServletException, IOException {
String username = request.getParameter("username");
String password = request.getParameter("password");
BusinessServiceImpl service = new BusinessServiceImpl();
User user = service.login(username, password);
if(user!=null) {
request.getSession().setAttribute("user", user);
response.sendRedirect(request.getContextPath()+"/index.jsp");
return;
}
request.setAttribute("message", "对不起,用户名或密码错误!!请重新登录!2秒后为您自动跳到登录页面!!<meta http-equiv='refresh' content='2;url="+request.getContextPath()+"/LoginUIServlet'>");
request.getRequestDispatcher("/message.jsp").forward(request, response);
}
protected void doPost(HttpServletRequest request, HttpServletResponse response)
throws ServletException, IOException {
doGet(request, response);
}
}
- 1
- 2
- 3
- 4
- 5
- 6
- 7
- 8
- 9
- 10
- 11
- 12
- 13
- 14
- 15
- 16
- 17
- 18
- 19
- 20
- 21
- 22
- 23
- 24
- 25
- 26
- 27
- 28
- 1
- 2
- 3
- 4
- 5
- 6
- 7
- 8
- 9
- 10
- 11
- 12
- 13
- 14
- 15
- 16
- 17
- 18
- 19
- 20
- 21
- 22
- 23
- 24
- 25
- 26
- 27
- 28
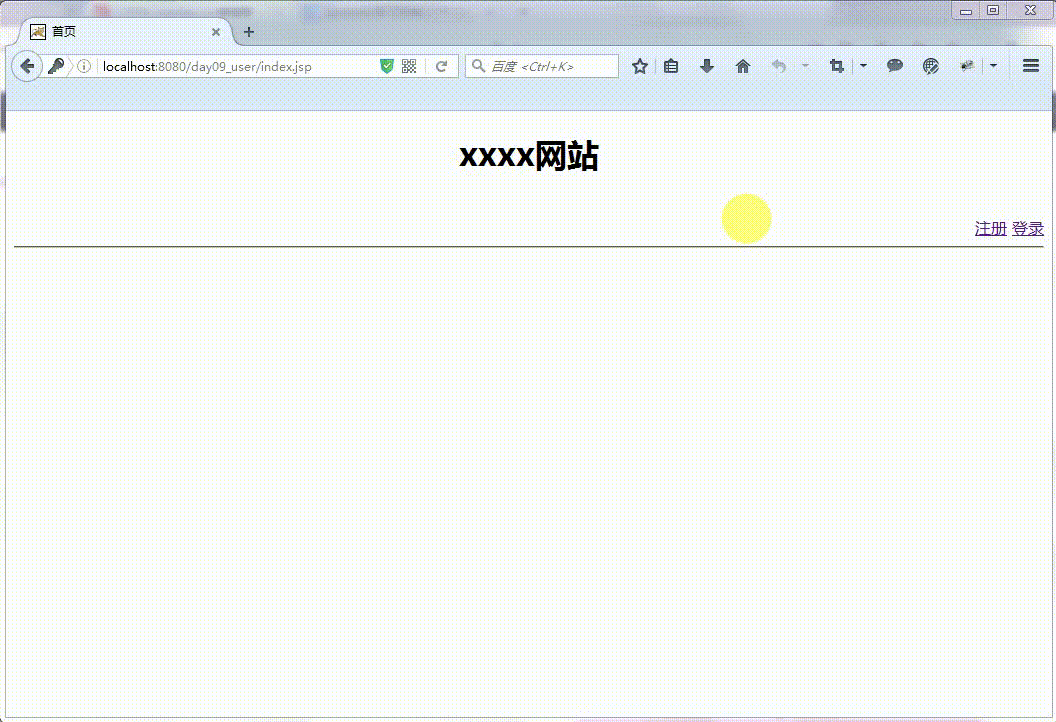
网站首页index.jsp代码如下:
<%@ page language="java" contentType="text/html; charset=UTF-8"
    pageEncoding="UTF-8"%>
<%@ taglib uri="http://java.sun.com/jsp/jstl/core" prefix="c" %>
<!DOCTYPE html PUBLIC "-//W3C//DTD HTML 4.01 Transitional//EN" "http://www.w3.org/TR/html4/loose.dtd">
<html>
<head>
<meta http-equiv="Content-Type" content="text/html; charset=UTF-8">
<title>首页</title>
</head>
<body style="text-align: center;">
    <h1>xxxx网站</h1>
    <br/>

    <div style="text-align: right;">
        <c:if test="${user!=null }">
            欢迎您:${user.nickname }
            <a href="${pageContext.request.contextPath }/LogoutServlet">注销</a>
        </c:if>

        <c:if test="${user==null }">
            <a href="${pageContext.request.contextPath }/RegisterUIServlet">注册</a>
            <a href="${pageContext.request.contextPath }/LoginUIServlet">登录</a>
        </c:if>
    </div>
    <hr/>
</body>
</html>
- 1
- 2
- 3
- 4
- 5
- 6
- 7
- 8
- 9
- 10
- 11
- 12
- 13
- 14
- 15
- 16
- 17
- 18
- 19
- 20
- 21
- 22
- 23
- 24
- 25
- 26
- 27
- 1
- 2
- 3
- 4
- 5
- 6
- 7
- 8
- 9
- 10
- 11
- 12
- 13
- 14
- 15
- 16
- 17
- 18
- 19
- 20
- 21
- 22
- 23
- 24
- 25
- 26
- 27
到此,用户登录的功能就算是开发完成了。
下面测试一下开发好的用户登录功能。
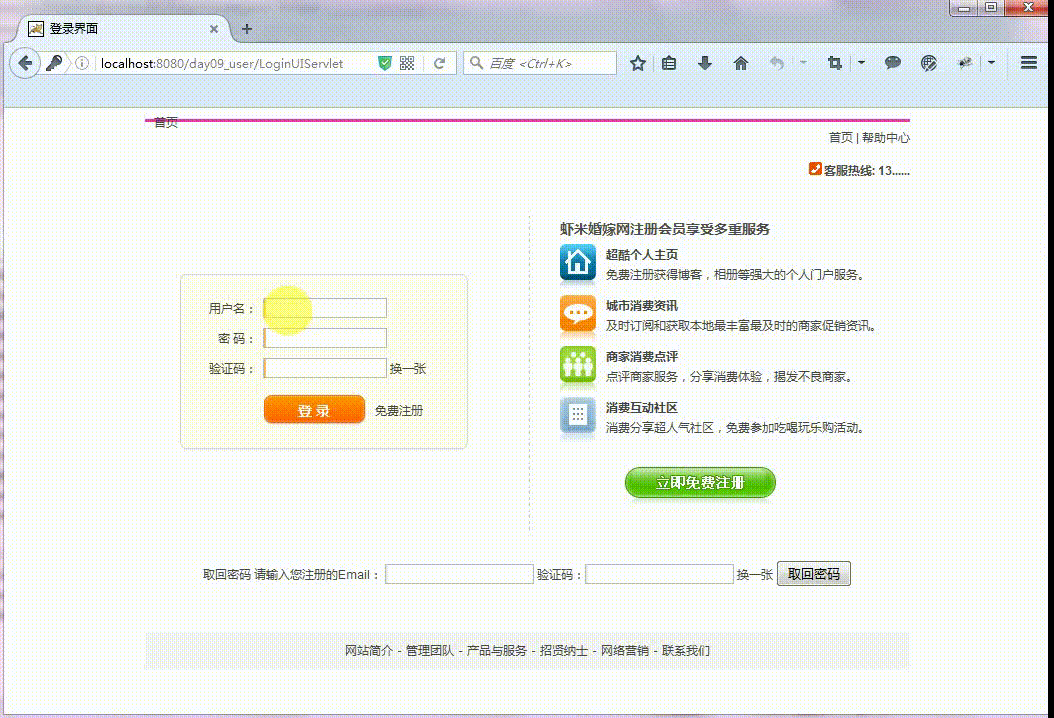
如果输入的用户名和密码错误,那么就无法登录成功,运行效果如下:
开发注销功能
在cn.itcast.web.controller包下编写用于处理用户注销的LogoutServlet。
LogoutServlet的代码如下:
public class LogoutServlet extends HttpServlet {
protected void doGet(HttpServletRequest request, HttpServletResponse response)
throws ServletException, IOException {
HttpSession session = request.getSession(false);
if(session != null) {
session.removeAttribute("user");
}
request.setAttribute("message", "注销成功,浏览器将在3秒后跳转,如果没有跳转,你就点...!!<meta http-equiv='refresh' content='3;url="+request.getContextPath()+"/index.jsp'>");
request.getRequestDispatcher("/message.jsp").forward(request, response);
}
protected void doPost(HttpServletRequest request, HttpServletResponse response)
throws ServletException, IOException {
doGet(request, response);
}
}
- 1
- 2
- 3
- 4
- 5
- 6
- 7
- 8
- 9
- 10
- 11
- 12
- 13
- 14
- 15
- 16
- 17
- 18
- 19
- 20
- 1
- 2
- 3
- 4
- 5
- 6
- 7
- 8
- 9
- 10
- 11
- 12
- 13
- 14
- 15
- 16
- 17
- 18
- 19
- 20
用户登录成功后,会将登录的用户信息存储在session中,所以我们要将存储在session中的user删除掉,这样就可以实现用户注销了。
用户登录成功后就会跳转到index.jsp页面,在index.jsp页面中放一个【注销】链接,当点击【注销】链接时,就访问LogoutServlet,将用户注销。
测试开发好的注销功能,效果如下:
到此,所有的功能都开发完成了,测试也通过了。
开发总结
通过这个小例子,可以了解到mvc分层架构的项目搭建,在平时的项目开发中,也都是按照如下的顺序来进行开发的:
- 搭建开发环境
- 创建web项目
- 导入项目所需的开发包
- 创建程序的包名,在java中是以包来体现项目的分层架构的
- 开发domain
把一张要操作的表当成一个VO类(VO类只定义属性以及属性对应的get和set方法,没有涉及到具体业务的操作方法),VO表示的是值对象,通俗地说,就是把表中的每一条记录当成一个对象,表中的每一个字段就作为这个对象的属性。每往表中插入一条记录,就相当于是把一个VO类的实例对象插入到数据表中,对数据表进行操作时,都是直接把一个VO类的对象写入到表中,一个VO类对象就是一条记录。每一个VO对象可以表示一张表中的一行记录,VO类的名称要和表的名称一致或者对应。 -
开发dao层
-
DAO操作接口:每一个DAO操作接口规定了,一张表在一个项目中的具体操作方法,此接口的名称最好按照如下格式编写:“表名称Dao”。
DAO接口里面的所有方法按照以下的命名编写:
- 更新数据库:doXxx()
- 查询数据库:findXxx()或getXxx()
-
DAO操作接口的实现类:实现类中完成具体的增删改查操作。
此实现类完成的只是数据库中最核心的操作,并没有专门处理数据库的打开和关闭,因为这些操作与具体的业务操作无关。
-
开发service层(service层对web层提供所有的业务服务)
- 开发web层


 5956
5956

 被折叠的 条评论
为什么被折叠?
被折叠的 条评论
为什么被折叠?
 到【灌水乐园】发言


