


micropython提供很好的便捷性,易于调试,上手简单。但是缺失重要的监控分析环节,也无法模拟仿真。ROS2就很好的提供了这方面的支持。至于ROS2干啥的,这里就不详述了,建议看小鱼的ROS教学,写的很详细。
安装ros2是基于Python,因为涉及到操作系统类型、软件版本等诸多兼容性问题,我这里采用了docker模式来部署,在windows上用virtualbox7.1虚拟机安装debian12,也可以用ubuntu。本人习惯debian系列而已.
从官网下载debian-12.9.0-amd64-DVD-1.iso镜像,内存4G,cpu4核。并采用默认安装。
进入系统后,第一步配置镜像源:
修改国内源
sudo nano /etc/apt/sources.list
#注释掉cdrom源
deb https://mirrors.cloud.tencent.com/debian/ bookworm main non-free non-free-firmware contrib
deb-src https://mirrors.cloud.tencent.com/debian/ bookworm main non-free non-free-firmware contrib
deb https://mirrors.cloud.tencent.com/debian-security/ bookworm-security main
deb-src https://mirrors.cloud.tencent.com/debian-security/ bookworm-security main
deb https://mirrors.cloud.tencent.com/debian/ bookworm-updates main non-free non-free-firmware contrib
deb-src https://mirrors.cloud.tencent.com/debian/ bookworm-updates main non-free non-free-firmware contrib
deb https://mirrors.cloud.tencent.com/debian/ bookworm-backports main non-free non-free-firmware contrib
deb-src https://mirrors.cloud.tencent.com/debian/ bookworm-backports main non-free non-free-firmware contrib
安装podman,替代docker。
sudo apt install podman
然后添加第三方加速通道,否则docker镜像下载巨慢无比。
修改 /etc/containers/registries.conf
unqualified-search-registries = ['docker.io']
[[registry]]
prefix = "docker.io"
insecure = true
location = "registry-1.docker.io"
[[registry.mirror]]
location = "docker.1ms.run"
修改存储,改overlay模式
nano ~/.config/containers/storage.conf
[storage]
driver = "overlay"
[storage.options.overlay]
mount_program = "/usr/bin/fuse-overlayfs"
拉取镜像(full表示全功能)
podman pull osrf/ros:humble-desktop-full
启动microros agent,为什么需要这个?因为micro-ros协议并不能直接用到ros中,需要一个中间服务来做转换,这个就是起这个作用。采用udp通讯方式,避免串口冲突。第一次可能要下载镜像。
podman run -it --rm --net=host microros/micro-ros-agent:humble udp4 --port 8888 -v6
虚拟机启动ros2镜像
打开X11屏幕转换权限,否则容器内无法启动图像界面。
sudo xhost +local:
启动容器,参数照抄就好。
podman run -it --rm --net=host -e DISPLAY=$DISPLAY -v /tmp/.X11-unix:/tmp/.X11-unix osrf/ros:humble-desktop-full
安装imu插件和joint的gui组件,
sudo apt-get install ros-humble-imu-tools
sudo apt install ros-humble-joint-state-publisher-gui
因为镜像退出就还原,不可直接修改,需要通过一些方法来修改镜像:
在不退出前面的安装终端的前提下,新开终端
通过podman ps -l ,查找镜像id

执行提交修改,最后是新镜像的命名
podman commit 763464cfd386 ros2fromimu:v1.0
提交修改后,都退出ROS2镜像。就可以启动新镜像了。
podman run -it --rm --net=host -e DISPLAY=$DISPLAY -v /tmp/.X11-unix:/tmp/.X11-unix --name r1 ros2fromimu:v1
进入系统以后,输入rviz2就可以启动图形界面了
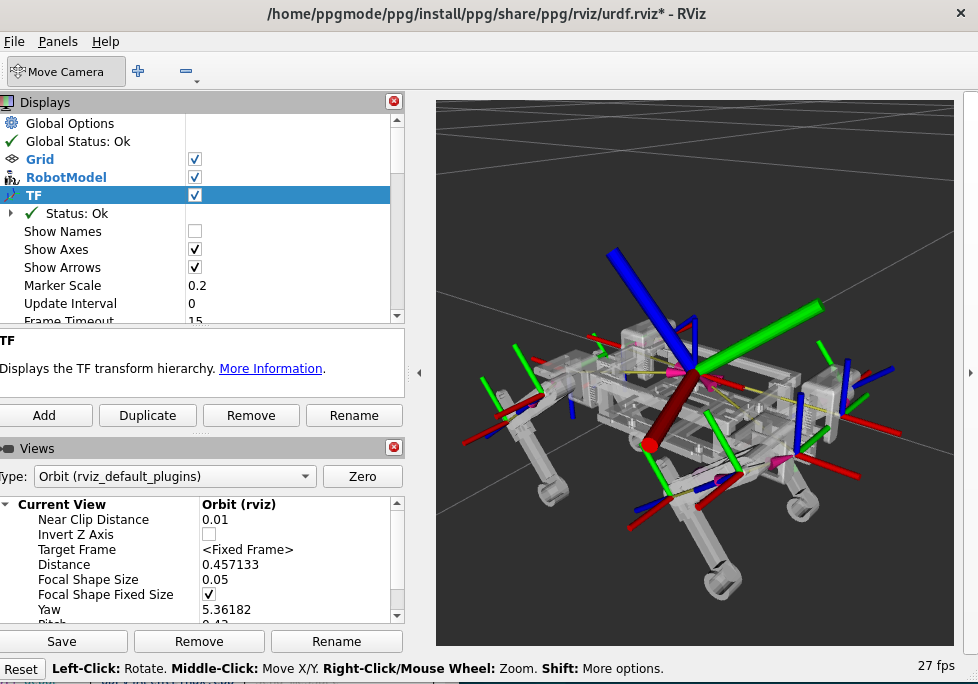
至此环境就搭好了。
这个狗狗模型怎么弄进去的?它是通过solidworks的导出插件产生的。官网有下载链接,根据各自的sw版本下载对应插件。有点需要注意的是,导出的格式是ros1的。需要通过手工转换成ros2格式,我写了个脚本做这个功能,下一篇讲sw导出部分的时候再提供下载连接。


 1873
1873

 被折叠的 条评论
为什么被折叠?
被折叠的 条评论
为什么被折叠?
 到【灌水乐园】发言


