


virtualbox后台静默运行虚拟机
介绍
安装好VirtualBox后,配置完成后发现不能后台运行 每次启动都会有界面,对于想要模拟集群的我来说很麻烦
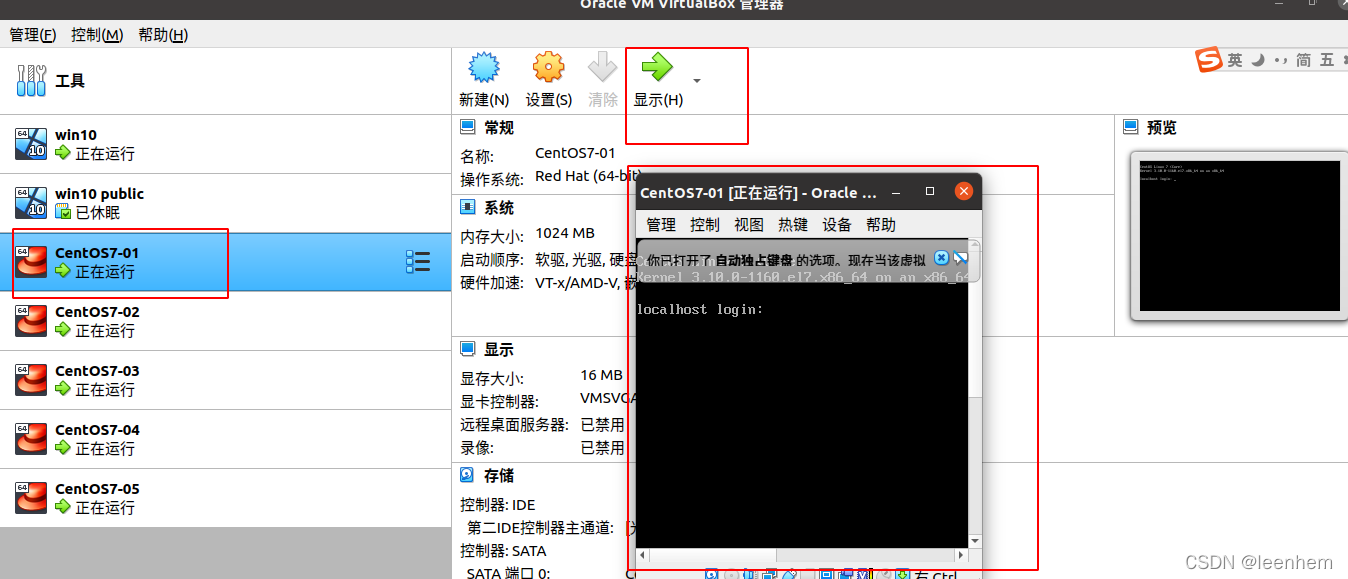
启动 VirtualBox 虚拟机
我们查看一下正常启动的虚拟机进程
leenhem@leenhem-Thinkpad-T440P:~$ ps -ef |grep vir
leenhem     2395    1627  0 08:25 ?        00:00:11 /usr/lib/virtualbox/VBoxXPCOMIPCD
leenhem     2401    1627  0 08:25 ?        00:00:34 /usr/lib/virtualbox/VBoxSVC --auto-shutdown
leenhem     4443    2401 53 08:35 ?        00:34:53 /usr/lib/virtualbox/VirtualBoxVM --comment win10 --startvm 01ba9392-82bc-4a14-ac00-481f206675a4 --no-startvm-errormsgbox
leenhem     4719    2401  0 08:36 ?        00:00:00 /usr/lib/virtualbox/VBoxNetDHCP --comment HostInterfaceNetworking-vboxnet0 --config /home/leenhem/.config/VirtualBox/HostInterfaceNetworking-vboxnet0-Dhcpd.config --log /home/leenhem/.config/VirtualBox/HostInterfaceNetworking-vboxnet0-Dhcpd.log
leenhem     8067    2401  0 09:37 ?        00:00:01 /usr/lib/virtualbox/VirtualBoxVM --comment CentOS7-01 --startvm ff9818a6-ad1a-48dd-91c9-676bf932a0e9 --no-startvm-errormsgbox --separate
leenhem     8193    4101  0 09:41 pts/0    00:00:00 grep --color=auto vir
可以看到正常的虚拟机进程是
VirtualBoxVM --comment CentOS7-01 --startvm ff9818a6-ad1a-48dd-91c9-676bf932a0e9
使用 VirtualBoxVM 后台启动
查看VirtualBoxVM参数没有发现,后台启动的参数
leenhem@leenhem-Thinkpad-T440P:~$ VirtualBoxVM --help
Oracle VM VirtualBox VM Runner v6.1.26_Ubuntu
(C) 2005-2021 Oracle Corporation
All rights reserved.

Options:
  --startvm <vmname|UUID>    start a VM by specifying its UUID or name
  --separate                 start a separate VM process
  --normal                   keep normal (windowed) mode during startup
  --fullscreen               switch to fullscreen mode during startup
  --seamless                 switch to seamless mode during startup
  --scale                    switch to scale mode during startup
  --no-startvm-errormsgbox   do not show a message box for VM start errors
  --restore-current          restore the current snapshot before starting
  --no-aggressive-caching    delays caching media info in VM processes
  --fda <image|none>         Mount the specified floppy image
  --dvd <image|none>         Mount the specified DVD image
  --dbg                      enable the GUI debug menu
  --debug                    like --dbg and show debug windows at VM startup
  --debug-command-line       like --dbg and show command line window at VM startup
  --debug-statistics         like --dbg and show statistics window at VM startup
  --no-debug                 disable the GUI debug menu and debug windows
  --start-paused             start the VM in the paused state
  --start-running            start the VM running (for overriding --debug*)

Expert options:
  --disable-patm             disable code patching (ignored by AMD-V/VT-x)
  --disable-csam             disable code scanning (ignored by AMD-V/VT-x)
  --recompile-supervisor     recompiled execution of supervisor code (*)
  --recompile-user           recompiled execution of user code (*)
  --recompile-all            recompiled execution of all code, with disabled
                             code patching and scanning
  --execute-all-in-iem       For debugging the interpreted execution mode.
  --warp-pct <pct>           time warp factor, 100%% (= 1.0) = normal speed
  (*) For AMD-V/VT-x setups the effect is --recompile-all.

The following environment (and extra data) variables are evaluated:
  VBOX_GUI_DBG_ENABLED (GUI/Dbg/Enabled)
                             enable the GUI debug menu if set
  VBOX_GUI_DBG_AUTO_SHOW (GUI/Dbg/AutoShow)
                             show debug windows at VM startup
  VBOX_GUI_NO_DEBUGGER
                             disable the GUI debug menu and debug windows
vboxmanage启动虚拟机
按照百度知道上面的说法 https://jingyan.baidu.com/article/60ccbceb6d042964cab19730.html
应该执行以下命令去启动虚拟机
leenhem@leenhem-Thinkpad-T440P:~$ vboxmanage startvm CentOS7-01 -type headless
Waiting for VM "CentOS7-01" to power on...
VM "CentOS7-01" has been successfully started.
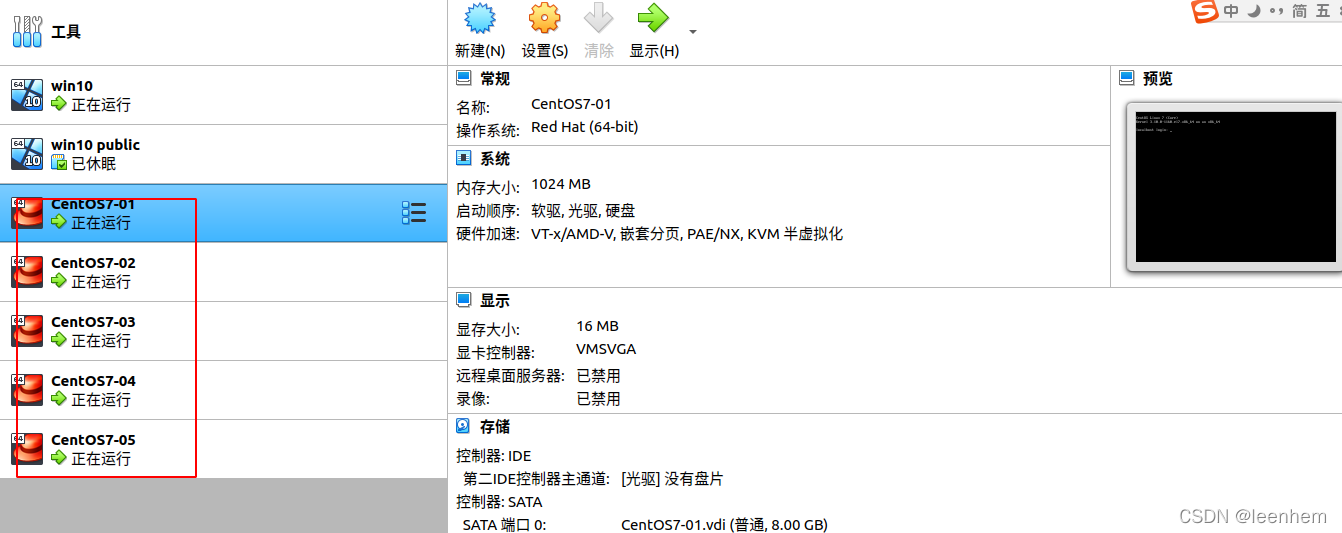
虚拟机正常启动
批量启动虚拟机
把启动命令放到脚本中 startvm.sh
vim startvm.sh
vboxmanage startvm CentOS7-01 -type headless
vboxmanage startvm CentOS7-02 -type headless
vboxmanage startvm CentOS7-03 -type headless
vboxmanage startvm CentOS7-04 -type headless
vboxmanage startvm CentOS7-05 -type headless
查看启动后的虚拟机
CSDN_码404:virtualbox后台静默运行虚拟机
https://www.code404.icu/1537.html


 2735
2735


 被折叠的 条评论
为什么被折叠?
被折叠的 条评论
为什么被折叠?
 到【灌水乐园】发言


