


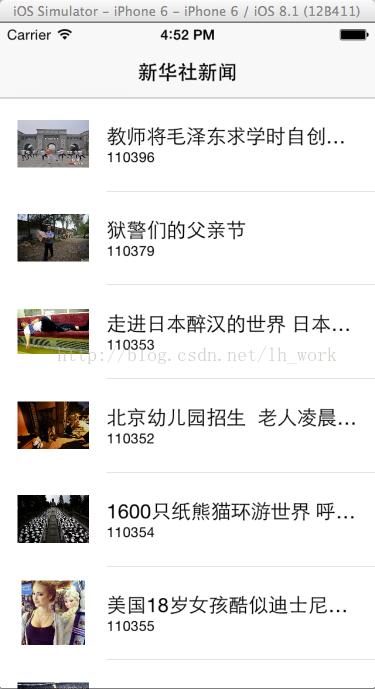
前面文章写得swift第一个ios项目用xcode6.1打开有点小错误了,毕竟原先是在xcode6 beta1版本上写的,xcode6正式版本上调整了一些东西。那么在这里对原来得项目进行些调整和补充吧,仍然是纯代码。先看效果图。

var table : UITableView?
var dataSource = []
var thumbQueue = NSOperationQueue()
let hackerNewsApiUrl = "http://qingbin.sinaapp.com/api/lists?ntype=%E5%9B%BE%E7%89%87&pageNo=1&pagePer=10&list.htm"
override func viewWillAppear(animated: Bool) {
//请求数据
self.loadDataSource()
//设置界面
self.setupViews()
}
//设置界面,添加tableview,并且设置UITableViewDelegate和UITableViewDataSource对象
func setupViews(){
self.table = UITableView(frame:CGRectMake(0, 0, UIScreen.mainScreen().bounds.size.width, UIScreen.mainScreen().bounds.size.height))
self.table!.delegate = self
self.table!.dataSource = self
self.table!.registerClass(UITableViewCell.self, forCellReuseIdentifier:"cell")
//将tableview添加到view试图上
self.view.addSubview(self.table!)
}
//异步请求网络数据,并在主界面中刷新tableview数据
func loadDataSource() {
var loadURL = NSURL(string: hackerNewsApiUrl)
var request = NSURLRequest(URL: loadURL!)
var loadDataSourceQueue = NSOperationQueue();
NSURLConnection.sendAsynchronousRequest(request, queue: loadDataSourceQueue, completionHandler: { response, data, error in
if (error != nil) {
println(error)
dispatch_async(dispatch_get_main_queue(), {
})
} else {
let json = NSJSONSerialization.JSONObjectWithData(data, options: NSJSONReadingOptions.MutableContainers, error: nil) as NSDictionary
let newsDataSource = json["item"] as NSArray
dispatch_async(dispatch_get_main_queue(), {
self.dataSource = newsDataSource
self.table!.reloadData()
})
}
})
}
class MyViewController: UIViewController, UITableViewDelegate,UITableViewDataSource
向tableview中填充数据
func tableView(tableView: UITableView, numberOfRowsInSection section: Int) -> Int
{
return dataSource.count;
}
// Row display. Implementers should *always* try to reuse cells by setting each cell's reuseIdentifier and querying for available reusable cells with dequeueReusableCellWithIdentifier:
// Cell gets various attributes set automatically based on table (separators) and data source (accessory views, editing controls)
func tableView(tableView: UITableView, cellForRowAtIndexPath indexPath: NSIndexPath) -> UITableViewCell
{
let cell = UITableViewCell(style:UITableViewCellStyle.Subtitle,reuseIdentifier:"cell")
let object = dataSource[indexPath.row] as NSDictionary
println(object)
// cell.shouldIndentWhileEditing = true
cell.selectionStyle = UITableViewCellSelectionStyle.None
cell.textLabel.text = object["title"] as? String
cell.detailTextLabel?.text = object["id"] as? String
cell.imageView.image = UIImage(named :"defaultphotoS")
cell.imageView.contentMode = UIViewContentMode.ScaleAspectFit
let request = NSURLRequest(URL: NSURL(string: object["thumb"] as String)!)
NSURLConnection.sendAsynchronousRequest(request, queue: thumbQueue, completionHandler: { response, data, error in
if (error != nil) {
println(error)
} else {
let image = UIImage.init(data :data)
dispatch_async(dispatch_get_main_queue(), {
cell.imageView.image = image
})
}
})
return cell
}
func tableView(tableView: UITableView!, heightForRowAtIndexPath indexPath: NSIndexPath!) -> CGFloat {
return 80
}
下一步就要设置点击cell进入新闻详情页了
这里需要说明的是新闻详情的数据是要根据新闻id号来获取的,当然这些在做具体项目的时候看接口文档就明白了
那么这里点击cell需要将新闻id号传过去,而新闻id号就存在先前请求的新闻列表的数据中,这里获取下传值到下一个viewcontroller就行了
func tableView(tableView: UITableView!, didSelectRowAtIndexPath indexPath: NSIndexPath!) {
var web = NewsViewController()
let object = dataSource[indexPath.row] as NSDictionary
let id = object["id"] as String
let a = id.toInt()
web.detailID = a!
self.navigationController?.pushViewController(web, animated: true)
}
这里NewsViewController就是我们要创建的新闻详情的页面了,创建一个ViewController,命名为NewsViewController
里面设置个detailId来接收传过来得id值,添加个webview用来显示新闻详情
var detailID = NSInteger()
var webView:UIWebView?
在viewDidLoad()中override func viewDidLoad() {
super.viewDidLoad()
self.webView = UIWebView(frame:self.view.frame)
self.title = "新闻中心"
self.loadData()
self.view.addSubview(self.webView!)
// Do any additional setup after loading the view.
}
根据detailID的值来请求新闻详情数据,并加载到webview中这里要注意的是,demo中提供得接口返回的新闻详情是html数据,所以可以用webview加载,如果请求返回的是别的数据请自行做处理显示
func loadData(){
var urlStr = "http://qingbin.sinaapp.com/api/html/\(detailID).html"
println(urlStr)
var url = NSURL(string: urlStr)
var urlRequest = NSURLRequest(URL :url!)
self.webView!.loadRequest(urlRequest)
}
好了,这里就完成了,点击运行就可以看到前面得效果,算是一个小demo了。是不是很简单。


 3177
3177


 被折叠的 条评论
为什么被折叠?
被折叠的 条评论
为什么被折叠?
 到【灌水乐园】发言


