1.首先现在gradle 版本为2.2.1文件下载地址:http://gradle.org/gradle-download/
2.在intelliJ IDEA 14.0.2创建gradle项目
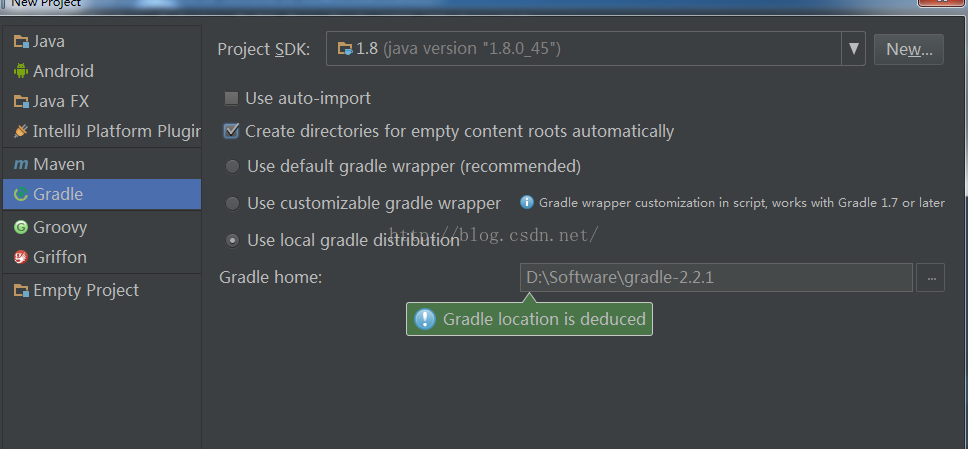
(1).File->New Product->Gradle如图所示:
(2).给工程命名为example
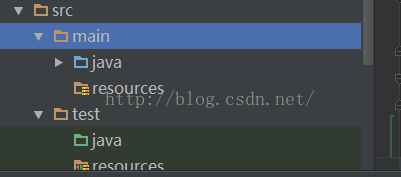
(3)创建完成后工程的目录结构为:
(4)在build.gradle中配置如下
apply plugin: 'java' sourceCompatibility = 1.8 version = '1.0' buildscript { repositories { jcenter() mavenCentral() } dependencies { classpath("org.springframework.boot:spring-boot-gradle-plugin:1.2.3.RELEASE") } } apply plugin: 'java' apply plugin: 'spring-boot' jar { baseName = 'myproject' version = '0.0.1-SNAPSHOT' } repositories { jcenter() mavenCentral() } dependencies { compile("org.springframework.boot:spring-boot-starter-web") testCompile("org.springframework.boot:spring-boot-starter-test") }
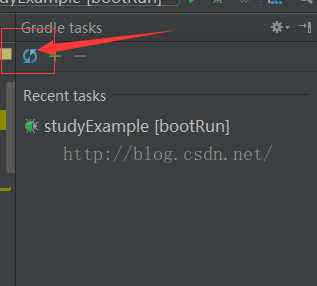
然后build项目
显示出gradle的界面,然后点击
然后程序会下载相应的jar包
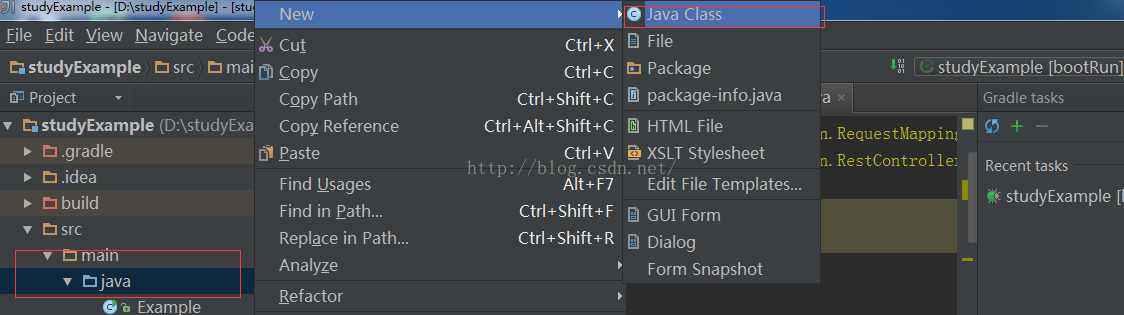
3.创建个测试类
测试类中的源码:
import org.springframework.boot.SpringApplication; import org.springframework.boot.autoconfigure.EnableAutoConfiguration; import org.springframework.web.bind.annotation.RequestMapping; import org.springframework.web.bind.annotation.RestController; @RestController @EnableAutoConfiguration public class Example { @RequestMapping ( "/" ) String home() { return "Hello World!" ; } public static void main(String[] args) throws Exception { SpringApplication.run(Example.class , args); } }
<img src= "https://img-blog.csdn.net/20160103172244548?watermark/2/text/aHR0cDovL2Jsb2cuY3Nkbi5uZXQv/font/5a6L5L2T/fontsize/400/fill/I0JBQkFCMA==/dissolve/70/gravity/Center" alt= "" />
最后在浏览器中输入localhost:8080,出现如下结果表示成功!
转载出处:http://blog.csdn.net/txw910/article/details/50430178


 95
95


 被折叠的 条评论
为什么被折叠?
被折叠的 条评论
为什么被折叠?
 到【灌水乐园】发言


