


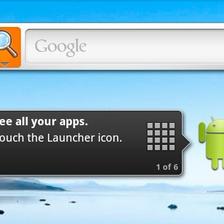
在android原生代码中,长按 图片中的向前屏切换或者向后屏切换或者中间的那个所有应用的按钮,在其上方就会出现5个小的屏幕缩略图。
由此,我们在launcher的代码里面查找一下,首先,我们要找到onLongClick(View v)这个方法,看下代码:
public boolean onLongClick(View v) {
        switch (v.getId()) {
            case R.id.previous_screen:
                if (!isAllAppsVisible()) {
                    mWorkspace.performHapticFeedback(HapticFeedbackConstants.LONG_PRESS,
                            HapticFeedbackConstants.FLAG_IGNORE_VIEW_SETTING);
                    showPreviews(v);
                }
                return true;
            case R.id.next_screen:
                if (!isAllAppsVisible()) {
                    mWorkspace.performHapticFeedback(HapticFeedbackConstants.LONG_PRESS,
                            HapticFeedbackConstants.FLAG_IGNORE_VIEW_SETTING);
                    showPreviews(v);
                }
                return true;
            case R.id.all_apps_button:
                if (!isAllAppsVisible()) {
                    mWorkspace.performHapticFeedback(HapticFeedbackConstants.LONG_PRESS,
                            HapticFeedbackConstants.FLAG_IGNORE_VIEW_SETTING);
                    showPreviews(v);
                }
                return true;
在这里只截取了代码中的一部分,我们看到,都调用了showPreviews方法。
private void showPreviews(View anchor) {
        showPreviews(anchor, 0, mWorkspace.getChildCount());
    }

    private void showPreviews(final View anchor, int start, int end) {
        final Resources resources = getResources();
        final Workspace workspace = mWorkspace;

        CellLayout cell = ((CellLayout) workspace.getChildAt(start));

        float max = workspace.getChildCount();

        final Rect r = new Rect();
        resources.getDrawable(R.drawable.preview_background).getPadding(r);
        int extraW = (int) ((r.left + r.right) * max);
        int extraH = r.top + r.bottom;

        int aW = cell.getWidth() - extraW;
        float w = aW / max;

        int width = cell.getWidth();
        int height = cell.getHeight();
        int x = cell.getLeftPadding();
        int y = cell.getTopPadding();
        width -= (x + cell.getRightPadding());
        height -= (y + cell.getBottomPadding());

        float scale = w / width;

        int count = end - start;

        final float sWidth = width * scale;
        float sHeight = height * scale;

        LinearLayout preview = new LinearLayout(this);

        PreviewTouchHandler handler = new PreviewTouchHandler(anchor);
        ArrayList<Bitmap> bitmaps = new ArrayList<Bitmap>(count);

        for (int i = start; i < end; i++) {
            ImageView image = new ImageView(this);
            cell = (CellLayout) workspace.getChildAt(i);

            final Bitmap bitmap = Bitmap.createBitmap((int) sWidth, (int) sHeight,
                    Bitmap.Config.ARGB_8888);

            final Canvas c = new Canvas(bitmap);
            c.scale(scale, scale);
            c.translate(-cell.getLeftPadding(), -cell.getTopPadding());
            cell.dispatchDraw(c);

            image.setBackgroundDrawable(resources.getDrawable(R.drawable.preview_background));
            image.setImageBitmap(bitmap);
            image.setTag(i);
            image.setOnClickListener(handler);
            image.setOnFocusChangeListener(handler);
            image.setFocusable(true);
            if (i == mWorkspace.getCurrentScreen()) image.requestFocus();
            //添加到LinearLayout中
            preview.addView(image,
                    LinearLayout.LayoutParams.WRAP_CONTENT, LinearLayout.LayoutParams.WRAP_CONTENT);
            //最后添加到ArrayList里面去
            bitmaps.add(bitmap);
        }
        //把上面的LinearLayout放到PopupWindow中。
        final PopupWindow p = new PopupWindow(this);
        p.setContentView(preview);
        p.setWidth((int) (sWidth * count + extraW));
        p.setHeight((int) (sHeight + extraH));
        p.setAnimationStyle(R.style.AnimationPreview);
        p.setOutsideTouchable(true);
        p.setFocusable(true);
        p.setBackgroundDrawable(new ColorDrawable(0));
        p.showAsDropDown(anchor, 0, 0);

        p.setOnDismissListener(new PopupWindow.OnDismissListener() {
            public void onDismiss() {
                dismissPreview(anchor);
            }
        });

        anchor.setTag(p);
        anchor.setTag(R.id.workspace, preview);
        anchor.setTag(R.id.icon, bitmaps);
    }
方法一共有三个参数,第一个,被点击的View,第二个从第几个开始,第三个是第几个结束。缩略图是从又向坐开始排列的。
在for循环中,是绘制预览图的代码。
 for (int i = start; i < end; i++) {
            ImageView image = new ImageView(this);
            //获取屏幕
            cell = (CellLayout) workspace.getChildAt(i);

            //按照上面设定的大小创建一个bitmap
            final Bitmap bitmap = Bitmap.createBitmap((int) sWidth, (int) sHeight,
             Bitmap.Config.ARGB_8888);
            //绘制
            final Canvas c = new Canvas(bitmap);
             //设置比例
             c.scale(scale, scale);
             c.translate(-cell.getLeftPadding(), -cell.getTopPadding());
             cell.dispatchDraw(c);

            //设置image
            image.setBackgroundDrawable(resources.getDrawable(R.drawable.preview_background));
            image.setImageBitmap(bitmap);
            //设置标记
            image.setTag(i);
            image.setOnClickListener(handler);
            image.setOnFocusChangeListener(handler);
            image.setFocusable(true);
            if (i == mWorkspace.getCurrentScreen()) image.requestFocus();

            //添加到LinearLayout中
            preview.addView(image,
                    LinearLayout.LayoutParams.WRAP_CONTENT, LinearLayout.LayoutParams.WRAP_CONTENT);
            //最后添加到ArrayList里面去
            bitmaps.add(bitmap);
          bitmaps.add(bitmap);
}
在源代码中有很多setTag()和getTag()方法,主要用于标记被点击的View,判断跳转事件时,根据tag里面的信息进行相应的跳转。以上面的代码为例,简单说下setTag():
image.setTag(i);
image.setOnClickListener(handler);
image.setOnFocusChangeListener(handler);
image.setFocusable(true);
我们找到Handler的代码:
class PreviewTouchHandler implements View.OnClickListener, Runnable, View.OnFocusChangeListener {
        private final View mAnchor;

        public PreviewTouchHandler(View anchor) {
            mAnchor = anchor;
        }
        //响应image的点击事件
        public void onClick(View v) {
            mWorkspace.snapToScreen((Integer) v.getTag());
            v.post(this);
        }
        public void run() {
            dismissPreview(mAnchor);
        }
        public void onFocusChange(View v, boolean hasFocus) {
            if (hasFocus) {
                mWorkspace.snapToScreen((Integer) v.getTag());
            }
        }
    }


 1524
1524

 被折叠的 条评论
为什么被折叠?
被折叠的 条评论
为什么被折叠?
 到【灌水乐园】发言


