


在消息的获取上是选择轮询还是推送得根据实际的业务需要来技术选型,例如对消息实时性比较高的需求,比如微博新通知或新闻等那就最好是用推送了。但如果只是一般的消息检测比如更新检查,可能是半个小时或一个小时一次,那用轮询也是一个不错的选择,因为不需要额外搭建推送服务器,不用额外配置推送服务。另外推送现在一般以维持长连接的方式实现,在手机客户端也会耗费一定的电量。今天就介绍一个在Android上实现轮询机制的方法——使用AlarmManager
AlarmManager在Android中主要用来定时处理一个事件或是定期处理一个事件,比如闹钟应用就是使用AlarmManager来实现的,我们今天要使用AlarmManager的定期执行功能来实现轮询的功能。对于定期执行任务也可以用Timer和TimerTask来实现,也可以开一个Service在Thread里面以while循环来实现。但最好的方案还是选用AlarmManager,这里涉及一个Android系统锁的机制,即系统在检测到一段时间没有活跃以后,会关闭一些不必要的服务来减少资源和电量消耗。使用Timer和Service来实现的话很可能出现的情况就是屏幕熄灭后一段时间,服务就被停止了,当然轮询也就被停止了。这个大家可以实验一下,之前我写过一篇文章也介绍了一种保持后台唤醒的机制《使用WakeLock使Android应用程序保持后台唤醒》,感兴趣的可以看看。那么接下来就开始使用AlarmManager+Service+Thread来实现我们的轮询服务吧!
一、新建轮询工具类PollingUtils.java
public class PollingUtils {

	//开启轮询服务
	public static void startPollingService(Context context, int seconds, Class<?> cls,String action) {
		//获取AlarmManager系统服务
		AlarmManager manager = (AlarmManager) context
				.getSystemService(Context.ALARM_SERVICE);

		//包装需要执行Service的Intent
		Intent intent = new Intent(context, cls);
		intent.setAction(action);
		PendingIntent pendingIntent = PendingIntent.getService(context, 0,
				intent, PendingIntent.FLAG_UPDATE_CURRENT);

		//触发服务的起始时间
		long triggerAtTime = SystemClock.elapsedRealtime();

		//使用AlarmManger的setRepeating方法设置定期执行的时间间隔(seconds秒)和需要执行的Service
		manager.setRepeating(AlarmManager.ELAPSED_REALTIME, triggerAtTime,
				seconds * 1000, pendingIntent);
	}

	//停止轮询服务
	public static void stopPollingService(Context context, Class<?> cls,String action) {
		AlarmManager manager = (AlarmManager) context
				.getSystemService(Context.ALARM_SERVICE);
		Intent intent = new Intent(context, cls);
		intent.setAction(action);
		PendingIntent pendingIntent = PendingIntent.getService(context, 0,
				intent, PendingIntent.FLAG_UPDATE_CURRENT);
		//取消正在执行的服务
		manager.cancel(pendingIntent);
	}
}
二、构建轮询任务执行PollingService.java
public class PollingService extends Service {

	public static final String ACTION = "com.ryantang.service.PollingService";

	private Notification mNotification;
	private NotificationManager mManager;

	@Override
	public IBinder onBind(Intent intent) {
		return null;
	}

	@Override
	public void onCreate() {
		initNotifiManager();
	}

	@Override
	public void onStart(Intent intent, int startId) {
		new PollingThread().start();
	}

	//初始化通知栏配置
	private void initNotifiManager() {
		mManager = (NotificationManager) getSystemService(NOTIFICATION_SERVICE);
		int icon = R.drawable.ic_launcher;
		mNotification = new Notification();
		mNotification.icon = icon;
		mNotification.tickerText = "New Message";
		mNotification.defaults |= Notification.DEFAULT_SOUND;
		mNotification.flags = Notification.FLAG_AUTO_CANCEL;
	}

	//弹出Notification
	private void showNotification() {
		mNotification.when = System.currentTimeMillis();
		//Navigator to the new activity when click the notification title
		Intent i = new Intent(this, MessageActivity.class);
		PendingIntent pendingIntent = PendingIntent.getActivity(this, 0, i,
				Intent.FLAG_ACTIVITY_NEW_TASK);
		mNotification.setLatestEventInfo(this,
				getResources().getString(R.string.app_name), "You have new message!", pendingIntent);
		mManager.notify(0, mNotification);
	}

	/**
	 * Polling thread
	 * 模拟向Server轮询的异步线程
	 * @Author Ryan
	 * @Create 2013-7-13 上午10:18:34
	 */
	int count = 0;
	class PollingThread extends Thread {
		@Override
		public void run() {
			System.out.println("Polling...");
			count ++;
			//当计数能被5整除时弹出通知
			if (count % 5 == 0) {
				showNotification();
				System.out.println("New message!");
			}
		}
	}

	@Override
	public void onDestroy() {
		super.onDestroy();
		System.out.println("Service:onDestroy");
	}

}
三、在MainActivity.java中开启和停止PollingService
public class MainActivity extends Activity {

	@Override
	protected void onCreate(Bundle savedInstanceState) {
		super.onCreate(savedInstanceState);
		setContentView(R.layout.activity_main);
		//Start polling service
		System.out.println("Start polling service...");
		PollingUtils.startPollingService(this, 5, PollingService.class, PollingService.ACTION);
	}

	@Override
	protected void onDestroy() {
		super.onDestroy();
		//Stop polling service
		System.out.println("Stop polling service...");
		PollingUtils.stopPollingService(this, PollingService.class, PollingService.ACTION);
	}

}
四、运行效果
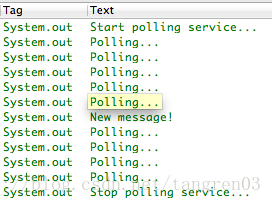
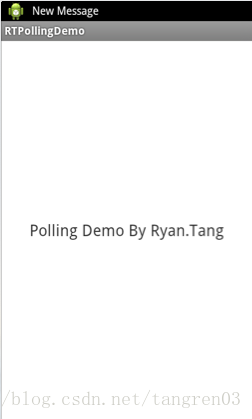
运行工程后可以在控制台输出看到,每隔5s就发出一个通知,退出Activity时,轮询服务就停止了,达到了我们事先期望的效果,并且锁屏后很长一段时间也不会停止服务,因为AlarmManager是系统及服务。Demo效果如下图:
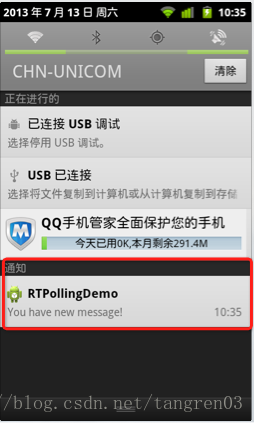
在手机上我们可以看到弹出的通知信息,点击通知则进到消息界面:
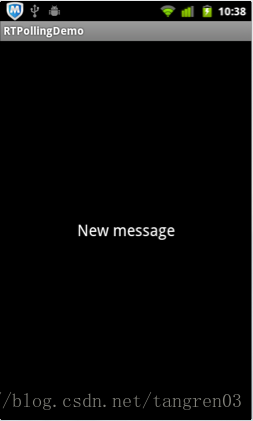
当进入消息详情Activity时,顶部状态栏的消息通知就会取消,使用如下方式也可以取消状态栏顶部的消息通知显示:
NotificationManager manager = (NotificationManager)getSystemService(Context.NOTIFICATION_SERVICE);
		manager.cancelAll();
以上就实现了使用AlarmManger实现轮询的一种方式,有不足或缺陷的地方欢迎大家留言补充,以上代码只是部分,需要工程源码的同学可以到Github上Clone:https://github.com/tangren03/RTPollingDemo


 8612
8612


 被折叠的 条评论
为什么被折叠?
被折叠的 条评论
为什么被折叠?
 到【灌水乐园】发言


